2022 TOYOTA COROLLA power steering
[x] Cancel search: power steeringPage 308 of 678

3064-5. Using the driving support systems
“Currently Unavailable”
There may be a system failure.
Power steering equipment is temporarily over-
heating.
Turn the engine switch off, wait for a little
while, and then start the engine again.
The engine is not operating.
Start the engine.
Ice, snow, dirt, etc., has adhered to a sensor.
Remove any ice, snow, dirt, etc.
Remove any ice, snow, dirt, etc.
The sensor is frozen.
Once the sensor thaws, the system will
return to normal.
The battery has been removed and reinstalled.
Drive the vehicle straight ahead for 5 sec-
onds or more at a speed of approximately
35 km/h (22 mph) or higher.
“Excessive Speed”
The S-IPA switch is operated when the vehicle
speed exceeds 30 km/h (16 mph).
Operate the switch when the vehicle
speed is approximately 30 km/h (16 mph)
or less.
“Unavailable”
“Try Another Location”
The S-IPA switch is operated in an area with no
parking spaces, or operated in an area where
the road width for parking is narrow.
Assist control cannot be used, as there is
no parking space. Proceed to a parking
space which width is approximately 2.6 m
(8.5 ft.) or larger.
Assist control cannot be used, as the
road width is narrow. Proceed to a park-
ing space where the road width is approx-
imately 4.5 m (15 ft.) or larger.
MessageSituation/Handling method
Page 316 of 678
3144-5. Using the driving support systems
*: If equipped
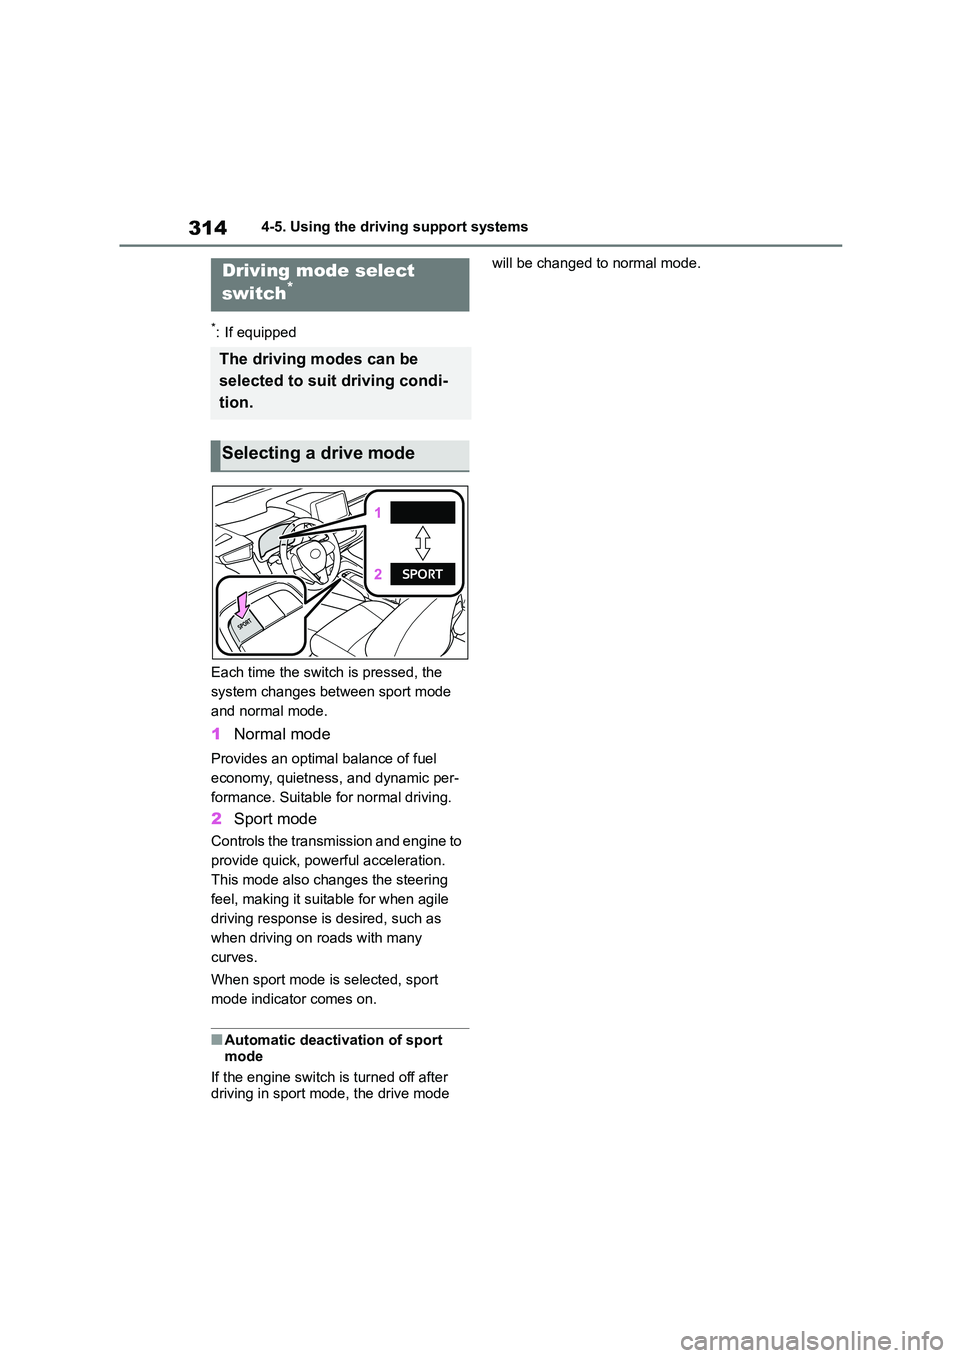
Each time the switch is pressed, the
system changes betw een sport mode
and normal mode.
1 Normal mode
Provides an optimal balance of fuel
economy, quietness, and dynamic per-
formance. Suitable for normal driving.
2 Sport mode
Controls the transmission and engine to
provide quick, powerful acceleration.
This mode also changes the steering
feel, making it suitable for when agile
driving response is desired, such as
when driving on roads with many
curves.
When sport mode is selected, sport
mode indicator comes on.
■Automatic deactivation of sport
mode
If the engine switch is turned off after
driving in sport mode, the drive mode
will be changed to normal mode.Driving mode select
switch*
The driving modes can be
selected to suit driving condi-
tion.
Selecting a drive mode
Page 318 of 678

3164-5. Using the driving support systems
■ABS (Anti-lock Brake System)
Helps to prevent wheel lock when
the brakes are applied suddenly, or
if the brakes are applied while driv-
ing on a slippery road surface
■Brake assist
Generates an increased level of
braking force after the brake pedal
is depressed when the system
detects a panic stop situation
■VSC (Vehicle St ability Control)
Helps the driver to control skidding
when swerving suddenly or turning
on slippery road surfaces.
■VSC+ (Vehicle Stability Con-
trol+)
Provides cooperative control of the
ABS, TRC, VSC and EPS.
Helps to maintain directional stabil-
ity when swerving on slippery road
surfaces by controlling steering per-
formance.
■TRC (Traction Control)
Helps to maintain drive power and
prevent the drive wheels from spin-
ning when starting the vehicle or
accelerating on slippery roads
■Active Cornering Assist (ACA)
Helps to prevent the vehicle from
drifting to the outer side by perform-
ing inner wheel brake control when
attempting to acce lerate while turn-
ing
■Hill-start assist control
Helps to reduce the backward
movement of the vehicle when
starting on an uphill
■EPS (Electric Po wer Steering)
Employs an electric motor to
reduce the amount of effort needed
to turn the steering wheel.
■Emergency brake signal
When the brakes are applied sud-
denly, the emergency flashers auto-
matically flash to alert the vehicle
behind.
■Secondary Collision Brake (if
equipped)
When the SRS airbag sensor
detects a collisi on and the system
operates, the brakes and brake
lights are automatically controlled
to reduce the vehicle speed and
help reduce the poss ibility of further
damage due to a secondary colli-
sion.
Driving assist systems
To keep driving safety and per-
formance, the following sys-
tems operate au tomatically in
response to various driving sit-
uations. Be aware, however,
that these systems are supple-
mentary and should not be
relied upon too heavily when
operating the vehicle.
Summary of the driving
assist systems
Page 329 of 678
327
5
5-1. Basic Operations
Audio system
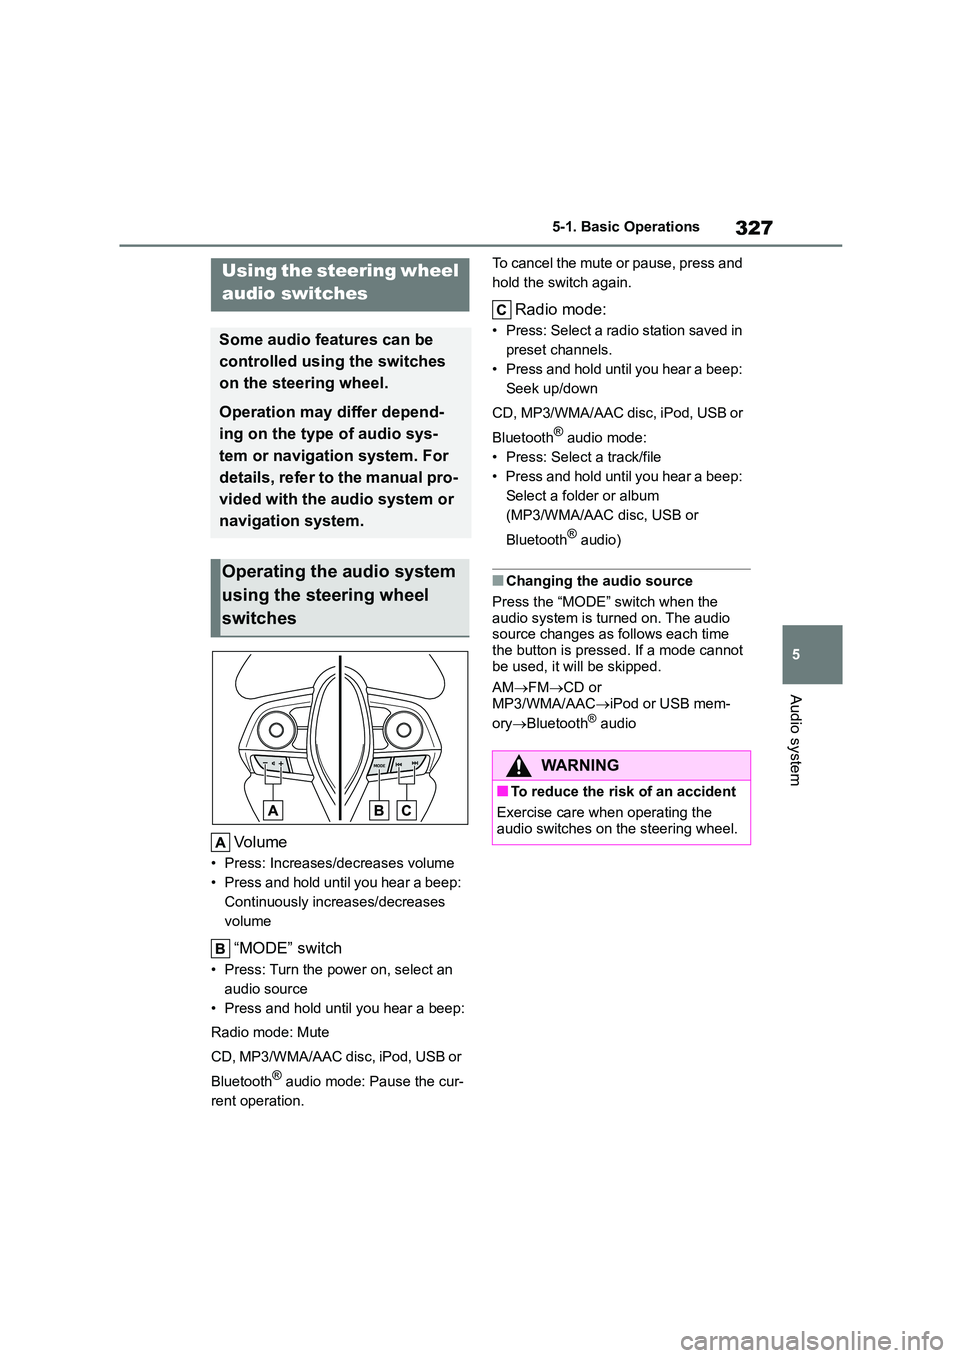
Volume
• Press: Increases/decreases volume
• Press and hold until you hear a beep:
Continuously increases/decreases
volume
“MODE” switch
• Press: Turn the power on, select an
audio source
• Press and hold until you hear a beep:
Radio mode: Mute
CD, MP3/WMA/AAC disc, iPod, USB or
Bluetooth® audio mode: Pause the cur-
rent operation.
To cancel the mute or pause, press and
hold the switch again.
Radio mode:
• Press: Select a radi o station saved in
preset channels.
• Press and hold until you hear a beep:
Seek up/down
CD, MP3/WMA/AAC disc, iPod, USB or
Bluetooth® audio mode:
• Press: Select a track/file
• Press and hold until you hear a beep:
Select a folder or album
(MP3/WMA/AAC disc, USB or
Bluetooth® audio)
■Changing the audio source
Press the “MODE” switch when the
audio system is turned on. The audio source changes as follows each time
the button is pressed. If a mode cannot
be used, it will be skipped.
AM FMCD or
MP3/WMA/AAC iPod or USB mem-
ory Bluetooth® audio
Using the steering wheel
audio switches
Some audio features can be
controlled using the switches
on the steering wheel.
Operation may differ depend-
ing on the type of audio sys-
tem or navigation system. For
details, refer to the manual pro-
vided with the audio system or
navigation system.
Operating the audio system
using the steering wheel
switches
WA R N I N G
■To reduce the risk of an accident
Exercise care when operating the
audio switches on the steering wheel.
Page 465 of 678
463
8
8-1. Essential information
When trouble arises
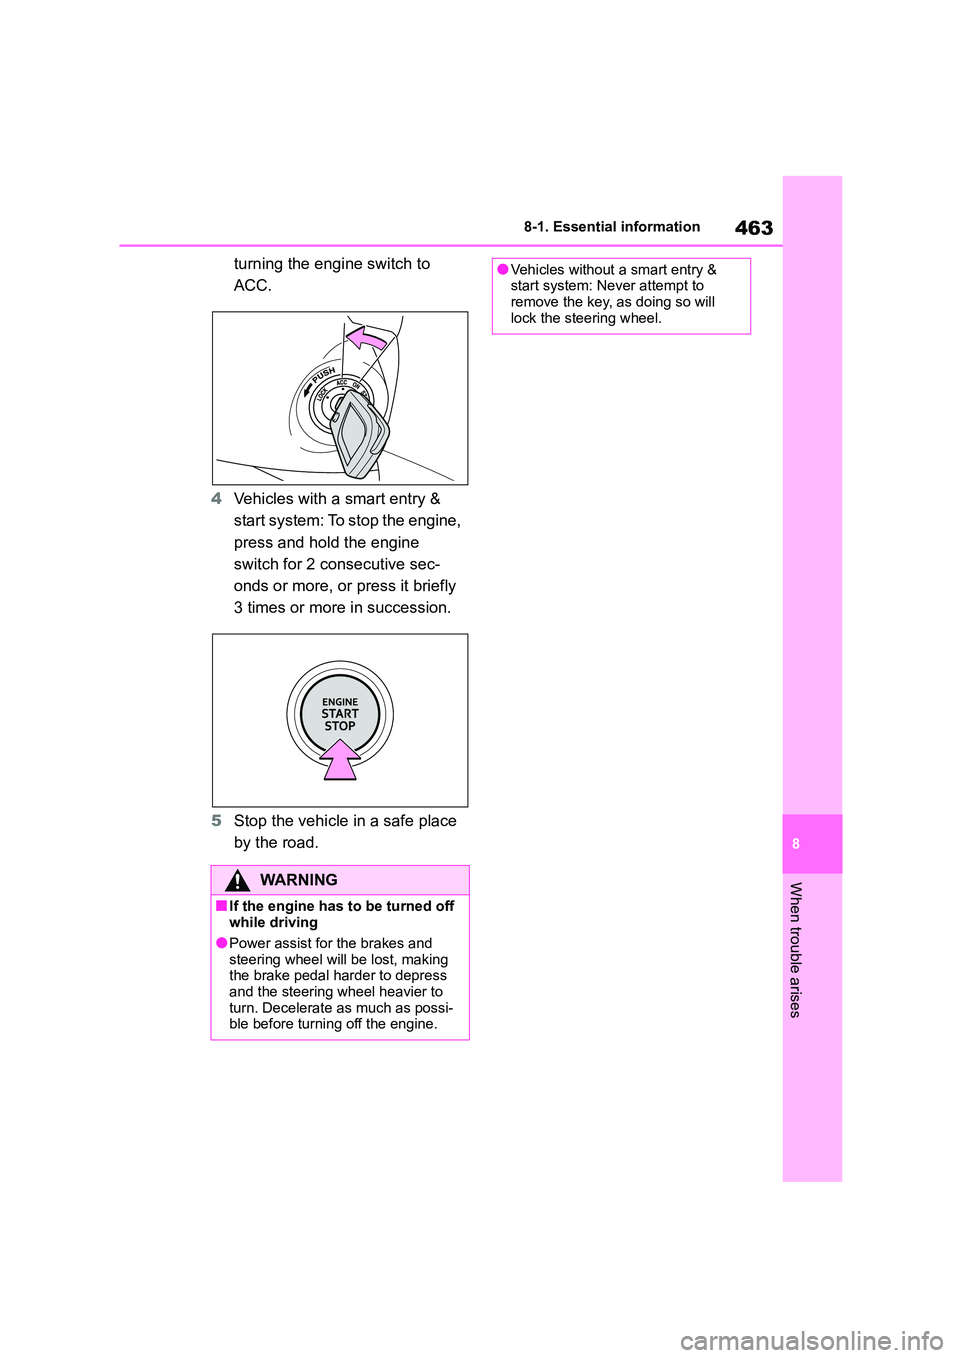
turning the engine switch to
ACC.
4 Vehicles with a smart entry &
start system: To stop the engine,
press and hold the engine
switch for 2 consecutive sec-
onds or more, or press it briefly
3 times or more in succession.
5 Stop the vehicle in a safe place
by the road.
WA R N I N G
■If the engine has to be turned off while driving
●Power assist for the brakes and
steering wheel will be lost, making the brake pedal harder to depress
and the steering wheel heavier to
turn. Decelerate as much as possi- ble before turning off the engine.
●Vehicles without a smart entry & start system: Never attempt to
remove the key, as doing so will
lock the steering wheel.
Page 470 of 678
4688-2. Steps to take in an emergency
5Securely attach cables or chains
to the towing eyelet.
Take care not to damage the vehicle
body.
6 Enter the vehicle being towed
and start the engine.
If the engine does not start, turn the
engine switch to ON.
7 Shift the shift lever to N and
release the parking brake.
Vehicles with electric parking brake:
Turn automatic mode off. P. 1 7 4
When the shift lever cannot be shifted
(vehicles with a Multidrive): P. 1 6 6
■While towing
If the engine is not running, the power
assist for the brakes and steering will
not function, making steering and brak- ing more difficult.
■Wheel nut wrench
Vehicles with wheel nut wrench: Wheel
nut wrench is installed in trunk. ( P.482, 498)
WA R N I N G
Observe the following precautions.
Failure to do so may result in death or
serious injury.
■While towing
●When towing using cables or chains, avoid sudden starts, etc.
which place excessive stress on the
towing eyelets, cables or chains. The towing eyelets, cables or
chains may become damaged, bro-
ken debris may hit people, and cause serious damage.
●Vehicles without smart entry & start system: Do not tu rn the engine
switch to the “LOCK” position.
There is a possibility that the steer-
ing wheel is locked and cannot be operated.
●Vehicles with smart entry & start system: Do not turn the engine
switch off.
There is a possibility that the steer- ing wheel is locked and cannot be
operated.
■Installing towing eyelets to the
vehicle
Make sure that towing eyelets are installed securely.
If not securely installed, towing eye-
lets may come loose during towing.
NOTICE
■To prevent damage to the vehicle during emergency towing
Do not secure cables or chains to the
suspension components.
Page 476 of 678
4748-2. Steps to take in an emergency
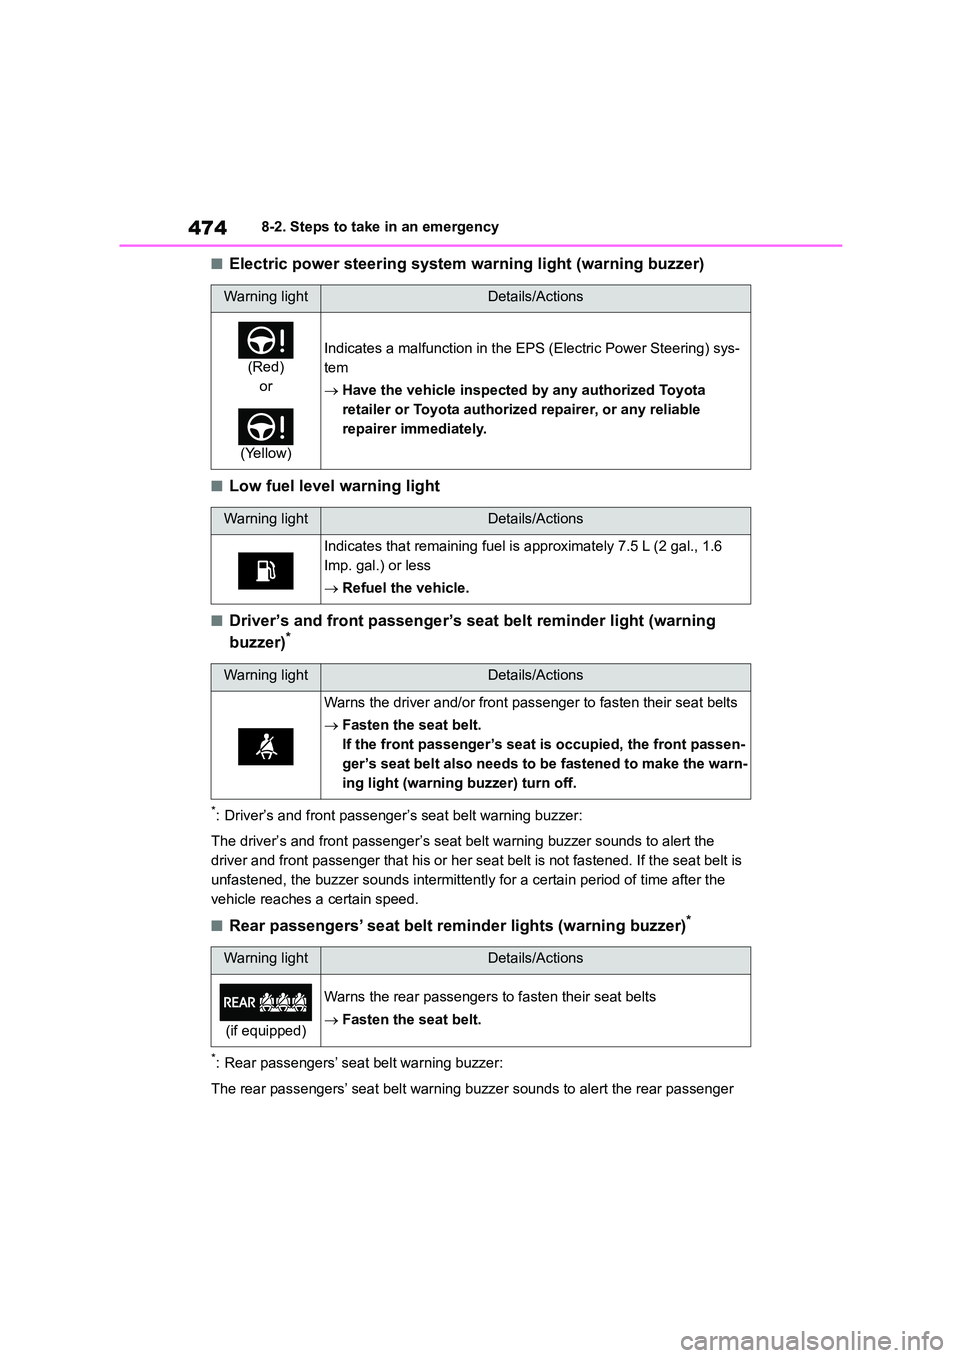
■Electric power steering system warning light (warning buzzer)
■Low fuel level warning light
■Driver’s and front passenger’s seat belt reminder light (warning
buzzer)*
*: Driver’s and front passenger’s seat belt warning buzzer:
The driver’s and front passenger’s seat belt warning buzzer sounds to alert the
driver and front passenger that his or her seat belt is not fastened. If the seat belt is
unfastened, the buzzer sounds intermittently for a certain period of time after the
vehicle reaches a certain speed.
■Rear passengers’ seat belt reminder lights (warning buzzer)*
*: Rear passengers’ seat belt warning buzzer:
The rear passengers’ seat belt warning buzze r sounds to alert the rear passenger
Warning lightDetails/Actions
(Red)
or
(Yellow)
Indicates a malfunction in the EPS (Electric Power Steering) sys-
tem
Have the vehicle inspected by any authorized Toyota
retailer or Toyota authorized repairer, or any reliable
repairer immediately.
Warning lightDetails/Actions
Indicates that remaining fuel is approximately 7.5 L (2 gal., 1.6
Imp. gal.) or less
Refuel the vehicle.
Warning lightDetails/Actions
Warns the driver and/or front passenger to fasten their seat belts
Fasten the seat belt.
If the front passenger’s seat is occupied, the front passen-
ger’s seat belt also needs to be fastened to make the warn-
ing light (warning buzzer) turn off.
Warning lightDetails/Actions
(if equipped)
Warns the rear passengers to fasten their seat belts
Fasten the seat belt.
Page 480 of 678

4788-2. Steps to take in an emergency
■Parking brake indicator
■Brake hold operated indicator
■Warning buzzer
In some cases, the buzzer may not be
heard due to being in a noisy location or audio sound.
■Front passenger detection sensor,
seat belt reminder and warning
buzzer
●If luggage is placed on the front pas-
senger seat, the front passenger detection sensor may cause the warn-
ing light to flash and the warning
buzzer to sound even if a passenger
is not sitting in the seat.
●If a cushion is placed on the seat, the
sensor may not detect a passenger, and the warning light may not operate
properly.
■If the malfunction indicator lamp
comes on while driving
The malfunction indicator lamp will
come on if the fuel tank becomes com-
pletely empty. If the fuel tank is empty, refuel the vehicle immediately. The mal-
function indicator lamp will go off after
several trips.
If the malfunction indicator lamp does
not go off, contact any authorized Toyota
retailer or Toyota authorized repairer, or any reliable repairer as soon as possi-
ble.
■Electric power steering system
warning light (warning buzzer)
When the battery charge becomes
insufficient or the voltage temporarily
drops, the electric power steering sys- tem warning light may come on and the
warning buzzer may sound.
■When the tire pressure warning
light comes on
Inspect the tires to check if a tire is
punctured.
If a tire is punctured: P.482, 498
If none of the tires are punctured:
Turn the engine switch off then turn it to
ON. Check if the tire pressure warning light comes on or blinks.
If the tire pressure warning light blinks
for approximately 1 minute then stays on
There may be a malfunction in the tire pressure warning system. Have the
vehicle inspected by any authorized
Toyota retailer or Toyota authorized repairer, or any reliable repairer immedi-
ately.
Warning lightDetails/Actions
(Flashes)
It is possible that the parking brake is not fully engaged or
released
Operate the parking brake once again.
This light comes on when the parking brake is not released. If the
light turns off after the parking brake is fully released, the system is
operating normally.
Warning lightDetails/Actions
(Flashes)
(if equipped)
Indicates a malfunction in the brake hold system
Have the vehicle inspected by any authorized Toyota
retailer or Toyota authorized repairer, or any reliable
repairer immediately.