Page 36 of 148

CLIMATE CONTROL
Tri-Zone Automatic Climate Control
The Tri-Zone Automatic Climate Control system allows you to set separate temperatures
for the driver, passenger, and rear seats. Set your desired temperature and let the system
automatically make the adjustments for you. At any time, you can manually take control of
the climate settings.
Operation in Automatic Mode
1Automatic Control Button:This system automatically controls all of the climate
system except defogging. Press “AUTO” to activate. Press “ON/OFF” to turn off the
system.
2Temperature Control Dial:Turn the dial clockwise to increase the temperature or
counterclockwise to decrease the temperature. The temperature will appear on the
screen. You can adjust separate temperature settings for the driver’s side and
passenger’s side.
3Tri-Zone Temperature SYNC Button:Press the button to synchronize the driver’s,
passenger’s and rear temperatures to the driver’s temperature control dial.
When using automatic mode, the fan speed, airflow distribution, air-inlet control and air
conditioning compressor are controlled automatically. To activate:
1. Press the “AUTO” button. The “FULL AUTO” indicator light illuminates on the climate
control display.
2. Set the preferred temperature using the temperature control dial.
If you operate any of the buttons other than “ON/OFF”, rear window defogger, “SYNC”, or
the temperature control dial, the “FULL” indicator light will turn off. The “AUTO” light will
remain illuminated. You can then manually control the system as desired. Press the
“AUTO” button to change back to “FULL AUTO” mode.
GETTING COMFORTABLE
34
Page 37 of 148
Operation in Manual Mode
4Air Conditioner Button:Press this button to activate or deactivate the air
conditioning.
5MAX A/C Button:Press this button for quickest cooling.
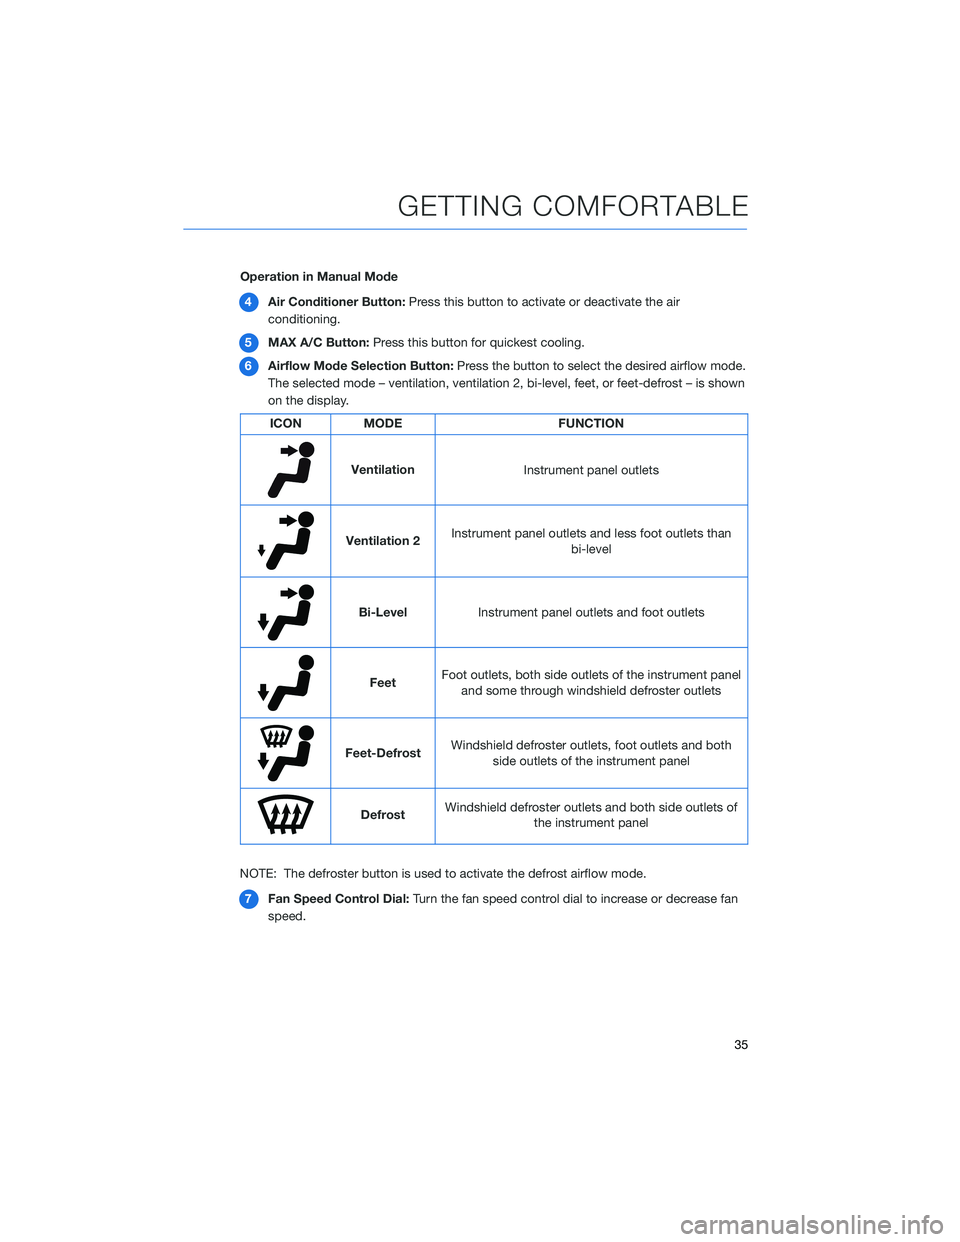
6Airflow Mode Selection Button:Press the button to select the desired airflow mode.
The selected mode – ventilation, ventilation 2, bi-level, feet, or feet-defrost – is shown
on the display.
ICON MODE FUNCTION
Ventilation
Instrument panel outlets
Ventilation 2Instrument panel outlets and less foot outlets than
bi-level
Bi-Level
Instrument panel outlets and foot outlets
FeetFoot outlets, both side outlets of the instrument panel
and some through windshield defroster outlets
Feet-DefrostWindshield defroster outlets, foot outlets and both
side outlets of the instrument panel
DefrostWindshield defroster outlets and both side outlets of
the instrument panel
NOTE: The defroster button is used to activate the defrost airflow mode.
7Fan Speed Control Dial:Turn the fan speed control dial to increase or decrease fan
speed.
GETTING COMFORTABLE
35
Page 38 of 148

8Recirculated/Outside Air Button:Press this button to prevent outside air from
entering your Subaru. Press the button again to allow outside air into your Subaru.
NOTE: To prevent windshield fogging, do not remain in the recirculated mode for an
extended period of time.
9Defroster Button:Press this button to defrost or dehumidify the windshield and front
door windows.
NOTE: The air conditioning compressor operates automatically to defrost the
windshield more quickly. However, the indicator on the air conditioner button may not
illuminate.
10Rear Window Defogger Button:Press this button to turn on the defogger. It will
automatically turn off after about 15 minutes. If the window clears before then, press
the button again to turn it off. If equipped, the outside mirror defogger and windshield
wiper de-icer will also activate. You can customize this function for continuous
operation through the Combination Meter Display (CMD) or the SUBARU STARLINK
®
touch screen.
11Rear Climate Control Button:Press this button to operate the rear climate control
with the front climate control panel. Press the button while the rear climate control is
on. Press and hold to lock the rear climate control. The lock indicator will illuminate
on the front and rear climate control panels.
12Rear Climate On and Off Button:Press this button to turn the rear climate control
system on or off.
GETTING COMFORTABLE
36
Page 39 of 148

Rear Climate Control Panel(if equipped)
1Temperature Control Button:Press the up or down arrow to increase or decrease
the temperature.
2Fan Speed Control Button:Press the up or down arrow to increase or decrease the
fan speed.
3On/Off Button:Press this button to turn the rear climate control system on or off.
4Airflow Mode Selection Button:Press this button to select the desired airflow mode.
The selected mode — ventilation, bi-level or feet — is shown on the display.
5Automatic Control Button:This system automatically controls all of the rear climate
system. Press “AUTO” to activate. Press “ON/OFF” to turn off the system.
To activate automatic mode:
1. Press the “AUTO” button. The “FULL AUTO” indicator light illuminates on the climate
control display.
2. Set the preferred temperature using the temperature control buttons.
If you use any of the buttons other that the temperature control buttons, the “FULL”
indicator light will turn off. The “AUTO” light remains illuminated. You can then manually
control the system as desired. Press the “AUTO” button to change back to “FULL AUTO”
mode.
GETTING COMFORTABLE
37
Page 40 of 148
Remote Engine Start with Climate Control(if equipped)
You can remotely start your Subaru and adjust the temperature using the STARLINK®
Safety and Security features through theMySubaruApp (subscription required). Please
refer to “SUBARU STARLINK Features” in your SUBARU STARLINK®Safety and Security
Owner's Manual for a list of required vehicle conditions for this feature.
Heated Seats(if equipped)
There are separate heated seat switches on the climate control panel for the driver and
passenger. Press the switch to activate the heated seat. Each time you press the switch,
the mode will change as follows: High, Mid, Low, and Off. Yellow indictors illuminate
indicating the level.
GETTING COMFORTABLE
38
Page 41 of 148
Ventilated Seats(if equipped)
There are separate ventilated seat switches on the climate control panel for the driver and
passenger. Press the switch to activate the ventilated seat. Each time you press the
switch, the mode will change as follows: High, Mid, Low, and Off. Blue indictors illuminate
indicating the level.
Second-row Heated Seats(if equipped)
There are separate heated seat switches on the rear climate control panel for each side.
Press the switch to activate the heated seat. The heating mode changes to High, Low, and
Off each time you press the switch, and yellow indictors illuminate indicating the level.
Heated Steering Wheel(if equipped)
To activate, pull the heated steering wheel switch with
the ignition in “ON” or “ACC”. The indicator light on
the switch illuminates. To deactivate, pull the switch
again. The heater will stay on for approximately
30 minutes.
GETTING COMFORTABLE
39
Page 42 of 148
ACCESSORY CONNECTIONS
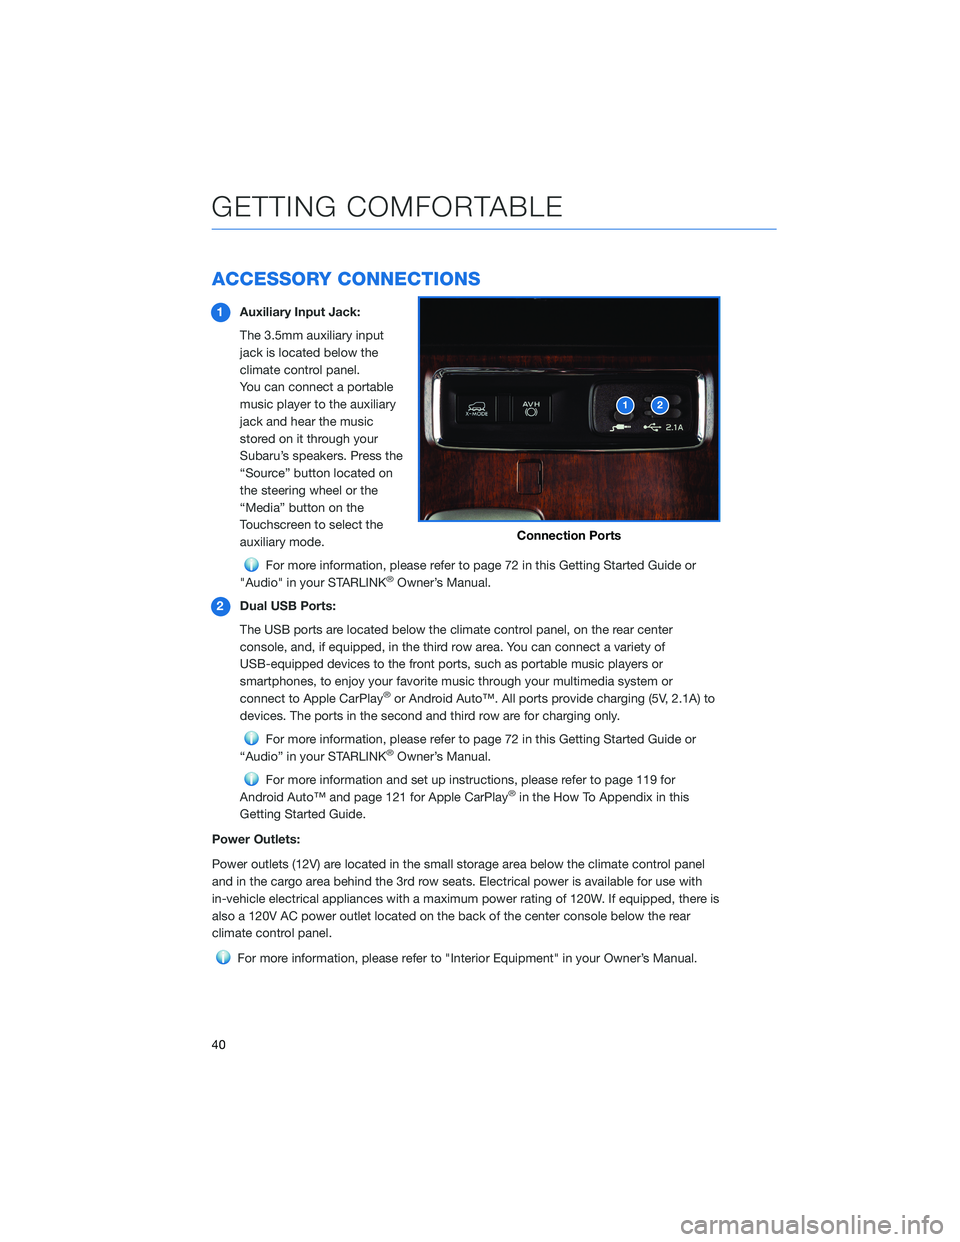
1Auxiliary Input Jack:
The 3.5mm auxiliary input
jack is located below the
climate control panel.
You can connect a portable
music player to the auxiliary
jack and hear the music
stored on it through your
Subaru’s speakers. Press the
“Source” button located on
the steering wheel or the
“Media” button on the
Touchscreen to select the
auxiliary mode.
For more information, please refer to page 72 in this Getting Started Guide or
"Audio" in your STARLINK®Owner’s Manual.
2Dual USB Ports:
The USB ports are located below the climate control panel, on the rear center
console, and, if equipped, in the third row area. You can connect a variety of
USB-equipped devices to the front ports, such as portable music players or
smartphones, to enjoy your favorite music through your multimedia system or
connect to Apple CarPlay
®or Android Auto™. All ports provide charging (5V, 2.1A) to
devices. The ports in the second and third row are for charging only.
For more information, please refer to page 72 in this Getting Started Guide or
“Audio” in your STARLINK®Owner’s Manual.
For more information and set up instructions, please refer to page 119 for
Android Auto™ and page 121 for Apple CarPlay®in the How To Appendix in this
Getting Started Guide.
Power Outlets:
Power outlets (12V) are located in the small storage area below the climate control panel
and in the cargo area behind the 3rd row seats. Electrical power is available for use with
in-vehicle electrical appliances with a maximum power rating of 120W. If equipped, there is
also a 120V AC power outlet located on the back of the center console below the rear
climate control panel.
For more information, please refer to "Interior Equipment" in your Owner’s Manual.
Connection Ports
GETTING COMFORTABLE
40
Page 43 of 148
IGNITION SWITCH
The ignition switch has four positions:
LOCK:You can only insert or remove the key in this position.
ACC (Accessory):Provides power to the audio system and accessory power outlets.
ON:All electrical systems are available. The key returns to this position after starting the
engine.
START:Turn the key to this position to start the engine.
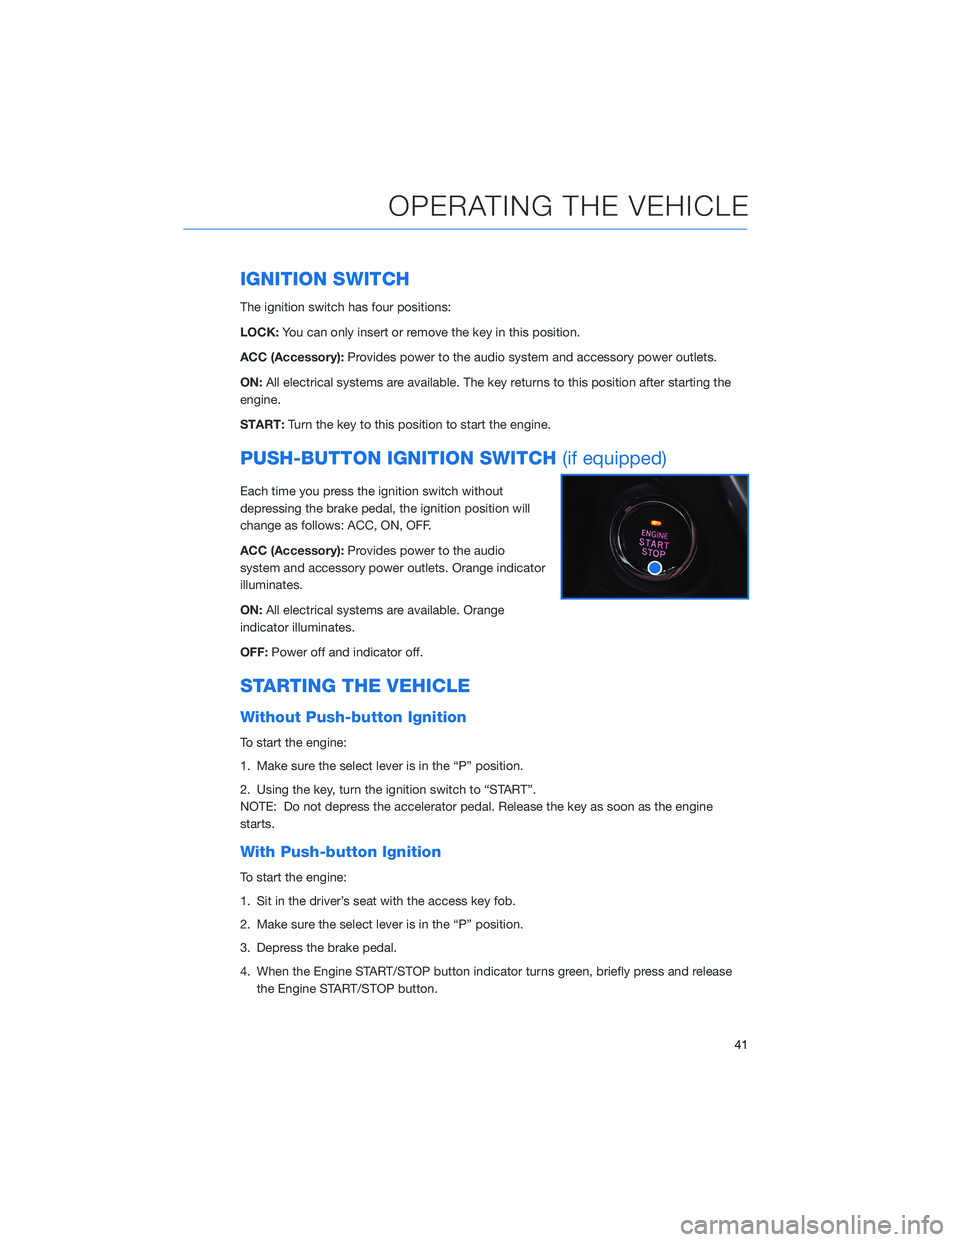
PUSH-BUTTON IGNITION SWITCH(if equipped)
Each time you press the ignition switch without
depressing the brake pedal, the ignition position will
change as follows: ACC, ON, OFF.
ACC (Accessory):Provides power to the audio
system and accessory power outlets. Orange indicator
illuminates.
ON:All electrical systems are available. Orange
indicator illuminates.
OFF:Power off and indicator off.
STARTING THE VEHICLE
Without Push-button Ignition
To start the engine:
1. Make sure the select lever is in the “P” position.
2. Using the key, turn the ignition switch to “START”.
NOTE: Do not depress the accelerator pedal. Release the key as soon as the engine
starts.
With Push-button Ignition
To start the engine:
1. Sit in the driver’s seat with the access key fob.
2. Make sure the select lever is in the “P” position.
3. Depress the brake pedal.
4. When the Engine START/STOP button indicator turns green, briefly press and release
the Engine START/STOP button.
OPERATING THE VEHICLE
41

