2022 RAM PROMASTER CITY maintenance reset
[x] Cancel search: maintenance resetPage 43 of 260

GETTING TO KNOW YOUR INSTRUMENT PANEL41
The menu items described below are an example
of what can be found in the vehicle's menu:
Dimmer
Speed Beep
Trip A / B (options are selectable through the
steering wheel stalk)
Buzzer Volume
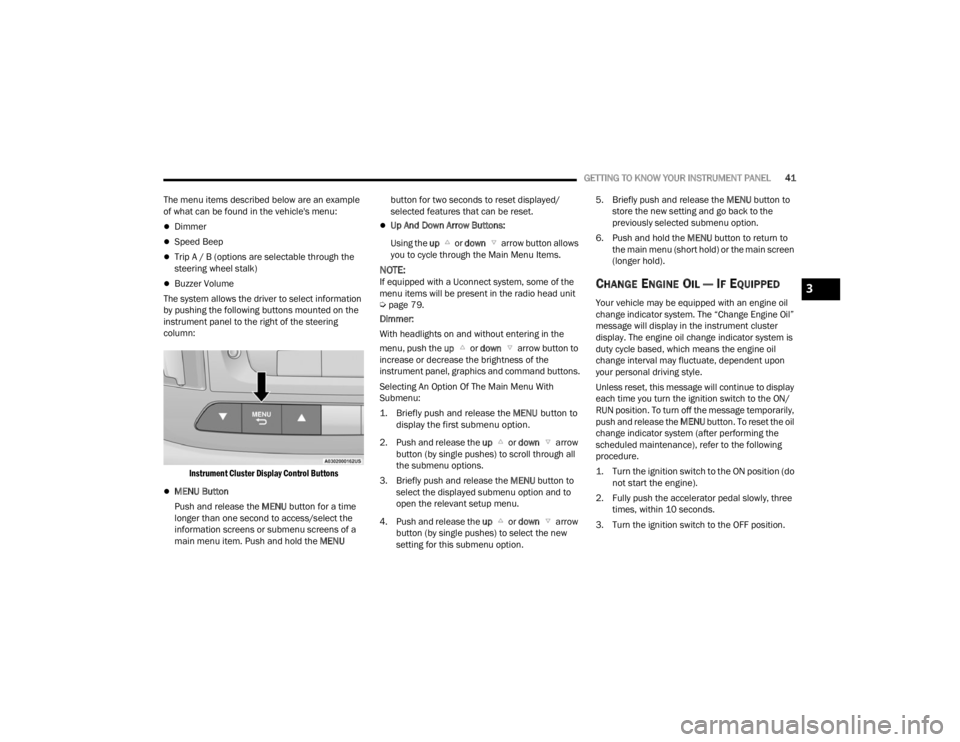
The system allows the driver to select information
by pushing the following buttons mounted on the
instrument panel to the right of the steering
column:
Instrument Cluster Display Control Buttons
MENU Button
Push and release the MENU button for a time
longer than one second to access/select the
information screens or submenu screens of a
main menu item. Push and hold the MENU button for two seconds to reset displayed/
selected features that can be reset.
Up And Down Arrow Buttons:
Using the up or down arrow button allows
you to cycle through the Main Menu Items.
NOTE:If equipped with a Uconnect system, some of the
menu items will be present in the radio head unit
Ú page 79.
Dimmer:
With headlights on and without entering in the
menu, push the up or down arrow button to
increase or decrease the brightness of the
instrument panel, graphics and command buttons.
Selecting An Option Of The Main Menu With
Submenu:
1. Briefly push and release the
MENU
button to
display the first submenu option.
2. Push and release the up or down arrow
button (by single pushes) to scroll through all
the submenu options.
3. Briefly push and release the MENU button to
select the displayed submenu option and to
open the relevant setup menu.
4. Push and release the up or down arrow
button (by single pushes) to select the new
setting for this submenu option. 5. Briefly push and release the MENU
button to
store the new setting and go back to the
previously selected submenu option.
6. Push and hold the MENU button to return to
the main menu (short hold) or the main screen
(longer hold).CHANGE ENGINE OIL — IF EQUIPPED
Your vehicle may be equipped with an engine oil
change indicator system. The “Change Engine Oil”
message will display in the instrument cluster
display. The engine oil change indicator system is
duty cycle based, which means the engine oil
change interval may fluctuate, dependent upon
your personal driving style.
Unless reset, this message will continue to display
each time you turn the ignition switch to the ON/
RUN position. To turn off the message temporarily,
push and release the MENU button. To reset the oil
change indicator system (after performing the
scheduled maintenance), refer to the following
procedure.
1. Turn the ignition switch to the ON position (do not start the engine).
2. Fully push the accelerator pedal slowly, three times, within 10 seconds.
3. Turn the ignition switch to the OFF position.
3
22_VM_OM_EN_USC_t.book Page 41
Page 191 of 260

189
SERVICING AND MAINTENANCE
SCHEDULED SERVICING
Your vehicle is equipped with an automatic oil
change indicator system. The oil change indicator
system will remind you that it is time to take your
vehicle in for scheduled maintenance.
Based on engine operation conditions, the oil
change indicator message will illuminate. This
means that service is required for your vehicle.
Operating conditions such as frequent short-trips,
trailer tow, extended engine idle time, extremely
hot or cold ambient temperatures will influence
when the “Oil Change Required” message is
displayed. Have your vehicle serviced as soon as
possible, within the next 500 miles (805 km).An authorized dealer will reset the oil change
indicator message after completing the scheduled
oil change. If a scheduled oil change is performed
by someone other than an authorized dealer, to
reset the message Ú
page 41.
NOTE:Under no circumstances should oil change
intervals exceed 10,000 miles (16,000 km), 350
hours of engine run time or 12 months, whichever
comes first. The 350 hours of engine run or idle
time is generally only a concern for fleet
customers. Once A Month Or Before A Long Trip:
Check engine oil level.
Check windshield washer fluid level.
Check tire pressure and look for unusual wear
or damage. Rotate tires at the first sign of irreg
-
ular wear, even if it occurs before the oil indi -
cator system turns on.
Check the fluid levels of the coolant reservoir
and brake master cylinder, fill as needed.
Check function of all interior and exterior lights.
8
22_VM_OM_EN_USC_t.book Page 189
Page 206 of 260

204SERVICING AND MAINTENANCE
Fluid Level Check
The fluid level is preset at the factory and does not
require adjustment under normal operating
conditions. Routine fluid level checks are not
required; therefore the transmission has no
dipstick. An authorized dealer can check your
transmission fluid level using special service tools.
If you notice fluid leakage or transmission
malfunction, visit an authorized dealer
immediately to have the transmission fluid level
checked. Operating the vehicle with an improper
fluid level can cause severe transmission damage.
Fluid And Filter Changes
Under normal operating conditions, the fluid
installed at the factory will provide satisfactory
lubrication for the life of the vehicle.
Routine fluid and filter changes are not required.
However, change the fluid and filter if the fluid
becomes contaminated (with water, etc.), or if the
transmission is disassembled for any reason.
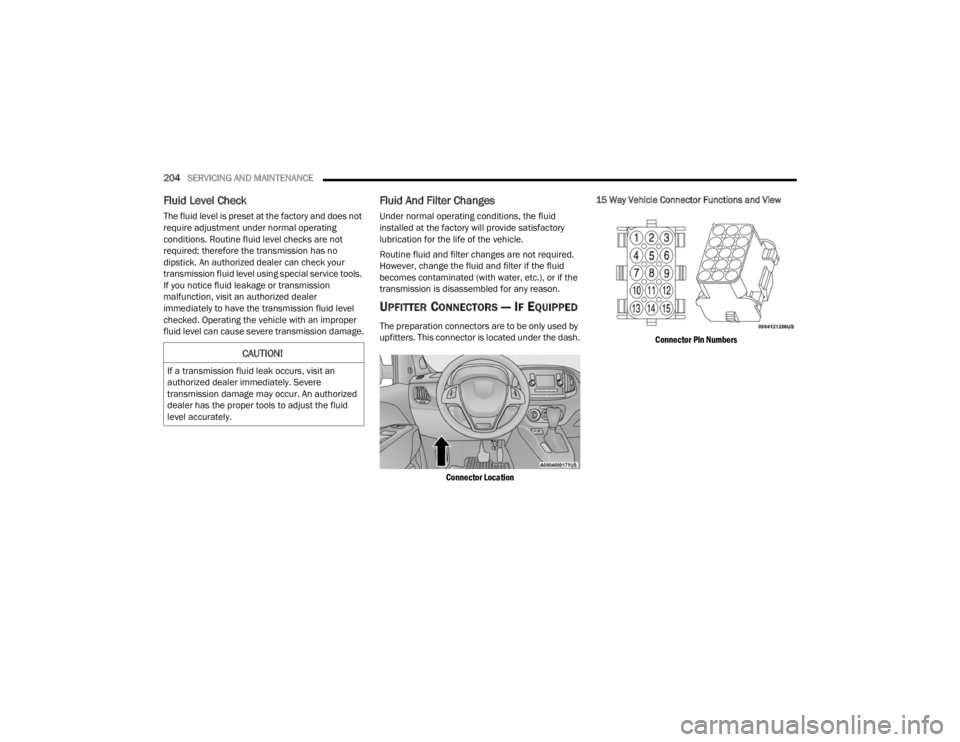
UPFITTER CONNECTORS — IF EQUIPPED
The preparation connectors are to be only used by
upfitters. This connector is located under the dash.
Connector Location
15 Way Vehicle Connector Functions and View
Connector Pin Numbers
CAUTION!
If a transmission fluid leak occurs, visit an
authorized dealer immediately. Severe
transmission damage may occur. An authorized
dealer has the proper tools to adjust the fluid
level accurately.
22_VM_OM_EN_USC_t.book Page 204
Page 252 of 260

250 Park
...................................................... 24, 49Passing........................................................ 24Seat Belt Reminder..................................... 46Service...................................................... 213Tire Pressure Monitoring (TPMS)............... 135Traction Control......................................... 133Turn Signals....................................... 49, 170Warning Instrument Cluster Descriptions..................................... 46, 49Loading Vehicle........................................ 67, 68Capacities................................................... 68Tires.......................................................... 221LocksPower Door.................................................. 13Low Tire Pressure System............................. 135Lubrication, Body........................................... 197Lug Nuts/Bolts.............................................. 236
M
Maintenance Free Battery............................. 194Maintenance Schedule.................................. 189
Malfunction Indicator Light (Check Engine).. 48, 51
ManualService...................................................... 245Master CylinderBrakes....................................................... 202Methanol....................................................... 238
Mirrors............................................................. 22Electric Powered.......................................... 23Electric Remote........................................... 23Exterior Folding............................................ 23Heated......................................................... 23Outside........................................................ 22Rearview...................................................... 22Modifications/AlterationsVehicle........................................................... 7Monitor, Tire Pressure System...................... 135Mopar Parts.................................................. 244
N
New Vehicle Break-In Period............................ 54
O
Occupant Restraints..................................... 137Octane Rating, Gasoline (Fuel)............ 237, 240Oil Change Indicator........................................ 41Reset........................................................... 41Oil Filter, Change.......................................... 196Oil Filter, Selection........................................ 196Oil Pressure Light............................................. 46Oil Reset.......................................................... 41Oil, Engine............................................ 195, 240Capacity.................................................... 240Checking................................................... 194Dipstick.................................................... 194
Disposal.................................................... 196Filter................................................ 196, 240Filter Disposal........................................... 196Identification Logo.................................... 195Materials Added To................................... 196Pressure Warning Light................................46Recommendation............................ 195, 240Synthetic................................................... 196Viscosity.................................................... 240Onboard Diagnostic System.............................50Operating Precautions.....................................50Operator ManualOwner's Manual........................................ 245Outside Rearview Mirrors.................................22Overheating, Engine...................................... 183
P
Paint Care..................................................... 233Parking Brake..................................................54ParkSense System, Rear..................................62Passing Light....................................................24Personal Settings.............................................79Pets............................................................... 168Phone Mode.................................................. 100Placard, Tire And Loading Information.......... 221PowerMirrors.........................................................23Steering.......................................................60Windows......................................................34
22_VM_OM_EN_USC_t.book Page 250