2022 PEUGEOT LANDTREK ECO mode
[x] Cancel search: ECO modePage 89 of 164
87
Driving
6in order to manoeuvre the vehicle with the
surrounding obstacles.
This view is not recommended for carrying out a
complete manoeuvre.
This view is automatically available via detection
by the parking sensors or by selecting the
direction indicators (the view of the side
concerned is displayed).
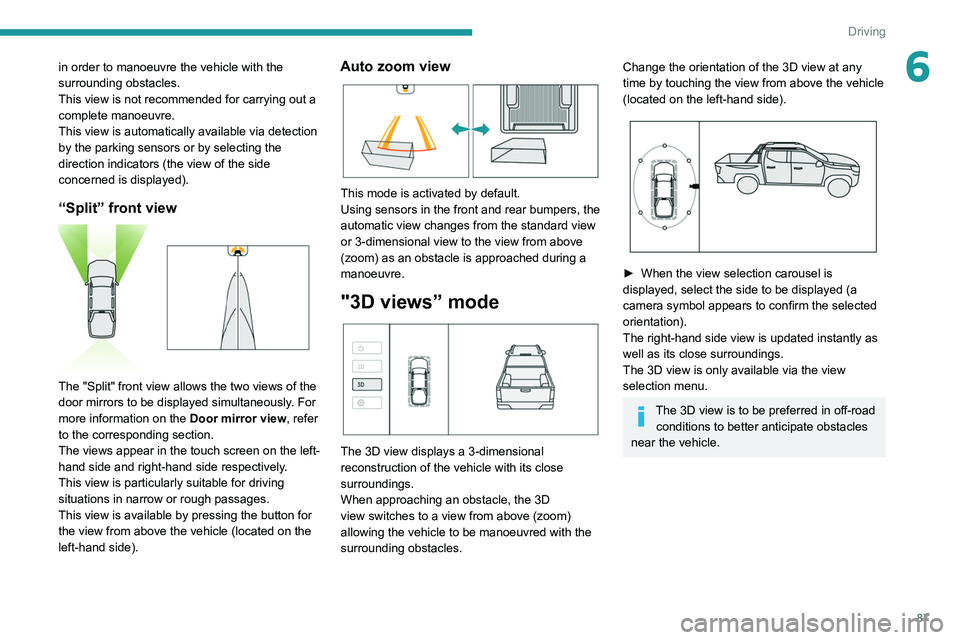
“Split” front view
The "Split" front view allows the two views of the
door mirrors to be displayed simultaneously. For
more information on the Door mirror view, refer
to the corresponding section.
The views appear in the touch screen on the left-
hand side and right-hand side respectively.
This view is particularly suitable for driving
situations in narrow or rough passages.
This view is available by pressing the button for
the view from above the vehicle (located on the
left-hand side).
Auto zoom view
This mode is activated by default.
Using sensors in the front and rear bumpers, the
automatic view changes from the standard view
or 3-dimensional view to the view from above
(zoom) as an obstacle is approached during a
manoeuvre.
"3D views” mode
The 3D view displays a 3-dimensional
reconstruction of the vehicle with its close
surroundings.
When approaching an obstacle, the 3D
view switches to a view from above (zoom)
allowing the vehicle to be manoeuvred with the
surrounding obstacles.
Change the orientation of the 3D view at any
time by touching the view from above the vehicle
(located on the left-hand side).
► When the view selection carousel is
displayed, select the side to be displayed (a
camera symbol appears to confirm the selected
orientation).
The right-hand side view is updated instantly as
well as its close surroundings.
The 3D view is only available via the view
selection menu.
The 3D view is to be preferred in off-road conditions to better anticipate obstacles
near the vehicle.
Page 105 of 164
103
Practical information
7of the throttle body against any projection of
liquid (oil, water, detergent or solvent).
►
Remove grease and carbon deposits from
the surface of the main duct with a specific
"carburettor" type cleaner
.
►
Rotate the throttle valve inside the duct to
clean the seats on each side.
►
Wipe and dry the throttle body with a soft,
lint-free cloth.
If no cleaning has been done for a long
time, deposits may be difficult to remove.
Clean and wipe the throttle body
several
times with a soft, lint-free cloth.
Never immerse the throttle body in a
cleaning liquid or in an ultrasonic tank.
Never use:
–
detergents containing methyl ketone or
other highly corrosive substances as well as
household cleaning detergent;
–
cleaning products directly on the throttle
bearings as well as on the body's connector;
–
hard, sharp or abrasive tools to remove
difficult deposits. Use a soft cloth with a
suitable detergent.
Refitting the throttle body
Before refitting the throttle body, check
the condition of the seal. If it is damaged,
replace it with a new one. ►
Install the seal on the intake manifold and fit
the throttle body
B, making sure that the seal
does not fall.
For reassembly, carry out the operations in the
reverse order to those for removal. Tighten the
screws to the correct tightening torque.
Free-wheeling
In certain situations, you must allow the vehicle
to free-wheel (while being towed, on a rolling
road, in an automatic car wash, or being
transported by rail or sea freight, etc.).
The procedure differs depending on the type of
gearbox and transmission.
/
To release them
► With the vehicle stationary and the engine
running, depress the brake pedal and release
the parking brake.
►
With a manual gearbox, move the gear lever
into neutral.
►
With an automatic gearbox, select position N
.
►
For 4-wheel drive vehicles (4x4), put the
transmission selector in 2H
mode.
►
Switch the ignition off.
Advice on care and maintenance
General recommendations
Observe the following recommendations to avoid
damaging the vehicle.
Exterior
Never use a high-pressure jet wash in
the engine compartment - risk of
damaging the electrical components!
Do not wash the vehicle in bright sunshine or
extremely cold conditions.
When washing the vehicle in an
automatic roller-brush car wash, be sure
to lock the doors and, depending on version,
move the electronic key away.
When using a high-pressure washer, keep
the jet nozzle at a minimum distance of 30
cm from the vehicle (particularly on any stone
chip impacts, sensors or seals).
Promptly clean up any stains containing
chemicals liable to damage the vehicle's
paintwork (including tree resin, bird
droppings, insect secretions, pollen and tar).
Depending on the environment, clean the
vehicle frequently to remove salty deposits
(in coastal areas), soot (in industrial areas)
and mud/salts (in wet or cold areas). These
substances can be highly corrosive.
Page 122 of 164
120
In the event of a breakdown
General recommendations
Observe the legislation in force in the
country where you are driving.
Ensure that the weight of the towing vehicle is
higher than that of the towed vehicle.
The driver must remain at the wheel of the
towed vehicle and must have a valid driving
licence.
When towing a vehicle with all four wheels on
the ground, always use an approved towing
arm; rope and straps are prohibited.
The towing vehicle must move off gently.
When the vehicle is towed with its engine
off, there is no longer braking and steering
assistance.A professional towing service must be
called if:
–
Broken down on a motorway or main road.
–
Not possible to put
the gearbox into neutral,
unlock the steering, or release the parking
brake.
–
Not possible to tow a vehicle with an
automatic gearbox, with the engine running.
–
T
owing with only two wheels on the ground.
–
Four-wheel drive vehicle.
–
No approved towbar available.
Before towing the vehicle, it is essential
to put the vehicle in free-wheeling mode.
For more information on Changing to free-
wheeling , refer to the corresponding section.
With a manual gearbox, place the gear
lever in neutral.
With an automatic gearbox, place the gear
selector in position N.
Failure to adhere to this instruction may lead
to damage to some braking components and
the lack of braking assistance on restarting
the engine.
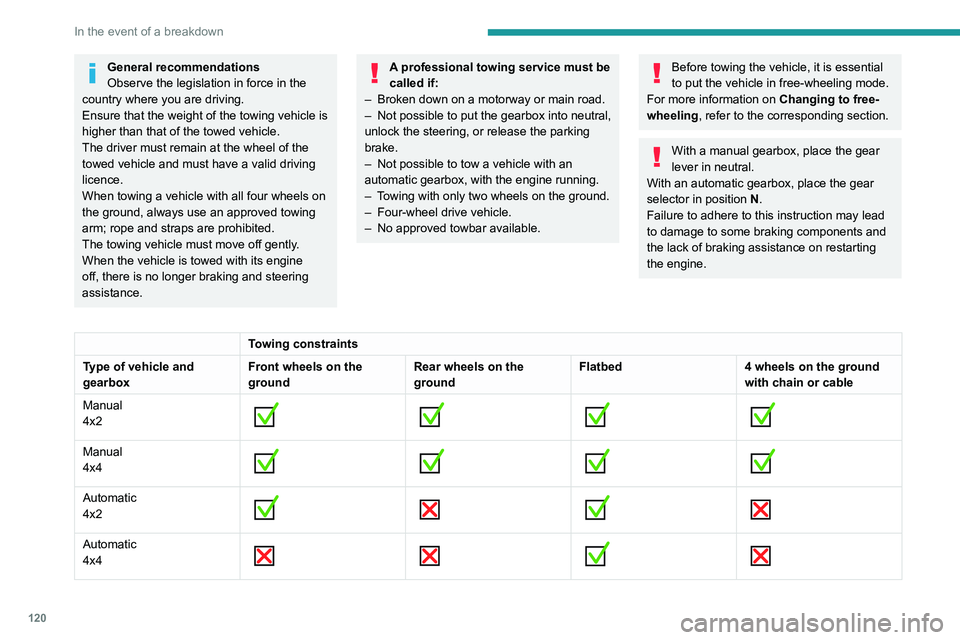
Towing constraints
Type of vehicle and
gearbox Front wheels on the
groundRear wheels on the
groundFlatbed
4 wheels on the ground
with chain or cable
Manual
4x2
Manual
4x4
Automatic
4x2
Automatic
4x4
Towing your vehicle
Access to the front hooks
The tow hooks are located under the front
bumper.
To be towed:
►
Securely install cables or chains to the tow
hooks.
► Put the gearbox into neutral.
Failure to observe this instruction could
result in damage to certain components
(braking, transmission, etc.) and to the
absence of braking assistance the next time
the engine is started.
Page 129 of 164
127
Bluetooth® audio system
10Bluetooth® audio system
The different functions and settings described vary according to the version
and configuration of your vehicle.
As a safety measure and because it requires sustained attention by the driver,
the pairing of a Bluetooth
® mobile telephone
with the Bluetooth® hands-free system of your
audio system must be done with the vehicle
stationary and the ignition on.
Your audio system is coded in such a way that it will only operate in your
vehicle.
All work on the system must be carried out
exclusively by a dealer or qualified workshop,
to avoid any risk of electrocution, fire or
mechanical faults.
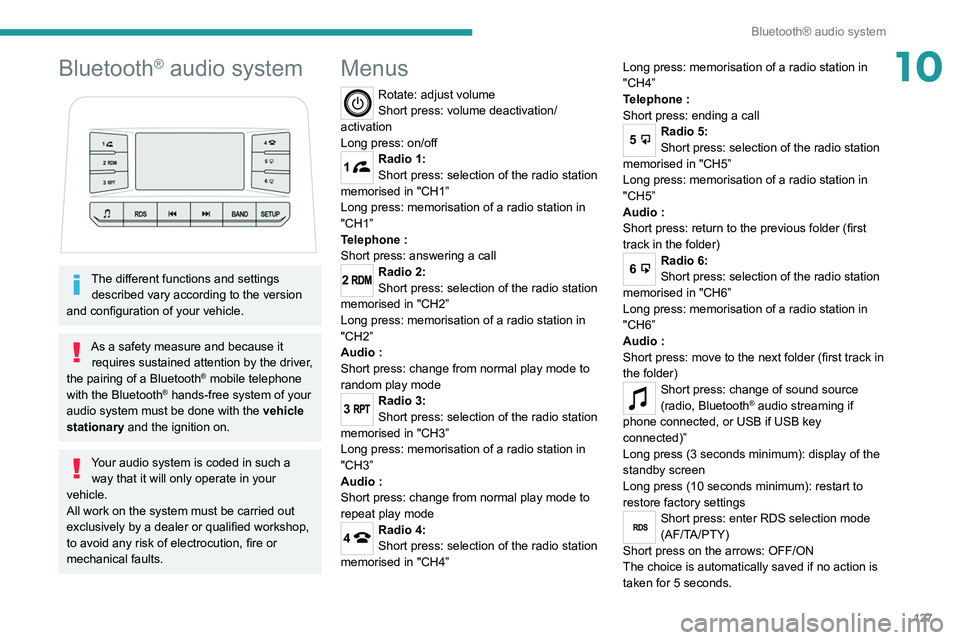
Menus
Rotate: adjust volume
Short press: volume deactivation/
activation
Long press: on/off
1Radio 1:
Short press: selection of the radio station
memorised in "CH1”
Long press: memorisation of a radio station in
"CH1”
Telephone
:
Short press: answering a call
2Radio 2:
Short press: selection of the radio station
memorised in "CH2”
Long press: memorisation of a radio station in
"CH2”
Audio
:
Short press: change from normal play mode to
random play mode
3Radio 3:
Short press: selection of the radio station
memorised in "CH3”
Long press: memorisation of a radio station in
"CH3”
Audio
:
Short press: change from normal play mode to
repeat play mode
4Radio 4:
Short press: selection of the radio station
memorised in "CH4” Long press: memorisation of a radio station in
"CH4”
Telephone
:
Short press: ending a call
5Radio 5:
Short press: selection of the radio station
memorised in "CH5”
Long press: memorisation of a radio station in
"CH5”
Audio
:
Short press: return to the previous folder (first
track in the folder)
6Radio 6:
Short press: selection of the radio station
memorised in "CH6”
Long press: memorisation of a radio station in
"CH6”
Audio
:
Short press: move to the next folder (first track in
the folder)
Short press: change of sound source
(radio, Bluetooth® audio streaming if
phone connected, or USB if USB key
connected)”
Long press (3 seconds minimum): display of the
standby screen
Long press (10 seconds minimum): restart to
restore factory settings
RDSShort press: enter RDS selection mode
(AF/TA/PTY)
Short press on the arrows: OFF/ON
The choice is automatically saved if no action is
taken for 5 seconds.
Page 130 of 164
128
Bluetooth® audio system
Media
USB socket
Insert a USB memory stick in the USB
socket.
The system changes automatically to "USB"
source and the "USB" symbol appears at the top
left of the screen.
To protect the system, do not use a USB hub.
Any additional devices connected to the system must comply with the standard
applicable to the product and/or the standard
IEC 60950-1.
When the USB socket is used, the
portable device charges automatically.
Play mode
The play modes available are:
– Normal: the tracks are played in order,
according to the classification of the selected
files.
– Random: the tracks in an album or folder are
played in a random order.
– Random on all media : all of the tracks saved
in the media are played in random order.
– Repeat: the tracks played are only those from
the current album or folder.
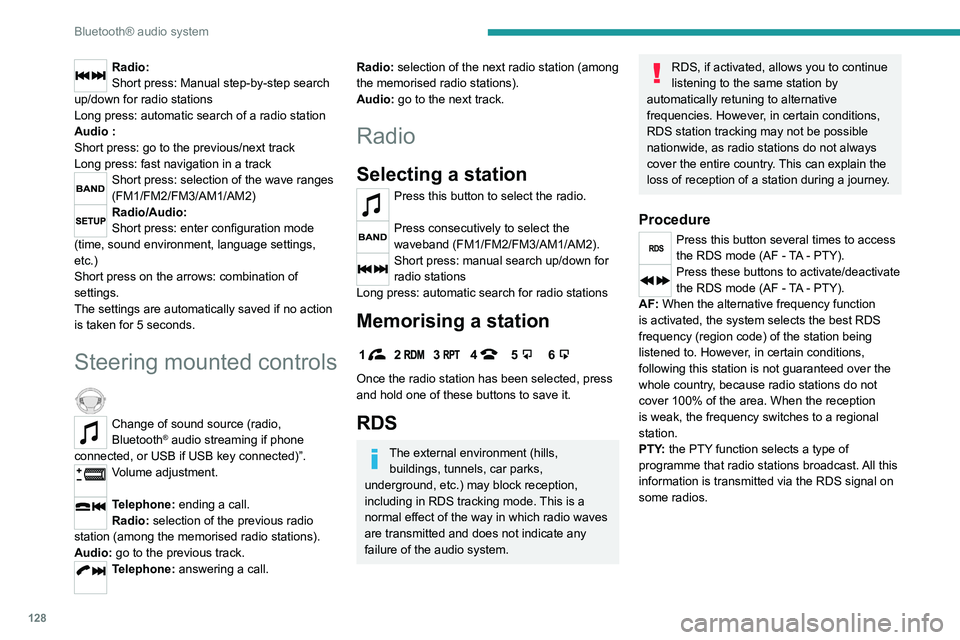
Radio:
Short press: Manual step-by-step search
up/down for radio stations
Long press: automatic search of a radio station
Audio
:
Short press: go to the previous/next track
Long press: fast navigation in a track
Short press: selection of the wave ranges
(FM1/FM2/FM3/AM1/AM2)
Radio/Audio:
Short press: enter configuration mode
(time, sound environment, language settings,
etc.)
Short press on the arrows: combination of
settings.
The settings are automatically saved if no action
is taken for 5 seconds.
Steering mounted controls
Change of sound source (radio,
Bluetooth® audio streaming if phone
connected, or USB if USB key connected)”.
Volume adjustment.
Telephone: ending a call.
Radio: selection of the previous radio
station (among the memorised radio stations).
Audio: go to the previous track.
Telephone: answering a call.
Radio: selection of the next radio station (among
the memorised radio stations).
Audio: go to the next track.
Radio
Selecting a station
Press this button to select the radio.
Press consecutively to select the
waveband (FM1/FM2/FM3/AM1/AM2).
Short press: manual search up/down for
radio stations
Long press: automatic search for radio stations
Memorising a station
123456
Once the radio station has been selected, press
and hold one of these buttons to save it.
RDS
The external environment (hills, buildings, tunnels, car parks,
underground, etc.) may block reception,
including in RDS
tracking mode. This is a
normal effect of the way in which radio waves
are transmitted and does not indicate any
failure of the audio system.
RDS, if activated, allows you to continue
listening to the same station by
automatically retuning to alternative
frequencies. However, in certain conditions,
RDS station tracking may not be possible
nationwide, as radio stations do not always
cover the entire country. This can explain the
loss of reception of a station during a journey.
Procedure
Press this button several times to access
the RDS mode (AF - TA - PTY).
Press these buttons to activate/deactivate
the RDS mode (AF - TA - PTY).
AF: When the alternative frequency function
is activated, the system selects the best RDS
frequency (region code) of the station being
listened to. However, in certain conditions,
following this station is not guaranteed over the
whole country, because radio stations do not
cover 100% of the area. When the reception
is weak, the frequency switches to a regional
station.
PTY: the PTY function selects a type of
programme that radio stations broadcast. All this
information is transmitted via the RDS signal on
some radios.
Page 131 of 164
129
Bluetooth® audio system
10Media
USB socket
Insert a USB memory stick in the USB
socket.
The system changes automatically to "USB"
source and the "USB" symbol appears at the top
left of the screen.
To protect the system, do not use a USB hub.
Any additional devices connected to the system must comply with the standard
applicable to the product and/or the standard
IEC 60950-1.
When the USB socket is used, the
portable device charges automatically.
Play mode
The play modes available are:
– Normal : the tracks are played in order,
according to the classification of the selected
files.
–
Random
: the tracks in an album or folder are
played in a random order.
–
Random on all media : all of the tracks saved
in the media are played in random order
.
–
Repeat
: the tracks played are only those from
the current album or folder. Normal play mode is activated by default.
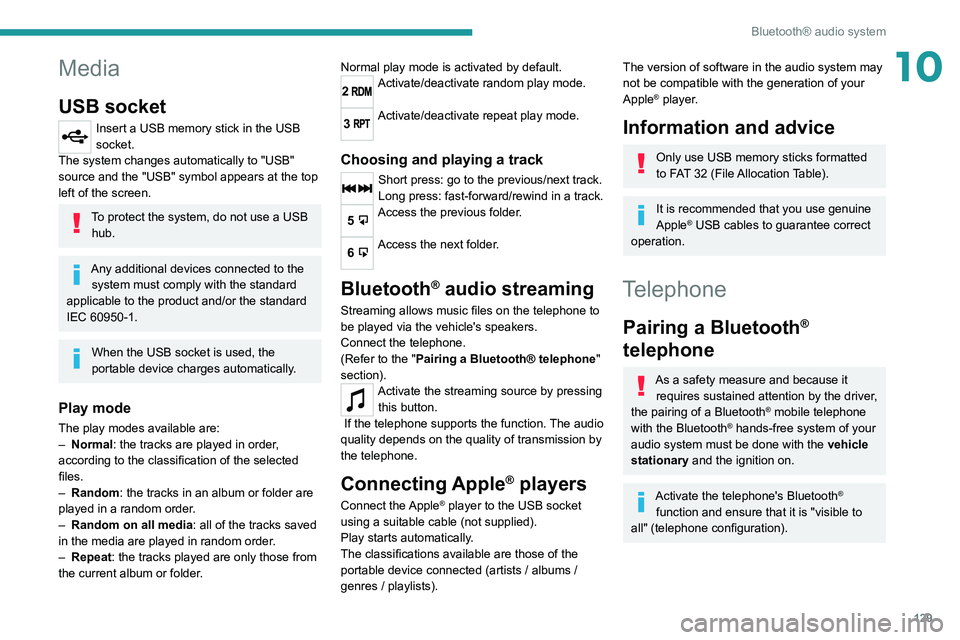
2Activate/deactivate random play mode.
3Activate/deactivate repeat play mode.
Choosing and playing a track
Short press: go to the previous/next track.
Long press: fast-forward/rewind in a track.
5Access the previous folder.
6Access the next folder.
Bluetooth® audio streaming
Streaming allows music files on the telephone to
be played via the vehicle's speakers.
Connect the telephone.
(Refer to the "Pairing a Bluetooth® telephone
"
section).
Activate the streaming source by pressing this button.
If the telephone supports the function. The audio
quality depends on the quality of transmission by
the telephone.
Connecting Apple® players
Connect the Apple® player to the USB socket
using a suitable cable (not supplied).
Play starts automatically.
The classifications available are those of the
portable device connected (artists / albums /
genres / playlists).
The version of software in the audio system may
not be compatible with the generation of your
Apple
® player.
Information and advice
Only use USB memory sticks formatted
to FAT 32 (File Allocation Table).
It is recommended that you use genuine
Apple® USB cables to guarantee correct
operation.
Telephone
Pairing a Bluetooth®
telephone
As a safety measure and because it
requires sustained attention by the driver,
the pairing of a Bluetooth
® mobile telephone
with the Bluetooth® hands-free system of your
audio system must be done with the vehicle
stationary and the ignition on.
Activate the telephone's Bluetooth®
function and ensure that it is "visible to
all" (telephone configuration).
Page 136 of 164
134
Peugeot Connect 10" Touchscreen
Deleting a telephone
In the list of paired telephones, press the
bin next to the telephone to be deleted.
Receiving a call
An incoming call is announced by a ring and a
display overlaid on the screen.
Accepting the call
Press this button on the steering-mounted
controls to answer the call.
Or
Select "Answer" on the touch screen.
Refusing the call
Press this button on the steering-mounted
controls to refuse the call.
Or
Select "End call" on the touch screen.
Making a call
Using the telephone is strongly
discouraged while driving.
Park the vehicle.
Make the call using the steering-mounted
controls.
Calling a new number
Press Telephone to display the main
page.
Select a source:"USB" to play files from a USB stick.
"Local" to play locally stored files.
"BT" to play audio streaming files.
Streaming allows you to listen to the
audio feed from your smartphone.
The Bluetooth profile must be activated.
If play does not start automatically, it may be
necessary to start the audio playback from
the smartphone.
Control is from the portable device or by using
the system's touch buttons.
Once connected in streaming mode, the
smartphone is considered to be a media
source.
USB port
Insert the USB memory stick into the USB
port or connect the USB device to the
USB port using a suitable cable (not supplied).
To protect the system, do not use a USB hub.
The system builds playlists (in temporary
memory); this operation can take from a
few seconds to several minutes at the first
connection.
Reduce the number of non-music files and the
number of folders to reduce the waiting time.
Playlists are updated whenever the ignition
is switched off or a USB memory stick is
connected. The audio system memorises these
lists, which will subsequently load faster if they
have not been changed.
Telephone
Pairing a Bluetooth®
telephone
As a safety measure and because it
requires sustained attention by the driver,
the pairing of a Bluetooth
® mobile telephone
with the Bluetooth® hands-free system of your
audio system must be done with the vehicle
stationary and the ignition on.
Activate the telephone's Bluetooth®
function and ensure that it is "visible to
all" (telephone configuration).
The services available depend on the network, the SIM card and the
compatibility of the Bluetooth
® devices used.
Refer to your telephone’s user guide and your
service provider to check which services you
are able to access.
Procedure from the telephone
Select the system name in the list of
detected devices.
The connection is made automatically.
If the pairing procedure fails, we
recommend deactivating and then
reactivating the Bluetooth
® function on the
telephone.
Procedure from the system
Press Telephone to display the primary
page.
Press "BT settings" .
Activate the Bluetooth connection.
Press “Available devices”.
The list of telephones detected is
displayed.
Select the name of the telephone in the list.
Automatic reconnection
On return to the vehicle, if the last telephone
connected is present again, it is automatically
recognised and within about 30 seconds
of switching on the ignition, the pairing is
established automatically (with Bluetooth
activated).
Page 138 of 164

136
Peugeot Connect 10" Touchscreen
Display
Press Settings to display the main page.
Select "Display".
– To adjust the screen brightness, move the
"Brightness" slider.
– Activate or deactivate video playback while
driving.
– To configure the display when the screen is
off, choose Digital, Analogue or Black.
Audio settings
Press Settings to display the main page.
Select “Audio settings” then “Treble” or
“Medium” or “Bass”.
Press Reset to restore the default settings.
BT settings
Press Settings to display the main page.
Select “BT settings”.
Activate or deactivate the Bluetooth®
search.
Activate or deactivate the synchronisation of the contacts on the paired telephone.
– Press "Local name" to change the name of
the system.
– Manage paired telephones in " Suitable
devices”.
On connecting the USB cable, the
CarPlay® function deactivates the
system's Bluetooth® mode.
The "CarPlay " function requires the use of
a compatible smartphone and compatible
applications.
Connect the USB cable. The smartphone
charges when connected by the USB
cable.
A message appears on the smartphone.
Read it and then confirm with the " Authorise"
button.
Press "CarPlay" to display the CarPlay®
interface.
MirrorLinkTM smartphone
connection
Depending on country.
The "MirrorLinkTM" function requires the
use of a compatible smartphone and
compatible
applications.
Check the compatibility of the telephone on
the Brand's website (services).
When connecting a smartphone to the
system, we recommend enabling
Bluetooth
® on the smartphone.Connect the USB cable. The smartphone
charges when connected by the USB
cable.
Press "MirrorLinkTM" to start the
application in the system.
Depending on the smartphone, it may be
necessary to activate the "MirrorLink
TM"
function.
During the procedure, several screen
pages relating to certain features are
displayed.
Accept to start and complete the connection.
Once the connection is established, a page is
displayed, showing the applications already
downloaded to the smartphone that are
compatible with MirrorLink
TM technology.
Access to the menus for the system is possible
at any time using the dedicated buttons.
There may be a pause before applications become available,
depending on the quality of the network.
Android Auto smartphone connection
Depending on country.
Install the "Android Auto" application on
the smartphone via "Google Play".
The "Android Auto" function requires the use
of a compatible smartphone and compatible
applications.
Connect the USB cable. The smartphone
charges when connected by the USB
cable.
Press "Android Auto" to start the
application in the system.
During the procedure, several screen
pages relating to certain features are
displayed.
Accept to start and complete the connection.
Access to the menus for the system is possible
at any time using the dedicated buttons.
There may be a pause before applications become available,
depending on the quality of the network.
Settings
System settings
Press Settings to display the main page.
Select "System".
–
T
o change the language, select “ Languages”.
–
T
o set the date and time automatically, choose
the time zone corresponding to the country in
which the vehicle is being driven in " Time zone".
Then choose the time display format ( 12h/24h).
–
T
o adjust the tone when touching the screen,
select "Key tone".
–
T
o adjust the volume of the touch screen and
telephone calls, move the " Automatic volume
control" and "Mobile " sliders.