2022 PEUGEOT 308 door lock
[x] Cancel search: door lockPage 4 of 260

2
Contents
■
Overview
■
Eco-driving
1InstrumentsDriver information 10
Matrix instrument panel 10
Digital instrument panels 10
Warning and indicator lamps 12
Indicators 18
Manual test 21
Total distance recorder 22
Trip computer 22
10-inch touch screen 23
i-Toggles 25
Remotely operable additional functions
(Rechargeable hybrid)
25
2AccessRemote control / Key 27
Proximity Keyless Entry and Start 29
Central locking 31
Back-up procedures 32
Doors 34
Boot 34
Motorised tailgate (SW) 35
Alarm 38
Electric windows 40
Sunroof 41
3Ease of use and comfortDriving position 43
Front seats 44
Steering wheel adjustment 48
Heated steering wheel 48
Mirrors 48
Rear bench seat 50
Heating and Ventilation 52
Dual-zone automatic air conditioning 53
Front demisting - defrosting 56
Rear screen demisting/defrosting 56
Heated windscreen 56
Temperature pre-conditioning
(Rechargeable hybrid)
57
Front fittings 58
Courtesy lamps 61
Interior ambient lighting 62
Rear fittings 62
Boot fittings 63
4Lighting and visibilityExterior lighting control stalk 67
Direction indicators 68
Headlamp beam height adjustment 68
Automatic illumination of headlamps 69
Guide-me-home and welcome lighting 69
Automatic lighting systems - General
recommendations
70
Automatic headlamp dipping 70
Peugeot Matrix LED Technology 2.0 71
Wiper control stalk 73
Intermittent wipers 75
Automatic wipers 75
Changing a wiper blade 76
5SafetyGeneral safety recommendations 78
Hazard warning lamps 78
Horn 79
Pedestrian horn (Rechargeable hybrid) 79
Emergency or assistance 79
Electronic stability control (ESC) 81
Seat belts 84
Airbags 86
Child seats 88
Deactivating the front passenger airbag 90
ISOFIX child seats 91
i-Size child seats 93
Installing child seats 93
Child lock 96
6DrivingDriving recommendations 97
Starting / Switching off the engine
with the key
99
Starting/Switching off the engine with
Keyless Entry and Start
100
Starting rechargeable hybrid vehicles 101
Electric parking brake 102
Manual gearbox 104
Automatic gearbox 105
Driving modes 107
Hill start assist 109
Gear shift indicator 11 0
Stop & Start 11 0
Tyre under-inflation detection 111
Driving and manoeuvring aids - General
recommendations
11 3
Steering wheel with hands-on detection 11 4
Shortcuts for driving aids 11 5
Page 6 of 260
4
Overview
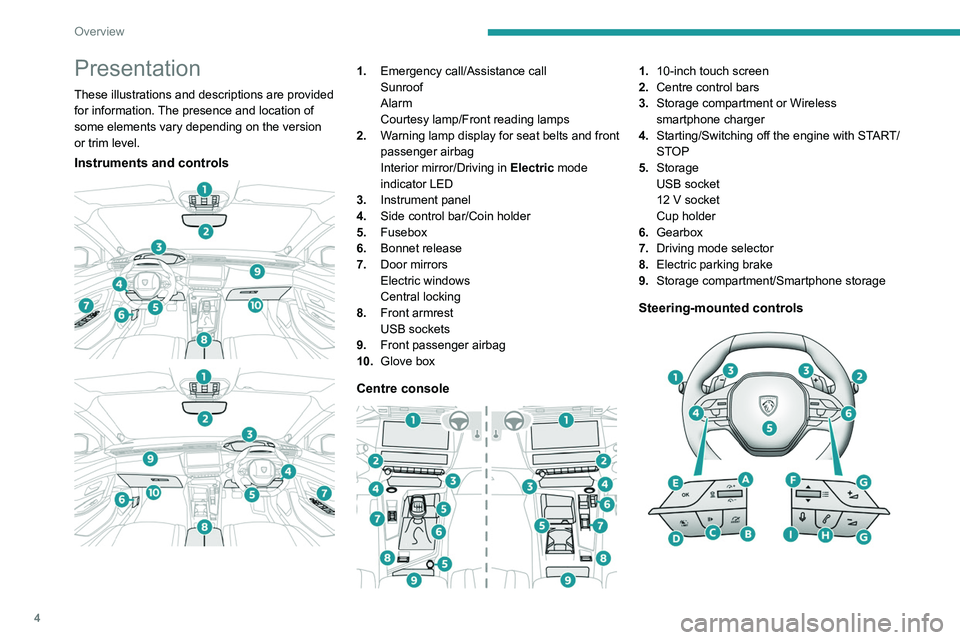
Presentation
These illustrations and descriptions are provided
for information. The presence and location of
some elements vary depending on the version
or trim level.
Instruments and controls
1. Emergency call/Assistance call
Sunroof
Alarm
Courtesy lamp/Front reading lamps
2. Warning lamp display for seat belts and front
passenger airbag
Interior mirror/Driving in Electric mode
indicator LED
3. Instrument panel
4. Side control bar/Coin holder
5. Fusebox
6. Bonnet release
7. Door mirrors
Electric windows
Central locking
8. Front armrest
USB sockets
9. Front passenger airbag
10. Glove box
Centre console
1.10-inch touch screen
2. Centre control bars
3. Storage compartment or Wireless
smartphone charger
4. Starting/Switching off the engine with START/
STOP
5. Storage
USB socket
12
V socket
Cup holder
6. Gearbox
7. Driving mode selector
8. Electric parking brake
9. Storage compartment/Smartphone storage
Steering-mounted controls
Page 24 of 260
22
Instruments
► Then select Safety > Diagnostics.
The following information is displayed on the
instrument panel:
–
T
yre pressures.
–
Engine oil level (depending on engine).
–
Next service due.
–
Driving range associated with the
AdBlue® and
the SCR system (BlueHDi
Diesel).
–
Current alerts.
This information is also displayed automatically every time the ignition is
switched on.
Total distance recorder
The total distance recorder measures the total
distance travelled by the vehicle since its initial
registration.
With the ignition on, the total distance is
displayed at all times. It remains displayed for
30
seconds after switching off the ignition. It is
displayed when the driver's door is opened, and
when the vehicle is locked or unlocked.
When travelling abroad, you may have to
change the distance units (miles or km):
the displayed speed must be in the local
country’s official unit (mph or km/h).
The unit is changed via the screen's
configuration application, with the vehicle
stationary.
Rechargeable hybrid vehicles
The total distance recorder is only
accessible from the trip computer.
For more information on the Trip computer,
refer to the corresponding section.
Lighting dimmer
Used to manually adjust the brightness of the
instruments and controls to suit the exterior light
level.
It is configured in the Settings >
Brightness touch screen application.
►
In the "
Cockpit" category, press or move the
slider to the desired setting.
Trip computer
Displays information related to the current trip
(range, fuel consumption, average speed, etc.).
Data displayed on the
instrument panel
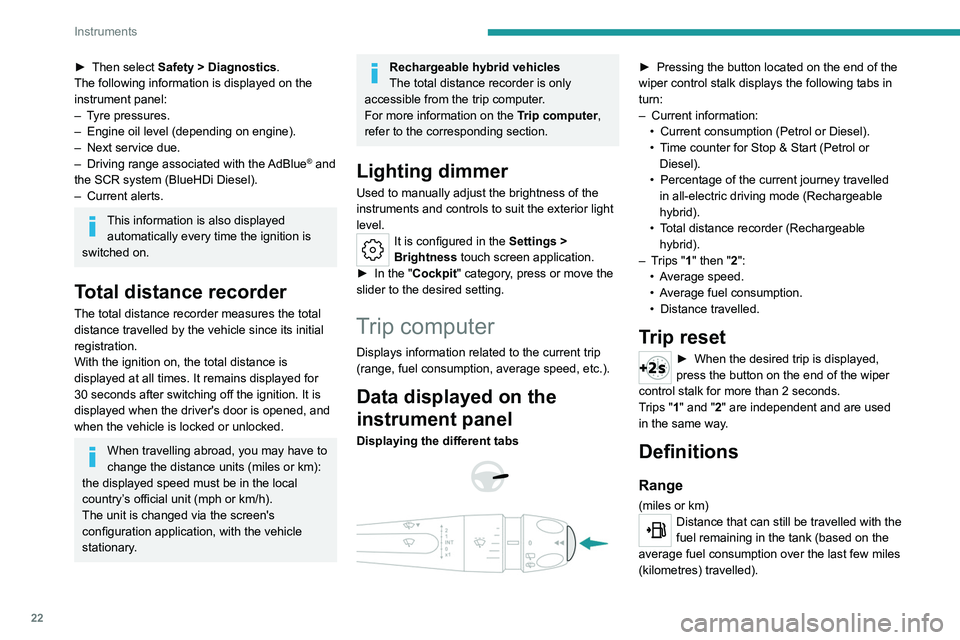
Displaying the different tabs
► Pressing the button located on the end of the
wiper control stalk displays the following tabs in
turn:
–
Current information:
•
Current consumption (Petrol or Diesel).
•
T
ime counter for Stop & Start (Petrol or
Diesel).
•
Percentage of the current journey travelled
in all-electric driving mode (Rechargeable
hybrid).
•
T
otal distance recorder (Rechargeable
hybrid).
–
T
rips "1" then "2":
•
A
verage speed.
•
A
verage fuel consumption.
•
Distance travelled.
Trip reset
► When the desired trip is displayed,
press the button on the end of the wiper
control stalk for more than 2
seconds.
Trips "1" and "2" are independent and are used
in the same way.
Definitions
Range
(miles or km)Distance that can still be travelled with the
fuel remaining in the tank (based on the
average fuel consumption over the last few miles
(kilometres) travelled).
Page 29 of 260
27
Access
2Remote control / Key
Remote control function
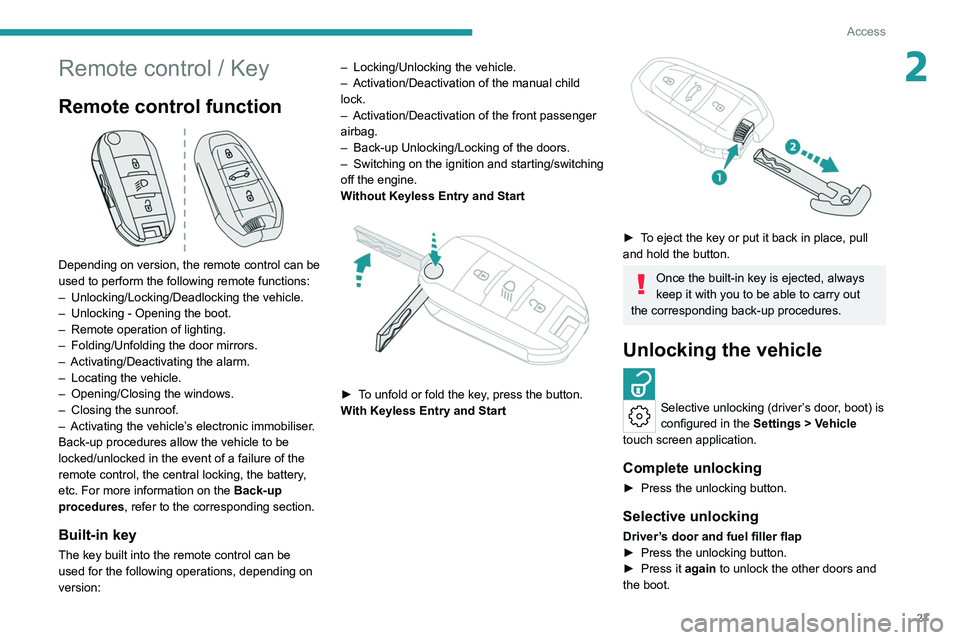
Depending on version, the remote control can be
used to perform the following remote functions:
–
Unlocking/Locking/Deadlocking the vehicle.
–
Unlocking - Opening the boot.
–
Remote operation of lighting.
–
Folding/Unfolding the door mirrors.
–
Activating/Deactivating the alarm.
–
Locating the vehicle.
–
Opening/Closing the windows.
–
Closing the sunroof.
–
Activating the vehicle’
s electronic immobiliser.
Back-up procedures allow the vehicle to be
locked/unlocked in the event of a failure of the
remote control, the central locking, the battery,
etc. For more information on the Back-up
procedures, refer to the corresponding section.
Built-in key
The key built into the remote control can be
used for the following operations, depending on
version: –
Locking/Unlocking the vehicle.
–
Activation/Deactivation of the manual child
lock.
–
Activation/Deactivation of the front passenger
airbag.
–
Back-up Unlocking/Locking of the doors.
–
Switching on the ignition and starting/switching
off the engine.
W
ithout Keyless Entry and Start
► To unfold or fold the key, press the button.
With Keyless Entry and Start
► To eject the key or put it back in place, pull
and hold the button.
Once the built-in key is ejected, always
keep it with you to be able to carry out
the corresponding back-up procedures.
Unlocking the vehicle
Selective unlocking (driver’s door, boot) is
configured in the Settings
> Vehicle
touch screen application.
Complete unlocking
► Press the unlocking button.
Selective unlocking
Driver’s door and fuel filler flap
► Press the unlocking button.
►
Press it
again to unlock the other doors and
the boot.
Page 30 of 260
28
Access
The charging nozzle can be unplugged on the
second press.
Complete or selective unlocking, and alarm
deactivation (depending on version), is confirmed
by the flashing of the direction indicators and the
lighting of the daytime running lamps.
Depending on version, the door mirrors unfold.
Opening the windows
►
T
o open the windows, press the unlocking
button for more than 3 seconds (depending on
version).
►
Press again to stop the windows opening.
Selective unlocking and opening of
the tailgate
By default, selective unlocking of the tailgate
is deactivated and its motorised operation is
activated.
► Press and hold this button to unlock
the boot and, depending on version,
trigger the motorised opening of the tailgate.
When selective unlocking of the tailgate is
activated, the doors and the fuel filler flap remain
locked.
If selective unlocking of the tailgate is
deactivated, pressing the button unlocks the
whole vehicle.
If motorised operation of the tailgate is
deactivated, pressing the button partially
opens the tailgate.
To lock the vehicle, it is necessary to close
the tailgate again.
Locking the vehicle
Normal locking
► Press the locking button.
The locking, and the activation of the alarm
depending on version,
is confirmed by the
lighting of the direction indicators and the
daytime running lamps.
Depending on version, the door mirrors fold.
An access (door or boot) that is not properly closed prevents locking of the
vehicle. However, if the vehicle is fitted with
an alarm, it will be activated after 45
seconds.
If the vehicle is unlocked but the doors or boot
are not subsequently opened,
the vehicle
will automatically lock itself again after about
30
seconds. If the vehicle is fitted with an
alarm, it will be reactivated automatically.
Deadlocking
Deadlocking renders the interior door
controls inoperative. It also deactivates
the central locking buttons.
The horn remains operational.
Never leave anyone inside the vehicle
when it is deadlocked.
► Press the locking button again within 3
seconds to deadlock the vehicle (confirmed by
the temporary lighting of the direction indicators).
Closing the windows and sunroof
An audible signal sounds before the start of the
movement.
►
T
o completely close the windows and,
depending on version, the sunroof, press the
locking button for more than 2 seconds.
►
Press again to stop closing.
Ensure that no person or object could
prevent the correct closing of the
windows and sunroof.
If, on versions with alarm, you want to
leave the windows and/or sunroof partially
open, you must first deactivate the interior
volumetric alarm protection.
For more information on the Alarm, refer to
the corresponding section.
Locating the vehicle
Helps you to locate your vehicle from a distance,
with the vehicle locked:
–
The direction indicators flash for approximately
10 seconds.
–
The door mirror spotlamps come on.
–
The courtesy lamps come on.
► Press this button.
Page 31 of 260
29
Access
2Remote lighting of the
lamps
Availability of this function depends on version.► Press this button. The sidelamps,
dipped beam headlamps, number plate
lamps and door mirror spotlamps come on for 30
seconds.
Pressing again before the end of the timed
period switches off the lamps immediately.
Advice
Remote control
The remote control is a sensitive, high-
frequency device; avoid handling it in your
pocket, due to the risk of unintentionally
unlocking the vehicle.
Avoid pressing the remote control buttons
while out of range of the vehicle, due to
the risk of rendering the remote control
inoperative. It would then be necessary to
reset it.
The remote control does not work
when the
key is in the ignition switch, even when the
ignition is switched off.
Anti-theft protection
Do not modify the electronic vehicle
immobiliser, as this might result in
malfunctions.
For vehicles with a key ignition switch,
remember to remove the key and turn the
steering wheel to engage the steering lock.
Locking the vehicle
Driving with the doors locked could make
it more difficult for the emergency services
to enter the passenger compartment in an
emergency.
As a safety precaution, remove the key from
the ignition or take the electronic key with you
when leaving the vehicle, even for a short
time.
Purchasing a second-hand vehicle
Have the key codes memorised by a
PEUGEOT dealer, to ensure that the keys
in your possession are the only ones able to
start the vehicle.
Proximity Keyless Entry
and Start
This is a Keyless Entry and Start system.
It enables automatic vehicle locking/unlocking
simply by detecting the electronic key.
As long as the driver has the electronic key
on their person, the vehicle unlocks as they
approach and locks when they walk away.
If the electronic key is present in an area
between 2 and 5 m from the vehicle for more than 30 minutes, the system is deactivated to
preserve the battery.
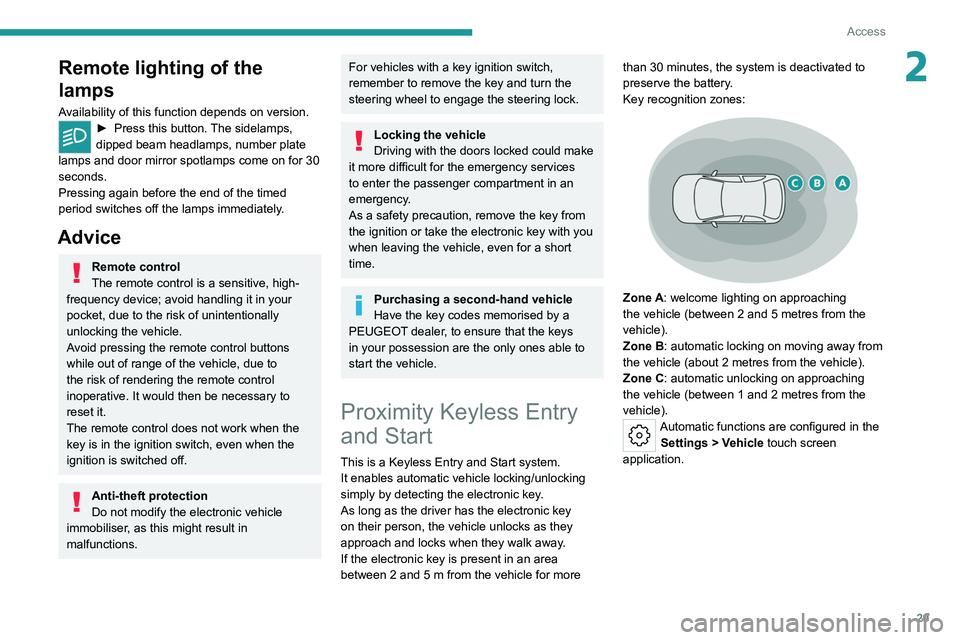
Key recognition zones:
Zone A: welcome lighting on approaching
the vehicle (between 2 and 5
metres from the
vehicle).
Zone B: automatic locking on moving away from
the vehicle (about 2
metres from the vehicle).
Zone C: automatic unlocking on approaching
the vehicle (between 1 and 2
metres from the
vehicle).
Automatic functions are configured in the Settings > Vehicle touch screen
application.
Page 32 of 260
30
Access
Unlocking the vehicle
Selective unlocking (driver’s door, boot) is
configured in the Settings
> Vehicle
touch screen application.
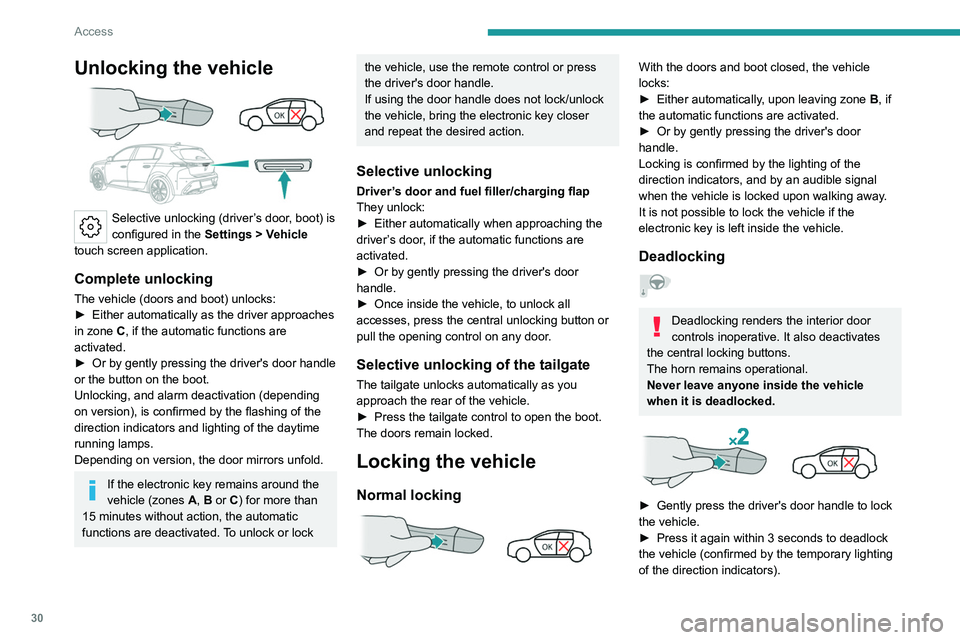
Complete unlocking
The vehicle (doors and boot) unlocks:
► Either automatically as the driver approaches
in zone
C, if the automatic functions are
activated.
►
Or by gently pressing the driver's door handle
or the button on the boot.
Unlocking, and alarm deactivation (depending
on version), is confirmed by the flashing of the
direction indicators and lighting of the daytime
running lamps.
Depending on version, the door mirrors unfold.
If the electronic key remains around the
vehicle (zones A, B or C) for more than
15 minutes without action, the automatic
functions are deactivated. To unlock or lock
the vehicle, use the remote control or press
the driver's door handle.
If using the door handle does not lock/unlock
the vehicle, bring the electronic key closer
and repeat the desired action.
Selective unlocking
Driver’s door and fuel filler/charging flap
They unlock:
►
Either automatically when approaching the
driver
’s door, if the automatic functions are
activated.
►
Or by gently pressing the driver's door
handle.
►
Once inside the vehicle, to unlock all
accesses, press the central unlocking button or
pull the opening control on any door
.
Selective unlocking of the tailgate
The tailgate unlocks automatically as you
approach the rear of the vehicle.
►
Press the tailgate control to open the boot.
The doors remain locked.
Locking the vehicle
Normal locking
With the doors and boot closed, the vehicle
locks:
►
Either automatically
, upon leaving zone B, if
the automatic functions are activated.
►
Or by gently pressing the driver's door
handle.
Locking is confirmed by the lighting of the
direction indicators, and by an audible signal
when the vehicle is locked upon walking away
.
It is not possible to lock the vehicle if the
electronic key is left inside the vehicle.
Deadlocking
Deadlocking renders the interior door
controls inoperative. It also deactivates
the central locking buttons.
The horn remains operational.
Never leave anyone inside the vehicle
when it is deadlocked.
► Gently press the driver's door handle to lock
the vehicle.
►
Press it again within 3
seconds to deadlock
the vehicle (confirmed by the temporary lighting
of the direction indicators).
Page 33 of 260
31
Access
2If one of the doors or the boot is still open
or if the electronic key for the Keyless
Entry and Start
system has been left inside
the vehicle, central locking will not take place.
If the vehicle is unlocked but the doors or
tailgate are not subsequently opened, the
vehicle will automatically lock itself again after
about 30
seconds. If fitted to the vehicle, the
alarm is automatically reactivated (if
previously activated).
Automatic folding/unfolding of the door mirrors is configured in the Settings
>
Vehicle touch screen application.
As a safety measure, never leave the vehicle, even for a short time, without
taking the Keyless Entry and Start system’s
electronic key with you.
Be aware of the risk of theft of the vehicle if
the key is present in one of the defined areas
while the vehicle is unlocked.
In order to preserve the battery in the
electronic key and the vehicle's battery:
–
The unlocking
on approach function
(zone
C) automatically switches to hibernation
mode after several days (approximately one
week) without being used. To unlock the
vehicle, use the remote control or press on
the driver’s door handle. The next time the
vehicle is started, the automatic unlocking
and locking functions will be reactivated.
–
If the welcome lighting is triggered
several times in succession without the
vehicle subsequently being started, it will be
deactivated.
–
All "hands-free" functions switch to
hibernation mode after 21 days without being
used.
To restore these functions, unlock the
vehicle using the remote control and start the
engine.
Electrical interference
The electronic key may not work if it is
close to an electronic device (e.g.
mobile
telephone (switched on or on standby), laptop
computer, strong magnetic fields). If this
occurs, move the electronic key away from
the electronic device.
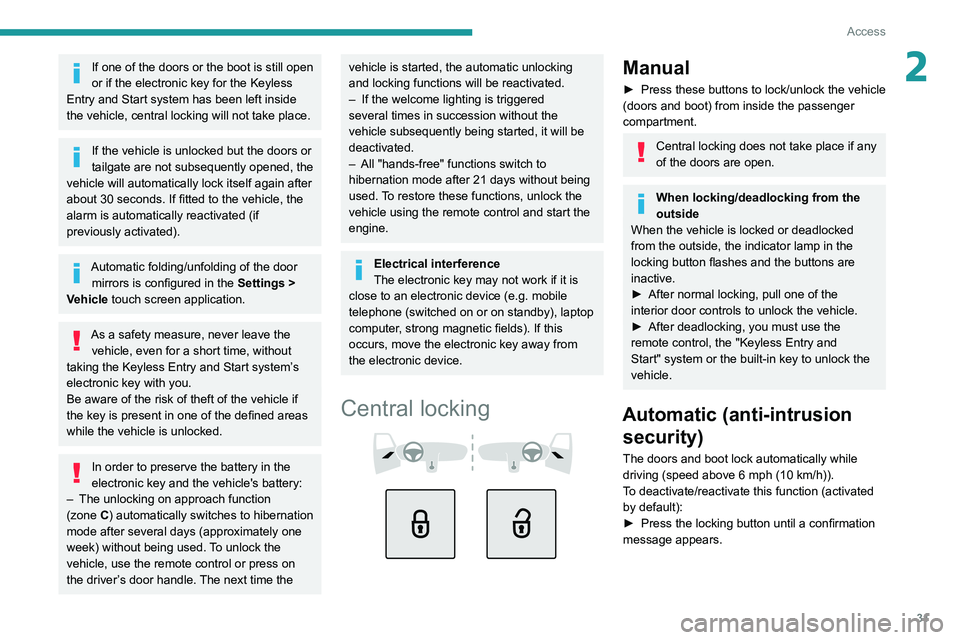
Central locking
Manual
► Press these buttons to lock/unlock the vehicle
(doors and boot) from inside the passenger
compartment.
Central locking does not take place if any
of the doors are open.
When locking/deadlocking from the
outside
When the vehicle is locked or deadlocked
from the outside, the indicator lamp in the
locking button
flashes and the buttons are
inactive.
►
After normal locking, pull one of the
interior door controls to unlock the vehicle.
►
After deadlocking, you must use the
remote control, the "Keyless Entry and
Start" system or the built-in key to unlock the
vehicle.
Automatic (anti-intrusion security)
The doors and boot lock automatically while
driving (speed above 6 mph (10
km/h)).
To deactivate/reactivate this function (activated
by default):
►
Press the locking button until a confirmation
message appears.