2022 PEUGEOT 308 sport mode
[x] Cancel search: sport modePage 10 of 260

8
Eco-driving
Eco-driving
Eco-driving refers to a range of everyday
practices that allow the motorist to optimise
the vehicle's energy consumption (fuel and/or
electricity) and CO
2 emissions.
Optimise your use of the gearbox
With a manual gearbox, move off gently and
change up promptly. While accelerating, change
up early.
With an automatic gearbox, favour automatic
mode. Do not depress the accelerator pedal
heavily or suddenly.
The gear shift indicator prompts you to engage
the most suitable gear. Whenever this indication
is displayed on the instrument panel, follow it
straight away.
With an automatic gearbox, this indicator
appears only in manual mode.
Drive smoothly
Maintain a safe distance between vehicles, use
engine braking rather than the brake pedal and
press the accelerator gradually. These practices
help to save on energy consumption, reduce
CO
2 emissions and decrease general traffic
noise.
With an EAT8 gearbox, with the gear selector
in mode
D, and except in Sport mode, favour
"free-wheeling" by fully lifting your foot from the
accelerator pedal in order to save fuel.
When the traffic is flowing smoothly, select the
cruise control.
Control the use of electrical equipment
Before moving off, if the passenger compartment
is too warm, ventilate it by opening the windows
and air vents before using the air conditioning.
At speeds above 31
mph (50 km/h), close the
windows and leave the air vents open.
Consider using equipment that can help keep
the temperature in the passenger compartment
down.
Unless automatically regulated, switch off the air
conditioning as soon as the desired temperature
has been reached.
Switch off the demisting and defrosting functions,
if they are not managed automatically.
Switch off the heated seat and heated steering
wheel as soon as possible.
Adapt your use of the headlamps and/or
foglamps to the level of visibility, in accordance
with current legislation in the country in which
you are driving.
Avoid running the engine before moving off,
particularly in winter (other than in severe wintry
conditions: temperature below -23°C). The
vehicle will warm up much faster while driving.
As a passenger, avoid connecting your
multimedia devices (e.g.
film, music, video
game) to help reduce the consumption of energy.
Disconnect all portable devices before leaving
the vehicle.
Limit the causes of excess consumption
Spread loads throughout the vehicle. Place the
heaviest items in the boot as close as possible to
the rear seats.
Limit the loads carried in the vehicle and
minimise wind resistance (e.g.
roof bars, roof
rack, bicycle carrier, trailer). Preferably, use a
roof box.
Remove roof bars and roof racks after use.
At the end of winter, remove snow tyres and refit
summer tyres.
Comply with the servicing instructions
Check tyre pressures regularly, with the tyres
cold, referring to the label in the door aperture on
the driver's side.
Carry out this check in particular:
–
before a long journey
.
–
at each change of season.
–
after a long period out of use.
Do not forget the spare wheel and, where
applicable, the tyres on your trailer or caravan.
Have your vehicle serviced regularly (e.g.
engine
oil, oil filter, air filter, passenger compartment
filter, etc.). Observe the schedule of operations in
the manufacturer's service schedule.
With a BlueHDi Diesel engine, if the SCR system
has a fault, your vehicle will emit pollution. Visit
a PEUGEOT dealer or a qualified workshop
as soon as possible to restore your vehicle's
nitrogen oxide emissions to legal levels.
When filling the fuel tank, do not continue after
the third cut-out of the nozzle, to avoid overflow.
Page 64 of 260
62
Ease of use and comfort
– when the ignition is switched on.
– 30 seconds after the last door is closed.
The front and rear touch-sensitive reading lamps
come on and go off at the same time as the
courtesy lamp.
A long press on the front touch-sensitive courtesy lamp completely deactivates it
(confirmed by the "OFF" symbol).
The front and rear touch-sensitive reading
lamps still remain operational.
Interior ambient lighting
The interior ambient lighting casts soft, coloured
lighting in the passenger compartment, when low
lighting conditions are detected.
By default, the colour of the interior ambient
lighting is linked to that of the screens,
depending on the driving mode selected.
Activation/deactivation and adjustment of the brightness are set via the Settings >
Brightness
touch screen application.
The colour is selected via the Settings >
Customisation touch screen application.
Rear fittings
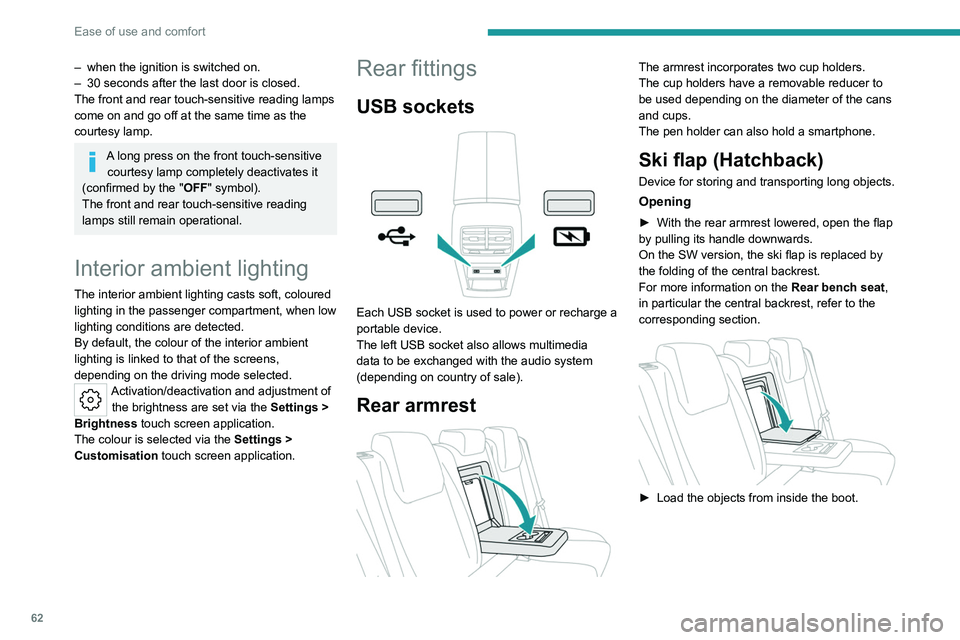
USB sockets
Each USB socket is used to power or recharge a
portable device.
The left USB socket also allows multimedia
data to be exchanged with the audio system
(depending on country of sale).
Rear armrest
The armrest incorporates two cup holders.
The cup holders have a removable reducer to
be used depending on the diameter of the cans
and cups.
The pen holder can also hold a smartphone.
Ski flap (Hatchback)
Device for storing and transporting long objects.
Opening
► With the rear armrest lowered, open the flap
by pulling its handle downwards.
On the SW version, the ski flap is replaced by
the folding of the central backrest.
For more information on the Rear bench seat,
in particular the central backrest, refer to the
corresponding section.
► Load the objects from inside the boot.
Page 110 of 260
108
Driving
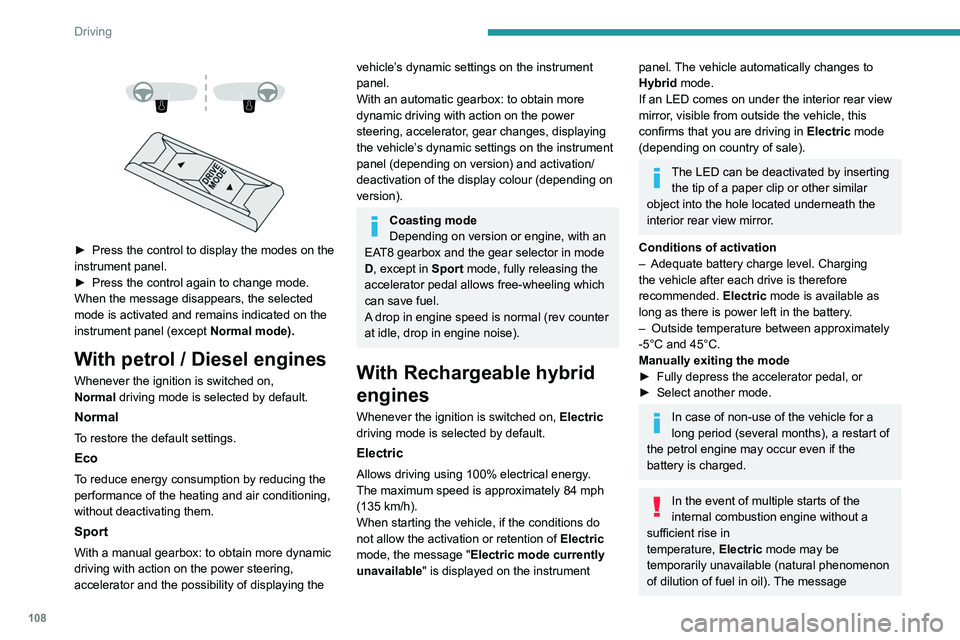
► Press the control to display the modes on the
instrument panel.
►
Press the control again to change mode.
When the message disappears, the selected
mode is activated and remains indicated on the
instrument panel (except Normal
mode).
With petrol / Diesel engines
Whenever the ignition is switched on,
Normal driving mode is selected by default.
Normal
To restore the default settings.
Eco
To reduce energy consumption by reducing the
performance of the heating and air conditioning,
without deactivating them.
Sport
With a manual gearbox: to obtain more dynamic
driving with action on the power steering,
accelerator and the possibility of displaying the
vehicle’s dynamic settings on the instrument
panel.
With an automatic gearbox: to obtain more
dynamic driving with action on the power
steering, accelerator, gear changes, displaying
the vehicle’s dynamic settings on the instrument
panel (depending on version) and activation/
deactivation of the display colour (depending on
version).
Coasting mode
Depending on version or engine, with an
EAT8 gearbox and the gear selector in mode
D, except in
Sport mode, fully releasing the
accelerator pedal allows free-wheeling which
can save fuel.
A drop in engine speed is normal (rev counter
at idle, drop in engine noise).
With Rechargeable hybrid
engines
Whenever the ignition is switched on, Electric
driving mode is selected by default.
Electric
Allows driving using 100% electrical energy.
The maximum speed is approximately 84 mph
(135
km/h).
When starting the vehicle, if the conditions do
not allow the activation or retention of Electric
mode, the message "Electric mode currently
unavailable" is displayed on the instrument
panel. The vehicle automatically changes to
Hybrid mode.
If an LED comes on under the interior rear view
mirror, visible from outside the vehicle, this
confirms that you are driving in Electric mode
(depending on country of sale).
The LED can be deactivated by inserting the tip of a paper clip or other similar
object into the hole located underneath the
interior rear view mirror.
Conditions of activation
–
Adequate battery charge level. Charging
the vehicle after each drive is therefore
recommended. Electric
mode is available as
long as there is power left in the battery.
–
Outside temperature between approximately
-5°C and 45°C.
Manually exiting the mode
►
Fully depress the accelerator pedal, or
►
Select another mode.
In case of non-use of the vehicle for a
long period (several months), a restart of
the petrol engine may occur even if the
battery is charged.
In the event of multiple starts of the
internal combustion engine without a
sufficient rise in
temperature,
Electric mode may be
temporarily unavailable (natural phenomenon
of dilution of fuel in oil). The message
Page 111 of 260
109
Driving
6"Electric mode unavailable: automatic
operation in progress" then appears on the
instrument panel.
To regain normal electrical operation, drive
approximately 50 miles (80 km) in "motorway"
conditions or approximately 125 miles (200
km) in urban conditions.
This phenomenon does not cause any
mechanical or electrical damage. It can occur
several times in the life of the vehicle.
Hybrid
To optimise the vehicle's fuel consumption by
managing the alternating or simultaneous
operation of the two types of engine ,
depending on driving conditions and driving
style.
In Hybrid mode, it is possible to drive in 100%
electric mode if the battery charge level is
sufficient and acceleration requirements are
moderate.
Sport
To obtain more dynamic driving in order to
benefit from the maximum performance of the
vehicle.
Electric power is used to supplement the petrol
engine as long as there is energy left in the
battery.
Hill start assist
This system keeps the vehicle briefly stationary
(for approximately 2 seconds) when making a hill
start, while you transfer your foot from the brake
pedal to the accelerator pedal.
The system is only active when:
–
The vehicle is completely stationary
, with your
foot on the brake pedal.
–
Certain slope conditions are met.
–
The driver
’s door is closed.
Do not leave the vehicle while it is being
held temporarily by hill start assist.
If someone needs to get out of the vehicle
with the engine running, apply the parking
brake manually. Then check that the parking
brake indicator lamp and the P indicator lamp
in the electric parking brake control are on
fixed.
The hill start assist function cannot be deactivated. However, using the parking
brake to immobilise the vehicle interrupts its
operation.
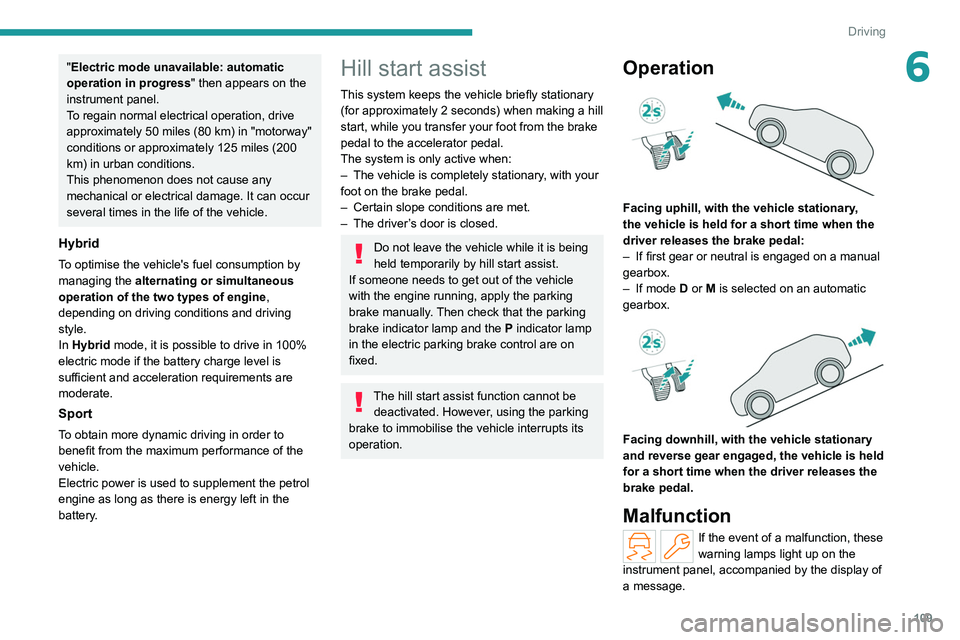
Operation
Facing uphill, with the vehicle stationary,
the vehicle is held for a short time when the
driver releases the brake pedal:
–
If first gear or neutral is engaged on a manual
gearbox.
–
If mode
D or M is selected on an automatic
gearbox.
Facing downhill, with the vehicle stationary
and reverse gear engaged, the vehicle is held
for a short time when the driver releases the
brake pedal.
Malfunction
If the event of a malfunction, these
warning lamps light up on the
instrument panel, accompanied by the display of
a message.
Page 114 of 260

11 2
Driving
must be reinitialised every time the tyre
pressures are adjusted or a wheel changed.
It takes the last values
stored during
the
reinitialisation request into account. It is
therefore essential that the tyre pressure is
correct during the operation. This operation is
the driver’s responsibility.
The tyre under-inflation detection cannot, in any circumstances, replace the need
for vigilance on the part of the driver.
This system does not avoid the need to
regularly check the tyre pressures (including
the spare wheel), especially before a long
journey.
Driving with under-inflated tyres, particularly
in adverse conditions (heavy load, high
speed, long journey):
–
worsens road-holding.
–
lengthens braking distances.
–
causes premature wear of the tyres.
–
increases energy consumption.
The inflation pressures defined for the vehicle can be found on the tyre pressure
label.
For more information on the Identification
markings, refer to the corresponding section.
Checking tyre pressures
This check should be done monthly
when the tyres are "cold" (vehicle stopped for
1 hour or after a journey of less than 6 miles
(10 km) at moderate speeds).
Otherwise, add 0.3 bar to the pressures
shown on the label.
Snow chains
The system does not have to be
reinitialised after fitting or removing snow
chains.
Under-inflation alert
This is signalled by the fixed illumination of this warning lamp, accompanied by an
audible signal and, depending on equipment, the
display of a message.
►
Reduce speed immediately
, avoid excessive
steering movements and avoid sudden braking.
►
Stop the vehicle as soon as it is safe to do
so.
The loss of pressure detected may not always cause visible deformation of the
tyre.
Do not rely on just a visual check.
►
Using a compressor
, such as the one in
the temporary puncture repair kit, check the
pressures of all four tyres when cold.
►
If it is not possible to carry out this check
immediately
, drive carefully at reduced speed.
►
In the event of a puncture, use the
temporary puncture repair kit or the spare wheel
(depending on equipment).
Driving too slowly may not ensure
optimum monitoring.
The alert is not immediately triggered in the
event of a sudden loss of pressure or tyre
blow-out. This is because analysis of the
values read by the wheel's speed sensors
can take several minutes.
The alert may be delayed at speeds below
25 mph (40 km/h), or when adopting a sporty
driving mode.
The alert is kept active until the system is reinitialised.
Reinitialisation
► The system must be reinitialised after any
adjustment to the pressure of one or more tyres,
and after changing one or more wheels.
Before reinitialising the system, make
sure that the pressures of the four tyres
are correct for the conditions of use of the
vehicle and conform to the values written on
the tyre pressure label.
Check the pressures of the four tyres before
performing the reinitialisation.
The system does not advise if a pressure is
incorrect at the time of reinitialisation.
With the vehicle stationary, the system
can be reinitialised in the
Settings>Vehicle touch screen application.
►
Then select
Safety > Tyre Pressure Setup .
Page 177 of 260
175
Practical information
7Never pour the AdBlue® into the Diesel
fuel tank.
If any AdBlue® is splashed, or if there are
any spillages on the bodywork, rinse
immediately with cold water or wipe with a
damp cloth.
If the fluid has crystallised, clean it off using a
sponge and hot water.
Important: in the event of a top-up after
a breakdown because of a lack of
AdBlue, it is essential to wait around 5
minutes before switching on the ignition,
without opening the driver’s door,
unlocking the vehicle, inserting the key
into the ignition switch, or bringing the
key for the "Keyless Entry and Start"
system into the passenger compartment.
Switch on the ignition, then wait for 10
seconds before starting the engine.
►
Switch off the ignition and remove the key
from the switch to switch off the engine.
or
►
With Keyless Entry and Start, press the
"
START/STOP" button to switch off the engine.
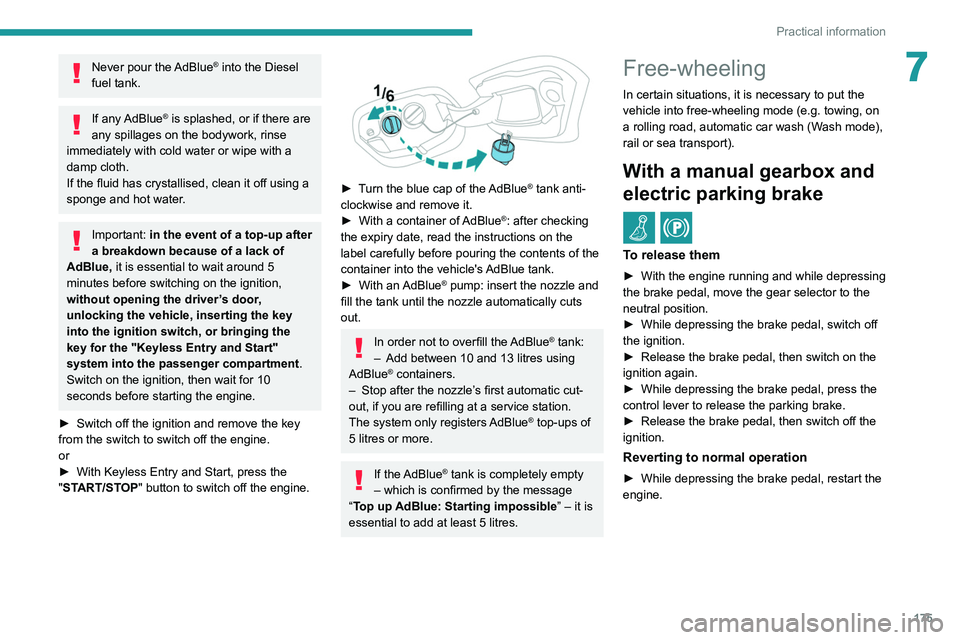
► Turn the blue cap of the AdBlue® tank anti-
clockwise and remove it.
►
With a container of
AdBlue
®: after checking
the expiry date, read the instructions on the
label carefully before pouring the contents of the
container into the vehicle's AdBlue tank.
►
With an
AdBlue® pump: insert the nozzle and
fill the tank until the nozzle automatically cuts
out.
In order not to overfill the AdBlue® tank:
–
Add between 10 and 13 litres using
AdBlue® containers.
–
Stop after the nozzle’ s first automatic cut-
out, if you are refilling at a service station.
The system only registers AdBlue
® top-ups of
5
litres or more.
If the AdBlue® tank is completely empty
– which is confirmed by the message
“Top up
AdBlue: Starting impossible ” – it is
essential to add at least 5 litres.
Free-wheeling
In certain situations, it is necessary to put the
vehicle into free-wheeling mode (e.g. towing, on
a rolling road, automatic car wash (Wash mode),
rail or sea transport).
With a manual gearbox and
electric parking brake
/
To release them
► With the engine running and while depressing
the brake pedal, move the gear selector to the
neutral position.
►
While depressing the brake pedal, switch off
the ignition.
►
Release the brake pedal, then switch on the
ignition again.
►
While depressing the brake pedal, press the
control lever to release the parking brake.
►
Release the brake pedal, then switch off the
ignition.
Reverting to normal operation
► While depressing the brake pedal, restart the
engine.
Page 228 of 260
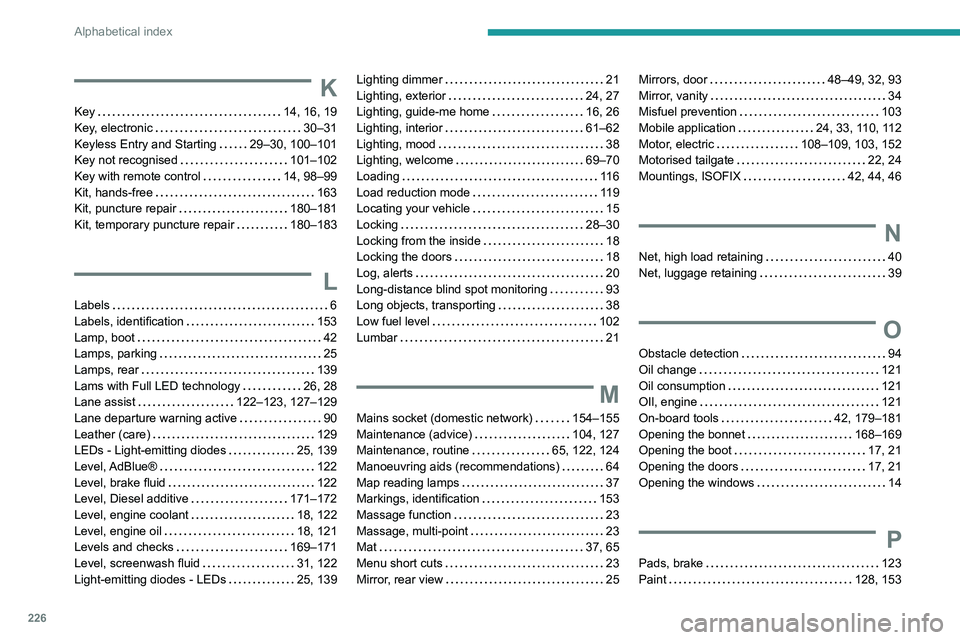
226
Alphabetical index
K
Key 14, 16, 19
Key, electronic
30–31
Keyless Entry and Starting
29–30, 100–101
Key not recognised
101–102
Key with remote control
14, 98–99
Kit, hands-free
163
Kit, puncture repair
180–181
Kit, temporary puncture repair
180–183
L
Labels 6
Labels, identification
153
Lamp, boot
42
Lamps, parking
25
Lamps, rear
139
Lams with Full LED technology
26, 28
Lane assist
122–123, 127–129
Lane departure warning active
90
Leather (care)
129
LEDs - Light-emitting diodes
25, 139
Level, AdBlue®
122
Level, brake fluid
122
Level, Diesel additive
171–172
Level, engine coolant
18, 122
Level, engine oil
18, 121
Levels and checks
169–171
Level, screenwash fluid
31, 122
Light-emitting diodes - LEDs
25, 139
Lighting dimmer 21
Lighting, exterior
24, 27
Lighting, guide-me home
16, 26
Lighting, interior
61–62
Lighting, mood
38
Lighting, welcome
69–70
Loading
11 6
Load reduction mode
119
Locating your vehicle
15
Locking
28–30
Locking from the inside
18
Locking the doors
18
Log, alerts
20
Long-distance blind spot monitoring
93
Long objects, transporting
38
Low fuel level
102
Lumbar
21
M
Mains socket (domestic network) 154–155
Maintenance (advice)
104, 127
Maintenance, routine
65, 122, 124
Manoeuvring aids (recommendations)
64
Map reading lamps
37
Markings, identification
153
Massage function
23
Massage, multi-point
23
Mat
37, 65
Menu short cuts
23
Mirror, rear view
25
Mirrors, door 48–49, 32, 93
Mirror, vanity
34
Misfuel prevention
103
Mobile application
24, 33, 110, 112
Motor, electric
108–109, 103, 152
Motorised tailgate
22, 24
Mountings, ISOFIX
42, 44, 46
N
Net, high load retaining 40
Net, luggage retaining
39
O
Obstacle detection 94
Oil change
121
Oil consumption
121
OIl, engine
121
On-board tools
42, 179–181
Opening the bonnet
168–169
Opening the boot
17, 21
Opening the doors
17, 21
Opening the windows
14
P
Pads, brake 123
Paint
128, 153
Page 230 of 260

228
Alphabetical index
Settings, equipment 10, 23
Shield, snow
11 7
Sidelamps
25, 139
Silent vehicle warning sound
(Rechargeable hybrid)
30
Ski flap
38
Smartphone
24, 35
Snow chains
63, 118
Snow screen
11 7
Socket, 12 V accessory
34, 41
Speakers
36
Speed adjustment during cornering
82
Speed limiter
117–120
Speed limit recognition
66, 68
Speedometer
9, 65
Sport mode
108–109
Spotlamps, side
27
Stability control (ESC)
32, 34
Starting a Diesel engine
102
Starting the engine
50, 52
Starting the vehicle
99–100, 57
Starting using another battery
52, 141
State of charge, battery
23
Station, radio
214–215
Stay, bonnet
120
Steering wheel
65
Steering wheel, adjustment
24
Stickers, customising ~ Stickers,
expressive
128
Stopping the vehicle
99–101, 106–107
Stop & Start
22, 29, 32, 110–111,
102, 119, 123, 143
Storage
34, 36, 62–63Storage box 42
Storage wells
39, 42
Storing driving positions
22
Stowing rings
39
Sunshine sensor
28
Sun visor
34
Suspension
124
Switching off the engine
50
Synchronising the remote control
20
T
Tables of engines 152
Tailgate
21
Tank, fuel
151–152
Technical data
152
Telephone
212–213, 216–217
Temperature, coolant
18
Time (setting)
169
Tool box
42
Tools
179–181
Topping-up AdBlue®
125
Top Tether (fixing)
42, 44, 46
Total distance recorder
21
Touch screen
23–25, 33
Touch-sensitive reading lamps
37
Towball, quickly detachable
162–165
Towbar
34, 112
Towbar with quickly detachable
towball
162–165
Towed loads
148, 152
Towing another vehicle
145, 147
Traction battery charge 107
Traction battery (Rechargeable
hybrid)
20, 152–153, 110
Traction control (ASR)
33
Trailer
34, 112
Trailer stability assist (TSA)
34
Trajectory control systems
32
Triangle, warning
130
Trip computer
22–23
Trip distance recorder
21
Tyres
124, 154
Tyre under-inflation detection
62, 133
U
Under-inflation (detection) 62
Unlocking
14, 17
Unlocking from the inside
18
Unlocking the boot
15, 17
Unlocking the doors
18
Unlocking the tailgate
15, 17
Updating the time
169
V
Vehicle data recording and privacy 171
Ventilation
28
Visibility
32
Visiopark 1
96
Visiopark 1 - Visiopark 2
97