Page 162 of 547

5. Message display*2
*1 Displays only while charge connector is connected.*2 Displayed only when a warning occurs.
▼Odometer, Trip Meter and Trip
Meter Selector
You can switch between the odometer
and trip meter display using the TRIP
switch.
1. TRIP switch
2. Odometer display
3. Trip meter A display
4. Trip meter B display
Odometer
The odometer records the total
distance the vehicle has been driven.
Tr i p m e t e r
The driving distance for a speci
fied
interval is indicated. Two types (TRIP A,
TRIP B) of interval distance can be
measured.
For instance, trip meter A can record
the distance from the point of origin,
and trip meter B can record the
distance from where the high voltage
battery was charged.
When trip meter A is selected, TRIP A
will be displayed. When trip meter B is
selected, TRIP B will be displayed.
The trip meter can be reset by pressing
the TRIP switch for 1.5 seconds or
more while the trip meter is displayed.
NOTE
Only the trip meters record tenths of
kilometers (miles).
▼ High Voltage Battery Temperature
Gauge
Displays the high voltage battery
temperature. The blue range of the
gauge indicates that the high voltage
battery temperature is low and the red
range indicates that it is high and
overheating.
When Driving
Instrument Cluster and Display
4-13
MX
-30_8JD4-EA -21G_Edition2_new 2021-5-18 14:38:07
Page 199 of 547

the HomeLink System with the
following:
NOTE
If programming a garage door opener
or gate operator, it is advised to unplug
the device during the “cycling” process
to prevent possible overheating.
While the indicator light is flashing in
amber, press the button on the
hand-held transmitter for 2 seconds
and release it repeatedly until the
indicator light changes from amber to
green.
Go back to Step 4 of Programming the
HomeLink System to complete the
procedure.
▼ Operating the HomeLink System
Press the programmed HomeLink
button to operate a programmed
device.
▼Reprogramming the HomeLink
system
To program a device to HomeLink
using a HomeLink button previously
trained, follow these steps:
1. Press and hold the desired
HomeLink button. DO NOT release
the button.
2. After 20 seconds, the indicator light
flashes in amber. After the indicator
light flashes, release the HomeLink
button.
3. Go back to Step 2 of Programming the HomeLink System to complete
the procedure.
NOTE
If the programming has not been
completed, the system returns to the
previous programming.
▼Erasing Programmed HomeLink
Buttons
NOTE
All of the programmed HomeLink
buttons are reset. Individual buttons
cannot be reset, however, individual
buttons can be reprogrammed. For
individual button reprogramming,
refer to Reprogramming the
HomeLink System (page 4-50).
Verify that the programming has
been erased if you resell the vehicle.
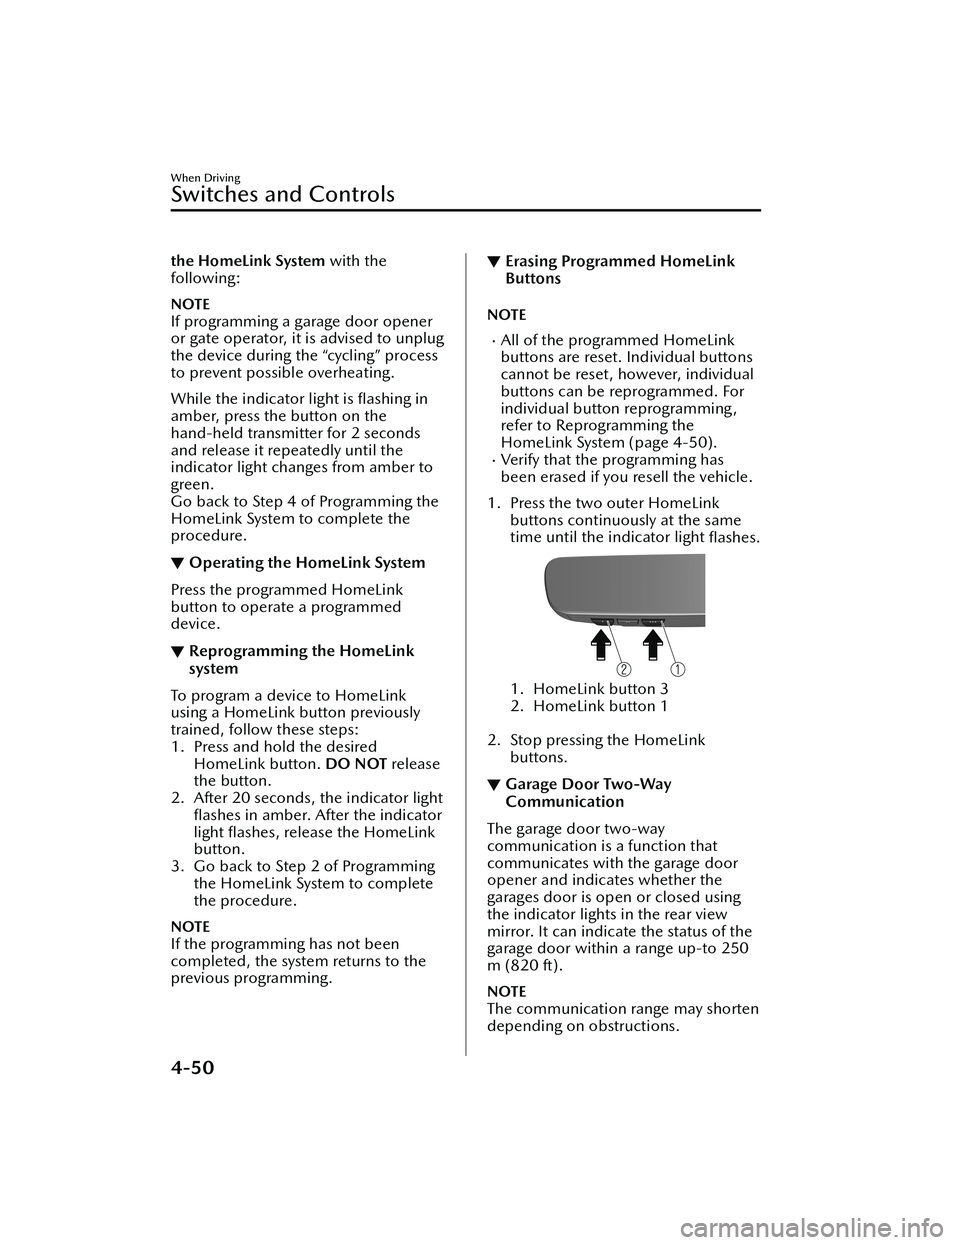
1. Press the two outer HomeLink buttons continuously at the same
time until the indicator light flashes.
1. HomeLink button 3
2. HomeLink button 1
2. Stop pressing the HomeLink buttons.
▼Garage Door Two-Way
Communication
The garage door two-way
communication is a function that
communicates with the garage door
opener and indicates whether the
garages door is open or closed using
the indicator lights in the rear view
mirror. It can indicate the status of the
garage door within a range up-to 250
m (820 ft).
NOTE
The communication range may shorten
depending on obstructions.
When Driving
Switches and Controls
4-50
MX
-30_8JD4-EA -21G_Edition2_new 2021-5-18 14:38:07
Page 469 of 547

“High Voltage Battery Is Urgently Low
Charge Battery Immediately”
displays/flashing
The indication displays when the
remaining high voltage battery power
is 0.
“High Voltage Battery Is Depleted
Vehicle Cannot Be Driven Until
Battery Is Charged”
displays/flashing
The indication/light displays/ flashes
when the remaining high voltage
battery power is 0 and the vehicle
cannot be driven.
▼ Charging System Warning
Indication/Warning Light
The indication/light displays/turns on
if the charging system has a problem.
Have your vehicle inspected by an
Authorized Mazda Dealer as soon as
possible. Otherwise, the charging
system may not charge the battery.
▼Output Restriction Warning
Indication/Warning Light
“Acceleration Limited” displays/turns
on
The indication/light displays/turns on
under the following conditions. The
vehicle speed may not increase even if
the accelerator pedal is depressed
because the motor output is restricted.
EV system is protected from
overheating
High voltage battery level is lowHigh voltage battery temperature is
low
“Acceleration Limited” displays/
fl ashing
If the vehicle continues to be driven
with the output restriction warning
indication/warning light turned on,
the output restriction warning light
flashes.
The vehicle speed may not increase
even if the accelerator pedal is
depressed because the motor output is
further restricted compared to the
condition in which the output
restriction warning light turns on.
“Excessive EV System Temp.
Acceleration Limited Avoid Moving at
Very Low Speeds. Depress Brake
When Not Moving” displays/turns on
When the vehicle is stopped on an
upslope or the vehicle is driven at low
speed on an upslope with the selector
lever in the D or R position, the
indication/light may display/turn on.
If necessary, park the vehicle in a safe
place and let the EV system cool down
because the output is restricted until
the EV system returns to the normal
temperature.
WARNING
When the output restriction warning
indication/warning light displays/
turns on or flashes, check the safety of
the surroundings:
The motor output decreases and the
vehicle speed decreases resulting in an
accident. If the vehicle cannot be
driven safety, stop the vehicle in a safe
place.
If Trouble Arises
Warning/Indicator Lights and Warning Sounds
7-24
MX -30_8JD4-EA -21G_Edition2_new 2021-5-18 14:38:07