Page 105 of 547

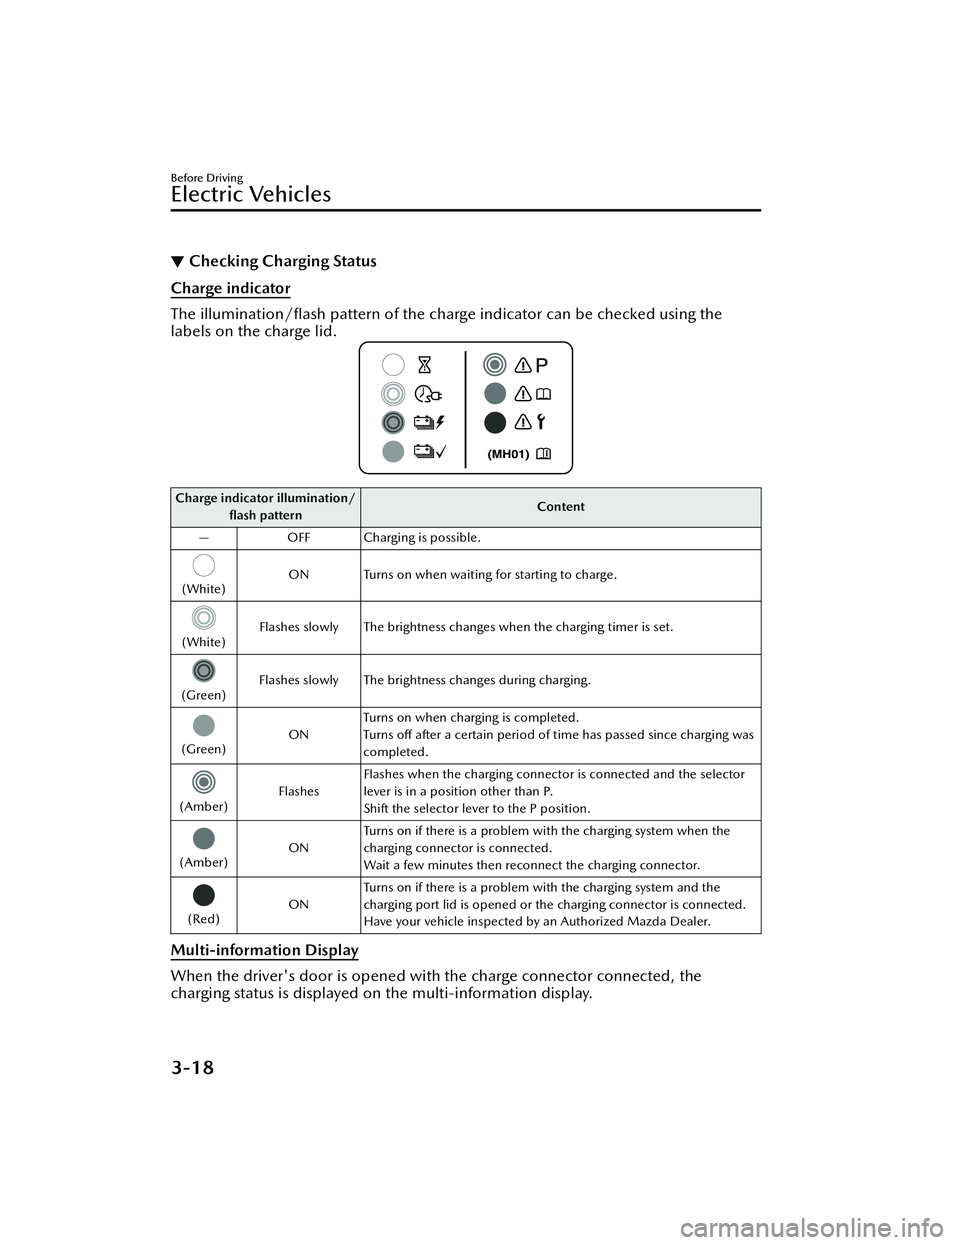
▼Checking Charging Status
Charge indicator
The illumination/
flash pattern of the charge indicator can be checked using the
labels on the charge lid.
Charge indicator illumination/
flash pattern Content
— OFF Charging is possible.
(White) ON Turns on when waiting for starting to charge.
(White)Flashes slowly The brightness changes when the charging timer is set.
(Green)
Flashes slowly The brightness changes during charging.
(Green)
ONTurns on when charging is completed.
Tu r n s o
ff after a certain period of time has passed since charging was
completed.
(Amber) FlashesFlashes when the charging connector is connected and the selector
lever is in a position other than P.
Shift the selector lever to the P position.
(Amber)
ONTurns on if there is a problem with the charging system when the
charging connector is connected.
Wait a few minutes then reconnect the charging connector.
(Red)
ONTurns on if there is a problem with the charging system and the
charging port lid is opened or the charging connector is connected.
Have your vehicle inspected by an Authorized Mazda Dealer.
Multi-information Display
When the driver's door is opened with the charge connector connected, the
charging status is displayed on the multi-information display.
Before Driving
Electric Vehicles
3-18
MX
-30_8JD4-EA -21G_Edition2_new 2021-5-18 14:38:07
Page 106 of 547

Powe r s wi tc h O F F
1. High voltage battery indication
2. Charging completion time
Powe r s wi tc h O N
1. High voltage battery indication
2. Charging completion time
IndicationContent
— Preparing to Charge Displays while the charging timer is being canceled
and when the charging connector is connected.
— Charging Scheduled Displays while in charging timer mode and when the
charging connector is connected.
Charging
Displays during charging.
Charging Complete Displays when charging is completed.
Charging Error. Shift Selector Lev-
er Not in ParkDisplays when charging is started with the selector
lever in a position other than P.
Charging Interrupted. See Own-
er's Manual for Details Displays when charging is interrupted.
Charging Error. Have the Vehicle
Inspected Displays when charging is not possible due to a
charging system problem.
NOTE
When charging is started, the charging st
atus screen is displayed for a while. The
charging status screen turns off after a certain period of time passes or the doors or
liftgate is locked.
The screen is displayed again when the doors or liftgate is unlocked.
Before Driving
Electric Vehicles
3-19
MX -30_8JD4-EA -21G_Edition2_new 2021-5-18 14:38:07
Page 107 of 547

▼Convenient Functions
Timer Charging
Timer charging is a function which
charges the battery automatically
according to a preset time.
You can charge the battery using this
function during time periods when
electricity rates are low. In addition,
the maximum charge limit can be set
and changed.
For the setting method, refer to
Charging Settings on page 3-21.
Canceling the Charging Timer
You can cancel the charging timer
setting temporarily to start charging the
battery immediately.
For the setting method, refer to
Charging Settings on page 3-21.
Climate Control Timer
The climate control timer is a function
which operates the cooling or heating
system automatically according to a
preset time.
The power consumption of the air
conditioner after starting to drive the
vehicle is reduced by operating the air
conditioner and providing a
comfortable temperature in the cabin
before driving.
For the setting method, refer to Turning
On the Climate Control System Using
the Timer (Climate Control Timer) on
page 5-12.
Charge Connector Lock
The charge connector lock is a function
which locks the charging connector
connected to the vehicle so that it
cannot be pulled out.
You can also select the lock conditions
for the charging connector according
to locations and situations.
For the setting method, refer to
Charging Settings on page 3-21.
Locked When Connected
The charging connector is locked at
the same time the charging
connector is connected. The
charging connector is unlocked for 1
minute after the driver’s door is
unlocked.
Select Locked When Connected
when charging in the following
locations/situations.
Outdoor parking lotCharging using your charging cable
at a charging facility
Locked When Charging
The charging connector is locked
only while charging. The charging
connector is unlocked when the
charging is
finished. In addition, the
charging connector is unlocked for 1
minute after the driver’s door is
unlocked, even while charging.
Select Locked When Charging when
leaving the vehicle while charging at
a public charging station where
people are waiting to charge their
vehicles.
O ff
The charging connector is not
locked.
Select O ff when charging in the
following locations/situations.
Indoor parking lot with a shutter
Before Driving
Electric Vehicles
3-20
MX -30_8JD4-EA -21G_Edition2_new 2021-5-18 14:38:07
Page 108 of 547

Use of the charge connector lock is
prohibited at a public charging
station.
Functions using a Smartphone
You can check the remaining high
voltage battery power, operate the
charging , and operate the air
conditioner remotely by using a
Smartphone.
Please refer to local Mazda website for
more Connected Service information.
▼ Charging Settings
How to set up the charging
1. Select Settings from the home
screen on Mazda Connect.
2. Select EV Settings from the setting
screen.
3. Select the setting item you want to change from the displayed content.
Charge When Connected
Cancels charging schedule to allow im-
mediate charging.
Available setting changes
Enable, Disable
NOTE
The charging timer can also be
canceled on the screen displayed on
the center display when the power
switch is switched OFF.
When the charging is completed
using the Charge When Connected
setting , the charging timer schedule
is restored.
Charging Schedule
Selects desired vehicle charging days
and times.
Function Available setting changes
1 ----
Enable, Disa-ble
*1Edit, Delete*2
2 ----
3 ----
4 ----
5 ----
6 ----
7 ----
*1 If a list selected using the cursor has beenset, the item can be Enable or Disable.
*2 Settings can be Edit/Delete by sliding a listselected using the cursor to the right.
NOTE
The charging timer does not work
immediately after the lead-acid
battery is removed or installed, or
when no GPS signal has been
received. When charging without
receiving GPS, quick charging begins.
When GPS signals are received, the
charging timer becomes operational.
Before Driving
Electric Vehicles
3-21
MX-30_8JD4-EA -21G_Edition2_new 2021-5-18 14:38:07
Page 109 of 547

Immediately after switching to
daylight savings, charging may occur
at the charging timer time set before
the switch to daylight savings until
the power switch is switched ON.
Edit
Function Available setting
changes
Start Time
Select the desired charging
start time. Time
(10-minute inter- vals)
End Time
Select the desired charging
end time. Time
(10-minute inter- vals)
Repeat
Select the day(s) of the
week to repeat. Monday
― Sun-
day
Charge Limit
Select the desired charge
limit method. According to Bat-
tery Charge Level, According to Esti- mated Range
Battery Charge Level
*1
Select the desired maxi-
mum charge level. 100%
― 10%
(10 levels)
Estimated Range
*2
Select the desired estimat-
ed range. In 10 km incre-
ments
*1 Can be changed when According to Battery
Charge Level is selected for Charge Limit.
Use when you want to charge only the
amount of charging you need. This helps you
save power and prevent high voltage battery
deterioration.
*2 Can be changed when According toEstimated Range is selected for Charge
Limit.
Use when you want to charge according to
your planned driving distance.
The distance-to-full discharge changes
depending on the driving conditions and
surrounding environment. Check the actual
remaining distance-to-full discharge.
If you change the distance unit after setting
the Estimated Range, the Estimated Range
will be calculated in the unit after the
change. (If you change the units to miles
after setting the estimated range to 100 km,
the charge distance will be for 60 miles.)
NOTE
A charging day is set using Repeat
If 1 repeat day is set, charging is
repeated every week on the set day
of the week.
Depending on the set days of the
week, the Repeat indication is
displayed as Weekdays, Weekends,
and Daily. Otherwise, it is displayed
as Custom.
Setting example
Function Available setting
changes
Start Time 21 : 00
End Time 6 : 00
Repeat Friday
Charge Limit According to Bat-
tery Charge Level
Battery Charge Level 80 %
In this case, charging is done every
week from Friday at 21 : 00 hours to
Saturday at 6:00 hours. However, if
the Battery Charge Level reaches
80%, the charging is stopped even if
it is before the End Time.
No day is set using Repeat
If no Repeat day is designated,
charging is done only 1 time at the
set hours.
Before Driving
Electric Vehicles
3-22
MX -30_8JD4-EA -21G_Edition2_new 2021-5-18 14:38:07
Page 110 of 547

Setting example (if settings below are
made at 13 : 00 hours)
FunctionAvailable setting
changes
Start Time 12 : 00
End Time 18 : 00
Repeat Once
Charge Limit According to Esti-
mated Range
Estimated Range 50 km
In this case, when the charge
connector is connected, charging
starts immediately for charging to
18 : 00 hours on the same day.
However, if a charging amount
allowing a 50 km trip is reached, the
charging is stopped even if it is
before the end time.
Setting example (if settings below are
made at 13 : 00 hours)
Function Available setting
changes
Start Time 1 : 00
End Time 8 : 00
Repeat Once
Charge Limit According to Bat-
tery Charge Level
Battery Charge Level 100 %
In this case, charging is done from
the next day at 1 : 00 hours to 8 : 00
hours. However, if the Battery
Charge Level reaches 100% is
reached, the charging is stopped
even if it is before the End Time.
Charge Limit for AC Charging
Sets the charge limit when using an AC
charger.
Available setting changes
100% ― 10% (10 levels)
NOTE
For normal charge, set the maximum
charge limit of the high voltage battery.
Set the Battery Charge Level of the
charging timer for each charging timer
setting.
Charge Limit for DC Fast Charging
Sets the charge limit when using a DC
Fast charger.
Available setting changes
100% ― 10% (10 levels)
Charge Connector Lock
Con figures when the charge connector
is locked.
Available setting changes
Locked When Charging
Unlocks connector when charging is complete
or vehicle is unlocked.
Locked When Connected
Unlocks connector only when vehicle is un-
locked.
Before Driving
Electric Vehicles
3-23
MX -30_8JD4-EA -21G_Edition2_new 2021-5-18 14:38:07
Page 111 of 547
Available setting changes
Off
Charge connector remains unlocked at all
times.
High Voltage Battery Heater
Con figures the high voltage battery
heater operation.
Available setting changes
Automatic, O ff
Before Driving
Electric Vehicles
3-24
MX-30_8JD4-EA -21G_Edition2_new 2021-5-18 14:38:07
Page 112 of 547

Keys
▼Keys
WARNING
Do not leave the key in your vehicle
with children and keep them in a
place where your children will not
fi
nd or play with them:
Leaving children in a vehicle with the
key is dangerous. This could result in
someone being badly injured or even
killed. Children may find these keys to
be an interesting toy to play with and
could cause the power windows or
other controls to operate, or even
make the vehicle move.
CAUTION
Because the key (transmitter) uses
low-intensity radio waves, it may not
function correctly under the
following conditions:
The key (transmitter) is carried with
communication devices such as
cellular phones.
The key (transmitter) contacts or is
covered by a metal object.
The key (transmitter) is near
electronic devices such as personal
computers.
Non-Mazda genuine electronic
equipment is installed in the
vehicle.
There is equipment which
discharges radio waves near the
vehicle.
The key (transmitter) may consume
battery power excessively if it
receives high-intensity radio waves.
Do not place the key (transmitter)
near electronic devices such as
televisions or personal computers.
To avoid damage to the key
(transmitter), DO NOT :
Drop the key (transmitter).
Get the key (transmitter) wet.
Disassemble the key (transmitter).
Expose the key (transmitter) to
high temperatures on places such
as the dashboard, under direct
sunlight.
Expose the key (transmitter) to any
kind of magnetic field.
Place heavy objects on the key
(transmitter).
Put the key (transmitter) in an
ultrasonic cleaner.
Put any magnetized objects close
to the key (transmitter).
NOTE
The driver must carry the key
(transmitter) to ensure the system
functions properly.
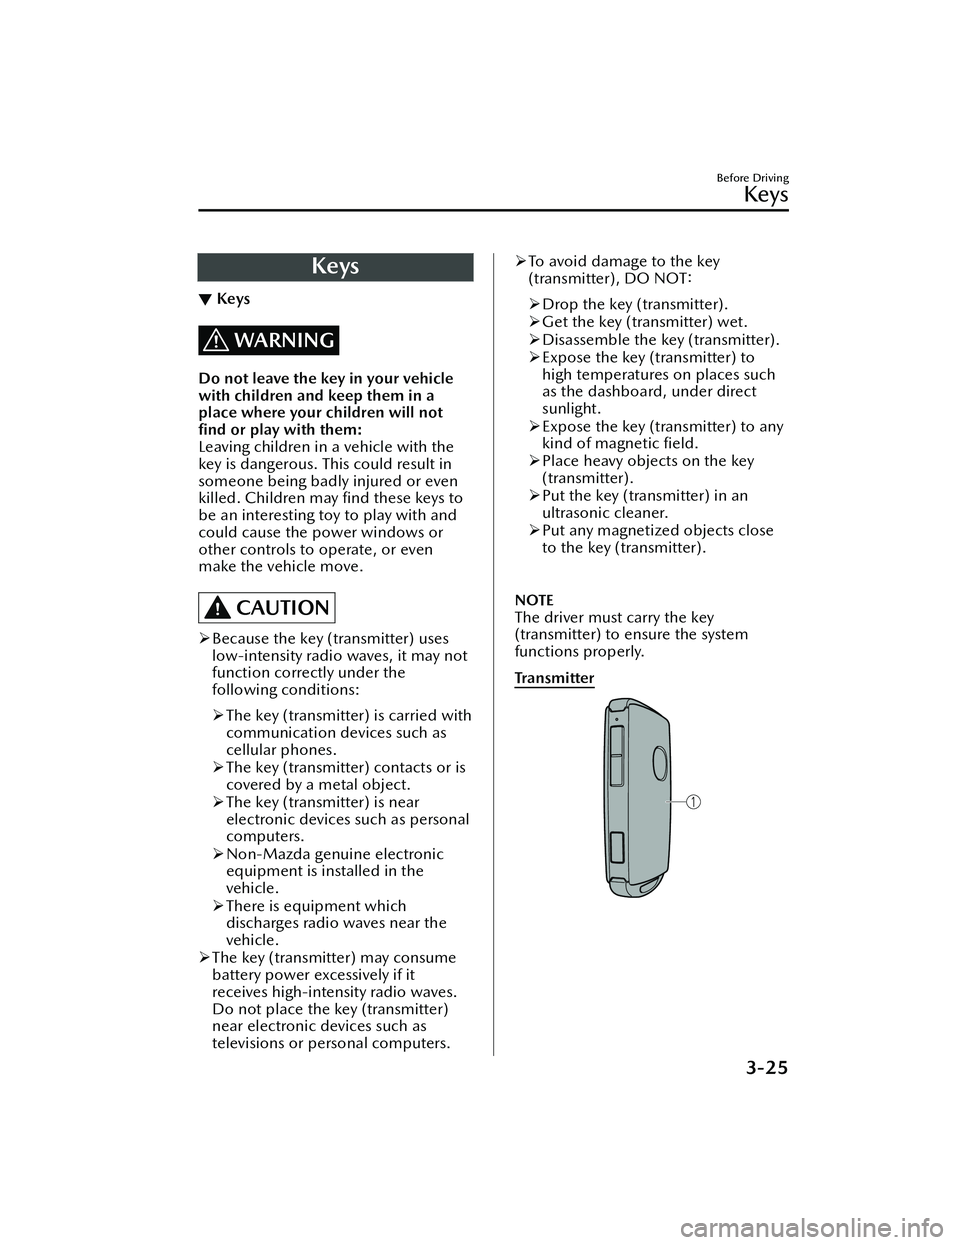
Tra n s m i t te r
Before Driving
Keys
3-25
MX -30_8JD4-EA -21G_Edition2_new 2021-5-18 14:38:07