2021 VOLVO V90 CROSS COUNTRY ESP
[x] Cancel search: ESPPage 151 of 683
DISPLAYS AND VOICE CONTROL
}}
* Option/accessory.149
Calibrating the horizontal positionIf the windshield or display unit has been replaced, the head-up display's horizontalposition may need to be calibrated. Calibrationmeans that the projected image is rotatedclockwise or counterclockwise. 1.
Tap
Settings in the center display's Top
view.
2. Select
My CarDisplaysHead-Up
Display Options
Head-Up Display
Calibration.
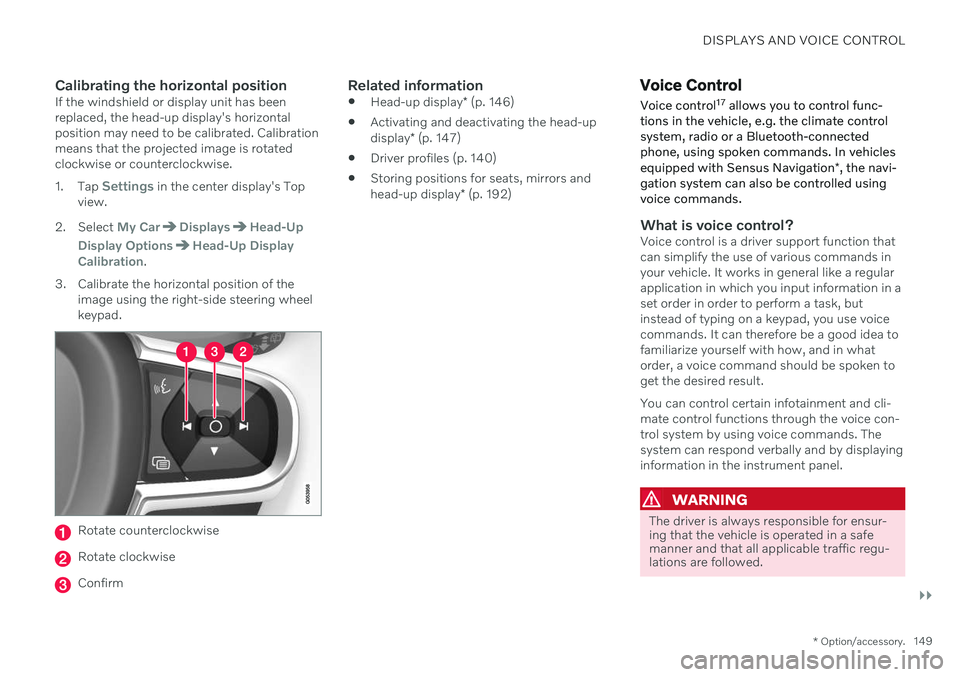
3. Calibrate the horizontal position of the image using the right-side steering wheel keypad.
Rotate counterclockwise
Rotate clockwise
Confirm
Related information
Head-up display
* (p. 146)
Activating and deactivating the head-up display
* (p. 147)
Driver profiles (p. 140)
Storing positions for seats, mirrors andhead-up display
* (p. 192)
Voice Control
Voice control 17
allows you to control func-
tions in the vehicle, e.g. the climate control system, radio or a Bluetooth-connectedphone, using spoken commands. In vehicles equipped with Sensus Navigation *, the navi-
gation system can also be controlled using voice commands.
What is voice control?Voice control is a driver support function that can simplify the use of various commands inyour vehicle. It works in general like a regularapplication in which you input information in aset order in order to perform a task, butinstead of typing on a keypad, you use voicecommands. It can therefore be a good idea tofamiliarize yourself with how, and in whatorder, a voice command should be spoken toget the desired result. You can control certain infotainment and cli- mate control functions through the voice con-trol system by using voice commands. Thesystem can respond verbally and by displayinginformation in the instrument panel.
WARNING
The driver is always responsible for ensur- ing that the vehicle is operated in a safemanner and that all applicable traffic regu-lations are followed.
Page 153 of 683
DISPLAYS AND VOICE CONTROL
}}
* Option/accessory.151
These may include:
Wait until after the tone, and then speak in your normal voice at a normal speed.
Do not speak while the system is respond-ing (the system is unable to process com-mands during this time).
Avoid background noises in the passengercompartment by keeping doors, windows and the panoramic roof
* closed.
NOTE
Not all system languages support voice control. If a language supports voice con- trol, it is marked with a
symbol in the
list of available system languages. Read more about where the information is foundin the section on voice control settings.
Generally, the system will listen for a basic command that is then followed by moredetailed commands specifying what you wantthe system to do. To change the audio volume of the system, turn the volume knob while the voice is speak-ing. It is possible to use other buttons whilevoice commands are being given. However,because other audio is silenced during dialogwith the system, it is not possible to perform any functions connected to audio using thebuttons.
Canceling voice controlTo cancel voice control, do one of the follow-ing:
Briefly press
and say "Cancel".
Press and hold the steering wheel key- pad's voice command button
until
two audible signals are given. This cancels voice control even when the system isspeaking.
Voice control will also be canceled if you donot respond during a dialog. The system willfirst ask three times for a response and if theresponse is still not given, voice control will beautomatically canceled. To speed up communication and skip prompts from the system, press the voice control but- ton
on the steering wheel keypad. This
will interrupt the system's response and you can say the next command.
Voice command examples
1. Tap . 2.
Say "
Call [First name] [Last name]
[number category]", e.g. "Call Robyn
Smith cellular".
> The system will call the selected con- tact from the phone book. If the contact has several phone numbers (e.g. home,cell, work), the right category must alsobe given.
Commands/phrasesThe following commands can usually be usedin any situation:
"
Repeat" - repeats the most recent voice
command in the current dialog.
"
Cancel" - cancels the dialog. 19
"
Help" - initiates a help dialog. The sys-
tem responds with commands that can be used in the current situation, an instruc-tion or an example.
Commands for specific functions, such as phone and audio, are described in the sections related to that function.
19 Note that this only cancels the dialog when the system is not speaking. To do this, press and hold until you hear two beeps.
Page 159 of 683
LIGHTING
* Option/accessory.157
WARNING
The vehicle lighting system cannot in all sit- uations determine when the daylight is tooweak or not strong enough, e.g. whenthere is fog or rain. The driver is always responsible for driving the vehicle with lighting that is safe for thetraffic conditions and as specified by appli-cable traffic regulations.
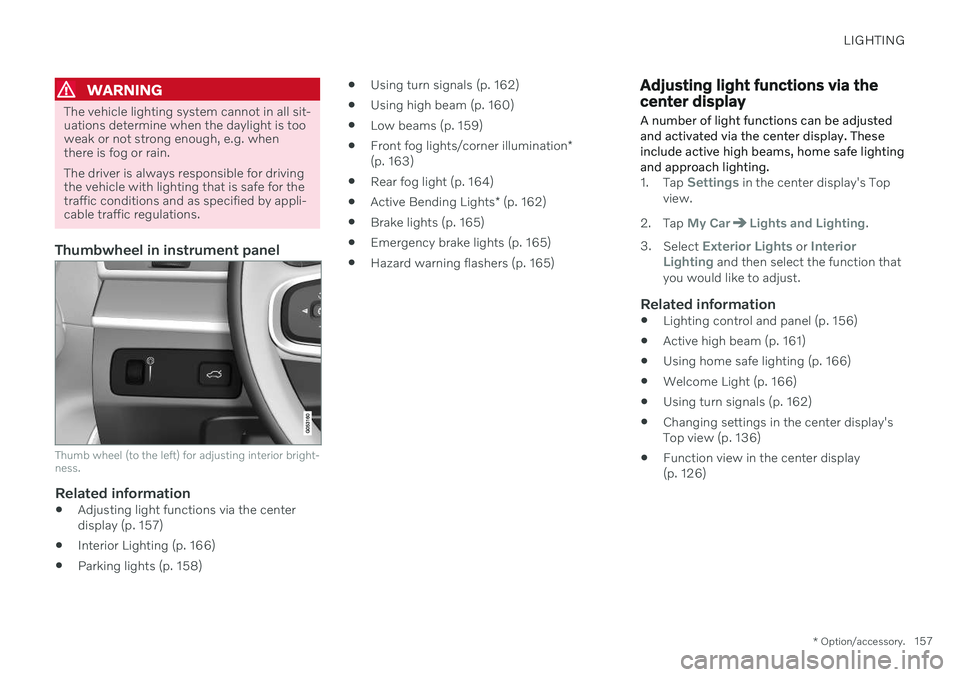
Thumbwheel in instrument panel
Thumb wheel (to the left) for adjusting interior bright- ness.
Related information
Adjusting light functions via the center display (p. 157)
Interior Lighting (p. 166)
Parking lights (p. 158)
Using turn signals (p. 162)
Using high beam (p. 160)
Low beams (p. 159)
Front fog lights/corner illumination
*
(p. 163)
Rear fog light (p. 164)
Active Bending Lights
* (p. 162)
Brake lights (p. 165)
Emergency brake lights (p. 165)
Hazard warning flashers (p. 165)
Adjusting light functions via the center display A number of light functions can be adjusted and activated via the center display. Theseinclude active high beams, home safe lightingand approach lighting.
1.
Tap Settings in the center display's Top
view.
2. Tap
My CarLights and Lighting.
3. Select
Exterior Lights or Interior
Lighting and then select the function that
you would like to adjust.
Related information
Lighting control and panel (p. 156)
Active high beam (p. 161)
Using home safe lighting (p. 166)
Welcome Light (p. 166)
Using turn signals (p. 162)
Changing settings in the center display's Top view (p. 136)
Function view in the center display(p. 126)
Page 161 of 683
LIGHTING
}}
* Option/accessory.159
US models
: When
mode is selected,
the daytime running lights can be deactivated in the center display. The parking lights willalso be deactivated. In weak daylight or darkconditions, the parking lights and low beamswill be illuminated. US models : With the lighting ring in the
or position, the daytime running lights
will be off.
Canadian models : With the lighting ring in
the
or position, the daytime run-
ning lights will be on.
NOTE
Volvo recommends use of Daytime Running Lights in the US. Its use is man-datory in Canada.
WARNING
The system is an energy saving aid – it cannot in all situations determine when thedaylight is too weak or not strong enough,e.g. when there is fog or rain. The driver is always responsible for driving the vehicle with lighting that is safe for thetraffic conditions and as specified by appli-cable traffic regulations.
Related information
Lighting control and panel (p. 156)
Ignition modes (p. 401)
Low beams (p. 159)
Replacing daytime running lights/front parking light bulbs (p. 626)
Low beams
When driving with the lighting ring in the
position, low beam will be automati-
cally activated in weak daylight or dark condi- tions, when the ignition is in the II position.
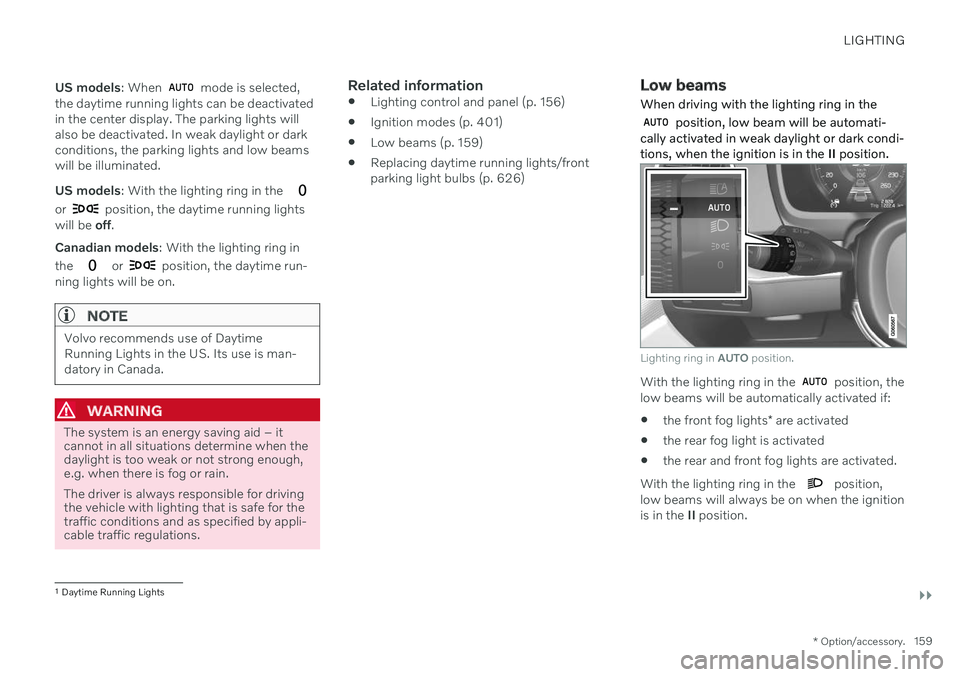
Lighting ring in AUTO position.
With the lighting ring in the position, the
low beams will be automatically activated if:
the front fog lights
* are activated
the rear fog light is activated
the rear and front fog lights are activated.
With the lighting ring in the
position,
low beams will always be on when the ignition is in the II position.
1
Daytime Running Lights
Page 163 of 683

LIGHTING
161
Active high beam
Active high beams is a function that uses camera sensors in the upper edge of thewindshield to detect the headlights ofapproaching vehicles or the taillights of thevehicle directly ahead. When either of theseis detected, the vehicle's headlights will auto-matically switch from high beams to lowbeams.
Active high beams is indicated by the symbol.
This function can be used in dark conditions when the vehicle's speed is approx. 20 km/h(approx. 12 mph) or higher. The function canalso detect street lighting. When the camerasensor no longer detects an approaching vehi-cle or a vehicle ahead, the headlights willreturn to high beams after a second or two.
Activating active high beamsActive high beams can be activated and deac-tivated by turning the lighting ring on the left- side steering wheel lever to position
.
The lighting ring will then return to
.
When active high beams are activated, a white
symbol will be displayed in the instru-
ment panel. When high beams are on, the symbol will be blue. If active high beams are deactivated when the high beams are on, the headlights will auto-matically switch to low beams.
Limitations for active high beamsThe camera sensor on which the function isbased has limitations.
If this symbol and the message
Active High Beam Temporarily
unavailable is displayed in the
instrument panel, switching
between high and low beams must be done manually. The
symbol will go out when
the message is displayed.
The same applies if this symbol along with the message
Windscreen sensor Sensor
blocked, see Owner's manual is
displayed.
Active high beams may be temporarily unavail- able in certain situations, e.g. heavy fog or rain. When active high beams become availa-ble again, or the windshield sensors are nolonger blocked, the message will disappear and the
symbol will be displayed.
WARNING
Automatic high beam is an aid in using the best possible light based on prevailing con-ditions. The driver is always responsible for man- ually switching between high and lowbeam when traffic situations or weatherconditions require this.
Related information
Lighting control and panel (p. 156)
Using high beam (p. 160)
Camera/radar sensor limitations (p. 390)
Page 177 of 683
WINDOWS, GLASS AND MIRRORS
* Option/accessory.175
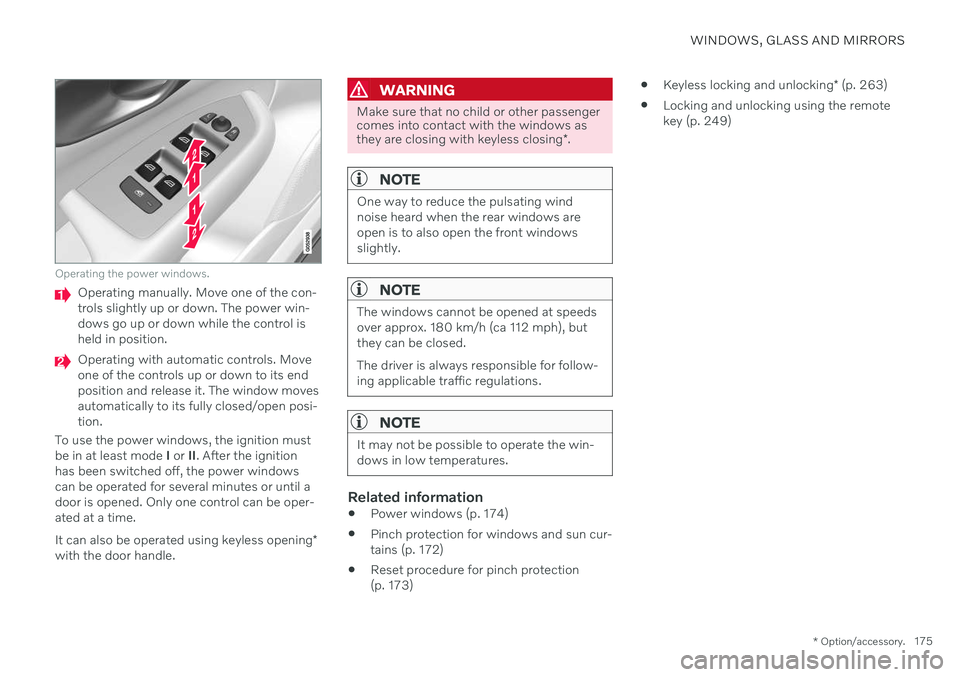
Operating the power windows.
Operating manually. Move one of the con- trols slightly up or down. The power win-dows go up or down while the control isheld in position.
Operating with automatic controls. Move one of the controls up or down to its endposition and release it. The window movesautomatically to its fully closed/open posi-tion.
To use the power windows, the ignition mustbe in at least mode I or II. After the ignition
has been switched off, the power windowscan be operated for several minutes or until adoor is opened. Only one control can be oper-ated at a time. It can also be operated using keyless opening *
with the door handle.
WARNING
Make sure that no child or other passenger comes into contact with the windows as they are closing with keyless closing *.
NOTE
One way to reduce the pulsating wind noise heard when the rear windows areopen is to also open the front windowsslightly.
NOTE
The windows cannot be opened at speeds over approx. 180 km/h (ca 112 mph), butthey can be closed. The driver is always responsible for follow- ing applicable traffic regulations.
NOTE
It may not be possible to operate the win- dows in low temperatures.
Related information
Power windows (p. 174)
Pinch protection for windows and sun cur- tains (p. 172)
Reset procedure for pinch protection(p. 173)
Keyless locking and unlocking
* (p. 263)
Locking and unlocking using the remotekey (p. 249)
Page 248 of 683
KEY, LOCKS AND ALARM
* Option/accessory.
246
Lock confirmation settings
Settings for how the vehicle confirms locking and unlocking can be adjusted in the centerdisplay's Settings menu.
To change the locking response settings: 1. Tap
Settings in the center display's Top
view.
2. Tap
My CarLocking.
3. Tap
Visible Locking Feedback to select
when the vehicle should provide a visible response:
Lock
Unlock
Both
Or turn off the function by marking Off .
4. Select to receive an audible response when locking the vehicle by marking
Audible Locking Feedback.
To change the settings for folding door mir- rors * when locking:
1. Tap
Settings in the center display's Top
view.
2. Tap
My CarMirrors and Convenience.
3. Select
Fold Mirror When Locked to acti-
vate or deactivate the function.
Related information
Lock indication (p. 244)
Remote key
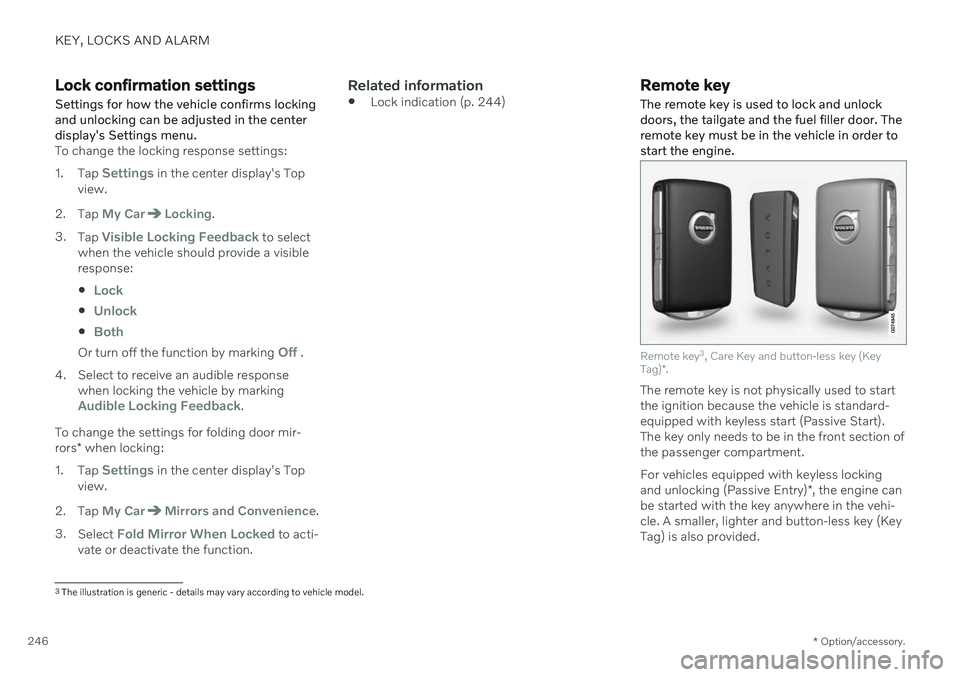
The remote key is used to lock and unlock doors, the tailgate and the fuel filler door. Theremote key must be in the vehicle in order tostart the engine.
Remote key 3
, Care Key and button-less key (Key
Tag) *.
The remote key is not physically used to start the ignition because the vehicle is standard-equipped with keyless start (Passive Start).The key only needs to be in the front section ofthe passenger compartment. For vehicles equipped with keyless locking and unlocking (Passive Entry) *, the engine can
be started with the key anywhere in the vehi- cle. A smaller, lighter and button-less key (Key Tag) is also provided.
3 The illustration is generic - details may vary according to vehicle model.
Page 263 of 683
KEY, LOCKS AND ALARM
* Option/accessory.261
This device complies with part 15 of the FCC Rules. Operation is subject to the followingtwo conditions: (1) This device may not cause harmful interference, and (2) this device must acceptany interference received, includinginterference that may cause undesiredoperation. CAUTION: Changes or modifications not expressly approved by the party responsiblefor compliance could void the user