2021 VOLKSWAGEN T-ROC Table
[x] Cancel search: TablePage 381 of 502

Otherwise, the engine could be damaged. If you cannot see any coolant in the expansion tank do not
drive on. Seek professional assistance.
level remains stable.
⇒ Fig. 188 . Do not
fill up above the top edge of the marked area⇒ .
⇒ Coolant
specification , do not use any other coolant additive! Instead, initially refill with distilled water⇒
only. Then add the correct proportion of the specified coolant additive as soon as possible
⇒ Coolant specification .
WARNING
Hot steam and hot coolant can cause serious burns.
coolant coming out of the engine
compartment. Always wait until you can no longer see or hear escaping steam or coolant.
components can burn the skin.
wing points must be observed before opening the bonnet once it has cooled down:
P or move the gear
lever to the neutral position.
hicle key from the ignition lock.
unattended.
expansion tank when the engine is hot. Coolant may spray out and cause serious burns and other
injuries.
-clockwise while exerting gentle downward pressure on
the cap.
with a large, thick cloth.
spilt service fluids can start a fire. In certain circumstances, the ethylene glycol in the coolant can
catch fire.
NOTICE
Page 383 of 502

Brake fluid that is compliant with VW standard 501 14 is available from Volkswagen dealerships.
If this brake fluid is not available and it is necessary to use another high-quality brake fluid instead,
brake fluid that is compliant with DIN ISO 4925 CLASS 4 or US standard FMVSS 116 DOT 4 can be
used.
Not all brake fluids that are compliant with DIN ISO 4925 CLASS 4 or US standard FMVSS 116 DOT 4
have the same chemical composition. Some of these brake fluids may contain chemicals that can
damage or destroy brake system components over time.
Volkswagen therefore recommends the use of brake fluid that is compliant with VW standard 501 14
to ensure sustained proper operation of the brake system.
Brake fluid that is compliant with VW standard 501 14 fulfils the requirements of DIN ISO 4925
CLASS 4 or US standard FMVSS 116 DOT 4.
Brake fluid level
The brake fluid level must always be between the MIN and MAX marking on the brake fluid reservoir
or above the MIN marking ⇒ .
The brake fluid level cannot be checked accurately in all models as engine components may partially
conceal the fluid level in the brake fluid reservoir. If the brake fluid level cannot be read exactly,
please go to a qualified workshop.
The brake fluid level drops slightly during vehicle operation as the brake pads wear and the brakes
are automatically adjusted.
Brake fluid level
The indicator lamp lights up red.
Brake fluid level is too low.
Do not drive on! Check the brake fluid level.
If the brake fluid level is too low, inform a qualified workshop. Have the brake system checked.
Changing the brake fluid
The brake fluid should be changed by a qualified workshop. Volkswagen recommends using a
Volkswagen dealership for this purpose. Only brake fluid that conforms with the required
specification should be used.
WARNING
Brake failure or reduced braking efficiency can be caused by the brake fluid level being too low or by
brake fluid that is too old or unsuitable.
Page 385 of 502

Do not work on the electrical system unless you are familiar with the task, aware of the general
safety procedures and have the correct equipment, service fluids and suitable tools. Serious injuries
can be caused by carrying out work incorrectly ⇒ . All work should be carried out by a qualified
workshop. Volkswagen recommends using a Volkswagen dealership for this purpose.
Information for warning and indicator lamps lit up can be found in the troubleshooting at the end of
the chapter ⇒ Troubleshooting .
Location of the 12-volt vehicle battery
The 12-volt vehicle battery is located in the engine compartment.
Explanation of the warnings on the 12-volt vehicle battery
Always wear eye protection!Electrolyte is very corrosive and caustic. Always wear
protective gloves and eye protection!Fire, sparks, naked lights and smoking are prohibited!
A highly explosive mixture of gases is given off when the 12-volt vehicle battery is charging!
Always keep children away from electrolyte and the 12-volt vehicle battery!Always
observe the owner's manual!
WARNING
Any work on the 12-volt vehicle battery and the electrical system can cause serious chemical burns,
fire or electric shocks. Always read and observe the following warnings and safety information
before carrying out any kind of work:
any work on the 12-volt
vehicle battery and also disconnect the negative cable from the 12-volt vehicle battery.
-volt vehicle battery.
12-volt vehicle battery, ensure that your hands, arms and face in particular are protected from acid
spillages.
r work near naked flames or sparks.
discharge.
-volt vehicle battery. It can explode. Damaged 12-volt vehicle batteries
must be replaced as soon as possible.
Page 399 of 502

NOTICE
Avoid heavy impacts and drive round obstacles whenever possible. Tyres can be deformed by
potholes and kerb edges especially. This can cause damage to the tyres and wheel rims.
Old tyres should be disposed of as required by legislation.
Volkswagen-approved tyres are guaranteed to have the dimensions that are suitable for the vehicle.
In the case of other tyres, the tyre seller must provide a certificate from the tyre manufacturer
stating that the tyre is also suitable for the vehicle. This certificate must be stored in a safe place in
the vehicle.
Wheel rims and wheel bolts
First read and observe the introductoryinformation and safety warnings⇒Introduction
Wheel rims, tyres and wheel bolts are matched to the vehicle type. If different wheel rims are fitted,
the correct wheel bolts with the correct length and correctly shaped bolt heads must be used.
For technical reasons, it is not generally possible to use the wheel rims from other vehicles. This can
also apply to wheel rims of the same vehicle type.
The tightening torque of the wheel bolts must be checked regularly with a properly functioning
torque wrench.
Wheel bolts
The correct wheel bolts must be used for each vehicle type; these bolts must always be tightened
with the correct tightening torque ⇒ Wheel bolts .
Wheel rims with bolted rim rings or trim elements
Rims with bolted-on rings or trim elements consist of several components. These components are
joined together using special bolts. Damaged wheel rims must be replaced and must always be
repaired only by a qualified workshop. Volkswagen recommends using a Volkswagen dealership for
this purpose ⇒ .
Wheel rim identification
In some countries, new wheel rims must contain information on certain properties. The following
information may appear on the wheel rim:
ed (month/year)
Page 400 of 502

WARNING
The use of unsuitable or damaged wheel rims can impair vehicle safety and cause accidents and
serious injuries.
ave been approved for the vehicle.
WARNING
Incorrect loosening and tightening of the bolts on wheel rims with bolted-on rings can cause
accidents and serious injuries.
on wheel rims with bolted-on rings.
-on rings must be carried out by a qualified workshop. Volkswagen
recommends using a Volkswagen dealership for this purpose.
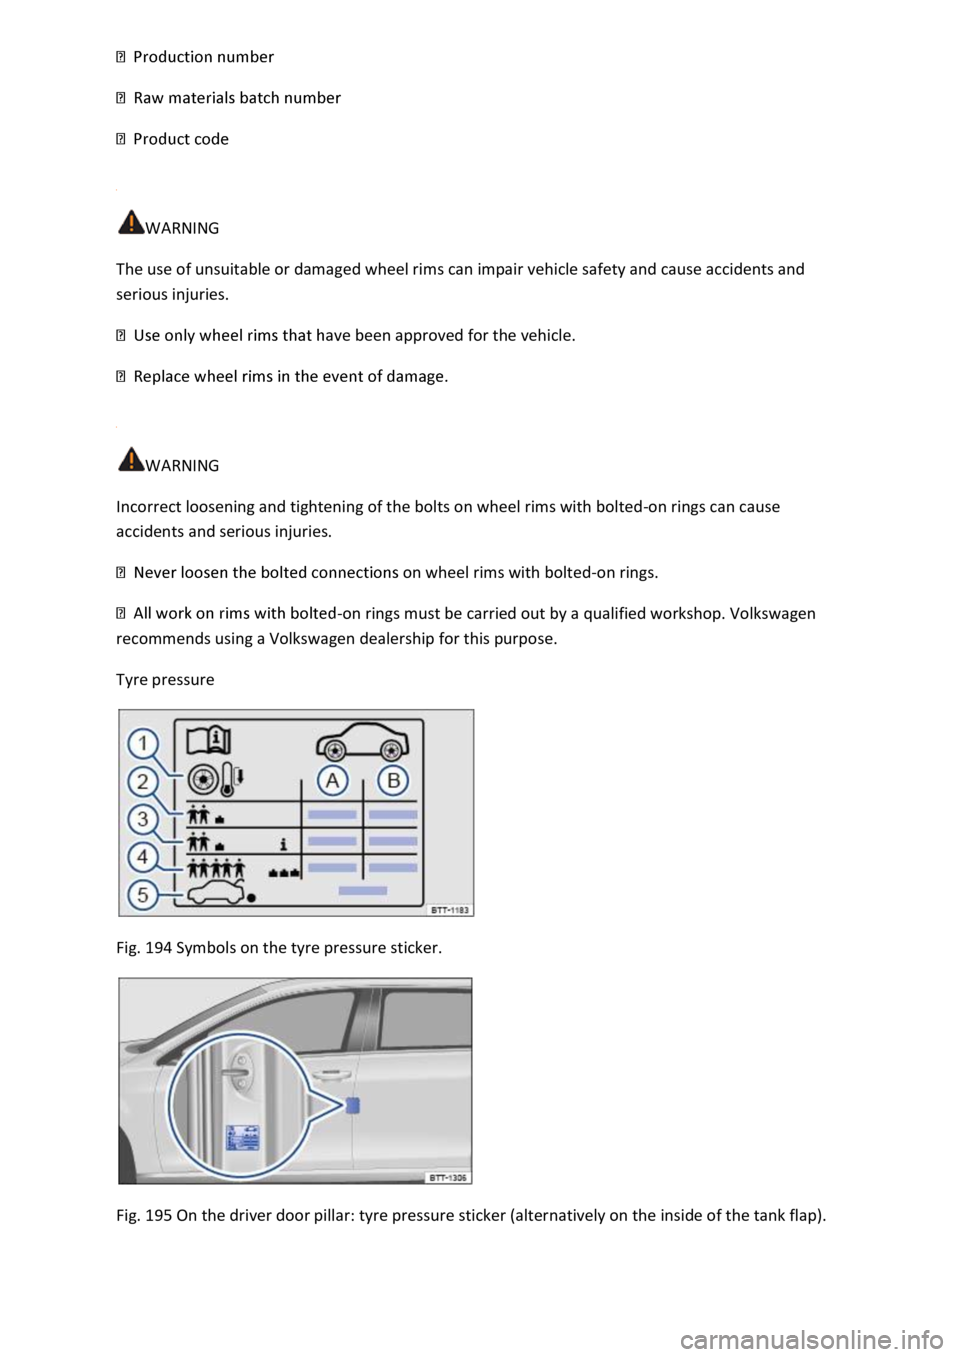
Tyre pressure
Fig. 194 Symbols on the tyre pressure sticker.
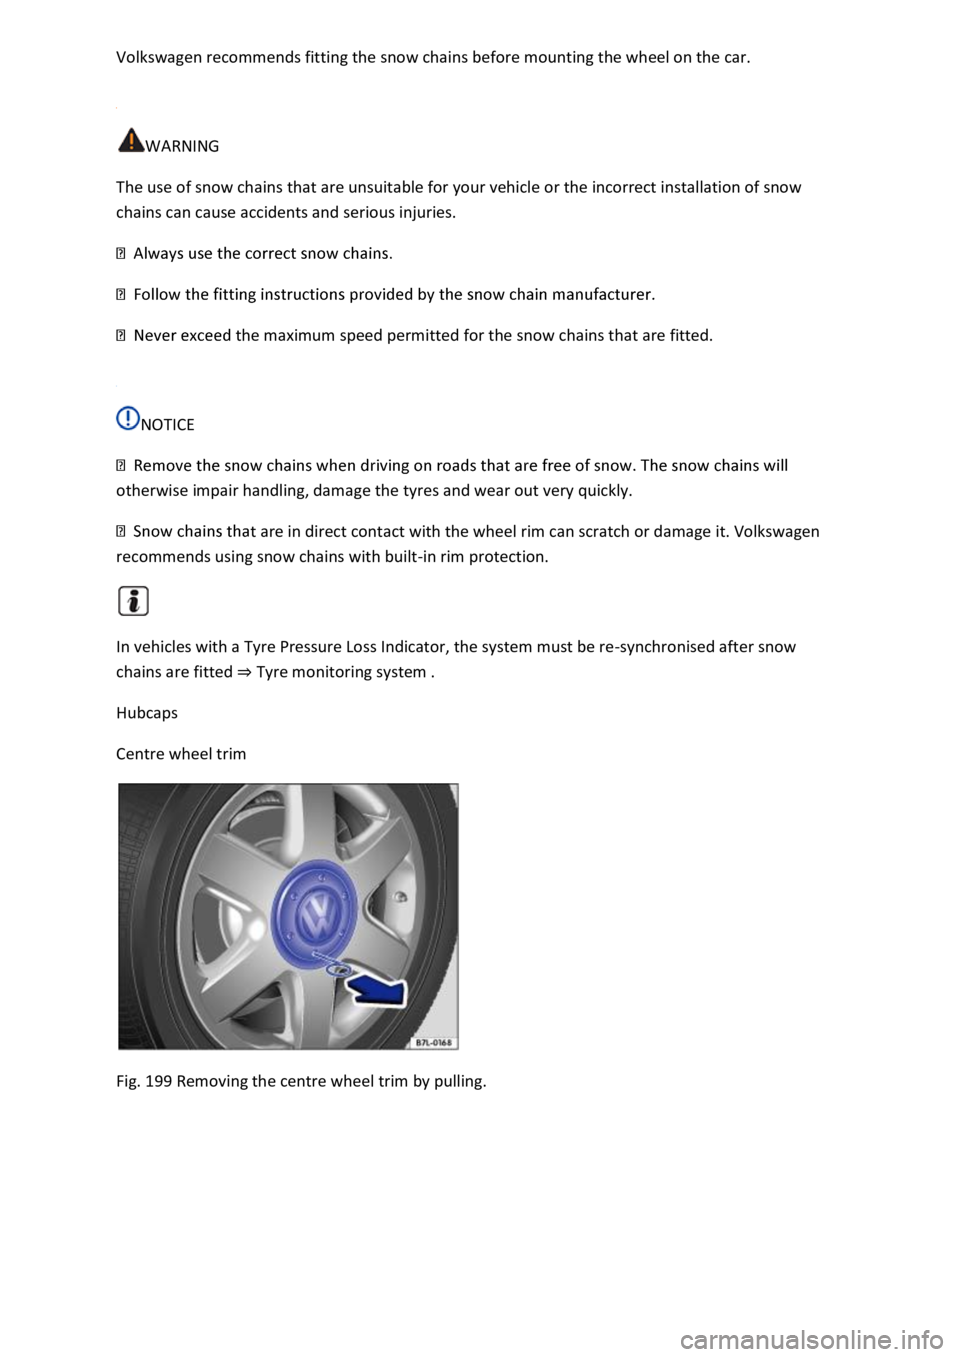
Fig. 195 On the driver door pillar: tyre pressure sticker (alternatively on the inside of the tank flap).
Page 409 of 502

⇒ Fig. 198 Tyre lettering
(example)
Meaning
15 Rim diameter in inches.
XL Heavy-duty tyre (Extra Load).
⑲ MAX LOAD 615 KG
(1235 LBS)
US load specification for the maximum load per
wheel.
⑳ SIDEWALL 1 PLY
RAYON
Information about the tyre carcass components:
1 ply of rayon (artificial silk).
TREAD 4 PLIES Information about the tread components:
1 RAYON + 2 STEEL
+ 1 NYLON
In the example there are 4 plies under the tread
surface: 1 ply of rayon (artificial silk), 2 steel belt
plies and 1 nylon ply.
The tyre lettering is located on both sides. Certain labels may only be found on one side of the tyre,
e.g. tyre identification number and manufacturing date.
Any additional numbers and letters are internal codes used by the tyre manufacturer or country-
specific identifiers.
Low-profile tyres
Low-profile tyres have a wider tread surface, larger rim diameter and lower side walls than
conventional wheel/tyre combinations ⇒ . Low-profile tyres can improve the vehicle's handling
and precision. They may however result in a less comfortable ride on poor road surfaces and tracks.
Tyres with directional tread pattern
An arrow on the tyre sidewall indicates the direction of rotation on tyres with directional tread
pattern. The direction of rotation must be observed in all cases. This guarantees the best possible
running characteristics.
If, however, the tyre is fitted in the opposite direction to the tread pattern, you must take more care
when driving as the tyre is now no longer being used according to its designation. The tyre must be
replaced as quickly as possible or be fitted with the tread in the correct direction.
Asymmetrical tyres
Asymmetrical tyres take into account the differing behaviour of the inner and outer areas of the
tread pattern. The sidewalls of asymmetrical tyres are marked to indicate "inside" or "outside".
Make sure that you observe the correct tyre positioning on the wheel rim.
Tyre load
The load index indicates how many kilograms can be loaded onto an individual tyre (tyre load).
Page 413 of 502

Volkswagen recommends fitting the snow chains before mounting the wheel on the car.
WARNING
The use of snow chains that are unsuitable for your vehicle or the incorrect installation of snow
chains can cause accidents and serious injuries.
the maximum speed permitted for the snow chains that are fitted.
NOTICE
otherwise impair handling, damage the tyres and wear out very quickly.
t are in direct contact with the wheel rim can scratch or damage it. Volkswagen
recommends using snow chains with built-in rim protection.
In vehicles with a Tyre Pressure Loss Indicator, the system must be re-synchronised after snow
chains are fitted ⇒ Tyre monitoring system .
Hubcaps
Centre wheel trim
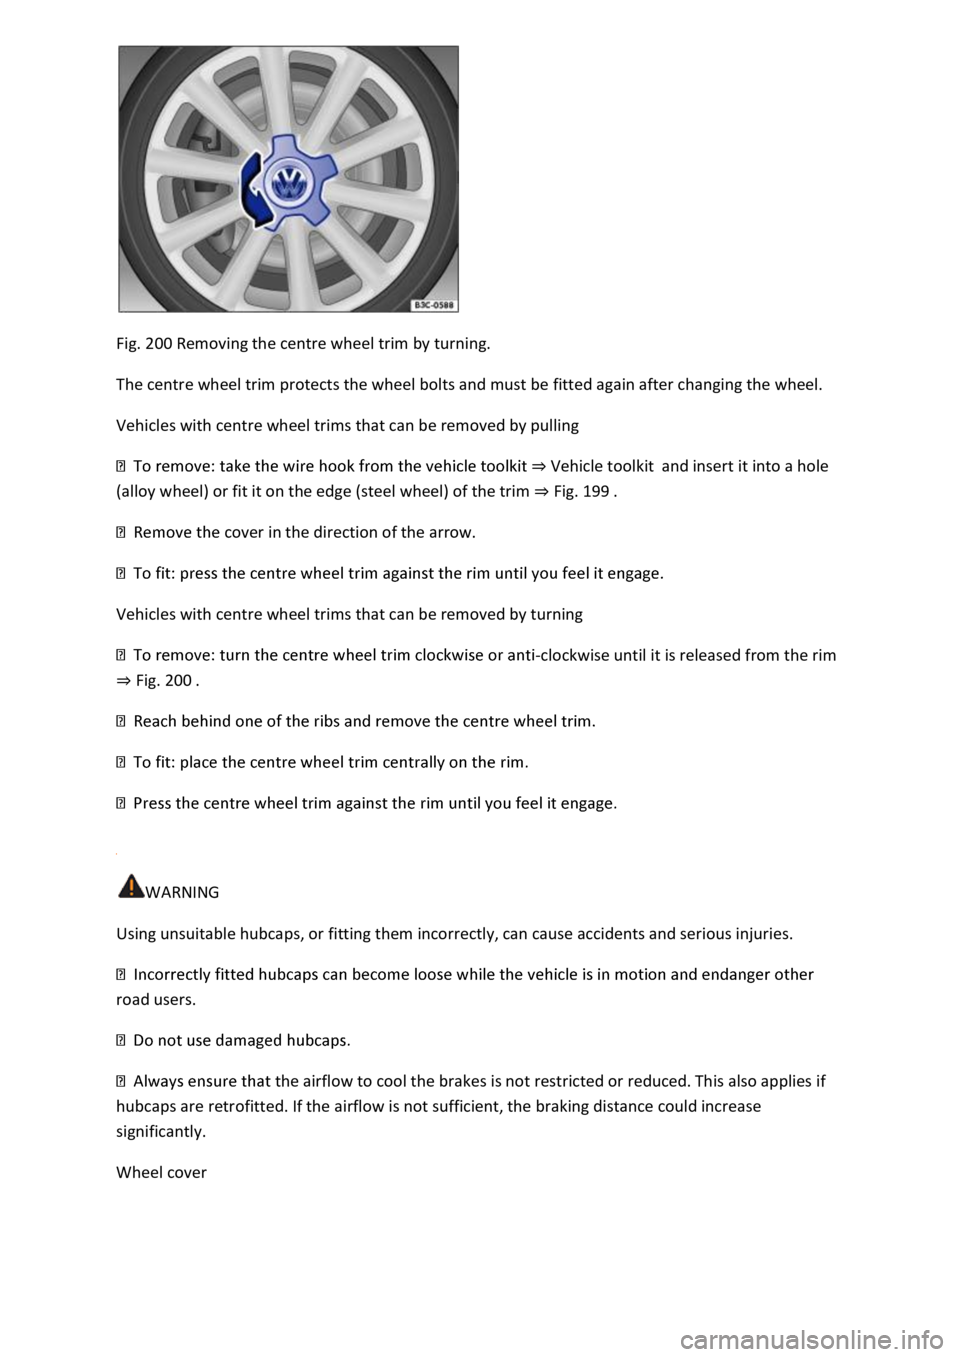
Fig. 199 Removing the centre wheel trim by pulling.
Page 414 of 502

Fig. 200 Removing the centre wheel trim by turning.
The centre wheel trim protects the wheel bolts and must be fitted again after changing the wheel.
Vehicles with centre wheel trims that can be removed by pulling
⇒ Vehicle toolkit and insert it into a hole
(alloy wheel) or fit it on the edge (steel wheel) of the trim ⇒ Fig. 199 .
cover in the direction of the arrow.
Vehicles with centre wheel trims that can be removed by turning
-clockwise until it is released from the rim
⇒ Fig. 200 .
WARNING
Using unsuitable hubcaps, or fitting them incorrectly, can cause accidents and serious injuries.
road users.
the airflow to cool the brakes is not restricted or reduced. This also applies if
hubcaps are retrofitted. If the airflow is not sufficient, the braking distance could increase
significantly.
Wheel cover