2021 RAM PROMASTER CITY child lock
[x] Cancel search: child lockPage 181 of 280

SAFETY179
installing a child restraint using the LATCH
system, buckle the seat belt behind the child
restraint and out of the child’s reach. If the
buckled seat belt interferes with the child
restraint installation, instead of buckling it
behind the child restraint, route the seat belt
through the child restraint belt path and then
buckle it. Do not lock the seat belt. Remind all
children in the vehicle that the seat belts are not
toys and that they should not play with them.Installing Child Restraints Using The Vehicle
Seat Belt In Vehicles With Rear Seating
Child restraint systems are designed to be
secured in vehicle seats by lap belts or the lap
belt portion of a lap/shoulder belt.
The seat belts in the passenger seating
positions are equipped with a Switchable
Automatic Locking Retractor (ALR) that is
designed to keep the lap portion of the seat belt
tight around the child restraint so that it is not
necessary to use a locking clip. The ALR
retractor can be “switched” into a locked mode
by pulling all of the webbing out of the retractor
and then letting the webbing retract back into
the retractor. If it is locked, the ALR will make a
clicking noise while the webbing is pulled back
into the retractor Ú page 159.
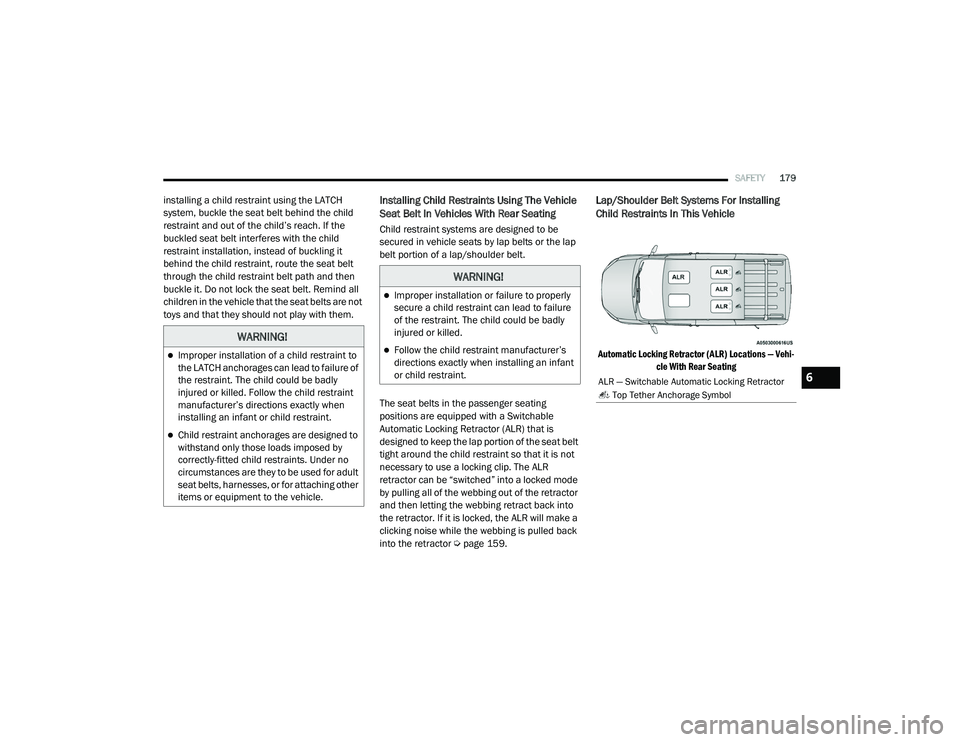
Lap/Shoulder Belt Systems For Installing
Child Restraints In This Vehicle
Automatic Locking Retractor (ALR) Locations — Vehi -
cle With Rear Seating
WARNING!
Improper installation of a child restraint to
the LATCH anchorages can lead to failure of
the restraint. The child could be badly
injured or killed. Follow the child restraint
manufacturer’s directions exactly when
installing an infant or child restraint.
Child restraint anchorages are designed to
withstand only those loads imposed by
correctly-fitted child restraints. Under no
circumstances are they to be used for adult
seat belts, harnesses, or for attaching other
items or equipment to the vehicle.
WARNING!
Improper installation or failure to properly
secure a child restraint can lead to failure
of the restraint. The child could be badly
injured or killed.
Follow the child restraint manufacturer’s
directions exactly when installing an infant
or child restraint.
ALR — Switchable Automatic Locking Retractor
Top Tether Anchorage Symbol6
21_VM_OM_EN_USC_t.book Page 179
Page 182 of 280

180SAFETY
(Continued)
Installing A Child Restraint With A Switchable
Automatic Locking Retractor (ALR):
Child restraint systems are designed to be
secured in vehicle seats by lap belts or the lap
belt portion of a lap/shoulder belt.
1. Place the child seat in the center of the seating position. If the second row seat can
be reclined, you may recline the seat and/
or raise the head restraint (if adjustable) to
get a better fit. If the rear seat can be
moved forward and rearward in the vehicle, you may wish to move it to its
rear-most position to make room for the
child seat. You may also move the front
seat forward to allow more room for the
child seat.
2. Pull enough of the seat belt webbing from the retractor to pass it through the belt path
of the child restraint. Do not twist the belt
webbing in the belt path.
3. Slide the latch plate into the buckle until you hear a “click.”
Frequently Asked Questions About Installing Child Restraints With Seat Belts
What is the weight limit (child’s weight + weight
of the child restraint) for using the Tether Anchor
with the seat belt to attach a forward facing
child restraint? Weight limit of the Child RestraintAlways use the tether anchor when using the
seat belt to install a forward facing child
restraint, up to the recommended weight limit of
the child restraint.
Can the rear-facing child restraint touch the
back of the front passenger seat? YesContact between the front passenger seat and
the child restraint is allowed, if the child
restraint manufacturer also allows contact.
Can the rear head restraints be removed? YesThe 2nd row head restraints can be removed in
every seating position if they interfere with the
installation of the child restraint Ú
page 21.
Can the buckle stalk be twisted to tighten the
seat belt against the belt path of the child
restraint? No
Do not twist the buckle stalk in a seating
position with an ALR retractor.
WARNING!
Improper installation or failure to properly
secure a child restraint can lead to failure
of the restraint. The child could be badly
injured or killed.
Follow the child restraint manufacturer’s
directions exactly when installing an infant
or child restraint.
WARNING!
(Continued)
21_VM_OM_EN_USC_t.book Page 180
Page 183 of 280

SAFETY181
(Continued)
4. Pull on the webbing to make the lap portion tight against the child seat.
5. To lock the seat belt, pull down on the shoulder part of the belt until you have
pulled all the seat belt webbing out of the
retractor. Then, allow the webbing to retract
back into the retractor. As the webbing
retracts, you will hear a clicking sound. This
means the seat belt is now in the Automatic
Locking mode.
6. Try to pull the webbing out of the retractor. If it is locked, you should not be able to pull
out any webbing. If the retractor is not
locked, repeat step 5.
7. Finally, pull up on any excess webbing to tighten the lap portion around the child
restraint while you push the child restraint
rearward and downward into the vehicle
seat.
8. If the child restraint has a top tether strap and the seating position has a top tether
anchorage, connect the tether strap to the
anchorage and tighten the tether strap. See
Úpage 181 for directions to attach a tether
anchor. 9. Test that the child restraint is installed
tightly by pulling back and forth on the child
seat at the belt path. It should not move
more than 1 inch (25.4 mm) in any
direction.
Any seat belt system will loosen with time, so
check the belt occasionally, and pull it tight if
necessary.
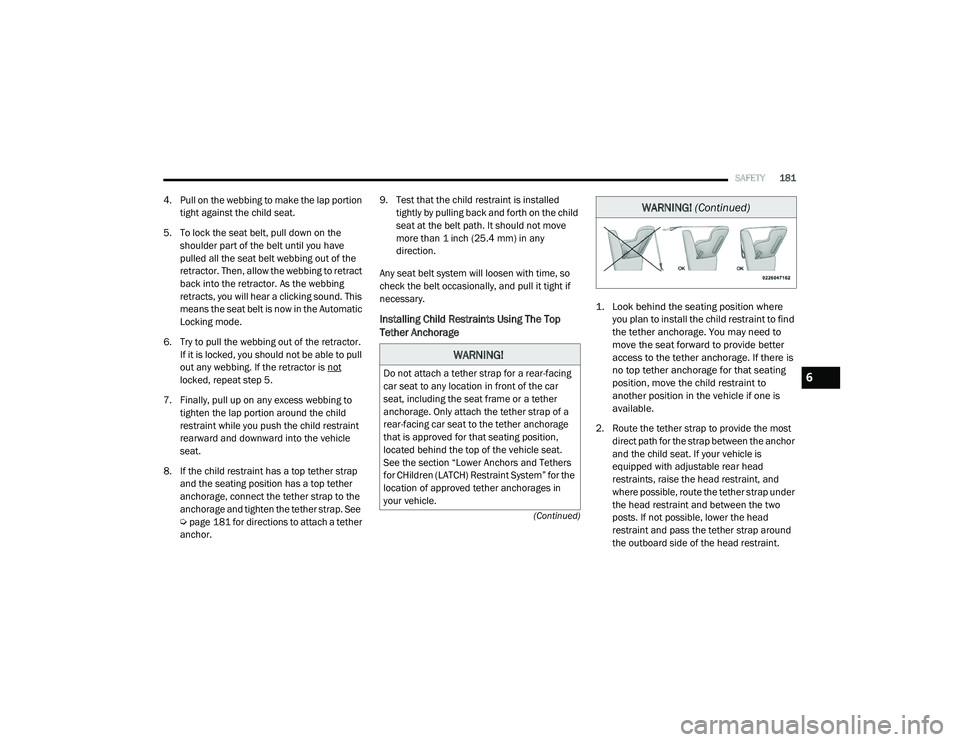
Installing Child Restraints Using The Top
Tether Anchorage
1. Look behind the seating position where you plan to install the child restraint to find
the tether anchorage. You may need to
move the seat forward to provide better
access to the tether anchorage. If there is
no top tether anchorage for that seating
position, move the child restraint to
another position in the vehicle if one is
available.
2. Route the tether strap to provide the most direct path for the strap between the anchor
and the child seat. If your vehicle is
equipped with adjustable rear head
restraints, raise the head restraint, and
where possible, route the tether strap under
the head restraint and between the two
posts. If not possible, lower the head
restraint and pass the tether strap around
the outboard side of the head restraint.
WARNING!
Do not attach a tether strap for a rear-facing
car seat to any location in front of the car
seat, including the seat frame or a tether
anchorage. Only attach the tether strap of a
rear-facing car seat to the tether anchorage
that is approved for that seating position,
located behind the top of the vehicle seat.
See the section “Lower Anchors and Tethers
for CHildren (LATCH) Restraint System” for the
location of approved tether anchorages in
your vehicle.
WARNING! (Continued)
6
21_VM_OM_EN_USC_t.book Page 181
Page 185 of 280

SAFETY183
The seat belt in the passenger seating position
is equipped with a Switchable Automatic
Locking Retractor (ALR). This seat belt is
designed to keep the lap portion of the seat belt
tight around the child restraint so that it is not
necessary to use a locking clip. The ALR
retractor can be “switched” into a locked mode
by pulling all of the webbing out of the retractor
and then letting the webbing retract back into
the retractor. If it is locked, the ALR will make a
clicking noise while the webbing is pulled back
into the retractor Ú page 159.
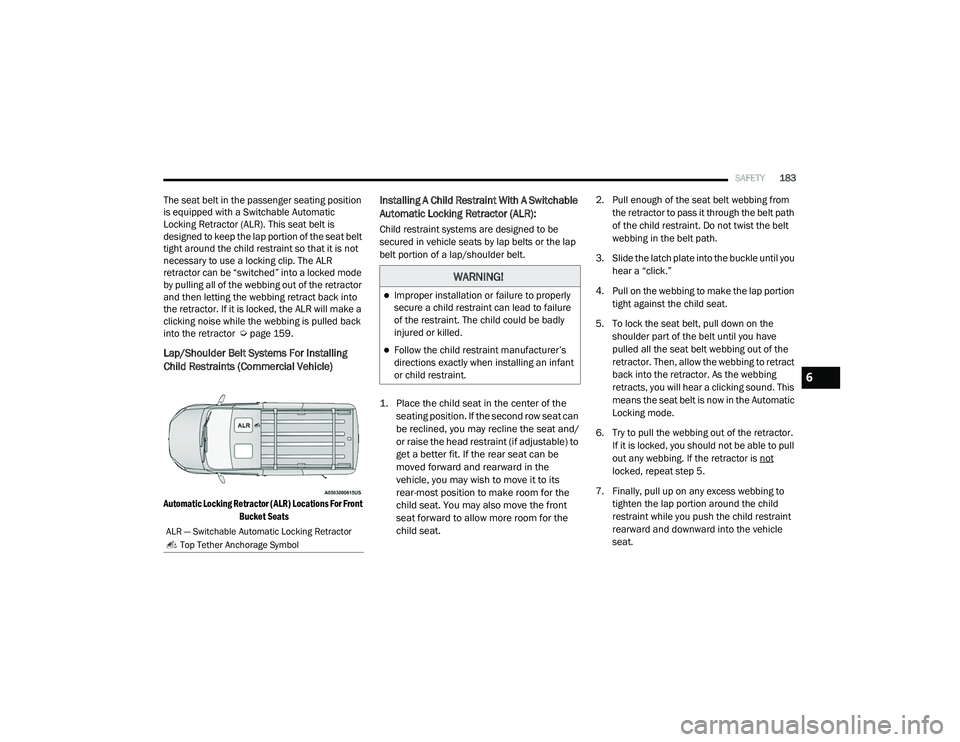
Lap/Shoulder Belt Systems For Installing
Child Restraints (Commercial Vehicle)
Automatic Locking Retractor (ALR) Locations For Front
Bucket Seats
Installing A Child Restraint With A Switchable
Automatic Locking Retractor (ALR):
Child restraint systems are designed to be
secured in vehicle seats by lap belts or the lap
belt portion of a lap/shoulder belt.
1. Place the child seat in the center of the seating position. If the second row seat can
be reclined, you may recline the seat and/
or raise the head restraint (if adjustable) to
get a better fit. If the rear seat can be
moved forward and rearward in the
vehicle, you may wish to move it to its
rear-most position to make room for the
child seat. You may also move the front
seat forward to allow more room for the
child seat.
2. Pull enough of the seat belt webbing from
the retractor to pass it through the belt path
of the child restraint. Do not twist the belt
webbing in the belt path.
3. Slide the latch plate into the buckle until you hear a “click.”
4. Pull on the webbing to make the lap portion tight against the child seat.
5. To lock the seat belt, pull down on the shoulder part of the belt until you have
pulled all the seat belt webbing out of the
retractor. Then, allow the webbing to retract
back into the retractor. As the webbing
retracts, you will hear a clicking sound. This
means the seat belt is now in the Automatic
Locking mode.
6. Try to pull the webbing out of the retractor. If it is locked, you should not be able to pull
out any webbing. If the retractor is not
locked, repeat step 5.
7. Finally, pull up on any excess webbing to tighten the lap portion around the child
restraint while you push the child restraint
rearward and downward into the vehicle
seat.
ALR — Switchable Automatic Locking Retractor
Top Tether Anchorage Symbol
WARNING!
Improper installation or failure to properly
secure a child restraint can lead to failure
of the restraint. The child could be badly
injured or killed.
Follow the child restraint manufacturer’s
directions exactly when installing an infant
or child restraint.
6
21_VM_OM_EN_USC_t.book Page 183
Page 269 of 280

267
C
Camera, Rear
.................................................. 73Capacities, Fluid............................................ 259Caps, Filler Fuel............................................................. 74Oil (Engine)................................................ 221Power Steering............................................ 68Radiator (Coolant Pressure)...................... 229Car Washes................................................... 252Carbon Monoxide Warning.................. 185, 258Cargo Area Cover............................................. 38Cargo Compartment........................................ 38Cargo Tie-Downs.............................................. 38Cellular Phone............................................... 143Certification Label........................................... 75Chains, Tire.................................................... 249Changing A Flat Tire....................................... 194Chart, Tire Sizing............................................ 235Check Engine Light (Malfunction Indicator
Light)............................................................... 57Checking Your Vehicle For Safety.................. 185Checks, Safety............................................... 185Child Restraint............................................... 170Child RestraintsBooster Seats............................................ 173Child Seat Installation..................... 180, 183How To Stow An unused ALR Seat Belt..... 178Infant And Child Restraints....................... 171
Locating The LATCH Anchorages.............. 177Lower Anchors And Tethers For Children.. 175Older Children And Child Restraints......... 172Seating Positions...................................... 174Clean Air Gasoline......................................... 256CleaningWheels..................................................... 248Climate Control................................................ 31Cold Weather Operation.................................. 58Compact Spare Tire...................................... 247Contract, Service.......................................... 263Cooling Pressure Cap (Radiator Cap)............ 229Cooling System............................................. 227Adding Coolant (Antifreeze)...................... 228Coolant Level............................................ 230Cooling Capacity....................................... 259Disposal Of Used Coolant......................... 229Drain, Flush, And Refill............................. 228Inspection........................................ 228, 230Points To Remember................................ 230Pressure Cap............................................ 229Radiator Cap............................................ 229Selection Of Coolant (Antifreeze)..... 228, 259Corrosion Protection..................................... 252Cruise Light...................................................... 55Customer Assistance.................................... 262Customer Programmable Features.................. 87Cybersecurity................................................... 86
D
Dealer Service............................................... 223Defroster, Windshield................................... 186Deleting A Phone........................................... 114Diagnostic System, Onboard............................56DipsticksOil (Engine)............................................... 222Power Steering............................................68Disable Vehicle Towing................................. 211Disconnecting............................................... 114DisposalAntifreeze (Engine Coolant)...................... 229Disturb.......................................................... 117Door Ajar..........................................................51Door Ajar Light.................................................51Door Locks.......................................................14Doors...............................................................14Driver’s Seat Back Tilt......................................17DrivingThrough Flowing, Rising, Or Shallow Standing Water
.......................................84
E
Electric Brake Control System....................... 146Electric Remote Mirrors...................................26Electrical Outlet, Auxiliary (Power Outlet).........40Electronic Range Select (ERS).........................67Electronic Stability Control (ESC)................... 14611
21_VM_OM_EN_USC_t.book Page 267