2021 Peugeot Landtrek ESP
[x] Cancel search: ESPPage 111 of 176

109
In the event of a breakdown
8Ensure that the jack is stable. If the
ground is slippery or loose, the jack may
slip or collapse - risk of injury!
Take care to position the jack strictly at
one of the jacking points
A
or B under the
vehicle, ensuring that the head of the jack is
centred under the contact area on the vehicle.
Otherwise, there is a risk of damage to the
vehicle and/or of the jack collapsing - risk of
injury!
Stop raising the vehicle when the yellow
warning line appears on the jack cylinder.
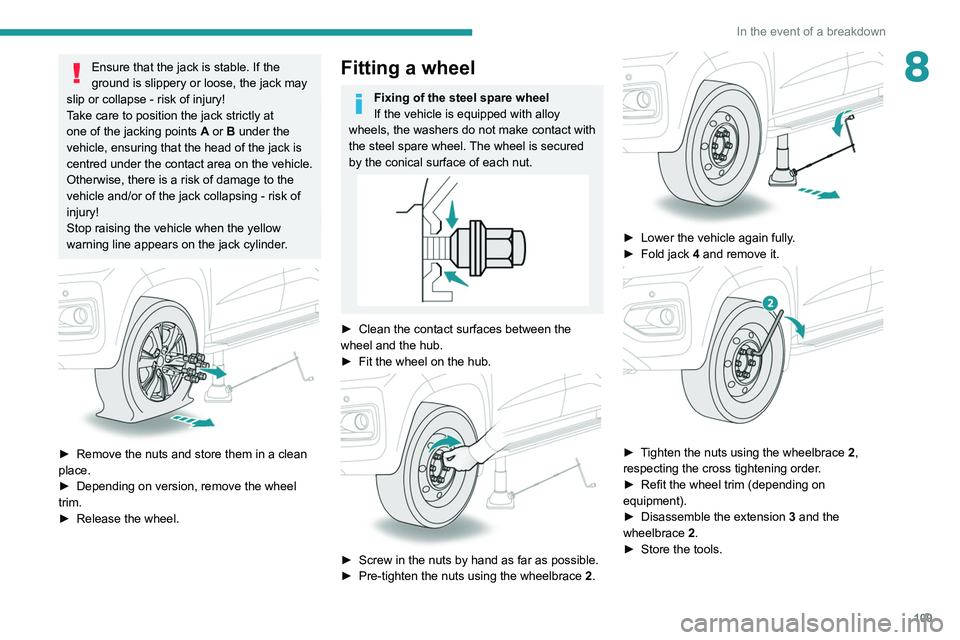
► Remove the nuts and store them in a clean
place.
►
Depending on version, remove the wheel
trim.
►
Release the wheel.
Fitting a wheel
Fixing of the steel spare wheel
If the vehicle is equipped with alloy
wheels, the washers do not make contact with
the steel spare wheel. The wheel is secured
by the conical surface of each nut.
► Clean the contact surfaces between the
wheel and the hub.
►
Fit the wheel on the hub.
► Screw in the nuts by hand as far as possible.
► Pre-tighten the nuts using the wheelbrace 2
.
► Lower the vehicle again fully.
► Fold jack 4 and remove it.
► Tighten the nuts using the wheelbrace 2,
respecting the cross tightening order.
►
Refit the wheel trim (depending on
equipment).
►
Disassemble the extension 3
and the
wheelbrace 2.
►
Store the tools.
Page 113 of 176

111
In the event of a breakdown
8Halogen bulbs (Hx)
To ensure good quality lighting, check
that the bulb is correctly positioned in its
housing.
Sidelamps
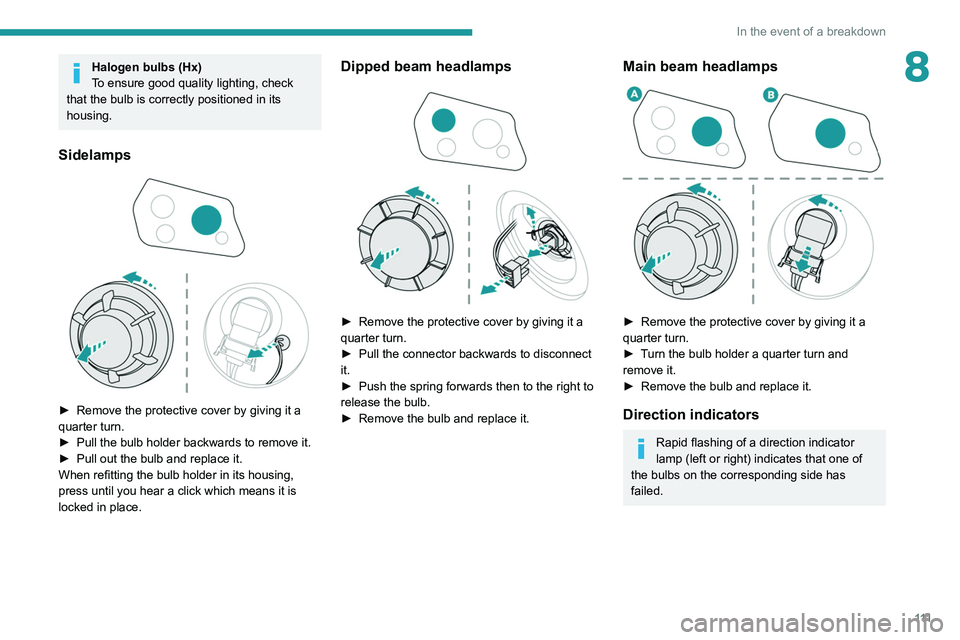
► Remove the protective cover by giving it a
quarter turn.
►
Pull the bulb holder backwards to remove it.
►
Pull out the bulb and replace it.
When refitting the bulb holder in its housing,
press until you hear a click which means it is
locked in place.
Dipped beam headlamps
► Remove the protective cover by giving it a
quarter turn.
►
Pull the connector backwards to disconnect
it.
►
Push the spring forwards then to the right to
release the bulb.
►
Remove the bulb and replace it.
Main beam headlamps
► Remove the protective cover by giving it a
quarter turn.
►
T
urn the bulb holder a quarter turn and
remove it.
►
Remove the bulb and replace it.
Direction indicators
Rapid flashing of a direction indicator
lamp (left or right) indicates that one of
the bulbs on the corresponding side has
failed.
Page 115 of 176

11 3
In the event of a breakdown
8
► Turn the bulb holder a quarter turn
anti-clockwise.
►
Remove the bulb holder and replace the
bulb by pulling or pressing then turning the bulb
(depending on the bulb type).
Changing a fuse
Accessing the tools
The extraction tweezers are located in the
fusebox.
► Unclip the first cover by pulling the upper
part, then tilt and remove the cover completely .
►
Unclip the second cover by pressing clip
A
,
then pull the cover to remove it.
►
T
ake the tweezers from their housing.
Changing a fuse
Before changing a fuse:
► Identify the cause of the fault and fix it.
►
Switch off all power consumption.
►
Immobilise the vehicle and switch off the
ignition.
►
Identify the defective fuse using the current
allocation tables and diagrams.
T
o replace a fuse, it is essential to:
►
Use the special tweezers to extract the fuse
from its housing and check the condition of its
filament.
►
Always replace the failed fuse with a fuse of
the same rating (same colour); use of a different
rating may cause malfunctions - risk of fire!
If the fault recurs soon after replacing a fuse,
have the electrical system checked by a
PEUGEOT dealer or a qualified workshop.
The fuse allocation tables and the corresponding diagrams are available
from a PEUGEOT dealer or from a qualified
workshop.
The replacement of a fuse not shown in the allocation tables may cause a serious
malfunction of the vehicle. Contact a
PEUGEOT dealer or a qualified workshop.
Good
Faulty
Tweezers
Installing electrical accessories
The vehicle's electrical system is
designed to operate with standard or optional
equipment.
Before fitting other electrical equipment
or accessories to your vehicle, contact a
PEUGEOT dealer or a qualified workshop.
Page 116 of 176

11 4
In the event of a breakdown
PEUGEOT accepts no responsibility for
the cost incurred in repairing the vehicle
or for rectifying malfunctions resulting from
the installation of accessories not supplied or
not recommended by PEUGEOT and not
installed in accordance with its recommendations, in particular when the
combined power consumption of all of the
additional equipment connected exceeds 10
milliamperes.Fuses in the dashboard
The fusebox is located in the lower dashboard
(left-hand side).
To access the fuses, follow the same procedure
as described for accessing the fuse replacement
tools.
Table of fuses
Fuse N° Rating
(Amps) Functions
F6 30 ARear screen defrosting.
F9 20 AFolding door mirrors.
F17 10 AGlove box lighting.
F21 15 AElectric passenger seat.
F22 15 AAlarm (retrofit).
F25 or F45 25 A or 10 AReversing lamps.
F26 10 AElectric driver’s seat.
F31 10 ACigarette lighter/12
V socket.
F34 15 ARain sensor (automatic wipers).
F36 10 AReversing radar (parking sensors).
F39 7.5 ABrake lamps.
F41 7.5 ADoor mirror defrosting.
F42 20 A12
V socket (in the loading bay).
F43/F44 10 AFront/Rear sidelamps.
Engine compartment fuses
The fusebox is placed in the engine
compartment near the battery.
Accessing the fuses
Petrol engine
Table of fuses
Diesel engine box
Fuse N° Rating
(Amps) Functions
F3 25 AHeating and ventilation.
F38 30 AElectric windows.
F46 25 AWipers.
F52/F53 10 ARight-hand/Left-hand sidelamps.
F54/F55 10 ARight-hand/Left-hand front foglamp.
F56/F57 10 ARight-hand/Left-hand dipped beam headlamp.
Page 118 of 176

11 6
In the event of a breakdown
Fuse N°Rating
(Amps) Functions
F58/F59 10 ARight-hand/Left-hand main beam headlamp.
Petrol engine box
Information for the petrol engine fuse box
was not available at the time of
publication.
For the allocation and position of the fuses,
contact a PEUGEOT dealer.
12 V battery
Procedure for starting the engine using another
battery or for charging a discharged battery.
Lead-acid starter batteries
These batteries contain harmful substances (sulphuric acid and lead).
They must be disposed of in accordance
with regulations and must never under any
circumstances be discarded with household
waste.
Take used remote control batteries and
vehicle batteries to a special collection point.
Protect your eyes and face before
handling the battery.
All operations on the battery must be carried
out in a well ventilated area and away from
naked flames and sources of sparks, to avoid
any risk of explosion or fire.
Wash your hands afterwards.
Natural battery discharge
In certain severe climatic conditions
(temperature, humidity), the battery can
discharge after 2 months, even with terminals
disconnected.
To store the vehicle or the battery, use a
location protected from heat and humidity.
Battery power loss
A battery can be discharged due to
power losses:
–
Continuous electrical consumption of a
component (e.g. alarm, anti-theft device).
–
Device powered up when the engine is off
(e.g. audio system, USB charger).
–
Electrical leakage due to poor insulation of
electrical components.
If the power loss cannot be located, contact a
PEUGEOT
dealer or a qualified workshop to
have the vehicle's electrical system checked.
Battery charge check
For batteries with a charge status
indicator, read the value indicated on the
battery directly.
For other types of batteries, the check can be
carried out with a voltmeter:
►
Connect the voltmeter to the battery
terminals (respect the polarities).
►
Read the voltage value.
►
T
urn the main beam headlamps on.
If the battery voltage remains at or above 10
V without rapidly decreasing, the charge is
correct.
If the battery voltage drops quickly or is less
than 10 V, the battery must be recharged or
replaced.
Accessing the battery
The battery is located under the bonnet.
Petrol engine
Diesel engine
For access to the (+) terminal:
► Release the bonnet by pulling the internal
release lever, then the external safety catch.
► Raise the bonnet.
(+) Positive terminal.
(-) Negative terminal (remote earth point).
Starting using another
battery
If the vehicle's battery is flat, the engine can be
started using a backup battery (either external or
Page 121 of 176

11 9
In the event of a breakdown
8► Switch off all electricity-consuming devices
(audio system, wipers, lamps, etc.).
►
Switch off the ignition and wait for 4
minutes.
After accessing the battery, it is only necessary
to disconnect the (+) terminal.
Screwed terminal
Disconnecting the (+) terminal
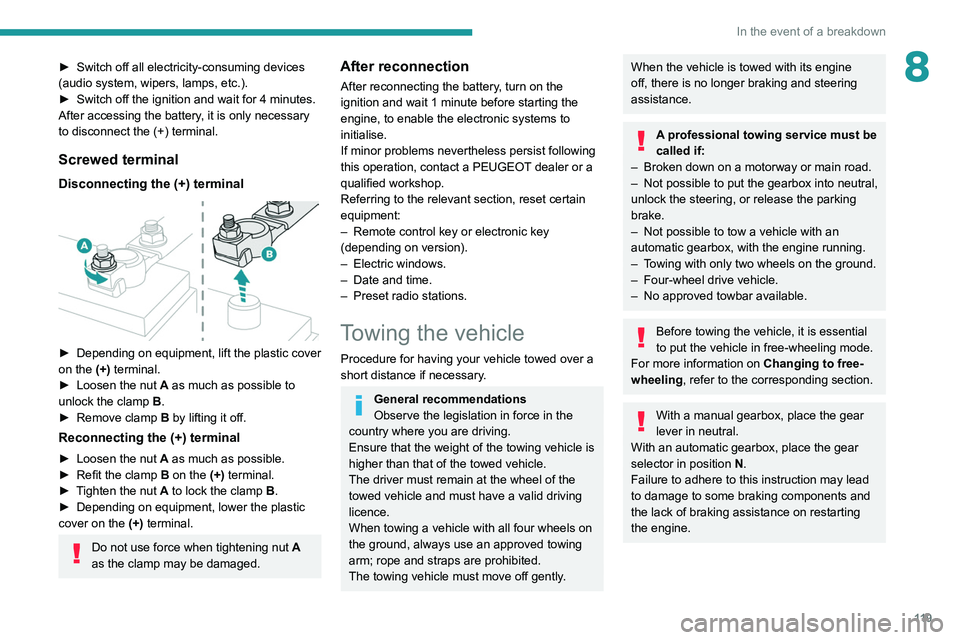
► Depending on equipment, lift the plastic cover
on the (+) terminal.
►
Loosen the nut
A as much as possible to
unlock the clamp B.
►
Remove clamp
B
by lifting it off.
Reconnecting the (+) terminal
► Loosen the nut A as much as possible.
► Refit the clamp B on the (+) terminal.
►
T
ighten the nut A to lock the clamp B.
►
Depending on equipment, lower the plastic
cover on the
(+) terminal.
Do not use force when tightening nut A
as the clamp may be damaged.
After reconnection
After reconnecting the battery, turn on the
ignition and wait 1 minute before starting the
engine, to enable the electronic systems to
initialise.
If minor problems nevertheless persist following
this operation, contact a PEUGEOT dealer or a
qualified workshop.
Referring to the relevant section, reset certain
equipment:
–
Remote control key or electronic key
(depending on version).
–
Electric windows.
–
Date and time.
–
Preset radio stations.
Towing the vehicle
Procedure for having your vehicle towed over a
short distance if necessary.
General recommendations
Observe the legislation in force in the
country where you are driving.
Ensure that the weight of the towing vehicle is
higher than that of the towed vehicle.
The driver must remain at the wheel of the
towed vehicle and must have a valid driving
licence.
When towing a vehicle with all four wheels on
the ground, always use an approved towing
arm; rope and straps are prohibited.
The towing vehicle must move off gently.
When the vehicle is towed with its engine
off, there is no longer braking and steering
assistance.
A professional towing service must be
called if:
–
Broken down on a motorway or main road.
–
Not possible to put
the gearbox into neutral,
unlock the steering, or release the parking
brake.
–
Not possible to tow a vehicle with an
automatic gearbox, with the engine running.
–
T
owing with only two wheels on the ground.
–
Four-wheel drive vehicle.
–
No approved towbar available.
Before towing the vehicle, it is essential
to put the vehicle in free-wheeling mode.
For more information on Changing to free-
wheeling , refer to the corresponding section.
With a manual gearbox, place the gear
lever in neutral.
With an automatic gearbox, place the gear
selector in position N.
Failure to adhere to this instruction may lead
to damage to some braking components and
the lack of braking assistance on restarting
the engine.
Page 124 of 176

122
Technical data
Engine technical data and
towed loads
Engines
The engine specifications are given in the
vehicle's registration document, as well as in
sales brochures.
Only the values available at the time of
publication are presented in the tables.
Contact a PEUGEOT dealer or a qualified
workshop to obtain the missing values.
The maximum power corresponds to the value type-approved on a test bed, under
conditions defined by legislation.
For more information, contact a PEUGEOT
dealer or a qualified workshop.
Weights and towed loads
The weights and towed loads relating to
the vehicle are indicated on the registration
document, as well as in sales brochures.
These values are also indicated on the
manufacturer's plate or label.
For more information, contact a PEUGEOT
dealer or a qualified workshop.
The GTW (Gross Train Weight) values and the
towable loads listed are valid for a maximum
altitude of 1,000
metres. The towable load must
be reduced by steps of 10% for each additional
1,000 metres.
The maximum authorised nose weight
corresponds to the weight permitted on the
towball.
When exterior temperatures are high, the
vehicle performance may be limited in
order to protect the engine. When the exterior
temperature is higher than 37°C, reduce the
towed weight.
Towing even with a lightly loaded vehicle can adversely affect its road holding.
Braking distances are increased when towing
a trailer.
When using a vehicle to tow, never exceed
a speed of 62 mph (100
km/h) (observe the
local legislation in force).
Engines and towed loads - Petrol
Engines 2.4 l - 210 Petrol engine
Gearboxes BVM6
(Manual 6-speed) BVA6
(Automatic 6-speed)
Model codes FBTGTEFBTGTLFBTGTT FBTGTZ
Transmission 4x24x44x24x4
Cubic capacity (cc) 2,3982,398
Max. power: EC standard (kW) 155155
Fuel UnleadedUnleaded
Braked trailer (within the GTW limit) (kg)
on a 10% or 12% gradient 3,000
2,500*
Unbraked trailer (kg) 750750
Maximum authorised nose weight (kg) --
Engine oil capacity (in litres)
Type C3 5W30 4.3
4.3
* Limitation to a GTW of 4,500 kg in the event of arduous use (towing on slopes and high te\
mperatures).
Page 137 of 176

135
Peugeot Connect 10" Touchscreen
11Accepting the call
Press this button on the steering-mounted
controls to answer the call.
Or
Select "Answer" on the touch screen.
Refusing the call
Press this button on the steering-mounted
controls to refuse the call.
Or
Select "End call" on the touch screen.
Making a call
Using the telephone is strongly
discouraged while driving.
Park the vehicle.
Make the call using the steering-mounted
controls.
Calling a new number
Press Telephone to display the main
page.
Press Call then enter the number using
the numeric keypad.
Press this button to make the call.
Calling a contact
Press Telephone to display the main
page.
Select "Contacts".
Search then select the desired contact in the
displayed list.
Press this button to call.
Calling a recently used
number
Press Telephone to display the main
page.
Select "Call".
The list of last numbers dialled is displayed on
the right of the screen.
Select the contact.
It is always possible to make a call
directly from the telephone; as a safety
measure, first park the vehicle.
Applications
USB ports
Depending on equipment, for more information
on the USB ports compatible with CarPlay®,
MirrorLinkTM or Android Auto applications, refer
to the "Ease of use and comfort" section.
For the list of suitable smartphones, visit
the Brand's national website.
Synchronising a smartphone enables
users to display applications that support
the smartphone’s MirrorLinkCarPlay®, TM or
Android Auto
technology on the vehicle’s
screen. For CarPlay
® technology, the
CarPlay® function must first be activated on
the smartphone.
Unlock the smartphone for the communication
process between the smartphone and the
system to work.
As principles and standards are constantly
changing, we recommend keeping the
smartphone's operating system up-to-
date, together with the date and time on
the smartphone and the system.
Connectivity
Press on one the CarPlay®, MirrorLinkTM
or Android Auto
menus
to access the
corresponding functions.
CarPlay® smartphone
connection
Depending on country.
On connecting the USB cable, the
CarPlay® function deactivates the
system's Bluetooth® mode.
The "CarPlay " function requires the use of
a compatible smartphone and compatible
applications.