2021 Peugeot Landtrek auto door lock
[x] Cancel search: auto door lockPage 4 of 176

2
Contents
■
Overview
■
Eco-driving
1Instruments
Instrument panels 7
Warning and indicator lamps 8
Total distance recorder 12
Lighting dimmer
12
Trip computer 12
Monochrome screen 13
Touch screen 14
2Access
Electronic key with remote control function
and built-in key, 16
Keyless Entry and Starting 18
Central locking 19
Back-up procedures 20
Doors 21
Tailgate 22
Alarm 22
Electric windows 24
3Ease of use and comfort
Front seats 25
2-seat front bench seat 26
Steering wheel adjustment 27
Mirrors 28
Rear bench seat 29
Heating and Ventilation 31
Heating 32
Manual air conditioning 32
Dual-zone automatic air conditioning 33
Front demisting - defrosting 35
Rear screen demisting/defrosting 35
Front fittings 35
Courtesy lamps 37
Rear fittings 38
Tipper body fittings
39
4Lighting and visibility
Exterior lighting control stalk 42
Cornering lighting 43
Direction indicators 43
Headlamp beam height adjustment 44
Automatic illumination of headlamps 44
Guide-me-home and welcome lighting 45
Wiper control stalk 45
Changing a wiper blade 46
Automatic wipers 47
5Safety
General safety recommendations 48
Hazard warning lamps 48
Horn 49
Electronic stability control (ESC) 49
Hill Assist Descent Control 51
Seat belts 52
Airbags 54
Child seats 56
Deactivating the front passenger airbag 58
ISOFIX child seats 59
Child lock 60
6Driving
Driving recommendations 61
Starting / Switching off the engine with
the key
63
Starting/Switching off the engine with
Keyless Entry and Starting
65
Manual parking brake 66
Locking the rear differential 67
4-wheel drive transmission selector 67
6-speed manual gearbox 69
Automatic gearbox 69
Driving mode 71
Hill start assist 72
Gear shift indicator 73
Tyre under-inflation detection 73
Driving and manoeuvring aids - General
recommendations
74
Speed limiter 75
Overspeed alert at 75 mph (120
km/h) 76
Cruise control - particular recommendations 76
Cruise control 77
Lane Departure Warning System 78
Parking sensors 80
Reversing camera 81
Off Road camera 82
360° camera 82
Page 19 of 176

17
Access
2Selective unlocking
Driver's door
► Press the unlocking button.
►
Press it
again to unlock the other doors.
Complete or selective unlocking and alarm
deactivation is confirmed by flashing the
direction indicators.
Depending on version, the door mirrors unfold.
Opening the windows
Depending on version, holding the
unlocking button pressed for more than 3
seconds opens the windows.
The windows stop when the button is released.
With the key
Driver's door
► T urn the key in the driver's door lock towards
the front of the vehicle to unlock it.
If the vehicle has an alarm, it will not be
deactivated. Opening a door will trigger the
alarm, which can be stopped by pressing the
remote control unlocking button.
Tailgate (depending on version)
►
T
urn the dedicated key in the tailgate lock to
the left to unlock.
Locking the vehicle
With the remote control
► Press this button to lock the vehicle.
Locking and alarm activation is confirmed by the
lighting of the direction indicators.
Depending on version, the door mirrors fold.
An improperly closed door prevents the vehicle from locking. If the vehicle is
fitted with an alarm, it will be activated after
about 45
seconds.
If the vehicle is unlocked but the doors
are not subsequently opened, the vehicle
will automatically lock itself again after
approximately 30
seconds. If the vehicle
is fitted with an alarm, it will be reactivated
automatically.
Closing the windows
Holding the locking button pressed for
more than 3 seconds closes the windows.
When closing windows, ensure that no
person or object could prevent their
correct closure.
With the key
Driver's door
► T urn the key in the driver's door lock towards
the rear of the vehicle to lock it.
Check that the doors are properly closed.
Tailgate (depending on version)
►
T
urn the dedicated key in the tailgate lock to
the right to lock it.
Locating the vehicle
Helps you to locate your vehicle from a distance,
with the vehicle locked:
–
The direction indicators flash for approximately
10 seconds.
–
The sidelamps and dipped beam headlamps
come on for 30 seconds.
► Press this button.
Remote audible signal
Used to locate the vehicle when it is not visible.
Also used to dissuade anyone who wants to
enter the vehicle or damage it.
► Press this button twice consecutively
to activate the horn twice.
Advice
Remote control
The remote control is a sensitive, high-
frequency device; avoid handling it in your
pocket, due to the risk of unintentionally
unlocking the vehicle.
Avoid pressing the remote control buttons
while out of range of the vehicle, due to
the risk of rendering the remote control
inoperative. It would then be necessary to
reset it.
The remote control does not work
when the
key is in the ignition switch, even when the
ignition is switched off.
Page 20 of 176

18
Access
Anti-theft protection
Do not modify the electronic vehicle
immobiliser, as this might result in
malfunctions.
For vehicles with a key ignition switch,
remember to remove the key and turn the
steering wheel to engage the steering lock.
Locking the vehicle
Driving with the doors locked could make
it more difficult for the emergency services
to enter the passenger compartment in an
emergency.
As a safety precaution, remove the key from
the ignition or take the electronic key with you
when leaving the vehicle, even for a short
time.
Purchasing a second-hand vehicle
Have the key codes memorised by a
PEUGEOT dealer, to ensure that the keys
in your possession are the only ones able to
start the vehicle.
Keyless Entry and
Starting
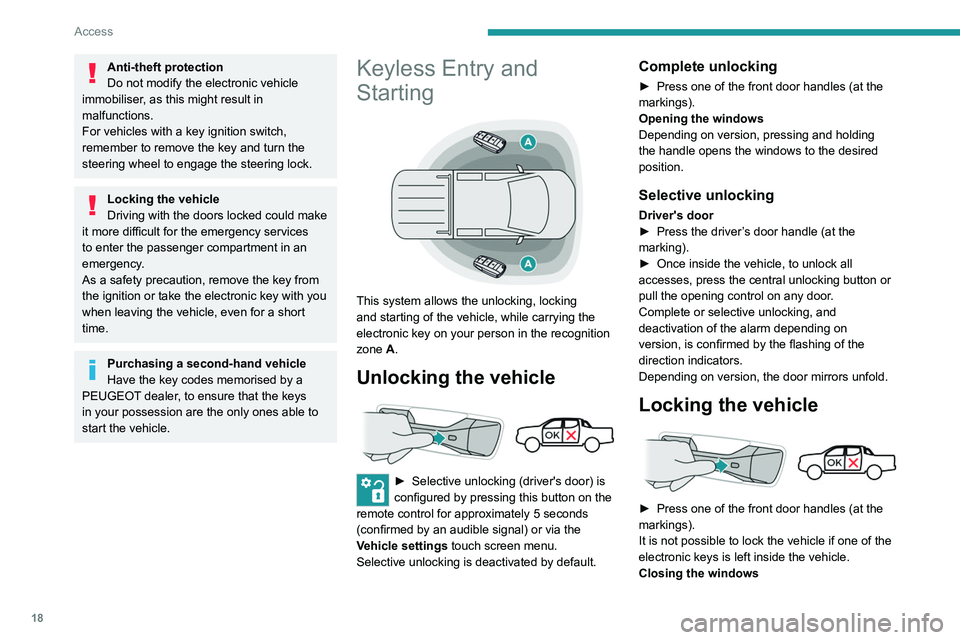
This system allows the unlocking, locking
and starting of the vehicle, while carrying the
electronic key on your person in the recognition
zone A.
Unlocking the vehicle
► Selective unlocking (driver's door) is
configured by pressing this button on the
remote control for approximately 5 seconds
(confirmed by an audible signal) or via the
Vehicle settings touch screen menu.
Selective unlocking is deactivated by default.
Complete unlocking
► Press one of the front door handles (at the
markings).
Opening the windows
Depending on version, pressing and holding
the handle opens the windows to the desired
position.
Selective unlocking
Driver's door
► Press the driver ’s door handle (at the
marking).
►
Once inside the vehicle, to unlock all
accesses, press the central unlocking button or
pull the opening control on any door
.
Complete or selective unlocking, and
deactivation of the alarm
depending on
version,
is confirmed by the flashing of the
direction indicators.
Depending on version, the door mirrors unfold.
Locking the vehicle
► Press one of the front door handles (at the
markings).
It is not possible to lock the vehicle if one of the
electronic keys is left inside the vehicle.
Closing the windows
Pressing and holding the handle closes the
windows.
When closing windows, ensure that no
person or object could prevent their
correct closure.
The locking, and the activation of the alarm
depending on version, is confirmed by the
temporary lighting of the direction indicators.
Depending on version, the door mirrors fold.
If one of the doors or the boot is still open
or if the electronic key for the Keyless
Entry and Starting system has been left inside
the vehicle, central locking will not take place.
However, if the vehicle is fitted with an alarm,
it will be activated after 45 seconds.
If the vehicle is unlocked but the doors
are not subsequently opened, the vehicle
will automatically lock itself again after
approximately 30 seconds. If the vehicle is
fitted with an alarm, it will also be reactivated
automatically.
The automatic relocking function is configured
via the touch screen’s vehicle configuration
menu.
The automatic door mirror folding/ unfolding function is configured by
pressing the button for the mirror folding/
unfolding control.
Page 21 of 176

19
Access
2Pressing and holding the handle closes the
windows.
When closing windows, ensure that no
person or object could prevent their
correct closure.
The locking, and the activation of the alarm
depending on version, is confirmed by the
temporary lighting of the direction indicators.
Depending on version, the door mirrors fold.
If one of the doors or the boot is still open
or if the electronic key for the Keyless
Entry and Starting
system has been left inside
the vehicle, central locking will not take place.
However
, if the vehicle is fitted with an alarm,
it will be activated after 45
seconds.
If the vehicle is unlocked but the doors
are not subsequently opened, the vehicle
will automatically lock itself again after
approximately 30
seconds. If the vehicle is
fitted with an alarm, it will also be reactivated
automatically.
The automatic relocking function is configured
via the touch screen’s vehicle configuration
menu.
The automatic door mirror folding/ unfolding function is configured by
pressing the button for the mirror folding/
unfolding control.
As a safety measure, never leave the vehicle, even for a short time, without
taking the Keyless Entry and Starting
system’s electronic key with you.
Be aware of the risk of theft of the vehicle if
the key is present in one of the defined areas
while the vehicle is unlocked.
To preserve the battery charge in the electronic key and the vehicle's battery,
the "hands-free" functions are set to
hibernation mode after 21 days without use.
To restore these functions, press one of the
remote control buttons or start the engine with
the electronic key against the back-up reader.
For more information on starting with the
Keyless Entry and Starting system, refer to
the corresponding section.
Electrical interference
The electronic key may not operate if
close to certain electronic devices such as
telephones (switched on or on standby) or
laptop computers, strong magnetic fields, etc.
Central locking
Manual
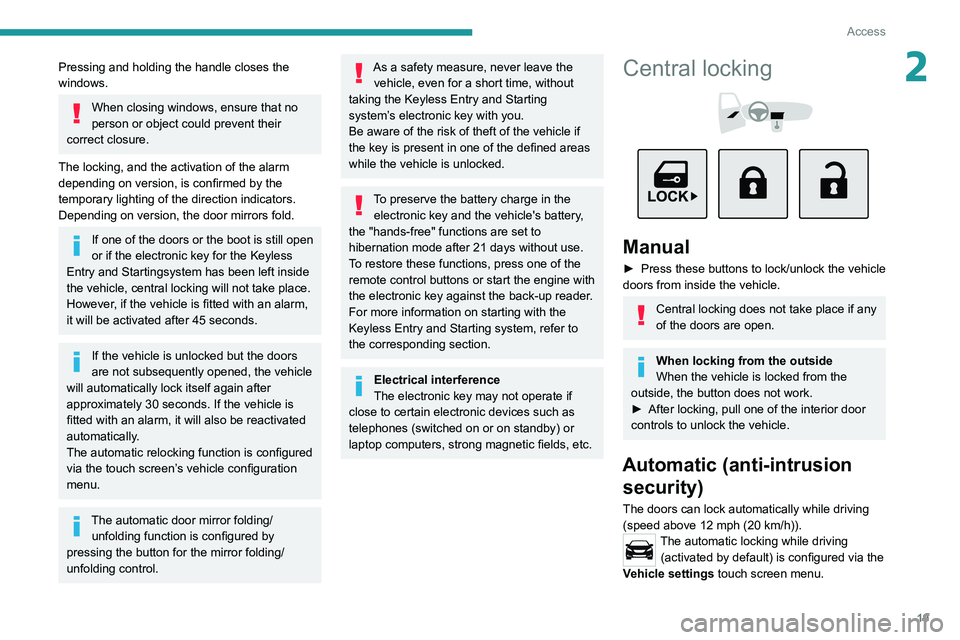
► Press these buttons to lock/unlock the vehicle
doors from inside the vehicle.
Central locking does not take place if any
of the doors are open.
When locking from the outside
When the vehicle is locked from the
outside, the button does not work.
►
After locking, pull one of the interior door
controls to unlock the vehicle.
Automatic (anti-intrusion security)
The doors can lock automatically while driving
(speed above 12 mph (20
km/h)).
The automatic locking while driving (activated by default) is configured via the
Vehicle settings touch screen menu.
Page 24 of 176

22
Access
Tailgate
Safety recommendations
Never drive with the tailgate down.
Ensure that there are no people or
obstacles present (on the ground and higher
up) when unloading.
Never place your hands near the bracket
when handling the tailgate, there is a risk of
trapping your fingers.
The loading bay tailgate is heavy, open it
carefully.
Observe the payload indicated on the
manufacturer's label present on the vehicle.
Regularly check that the suspensions are in
good condition and that the tyres are inflated
to the recommended pressure.
Spread the load evenly in the loading bay.
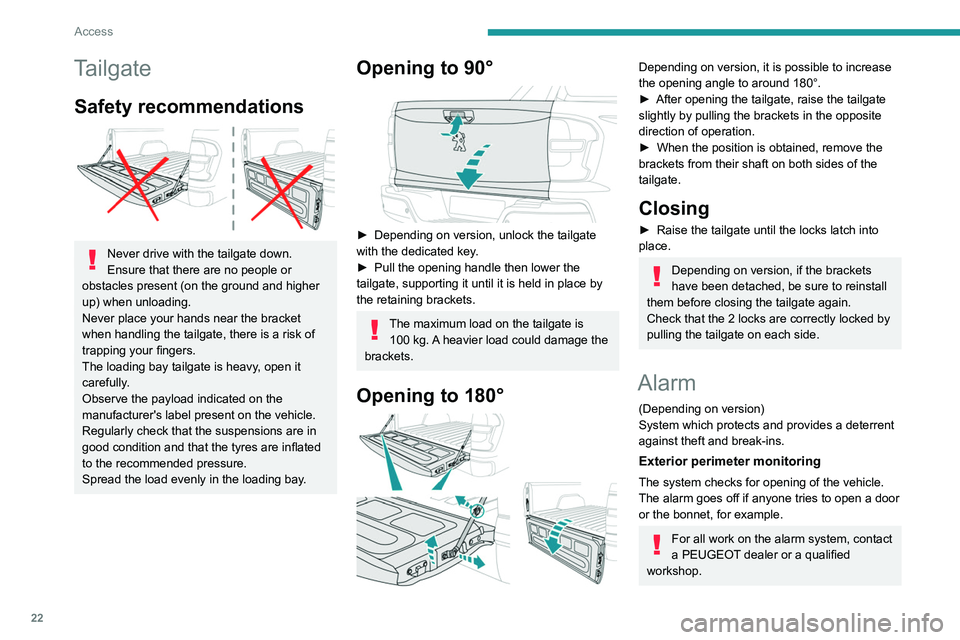
Opening to 90°
► Depending on version, unlock the tailgate
with the dedicated key .
►
Pull the opening handle then lower the
tailgate, supporting it until it is held in place by
the retaining brackets.
The maximum load on the tailgate is 100 kg. A heavier load could damage the
brackets.
Opening to 180°
Depending on version, it is possible to increase
the opening angle to around 180°.
►
After opening the tailgate, raise the tailgate
slightly by pulling the brackets in the opposite
direction of operation.
►
When the position is obtained, remove the
brackets from their shaft on both sides of the
tailgate.
Closing
► Raise the tailgate until the locks latch into
place.
Depending on version, if the brackets
have been detached, be sure to reinstall
them before closing the tailgate again.
Check that the 2 locks are correctly locked by
pulling the tailgate on each side.
Alarm
(Depending on version)
System which protects and provides a deterrent
against theft and break-ins.
Exterior perimeter monitoring
The system checks for opening of the vehicle.
The alarm goes off if anyone tries to open a door
or the bonnet, for example.
For all work on the alarm system, contact
a PEUGEOT dealer or a qualified
workshop.
Locking the vehicle with
alarm system
Activation
► Switch off the ignition and exit the vehicle.
► Lock the vehicle using the remote control or
with the “Keyless Entry and Starting” system.
When the monitoring system is active,
this indicator lamp flashes once per
second on the instrument panel and the direction
indicators flash for about 2 seconds.
The exterior perimeter monitoring is activated
after 5 seconds.
If an opening (door or bonnet) is not
properly closed, the vehicle is not locked,
but the exterior perimeter monitoring will be
activated after 45 seconds.
Deactivation
► Press the remote control unlocking
button.
or
► Unlock the vehicle with the Keyless Entry and
Starting system.
The monitoring system is deactivated: the
indicator lamp on the instrument panel goes off
and the direction indicators flash for about 2
seconds.
If the vehicle automatically locks itself
again (as happens if a door is not
Page 25 of 176

23
Access
2Locking the vehicle with
alarm system
Activation
► Switch off the ignition and exit the vehicle.
► Lock the vehicle using the remote control or
with the “Keyless Entry and Starting” system.
When the monitoring system is active,
this indicator lamp flashes once per
second on the instrument panel and the direction
indicators flash for about 2 seconds.
The exterior perimeter monitoring is activated
after 5 seconds.
If an opening (door or bonnet) is not
properly closed, the vehicle is not locked,
but the exterior perimeter monitoring will be
activated after 45
seconds.
Deactivation
► Press the remote control unlocking
button.
or
►
Unlock the vehicle with the Keyless Entry and
Starting system.
The monitoring system is deactivated: the
indicator lamp on the instrument panel goes off
and the direction indicators flash for about 2
seconds.
If the vehicle automatically locks itself
again (as happens if a door is not
opened within 30 seconds of unlocking), the
monitoring system is automatically
reactivated.
Triggering of the alarm
This is indicated by sounding of the siren
and flashing of the direction indicators for 25
seconds.
The flashing of the direction indicators and of
the alarm warning lamp on the instrument panel
indicate that the alarm was triggered during your
absence. When the vehicle is unlocked using the
remote control or the Keyless Entry and Starting
system, the direction indicators and the warning
lamp on the instrument panel
stop flashing.
Failure of the remote control
To deactivate the monitoring functions:
► Unlock the vehicle using the key in the
driver's door lock.
►
Open the door; the alarm is triggered.
►
Switch on the ignition and start the engine;
this stops the alarm.
The indicator lamp on the
instrument panel goes off.
Locking the vehicle without
activating the alarm
► Lock the vehicle using the key (integral to the
remote control) in the driver's door lock.
Malfunction
When the ignition is switched on, fixed
illumination of the indicator lamp on the
instrument panel indicates a system malfunction.
Have the system checked by a PEUGEOT
dealer or a qualified workshop.
Automatic activation
(Depending on version)
The system is activated automatically 2 minutes
after the last door is closed.
►
T
o avoid triggering the alarm on entering the
vehicle, first press the unlocking button on the
remote control or unlock the vehicle using the
“Keyless Entry and Starting” system.
Deactivating the alarm
► Press the remote control unlocking
button for about 4 seconds. An audible
signal is triggered and the direction indicators
flash 4 times to indicate that the alarm is
deactivated (the indicator lamp on the instrument
panel is deactivated).
►
Reactivate the alarm by pressing the
unlocking button.
Page 46 of 176

44
Lighting and visibility
► Left or right: lower or raise the lighting control
stalk, beyond the point of resistance.
Parking lamps
Vehicle side marking by lighting the sidelamps
on the traffic side only.
►
Depending on version, within one minute
of switching off the ignition, move the lighting
control stalk up or down, depending which side
the traffic is on (for example, when parking on
the left, moving the lighting control stalk upwards
turns on the right-hand sidelamps).
This is confirmed by an audible signal and the
lighting of the corresponding direction indicator
lamp on the instrument panel.
►
T
o switch off the parking lamps, return the
lighting control stalk to the central position.
Headlamp beam height
adjustment
To avoid dazzling other road users, the height
of these headlamp beams should be adjusted
according to the load in the vehicle. 6 positions are available (from
0 for an empty
vehicle to 5 for a heavily loaded vehicle).
Automatic illumination of headlamps
When the ring is at the “AUTO" position and
a low level of ambient light is detected by the
rain/sunshine sensor, the number plate lamps,
sidelamps and dipped beam headlamps are
switched on automatically, without any action on
the part of the driver. They may also come on if
rain is detected, at the same time as automatic
operation of the windscreen wipers.
As soon as the brightness returns to a sufficient
level or after the windscreen wipers are switched
off, the lamps are switched off automatically.
Switching on/off
► To activate it, turn the ring to the "AUTO"
position.
►
T
o deactivate it, turn the ring to any other
position.
When the function is activated or deactivated, a
message is displayed.
Malfunction
In the event of a malfunction of the rain/
sunshine sensor, the vehicle’s lighting
comes on and this warning lamp is displayed in
the instrument panel, accompanied by an
audible signal and/or the display of a message.
Contact a PEUGEOT dealer or a qualified
workshop.
Do not cover the rain/sunshine sensor
located at the top centre of the
windscreen behind the interior rear view
mirror; the associated functions would no
longer be controlled.
In fog or snow, the rain/sunshine sensor
may detect sufficient light. For this
reason, the lighting will not come on
automatically.
The inner surface of the windscreen may become misted up and affect the proper
operation of the rain/sunshine sensor.
In humid and cold weather, demist the
windscreen regularly.
Guide-me-home and
welcome lighting
Guide-me-home lighting
Depending on version, when the light is poor, the
dipped beam headlamps come on automatically
when the ignition is switched off.
Guide-me-home lighting goes off automatically
after a period of time.
You can activate/deactivate this function and adjust the guide-me-home lighting
duration in the Vehicle settings touch screen
menu.
Welcome lighting
When unlocking the vehicle, this system
automatically switches on the dipped beam
headlamps and certain lights in the passenger
compartment.
DOORWhen the front courtesy lamp control is
activated, the front courtesy lamp comes
on automatically when a door is opened.
Depending on version, the front doors have sill
lighting. Each sill light automatically switches on
when a front door is opened to facilitate entry
into the vehicle at night.
You can activate/deactivate this function and adjust the welcome lighting duration
in the Vehicle settings touch screen menu.
Page 47 of 176

45
Lighting and visibility
4Guide-me-home and
welcome lighting
Guide-me-home lighting
Depending on version, when the light is poor, the
dipped beam headlamps come on automatically
when the ignition is switched off.
Guide-me-home lighting goes off automatically
after a period of time.
You can activate/deactivate this function and adjust the guide-me-home lighting
duration in the Vehicle settings
touch screen
menu.
Welcome lighting
When unlocking the vehicle, this system
automatically switches on the dipped beam
headlamps and certain lights in the passenger
compartment.
DOORWhen the front courtesy lamp control is
activated, the front courtesy lamp comes
on automatically when a door is opened.
Depending on version, the front doors have sill
lighting. Each sill light automatically switches on
when a front door is opened to facilitate entry
into the vehicle at night.
You can activate/deactivate this function and adjust the welcome lighting duration
in the Vehicle settings touch screen menu.
Wiper control stalk
Before operating the wipers in wintry
conditions, clear any snow, ice or frost
from the windscreen, and from around the
wiper arms and blades.
Do not operate the wipers on a dry
windscreen. In extremely hot or cold
weather, check that the wiper blades are not
stuck to the windscreen before operating the
wipers.
After using an automatic car wash, you may temporarily notice abnormal noises
and poorer wiping performance.
You do not
need to replace the wiper blades.
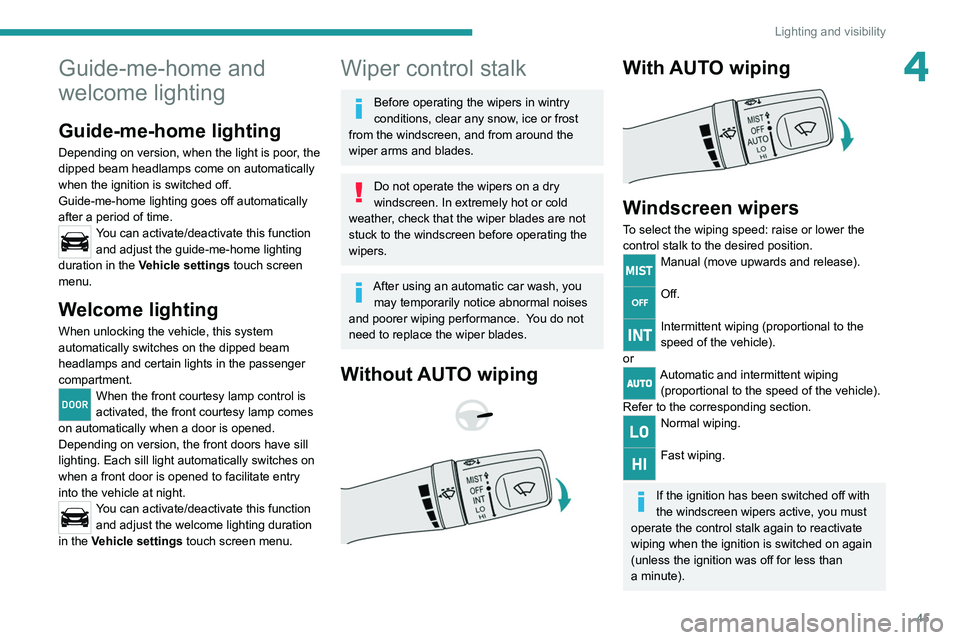
Without AUTO wiping
With AUTO wiping
Windscreen wipers
To select the wiping speed: raise or lower the
control stalk to the desired position.
Manual (move upwards and release).
Off.
Intermittent wiping (proportional to the
speed of the vehicle).
or
Automatic and intermittent wiping (proportional to the speed of the vehicle).
Refer to the corresponding section.
Normal wiping.
Fast wiping.
If the ignition has been switched off with
the windscreen wipers active, you must
operate the control stalk again to reactivate
wiping when the ignition is switched on again
(unless the ignition was off for less than
a
minute).