2021 Peugeot Landtrek change wheel
[x] Cancel search: change wheelPage 8 of 176

6
Eco-driving
Eco-driving
Eco-driving refers to a range of everyday
practices that allow the motorist to optimise their
energy consumption (fuel and/or electricity) and
CO
2 emissions.
Optimise your use of the gearbox
With a manual gearbox, move off gently and
change up promptly. While accelerating, change
up early.
With an automatic gearbox, favour automatic
mode and avoid pressing the accelerator pedal
heavily or suddenly.
With a 4-wheel drive vehicle, favour 2H
transmission (standard) mode over 4H mode.
With a manual gearbox, the gear shift indicator
prompts you to engage the most suitable gear:
whenever this indication is displayed on the
instrument panel, follow it straight away.
Drive smoothly
Maintain a safe distance between vehicles, use
engine braking rather than the brake pedal and
press the accelerator gradually. These practices
help to save on energy consumption, reduce
CO
2 emissions and decrease general traffic
noise.
If the vehicle has the steering-mounted
"CRUISE" control, use cruise control at speeds
above 25
mph (40 km/h) when traffic is flowing
smoothly.
Control the use of electrical equipment
Before moving off, if the passenger compartment
is too warm, ventilate it by opening the windows
and air vents before using the air conditioning.
At speeds above 31
mph (50 km/h), close the
windows and leave the air vents open.
Consider using equipment that can help keep
the temperature in the passenger compartment
down.
Unless automatically regulated, switch off the air
conditioning as soon as the desired temperature
has been reached.
Switch off the demisting and defrosting functions,
if they are not managed automatically.
Switch off the heated seat as soon as possible.
Switch off the headlamps and foglamps when
the visibility conditions do not require their use.
Avoid running the engine before moving off,
particularly in winter (other than in severe wintry
conditions: temperature below -23°C); your
vehicle will warm up much faster while driving.
As a passenger, avoid connecting your
multimedia devices (film, music, video game,
etc.) to help reduce consumption of energy.
Disconnect all portable devices before leaving
the vehicle.
Limit the causes of excess consumption
Spread loads throughout the vehicle.
Limit the loads carried in the vehicle and
minimise wind resistance (roof bars, roof rack,
bicycle carrier, trailer, etc.). Preferably, use a
roof box. Remove roof bars and roof racks after use.
At the end of winter, remove snow tyres and refit
summer tyres.
Comply with the servicing instructions
Check tyre pressures regularly, with the tyres
cold, referring to the label in the door aperture on
the driver's side.
Carry out this check in particular:
–
before a long journey
.
–
at each change of season.
–
after a long period out of use.
Do not forget the spare wheel and, where
applicable, the tyres on your trailer or caravan.
Have your vehicle serviced regularly (engine oil,
oil filter
, air filter, passenger compartment filter,
etc.)and observe the schedule of operations in
the manufacturer's service schedule.
With an HDi Diesel engine, if the particle filter
is faulty, your vehicle will emit pollution. Visit
a PEUGEOT dealer or a qualified workshop
as soon as possible to restore your vehicle's
particulate emissions to legal levels.
When filling the fuel tank, do not continue after
the third cut-out of the nozzle, to avoid overflow.
You will only see the fuel consumption of your
new vehicle settle down to a consistent average
after the first 1,900 miles (3,000 kilometres).
Page 14 of 176
12
Instruments
Total distance recorder
The total distance recorder measures the total
distance travelled by the vehicle since its initial
registration.
With the ignition on, the total distance is
displayed at all times. It remains displayed for
30 seconds after switching off the ignition. It is
displayed when the driver's door is opened, and
when the vehicle is locked or unlocked.
When travelling abroad, you may have to
change the distance units (km or miles):
the road speed must be displayed in the local
country’s official unit (km/h or mph).
The unit is changed via the screen
configuration menu, with the vehicle
stationary.
Instrument panel lighting
dimmer
Instrument panel lighting
dimmer
► In the Settings tab, select
“Brightness”.
► Adjust the brightness, using the knob located
on the right side of the steering wheel.
Touch screen lighting
dimmer
► Press the " Settings" button.
► Select “Display” then “Brightness”.
► Adjust the brightness by moving the
slider
.
The brightness can be set differently for day mode (lighting control stalk in the
"OFF " position) and night mode (lighting
control stalk in any other position).
Trip computer
Displays information related to the current trip
(range, fuel consumption, average speed, etc.).
Display of data on the
instrument panel
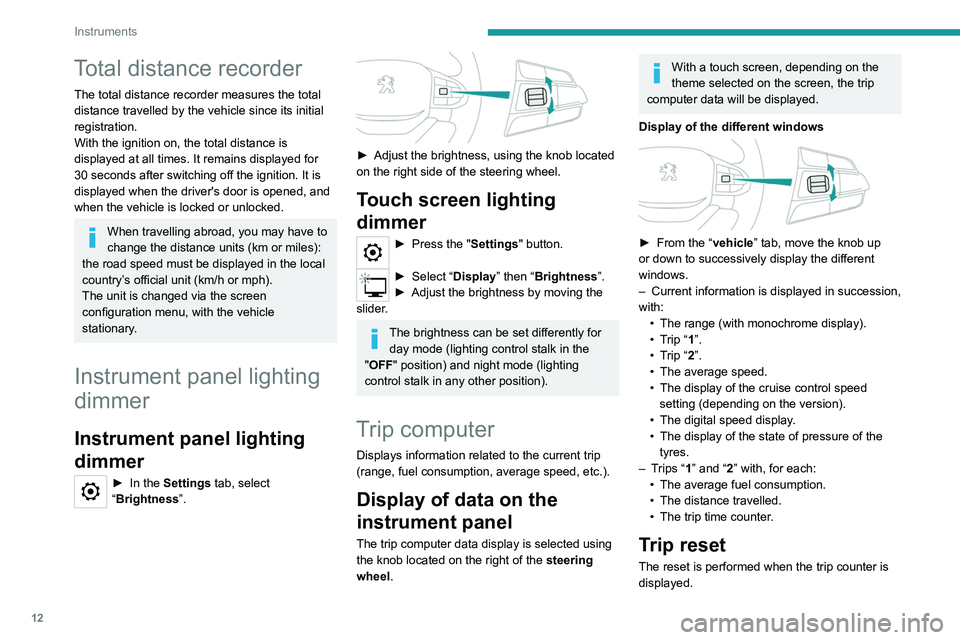
The trip computer data display is selected using
the knob located on the right of the steering
wheel.
With a touch screen, depending on the
theme selected on the screen, the trip
computer data will be displayed.
Display of the different windows
► From the “ vehicle” tab, move the knob up
or down to successively display the different
windows.
–
Current information is displayed in succession,
with: •
The range (with monochrome display).
•
T
rip “1”.
•
T
rip “2”.
•
The average speed.
•
The display of the cruise control speed
setting (depending on the version).
•
The digital speed display
.
•
The display of the state of pressure of the
tyres.
–
T
rips “1” and “2” with, for each:
•
The average fuel consumption.
•
The distance travelled.
•
The trip time counter
.
Trip reset
The reset is performed when the trip counter is
displayed.
Page 15 of 176
13
Instruments
1
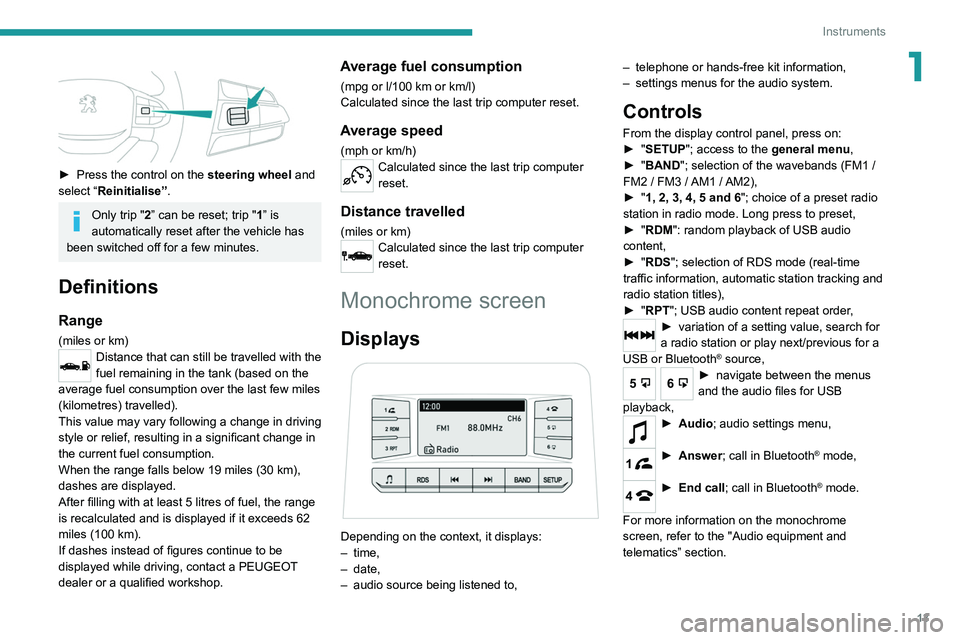
► Press the control on the steering wheel and
select “Reinitialise”.
Only trip "2” can be reset; trip "1” is
automatically reset after the vehicle has
been switched off for a few minutes.
Definitions
Range
(miles or km)Distance that can still be travelled with the
fuel remaining in the tank (based on the
average fuel consumption over the last few miles
(kilometres) travelled).
This value may vary following a change in driving
style or relief, resulting in a significant change in
the current fuel consumption.
When the range falls below 19 miles (30
km),
dashes are displayed.
After filling with at least 5 litres of fuel, the range
is recalculated and is displayed if it exceeds 62
miles (100
km).
If dashes instead of figures continue to be
displayed while driving, contact a PEUGEOT
dealer or a qualified workshop.
Average fuel consumption
(mpg or l/100 km or km/l)
Calculated since the last trip computer reset.
Average speed
(mph or km/h)Calculated since the last trip computer
reset.
Distance travelled
(miles or km)Calculated since the last trip computer
reset.
Monochrome screen
Displays
Depending on the context, it displays:
– time,
–
date,
–
audio source being listened to, –
telephone or hands-free kit information,
–
settings menus for the audio system.
Controls
From the display control panel, press on:
►
" SETUP"; access to the general menu,
►
"
BAND "; selection of the wavebands (FM1
/
FM2
/ FM3 / AM1 / AM2),
►
"
1, 2, 3, 4, 5 and 6"; choice of a preset radio
station in radio mode. Long press to preset,
►
"
RDM": random playback of USB audio
content,
►
"
RDS"; selection of RDS mode (real-time
traffic information, automatic station tracking and
radio station titles),
►
"
RPT"; USB audio content repeat order,
► variation of a setting value, search for
a radio station or play next/previous for a
USB or Bluetooth
® source,
56► navigate between the menus
and the audio files for USB
playback,
► Audio; audio settings men u,
1► Answer; call in Bluetooth® mode,
4► End call; call in Bluetooth® mode.
For more information on the monochrome
screen, refer to the "Audio equipment and
telematics” section.
Page 30 of 176

28
Ease of use and comfort
Manual model
Day/night position
► Pull the lever to change to the anti-dazzle
"night” position.
► Push the lever to change to the normal "day"
position.
Adjustment
► Set the mirror to the normal “day” position.
Rear bench seat
Bench seat with folding cushions (giving access
to storage compartments) and split folding
backrests (2/3-1/3).
► When stationary , pull control A to release the
steering wheel.
►
Adjust the height and reach to suit your
driving position.
►
Push the control to lock the steering wheel.
For safety reasons, these adjustments
must only be carried out with the vehicle
stationary.
Mirrors
Door mirrors
As a safety measure, the mirrors should be adjusted to reduce the "blind spots".
The objects that you see in the mirrors are
in fact closer than they appear. Take this
into account in order to correctly judge the
distance of vehicles approaching from behind.
Manual adjustment
► Directly manouevre the mirror glass to adjust
the mirror concerned.
Electric adjustment
► Move control A to the right or to the left to
select the corresponding mirror.
►
Move control
B in any of the four directions
to adjust.
►
Return control A
to its central position.
Manual folding
The mirrors can be folded manually (parking
obstruction, narrow garage, etc.).
►
T
urn the mirror towards the vehicle.
Electric folding
Depending on equipment, the mirrors can be
folded electrically from the inside, with the
vehicle parked and the ignition on.
► Press control C.
Lock the vehicle from the outside.
Electric unfolding
► From outside: unlock the vehicle.
► From inside: with the ignition on, press
control
C.
Demisting/Defrosting
Demisting/defrosting of the door mirrors
operates by pressing on the rear screen
defrost control.
For more information on Rear screen
demisting/defrosting , refer to the
corresponding section.
Interior rear view mirror
Equipped with an anti-dazzle system, which
darkens the mirror glass and reduces the
nuisance to the driver caused by the sun,
headlamps of other vehicles, etc.
Page 34 of 176

32
Ease of use and comfort
Air conditioning does not operate when the air flow is disabled.
To obtain cool air more quickly, enable interior
air recirculation for a brief period. Then return
to the intake of exterior air.
Switching off the air conditioning may result in
some discomfort (humidity or misting).
Maximum air conditioning
The system automatically adjusts the
temperature setting to the lowest possible, the
air distribution towards the central and side air
vents, the air flow to maximum and activates
recirculation of interior air.
► Press button 9 to activate/deactivate the
function (confirmed by the indicator lamp coming
on/switching off).
Once the function is deactivated, the system
returns to the previous settings.
Dual-zone automatic air
conditioning
1. Temperature.
2. Air flow.
3. Air distribution.
4. Recirculation of interior air.
of interior air recirculation. Risk of misting and
deterioration of the air quality!
If the interior temperature is very high
after the vehicle has stood for a long
time in the sunshine, air the passenger
compartment for a few moments.
Put the air flow control at a setting high
enough to quickly change the air in the
passenger compartment.
Condensation created by the air
conditioning results in a discharge of
water underneath the vehicle. This is perfectly
normal.
Servicing the ventilation and air
conditioning system
►
Ensure that the passenger compartment
filter is in good condition and have the filter
elements replaced regularly
.
We recommend using a composite passenger
compartment filter. Thanks to its special active
additive, this type of filter helps to purify the
air breathed by the occupants and keep the
passenger compartment clean (by reducing
allergic symptoms, unpleasant odours and
greasy deposits).
►
T
o ensure correct operation of the
air conditioning system, have it checked
according to the recommendations in the
Maintenance and Warranty Guide.
Heating
Manual air conditioning
1. Temperature.
2. Air flow/System switch-off.
3. Air distribution.
4. Recirculation of interior air.
5. System switch-off.
6. Front demisting/defrosting on/off.
7. Rear screen demisting/defrosting on/off.
8. Air conditioning on/off.
9. Maximum air conditioning.
The air conditioning system only operates with
the engine running.
Temperature
► Turn the thumbwheel 1 from "Blue" (cold)
to "Red" (hot) to adjust the temperature to your
requirements.
Air flow
► Turn the thumbwheel 2 to obtain a sufficient
air flow to ensure your comfort.
If the air flow control is in
the minimum position (system
deactivated), the temperature in the vehicle
will no longer be controlled. A slight flow of air
can still be felt, due to the forward movement
of the vehicle.
Air distribution
► Press one of the buttons 3 to direct the air
flow in turn towards:
–
windscreen, side windows and footwells,
–
central and side vents,
–
footwells,
–
central vents, side vents and footwells.
The air distribution can be adapted by combining
the corresponding buttons.
Air conditioning on/off
The air conditioning system is designed to
operate effectively in all seasons, with the
windows closed.
It is used to:
–
lower the temperature in summer
,
–
increase the effectiveness of the demisting in
winter
, above 3°C.
►
Press button
8 to activate/deactivate the air
conditioning system.
Page 70 of 176
68
Driving
The mode cannot be changed if the vehicle is in motion.
With a manual gearbox, depress and hold
the clutch pedal to change the mode.
There is a risk of damaging the
transfer box!
While the indicator lamp for the selected
mode is flashing on the instrument panel:
– Do not accelerate.
– Do not release the clutch pedal with a
manual gearbox.
– Do not engage a gear with an automatic
gearbox.
Recommendations
On dry, tarmac or high-speed roads,
mainly use the 2H mode.
In 4L mode, avoid driving at a speed above
25 mph (40 km/h) and stay in a straight line.
Driving in 4H or 4L mode:
– on dry or tarmac road can cause oil
leakage, and seizure or malfunctions of the
transmission - risk of accident or serious
damage!
– on hard roads increases tyre wear and fuel
consumption.
Do not turn the selector suddenly from the 2L
position to 4H or 4L - risk of loss of control of
the vehicle!
Never change from 2H to 4H mode when the
wheels are spinning or skidding.
Mode suitable for normal driving on dry roads
with hard surface; provides economical, quiet
driving and reduces tyre wear.
4H mode: 4-wheel drive at high speed
Mode to be used only for driving on tracks where
the wheels may slip (off-road or on icy, snowy
roads, for example); provides stronger grip than
the 2-wheel drive transmission
mode (2H mode).
4L mode: 4-wheel drive at low speed
Mode to be used for maximum power and
traction; allows you to climb or descend steep
off-road slopes and benefits from maximum
traction (in sand, mud or in a thick layer of snow,
for example).
Associated indicator lamps
4H4H mode activated.
4L4L mode activated.
Transmission malfunction.
Use
Changing from 2H mode to 4H mode
With the speed below 43 mph (70 km/h):
► With the ignition on, turn the selector to the
4H position.
4HThis indicator lamp flashes on the instrument panel, then comes on fixed
when 4H mode is engaged.
If the mode is selected and the speed of the
vehicle is too high, the indicator lamp flashes,
accompanied by an audible signal.
►
Reduce the speed of the vehicle or turn the
selector (when the vehicle is at low speed) to the
2H position then to the 4H position.
If the indicator
lamp is still flashing, with 4H
mode selected, perform the following steps in a
straight line; accelerate, decelerate and shift into
reverse.
If the changeover to 4H mode has been
made when the vehicle is stationary and
the indicator
lamp is flashing, it may be
necessary to drive in forward gear and then in
reverse until the indicator
lamp stops flashing.
Changing from 4H mode to 2H mode
► With the ignition on, turn the selector to the
2H position.
4HThis indicator lamp flashes on the
instrument panel, then goes off when 2H
mode is engaged.
If the indicator
lamp is still flashing, with 2H
mode selected, perform the following steps in a
straight line; accelerate, decelerate and shift into
reverse.
If the indicator
lamp continues to flash, repeat
the steps, turning the steering wheel from right
to left.
During the procedure, it is normal to
experience jerks in the steering.
Changing from 4H mode to 4L mode
and vice versa
► Stop the vehicle (without switching off the
engine).
►
With a
manual gearbox, place the gear lever
in neutral, then fully depress the clutch pedal.
►
With an
automatic gearbox, move the gear
selector into position N.
►
From 4H mode, press the selector then turn
it to the 4L
position, or from 4L mode, turn the
selector to the 4H position.
4L4HChanging from 4H mode to 4L
mode and vice versa: the indicator
lamp for 4H or 4L mode goes off on the
instrument panel and the indicator lamp for 4L or
4H mode flashes then comes on fixed when the
mode is activated.
With a manual gearbox, keep the clutch
pedal depressed until the indicator lamp
on the instrument panel is fixed.
If one of the modes (4H or 4L) is selected, when
driving the vehicle, the indicator lamp for 4H or
4L mode flashes and an audible signal sounds.
►
Return the selector to its original position,
stop the vehicle then restart the operation.
T
o move the vehicle, with the 4L or 4H mode
indicator lamp on fixed:
►
With a
manual gearbox, engage a gear.
►
With an
automatic gearbox, move the gear
selector into position D or R.
Page 71 of 176
69
Driving
6The mode cannot be changed if the vehicle is in motion.
With a manual gearbox, depress and hold
the clutch pedal to change the mode.
There is a risk of damaging the
transfer box!
While the indicator lamp for the selected
mode is flashing on the instrument panel:
–
Do not accelerate.
–
Do not release the clutch pedal with a
manual gearbox
.
–
Do not engage a gear with an automatic
gearbox
.
Recommendations
On dry, tarmac or high-speed roads,
mainly use the 2H mode.
In 4L mode, avoid driving at a speed above
25 mph (40 km/h) and stay in a straight line.
Driving in 4H or 4L mode:
–
on dry or tarmac road can cause oil
leakage, and seizure or malfunctions of the
transmission
- risk of accident or serious
damage!
–
on hard roads increases tyre wear and fuel
consumption.
Do not turn the selector suddenly from the 2L
position to 4H or 4L - risk of loss of control of
the vehicle!
Never change from 2H to 4H mode when the
wheels are spinning or skidding.
Malfunction
4H4LIf one of these indicator lamps is
still flashing, contact a PEUGEOT
dealer or a qualified workshop.
If the vehicle is driven in 4H or 4L mode
for too long, this indicator lamp flashes,
accompanied by an audible signal and the
display of a message indicating that the
transmission oil temperature is too high.
►
Select 2H mode, then wait for the warnings to
disappear before changing the mode.
If the warnings persist, visit a PEUGEOT
dealer
or a qualified workshop.
In cold weather, engaging modes 2H and
4H may not be possible. Reduce the
speed or stop the vehicle to select the mode.
6-speed manual gearbox
Engaging 5th or 6th gear
► Move the gear selector fully to the right to
engage 5th or 6th gear.
Failure to follow this instruction could
cause permanent damage to the gearbox
(inadvertent engagement of 3
rd or 4th gear).
Engaging reverse gear
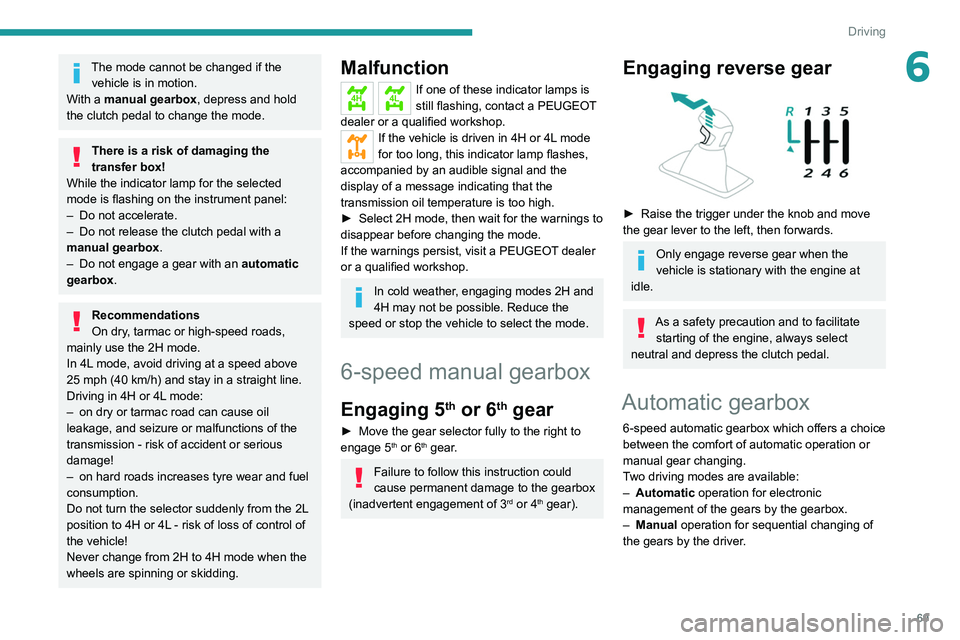
► Raise the trigger under the knob and move
the gear lever to the left, then forwards.
Only engage reverse gear when the
vehicle is stationary with the engine at
idle.
As a safety precaution and to facilitate starting of the engine, always select
neutral and depress the clutch pedal.
Automatic gearbox
6-speed automatic gearbox which offers a choice
between the comfort of automatic operation or
manual gear changing.
Two driving modes are available:
–
Automatic
operation for electronic
management of the gears by the gearbox.
–
Manual
operation for sequential changing of
the gears by the driver.
Page 85 of 176
83
Driving
6
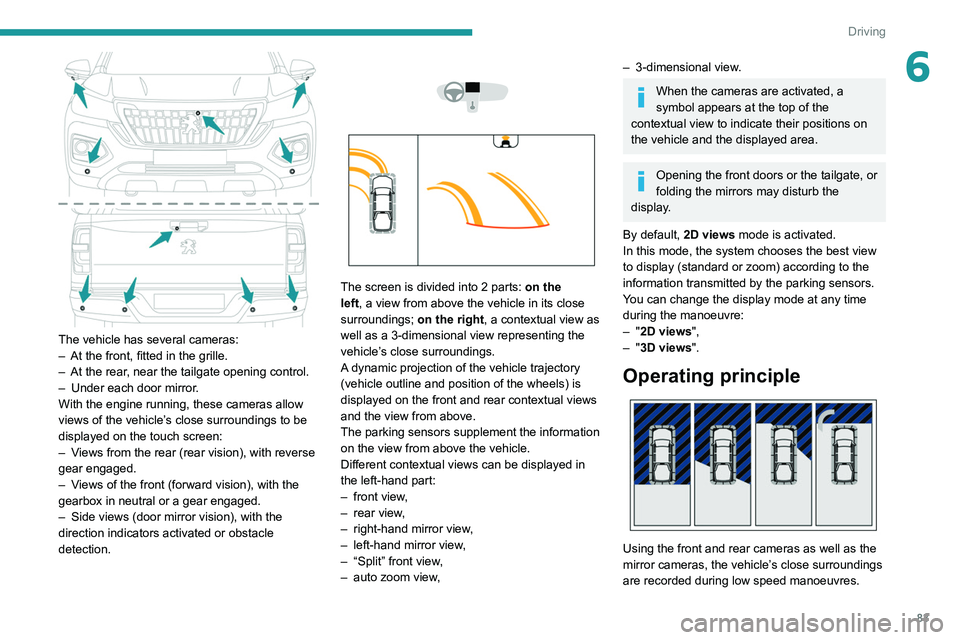
The vehicle has several cameras:
– At the front, fitted in the grille.
–
At the rear
, near the tailgate opening control.
–
Under each door mirror
.
With the engine running, these cameras allow
views of the vehicle’s close surroundings to be
displayed on the touch screen:
–
V
iews from the rear (rear vision), with reverse
gear engaged.
–
V
iews of the front (forward vision), with the
gearbox in neutral or a gear engaged.
–
Side views (door mirror vision), with the
direction indicators activated or obstacle
detection.
The screen is divided into 2 parts: on the
left, a view from above the vehicle in its close
surroundings; on the right, a contextual view as
well as a 3-dimensional view representing the
vehicle’s close surroundings.
A dynamic projection of the vehicle trajectory
(vehicle outline and position of the wheels) is
displayed on the front and rear contextual views
and the view from above.
The parking sensors supplement the information
on the view from above the vehicle.
Different contextual views can be displayed in
the left-hand part:
–
front view
,
–
rear view
,
–
right-hand mirror view
,
–
left-hand mirror view
,
–
“Split” front view
,
–
auto zoom view
,
– 3-dimensional view .
When the cameras are activated, a
symbol appears at the top of the
contextual view to indicate their positions on
the vehicle and the displayed area.
Opening the front doors or the tailgate, or
folding the mirrors may disturb the
display.
By default, 2D views mode is activated.
In this mode, the system chooses the best view
to display (standard or zoom) according to the
information transmitted by the parking sensors.
You can change the display mode at any time
during the manoeuvre:
–
"2D views",
–
"3D views".
Operating principle
Using the front and rear cameras as well as the
mirror cameras, the vehicle’s close surroundings
are recorded during low speed manoeuvres.