2021 Peugeot Landtrek change wheel
[x] Cancel search: change wheelPage 87 of 176
85
Driving
6The guiding line 1 (in red) represents the end of
the bumper.
From the bumper, the thin orange guiding
lines
2 represent the width of the vehicle, with
the mirrors unfolded and the wide orange
guiding
lines 3 represent the trajectory of the
vehicle.
Lines 2 and 3 are oriented according to the
position of the steering wheel.
The system is deactivated:
–
Automatically above about 19 mph (30
km/h)
(the image disappears temporarily from 12 mph
(20
km/h)).
–
By pressing the function activation button
again.
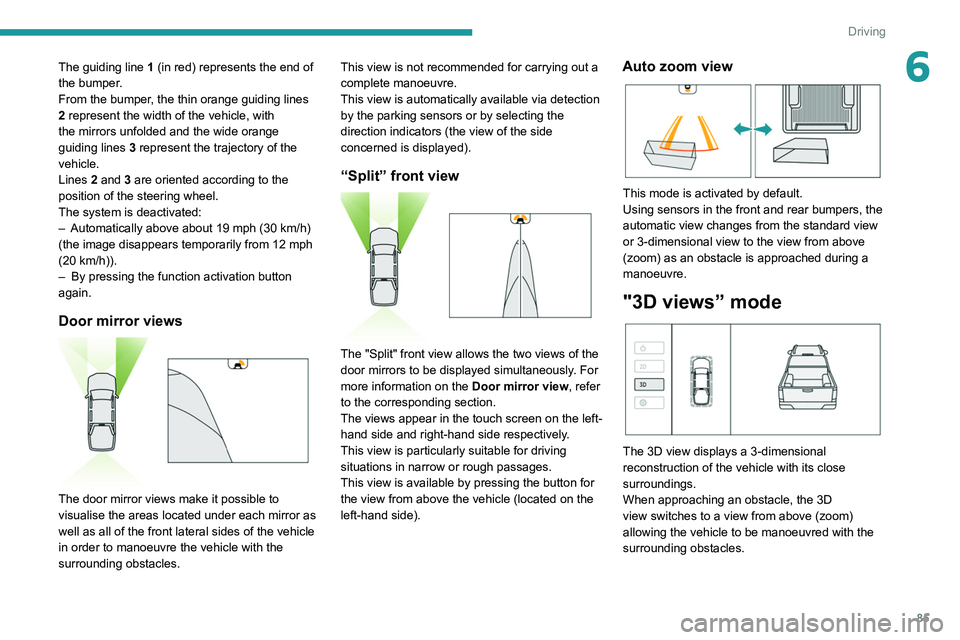
Door mirror views
The door mirror views make it possible to
visualise the areas located under each mirror as
well as all of the front lateral sides of the vehicle
in order to manoeuvre the vehicle with the
surrounding obstacles. This view is not recommended for carrying out a
complete manoeuvre.
This view is automatically available via detection
by the parking sensors or by selecting the
direction indicators (the view of the side
concerned is displayed).
“Split” front view
The "Split" front view allows the two views of the
door mirrors to be displayed simultaneously. For
more information on the
Door mirror view, refer
to the corresponding section.
The views appear in the touch screen on the left-
hand side and right-hand side respectively.
This view is particularly suitable for driving
situations in narrow or rough passages.
This view is available by pressing the button for
the view from above the vehicle (located on the
left-hand side).
Auto zoom view
This mode is activated by default.
Using sensors in the front and rear bumpers, the
automatic view changes from the standard view
or 3-dimensional view to the view from above
(zoom) as an obstacle is approached during a
manoeuvre.
"3D views” mode
The 3D view displays a 3-dimensional
reconstruction of the vehicle with its close
surroundings.
When approaching an obstacle, the 3D
view switches to a view from above (zoom)
allowing the vehicle to be manoeuvred with the
surrounding obstacles.
Page 92 of 176
90
Practical information
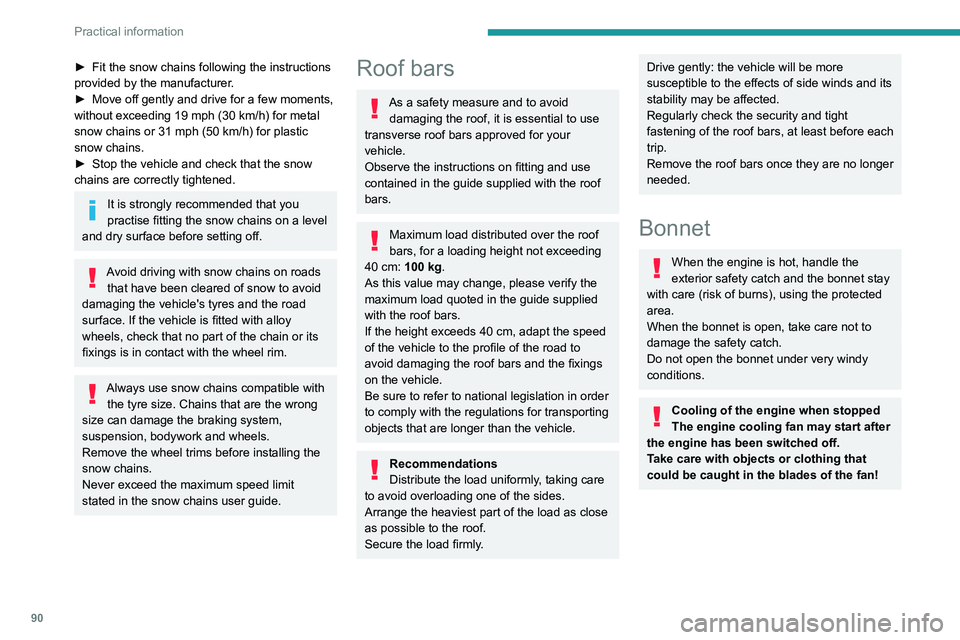
Opening
► Open the left-hand front door.
► Pull the interior release lever, located at the
bottom of the dashboard, towards you.
► Tilt the exterior safety catch to the left and
raise the bonnet.
► Unclip the stay from its housing and place it
in the support slot to hold the bonnet open.
* Depending on engine.
► Fit the snow chains following the instructions
provided by the manufacturer .
►
Move off gently and drive for a few moments,
without exceeding 19
mph (30 km/h) for metal
snow chains or 31 mph (50 km/h) for plastic
snow chains.
►
Stop the vehicle and check that the snow
chains are correctly tightened.
It is strongly recommended that you
practise fitting the snow chains on a level
and dry surface before setting off.
Avoid driving with snow chains on roads that have been cleared of snow to avoid
damaging the vehicle's tyres and the road
surface. If the vehicle is fitted with alloy
wheels, check that no part of the chain or its
fixings is in contact with the wheel rim.
Always use snow chains compatible with the tyre size. Chains that are the wrong
size can damage the braking system,
suspension, bodywork and wheels.
Remove the wheel trims before installing the
snow chains.
Never exceed the maximum speed limit
stated in the snow chains user guide.
Roof bars
As a safety measure and to avoid damaging the roof, it is essential to use
transverse roof bars approved for your
vehicle.
Observe the instructions on fitting and use
contained in the guide supplied with the roof
bars.
Maximum load distributed over the roof
bars, for a loading height not exceeding
40 cm: 100
kg.
As this value may change, please verify the
maximum load quoted in the guide supplied
with the roof bars.
If the height exceeds 40 cm, adapt the speed
of the vehicle to the profile of the road to
avoid damaging the roof bars and the fixings
on the vehicle.
Be sure to refer to national legislation in order
to comply with the regulations for transporting
objects that are longer than the vehicle.
Recommendations
Distribute the load uniformly, taking care
to avoid overloading one of the sides.
Arrange the heaviest part of the load as close
as possible to the roof.
Secure the load firmly.
Drive gently: the vehicle will be more
susceptible to the effects of side winds and its
stability may be affected.
Regularly check the security and tight
fastening of the roof bars, at least before each
trip.
Remove the roof bars once they are no longer
needed.
Bonnet
When the engine is hot, handle the
exterior safety catch and the bonnet stay
with care (risk of burns), using the protected
area.
When the bonnet is open, take care not to
damage the safety catch.
Do not open the bonnet under very windy
conditions.
Cooling of the engine when stopped
The engine cooling fan may start after
the engine has been switched off.
Take care with objects or clothing that
could be caught in the blades of the fan!
Page 97 of 176
95
Practical information
7Particle filter (Diesel)
(Depending on version)The start of clogging of the particle filter is indicated by the temporary lighting of this
warning lamp, accompanied by an alert
message.
As soon as the traffic conditions permit,
regenerate the filter by driving at a speed of at
least 37
mph (60 km/h) until the warning lamp
goes off.
If the warning lamp stays on, this
indicates a low Diesel additive level.
For more information on Checking levels,
refer to the corresponding section.
Following prolonged operation of the
vehicle at very low speed or at idle, you
may, in exceptional circumstances, notice
water vapour coming from the exhaust while
accelerating. These emissions have no
impact on the vehicle’s behaviour and the
environment.
New vehicle
During the first few particle filter
regeneration operations, you may notice a
"burning" smell. This is perfectly normal.
Manual gearbox
The gearbox does not require any maintenance (no oil change).
Automatic gearbox
The gearbox does not require any maintenance (no oil change).
Brake pads
Brake wear depends on the style of
driving, particularly in the case of vehicles
used in town, over short distances. It may be
necessary to have the condition of the brakes
checked, even between vehicle services.
Unless there is a leak in the circuit, a drop in the
brake fluid level indicates that the brake pads
are worn.
After washing the vehicle, moisture, or in wintry conditions, ice can form on the
brake discs and pads: braking efficiency may
be reduced. Gently dab the brakes to dry and
defrost them.
Brake disc wear
For information on checking brake disc
wear, contact a PEUGEOT dealer or a
qualified workshop.
Manual parking brake
If you notice excessive brake lever travel
or decreased effectiveness, the parking
brake must be adjusted, even between two
services.
This system must be checked by a PEUGEOT
dealer or a qualified workshop.
Steering wheel
Play or a loss of precision in the steering
means that this system needs to be
checked.
This system must be checked by a PEUGEOT
dealer or a qualified workshop.
Wheels and tyres
The inflation pressure of all tyres, including the spare wheel, must be
checked on "cold” tyres at least once a month.
The pressures indicated on the tyre pressure
label are valid for "cold" tyres. If you have driven
for more than 10 minutes or more than 6 miles
(10 kilometres) at over 31 mph (50
km/h), add
0.3 bar (30 kPa) to the values indicated on the
label.
The pressure difference between the left-hand
side and right-hand side tyres must not exceed
0.05 bar (5 kPa).
Under-inflation increases energy
consumption. Non-compliant tyre
pressures cause tyres to wear prematurely
and have an adverse effect on the vehicle's
road holding - risk of accident!
Driving with worn or damaged tyres reduces the
braking and road holding performance of the
vehicle. Regularly check the condition of the
tyres (tread and sidewalls) and rims as well as
the presence of the valve caps.
Page 108 of 176
106
In the event of a breakdown
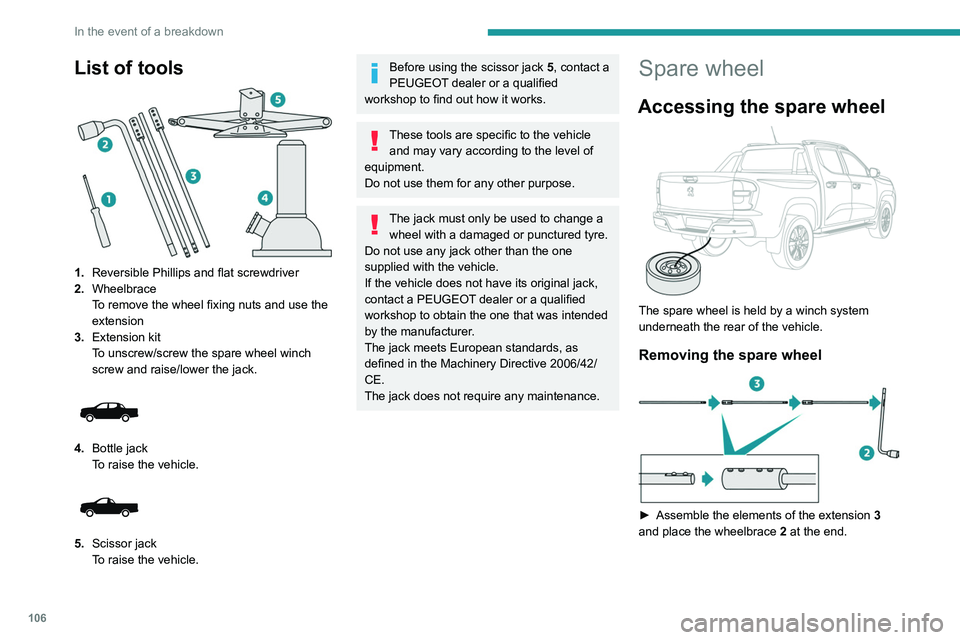
List of tools
1.Reversible Phillips and flat screwdriver
2. Wheelbrace
To remove the wheel fixing nuts and use the
extension
3. Extension kit
To unscrew/screw the spare wheel winch
screw and raise/lower the jack.
4.Bottle jack
To raise the vehicle.
5.Scissor jack
To raise the vehicle.
Before using the scissor jack 5, contact a
PEUGEOT dealer or a qualified
workshop to find out how it works.
These tools are specific to the vehicle and may vary according to the level of
equipment.
Do not use them for any other purpose.
The jack must only be used to change a wheel with a damaged or punctured tyre.
Do not use any jack other than the one
supplied with the vehicle.
If the vehicle does not have its original jack,
contact a PEUGEOT dealer or a qualified
workshop to obtain the one that was intended
by the manufacturer.
The jack meets European standards, as
defined in the Machinery Directive 2006/42/
CE.
The jack does not require any maintenance.
Spare wheel
Accessing the spare wheel
The spare wheel is held by a winch system
underneath the rear of the vehicle.
Removing the spare wheel
► Assemble the elements of the extension 3
and place the wheelbrace 2 at the end.
Page 110 of 176

108
In the event of a breakdown
Ensure that the occupants have left the
vehicle and are located in a safe place.
Never start the engine while the vehicle is on
the jack.
Never go underneath a vehicle raised using a
jack; use an axle stand.
Always place a chock against the wheel
diagonally opposite to the one being replaced.
► Loosen the nuts using the wheelbrace 2 .
Front
Rear
► Place the foot of jack 4 on the ground and
ensure that it is directly below the front A or
rear
B jacking point on the underbody, whichever
is closest to the wheel to be changed.
► Extend the jack 4, using the knob integrated
to the jack, until its head comes into contact
with the jacking point
A
or B, whichever is being
used; the vehicle contact area
A
or B must be
perfectly flat against the head of the jack.
►
Raise the vehicle, using the extension 3
and
the wheelbrace 2, until there is sufficient space
between the wheel and the ground, to then
easily fit the spare (not punctured) wheel.
Page 133 of 176

131
Peugeot Connect 10" Touchscreen
11Peugeot Connect 10"
Touchscreen
GPS navigation -
Applications - Multimedia
audio system - Bluetooth
®
telephone
The functions and settings described
vary according to the vehicle version and
configuration, as well as the country of sale.
For safety reasons and because they
require sustained attention by the driver,
the following operations must be carried out
with the vehicle stationary and the ignition
on:
–
Pairing the smartphone with the system via
Bluetooth.
–
Using the smartphone.
– Connection to the CarPlay®, MirrorLinkTM
or Android Auto applications (certain
applications interrupt their display while the
vehicle is moving).
–
W
atching a video (the video stops when the
vehicle starts to move again).
–
Changing the system settings and
configuration.
To perform system and map updates, visit a Peugeot dealer.
First steps
With the engine running, a short press
mutes the sound. A long press (3 sec)
puts the system on standby. A very long press
(10 sec) restarts the system.
With the ignition off, a short press turns the
system on.
Increase or decrease the volume using the
thumbwheel.
Use the main menu buttons on the touch screen
to access the sub-menus.
Press this button to return to the menu
carousel.
Slide your finger on the touch screen from
top to bottom to display a set of quick
settings (Bluetooth
® connection, volume,
brightness) and notifications.
Press this button to directly access the
quick settings (depending on equipment).
Press the back arrow to go back a level.
The touch screen is of the "capacitive" type.
To clean the screen, use a soft, non-abrasive
cloth (e.g. spectacles cloth) with no additional
product.
Do not use sharp objects on the screen.
Do not touch the screen with wet hands.
Steering mounted controls
Short press: change of multimedia
source.
Long press: access to smartphone voice
commands via the system (available only via the
CarPlay
® or Android Auto).Decrease volume.
Increase volume.
Telephone: refuse an incoming call, hang
up a call in progress.
Radio: short press, access to the previous
memorised station; long press, automatic search
for the previous station.
Media: short press, access to the previous track/
video; long press, fast-rewind in the track/video.
Telephone: answering an incoming call.
Radio: access to the next memorised
station; long press, automatic search for the next
station.
Page 143 of 176
141
Alphabetical index
Mountings, ISOFIX 59
N
Normal mode 71
O
Obstacle detection 80
Off-road camera
82
Oil change
92, 99
Oil consumption
92
OIl, engine
92, 99
On-board tools
105–106
Opening the bonnet
90–91
Opening the boot
18
Opening the doors
18, 21
Opening the windows
17
Over-speed buzzer
76
P
Pads, brake 95
Paint
103, 125
Paint colour code
125
Parking brake
66, 95
Parking sensors, audible and visual
80
Parking sensors, front
81
Parking sensors, rear
80
Plates, identification 125
Player, Apple®
129
Player, USB
129, 133–134
Port, USB
36, 129, 133–135
Pressures, tyres
95, 126
Pre-tensioning seat belts
54
Priming pump
105
Priming the fuel system
105
Protecting children
55–59
Puncture
106
R
Radio 128, 133
Reading lamps
38
Rear differential locking
67
Rear screen, demisting
35
Recharging the battery
11 8
Recirculation, air
34
Recovery
119, 121
Regeneration of the particle filter
95
Reinitialisation of the under-inflation
detection system
74
Reinitialising the remote control
21
Reminder, key in ignition
64
Reminder, lighting on
43
Remote control
16–20
Removing a wheel
107–109
Removing the mat
37
Replacing bulbs
110, 112
Replacing fuses
113–114
Replacing the air filter 94, 99
Replacing the battery
98
Replacing the Diesel filter
100
Replacing the oil filter
94, 100
Replacing the passenger compartment
filter
94, 98
Reservoir, screenwash
94
Reset trip
12
Rev counter
7
Reversing camera
75, 81
Reversing lamps
11 2
Roof bars
90
Running out of fuel (Diesel)
105
S
Safety, children 55–59
Saturation of the particle filter (Diesel)
95
Screen, monochrome
13
Screenwash
46
Screenwash, front
46
Seat angle
26
Seat belts
52–54
Seat belts, rear
53
Seat, bench front, 2-seat
26–27, 53
Seat, rear bench
29–30
Seats, electric
26
Seats, front
25–26
Seats, rear
29–30, 57
Selector, gear
70
Sensors (warnings)
75