2021 Peugeot 308 ESP
[x] Cancel search: ESPPage 47 of 244

45
Ease of use and comfort
3Press the "Air conditioning" menu
button to display the air conditioning
system controls page.
1. Temperature.
2. Air flow.
3. Air distribution.
4. Air conditioning on/off.
5. Automatic comfort programme.
6. Access to the second page.
Temperature adjustment
The driver and front passenger can each set the
temperature.
►
Press one of the buttons
1 to increase or
decrease the air flow.
The value displayed corresponds to a level of
comfort and not to a precise temperature.
It is recommended that you avoid a difference
between the left and right setting of more than 3.
Automatic comfort programme
► Press the button 5 to activate/deactivate the
automatic mode of the air conditioning system.
When the indicator lamp in the button is on, the
air conditioning system operates automatically:
the system manages the temperature, air
flow and air distribution in the passenger
compartment in an optimum way depending on
the comfort level you have selected.
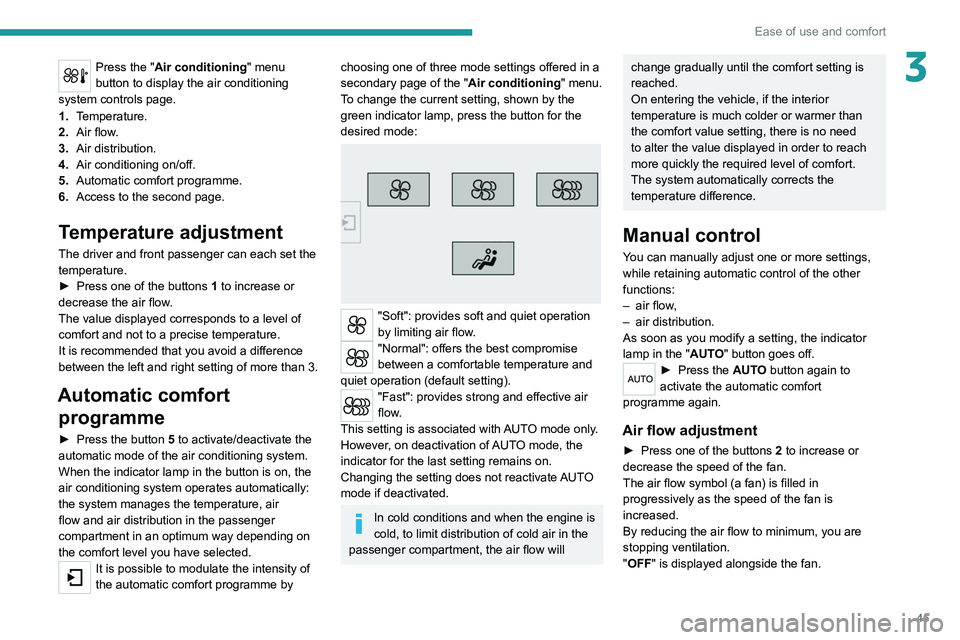
It is possible to modulate the intensity of
the automatic comfort programme by
choosing one of three mode settings offered in a
secondary page of the " Air conditioning" menu.
To change the current setting, shown by the
green indicator lamp, press the button for the
desired mode:
"Soft": provides soft and quiet operation
by limiting air flow.
"Normal": offers the best compromise
between a comfortable temperature and
quiet operation (default setting).
"Fast": provides strong and effective air
flow.
This setting is associated with AUTO mode only.
However, on deactivation of AUTO mode, the
indicator for the last setting remains on.
Changing the setting does not reactivate AUTO
mode if deactivated.
In cold conditions and when the engine is
cold, to limit distribution of cold air in the
passenger compartment, the air flow will
change gradually until the comfort setting is
reached.
On entering the vehicle, if the interior
temperature is much colder or warmer than
the comfort value setting, there is no need
to alter the value displayed in order to reach
more quickly the required level of comfort.
The system automatically corrects the
temperature difference.
Manual control
You can manually adjust one or more settings,
while retaining automatic control of the other
functions:
–
air flow
,
–
air distribution.
As soon as you modify a setting, the indicator
lamp in the "
AUTO" button goes off.
► Press the AUTO button again to
activate the automatic comfort
programme again.
Air flow adjustment
► Press one of the buttons 2 to increase or
decrease the speed of the fan.
The air flow symbol (a fan) is filled in
progressively as the speed of the fan is
increased.
By reducing the air flow to minimum, you are
stopping ventilation.
"OFF " is displayed alongside the fan.
Page 50 of 244

48
Ease of use and comfort
Closing
► Press the front of the control without going
beyond the point of resistance.
The blind stops when your release the control.
You can also press or pull the control beyond the point of resistance: the blind
opens or closes completely after you release
the control.
Operating the control again stops the
movement of the blind.
Anti-pinch
If the blind encounters an obstacle,
you should reverse the movement. Use the
control to do this.
Remember to always switch off the ignition
when leaving the vehicle, even for a short
time.
When operating the control, the driver should
ensure that there is nothing preventing
movement of the blind.
The driver must ensure that passengers use
the blind correctly.
Be aware of children when operating the
blind.
Courtesy lamps
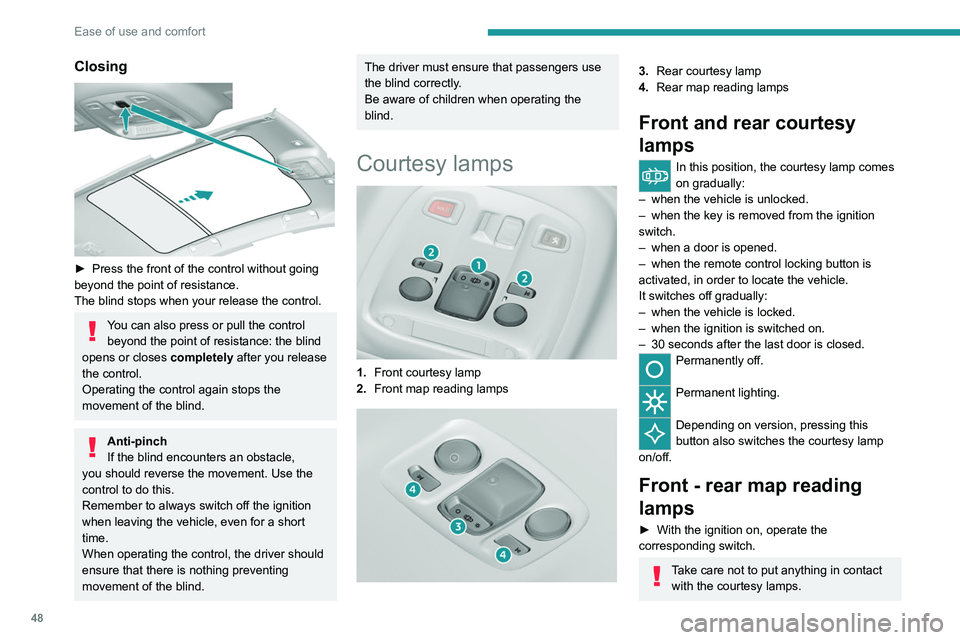
1. Front courtesy lamp
2. Front map reading lamps
3.Rear courtesy lamp
4. Rear map reading lamps
Front and rear courtesy
lamps
In this position, the courtesy lamp comes
on gradually:
–
when the vehicle is unlocked.
–
when the key is removed from the ignition
switch.
–
when a door is opened.
–
when the remote control locking button is
activated, in order to locate the vehicle.
It switches off gradually:
–
when the vehicle is locked.
–
when the ignition is switched on.
–
30 seconds after the last door is closed.
Permanently off.
Permanent lighting.
Depending on version, pressing this
button also switches the courtesy lamp
on/off.
Front - rear map reading
lamps
► With the ignition on, operate the
corresponding switch.
Take care not to put anything in contact with the courtesy lamps.
In "permanent lighting" mode, the lighting
time varies according to the
circumstances:
– when the ignition is off, approximately ten
minutes,
– in energy saving mode, approximately thirty
seconds,
– with the engine running, unlimited.
Footwell lighting
Switching on
Its operation is the same as the courtesy lamps.
The lamps come on when one of the doors is
opened.
Page 52 of 244

50
Lighting and visibility
Exterior lighting control
stalk
Main lighting
Lamps off (ignition off)/
Daytime running lamps (engine running)
Automatic illumination of lamps/daytime running lamps
Sidelamps only
Dipped or main beam headlamps
Dipping the headlamps
Pull the stalk to switch the lighting between
dipped and main beam headlights.
In lighting off and sidelamps modes, the driver
can switch on the main beam headlamps
temporarily ("headlamp flash") by pulling on the
stalk.
Display
Illumination of the corresponding indicator lamp
in the instrument panel confirms that the lighting
selected is on.
Foglamps
In good or rainy weather, by both day
and night, the front foglamps and the rear
foglamps are prohibited. In these situations,
the power of their beams may dazzle other
drivers. They should only be used in fog or
falling snow.
In these weather conditions, it is your
responsibility to switch on the foglamps and
dipped headlamps manually as the sunshine
sensor may detect sufficient light.
Switch off the front and rear foglamps when
they are no longer necessary.
Rear foglamp
It only works if the dipped or main beam
headlamps are on.
► Rotate the ring forwards/backwards to turn
it on/off.
When the lighting is switched off automatically
("
AUTO" position), the foglamp is switched off.
Front foglamps/Rear
foglamps
They operate with the sidelamps, dipped or main beam headlamps on.
► Rotate the ring forwards:
• once to switch on the front foglamps,
•
a second time to switch on the rear
foglamps.
►
Rotate
the ring backwards:
•
once to switch off the rear foglamps,
•
a second time to switch off the front
foglamps.
If the lighting is switched off automatically (with
AUT
O model) or the dipped beam headlamps
are switched off manually, the foglamps and
sidelamps remain on.
►
Rotate the ring backwards to switch the
foglamps off; the sidelamps will then switch off.
Never look too closely at the luminous
beam of “Full LED” headlamps: risk of
serious eye injury.
In some weather conditions (e.g. low
temperature or humidity), the presence
of misting on the internal surface of the glass
of the headlamps and rear lamps is normal; it
disappears after the lamps have been on for a
few minutes.
Travelling abroad
Halogen headlamps
If using your vehicle in a country that drives
on the other side of the road to the one in
which your vehicle was sold, the headlamps
must be adjusted to avoid dazzling oncoming
drivers.
Contact a PEUGEOT dealer or a qualified
workshop.
LED lamps
The design of the front LED headlamps
allows driving without modification in a
country that drives on the other side of the
road to the country in which your vehicle was
sold.
Switching off the lights when the
ignition is switched off
On switching off the ignition, all of the lights
turn off immediately, except for dipped
beam if automatic guide-me-home lighting is
activated.
Page 54 of 244

52
Lighting and visibility
windscreen behind the interior rear view
mirror; the associated functions would no
longer be controlled.
In fog or snow, the rain/sunshine sensor
may detect sufficient light. For this
reason, the lighting will not come on
automatically.
The inner surface of the windscreen may become misted up and affect the proper
operation of the rain/sunshine sensor.
In humid and cold weather, demist the
windscreen regularly.
Automatic headlamp dipping
When the ring is in the "AUTO” position and the
function is activated on the touch screen, this
system automatically switches between dipped
and main beam headlamps depending on light
and traffic conditions, using a camera located at
the top of the windscreen.
This system is a driving aid.
The driver remains responsible for
the vehicle's lighting, its correct use in the
prevailing light, visibility and traffic conditions,
and for compliance with driving and vehicle
regulations.
The system becomes operational when the vehicle exceeds 16 mph (25 km/h).
When the speed falls below 9 mph (15 km/h),
the function is no longer operational.
Activation/Deactivation
It is set via the Driving / Vehicle touch
screen menu.
The state of the system stays in the memory
when switching off the ignition.
Operation
If the ambient light level is sufficient and/or the
traffic conditions do not allow the main beam
headlamps to be lit:
– The dipped beam head lamps
remain lit. These indicator lamps
come on on the instrument panel.
If the ambient light level is very low and traffic
conditions permit:
– The main beam headla mps
come on automatically. These
indicator lamps come on on the instrument
panel.
The function is deactivated if the fog lamps are
switched on or the system detects dense fog.
When the fog lamps are switched off or the
vehicle leaves the area of dense fog, the function
is automatically reactivated.
This indicator lamp goes out when the function is deactivated.
Pause
If the situation requires a change of headlamp
beam, the driver can take over at any time.
►
A
"headlamp flash" pauses the function:
•
if the "AUT
O" and "Dipped beam" indicator
lamps were on, the system changes to main
beam,
•
if the "AUT
O" and "Main beam" indicator
lamps were on, the system changes to
dipped beam.
To reactivate the system, flash the headlamps
again.
The system may suffer interference or not work correctly:
– under conditions of poor visibility (snow,
heavy rain, etc.),
– if the windscreen in front of the camera is
dirty, misted or obscured (for example, by a
sticker, etc.),
– if the vehicle is facing highly reflective
signs.
When the system detects thick fog, it
temporarily deactivates the function.
The system is not able to detect:
– road users that do not have their own
lighting, such as pedestrians,
– vehicles whose lighting is obscured (for
example: vehicles running behind a safety
barrier on a motorway),
– vehicles at the top or bottom of a steep
slope, on winding roads, on crossroads.
Clean the windscreen regularly,
particularly the area in front of the
camera.
The internal surface of the windscreen can
also become misted around the camera.
In humid and cold weather, demist the
windscreen regularly.
Do not allow snow to accumulate on the
bonnet or roof of the vehicle as this could
obstruct the detection camera.
Page 56 of 244

54
Lighting and visibility
Three flashes
► Press briefly upwards or downwards, without
going beyond the point of resistance; the
direction indicators will flash 3 times.
Headlamp beam height
adjustment
Manual headlamp
adjustment
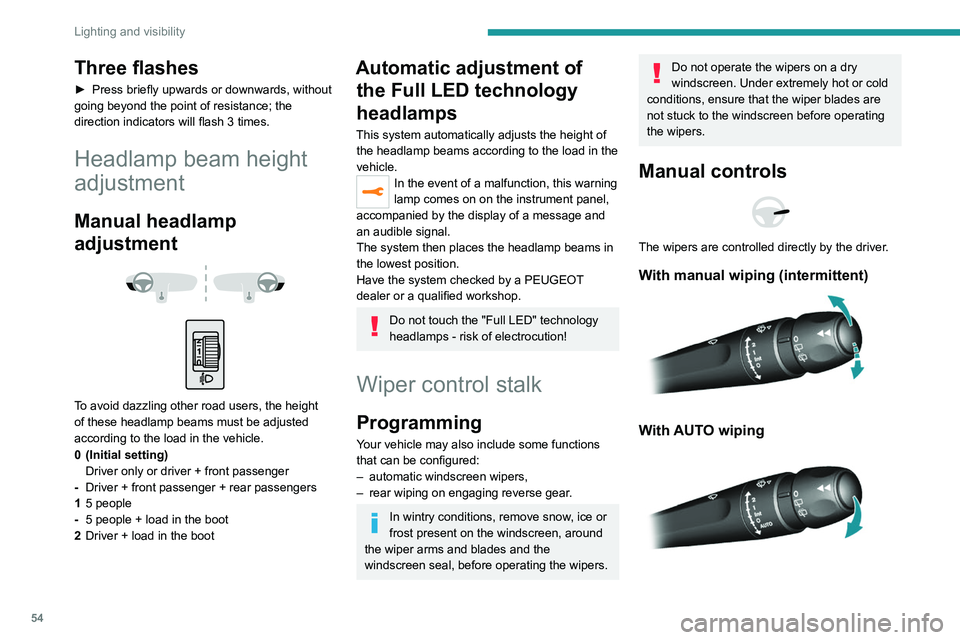
To avoid dazzling other road users, the height
of these headlamp beams must be adjusted
according to the load in the vehicle.
0 (Initial setting) Driver only or driver + front passenger
- Driver + front passenger + rear passengers
1 5 people
- 5 people + load in the boot
2 Driver + load in the boot
Automatic adjustment of
the Full LED technology
headlamps
This system automatically adjusts the height of
the headlamp beams according to the load in the
vehicle.
In the event of a malfunction, this warning
lamp comes on on the instrument panel,
accompanied by the display of a message and
an audible signal.
The system then places the headlamp beams in
the lowest position.
Have the system checked by a PEUGEOT
dealer or a qualified workshop.
Do not touch the "Full LED" technology
headlamps - risk of electrocution!
Wiper control stalk
Programming
Your vehicle may also include some functions
that can be configured:
–
automatic windscreen wipers,
–
rear wiping on engaging reverse gear
.
In wintry conditions, remove snow, ice or
frost present on the windscreen, around
the wiper arms and blades and the
windscreen seal, before operating the wipers.
Do not operate the wipers on a dry
windscreen. Under extremely hot or cold
conditions, ensure that the wiper blades are
not stuck to the windscreen before operating
the wipers.
Manual controls
The wipers are controlled directly by the driver.
With manual wiping (intermittent)
With AUTO wiping
Windscreen wipers
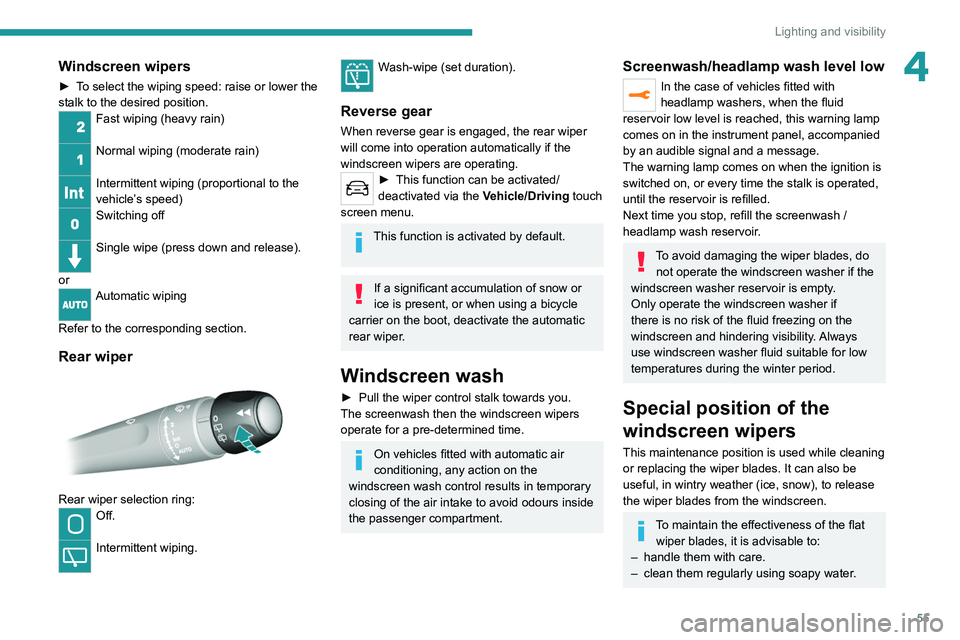
► To select the wiping speed: raise or lower the
stalk to the desired position.
Fast wiping (heavy rain)
Normal wiping (moderate rain)
Intermittent wiping (proportional to the
vehicle’s speed)
Switching off
Single wipe (press down and release).
or
Automatic wiping
Refer to the corresponding section.
Rear wiper
Rear wiper selection ring:Off.
Intermittent wiping.
Page 57 of 244

55
Lighting and visibility
4Windscreen wipers
► To select the wiping speed: raise or lower the
stalk to the desired position.
Fast wiping (heavy rain)
Normal wiping (moderate rain)
Intermittent wiping (proportional to the
vehicle’s speed)
Switching off
Single wipe (press down and release).
or
Automatic wiping
Refer to the corresponding section.
Rear wiper
Rear wiper selection ring:Off.
Intermittent wiping.
Wash-wipe (set duration).
Reverse gear
When reverse gear is engaged, the rear wiper
will come into operation automatically if the
windscreen wipers are operating.
► This function can be activated/
deactivated via the V
ehicle/Driving touch
screen menu.
This function is activated by default.
If a significant accumulation of snow or
ice is present, or when using a bicycle
carrier on the boot, deactivate the automatic
rear wiper.
Windscreen wash
► Pull the wiper control stalk towards you.
The screenwash then the windscreen wipers
operate for a pre-determined time.
On vehicles fitted with automatic air
conditioning, any action on the
windscreen wash control results in temporary
closing of the air intake to avoid odours inside
the passenger compartment.
Screenwash/headlamp wash level low
In the case of vehicles fitted with
headlamp washers, when the fluid
reservoir low level is reached, this warning lamp
comes on in the instrument panel, accompanied
by an audible signal and a message.
The warning lamp comes on when the ignition is
switched on, or every time the stalk is operated,
until the reservoir is refilled.
Next time you stop, refill the screenwash /
headlamp wash reservoir.
To avoid damaging the wiper blades, do not operate the windscreen washer if the
windscreen washer reservoir is empty.
Only operate the windscreen washer if
there is no risk of the fluid freezing on the
windscreen and hindering visibility. Always
use windscreen washer fluid suitable for low
temperatures during the winter period.
Special position of the
windscreen wipers
This maintenance position is used while cleaning
or replacing the wiper blades. It can also be
useful, in wintry weather (ice, snow), to release
the wiper blades from the windscreen.
To maintain the effectiveness of the flat wiper blades, it is advisable to:
–
handle them with care.
–
clean them regularly using soapy water
.
Page 60 of 244

58
Safety
General safety
recommendations
Do not remove the labels attached in
different places on your vehicle. They
include safety warnings as well as
identification information for the vehicle.
For all work on your vehicle, use a
qualified workshop that has the technical
information, skills and equipment required, all
of which a PEUGEOT dealer is able to
provide.
Depending on country regulations,
certain safety equipment may be
mandatory: high visibility safety vests,
warning triangles, breathalysers, spare bulbs,
spare fuses, fire extinguisher, first aid kit, mud
flaps at the rear of the vehicle, etc.
Installing electrical accessories:
– The fitting of electrical equipment or
accessories not approved by PEUGEOT
may
cause excessive current consumption and
faults and failures with the electrical system
of your vehicle. Contact a PEUGEOT dealer
for information on the range of approved
accessories.
–
As a safety measure, access to the
diagnostic socket, used for the vehicle's
electronic systems, is reserved strictly for
PEUGEOT dealers or qualified workshops,
equipped with the special tools required (risk
of malfunctions of the vehicle's electronic
systems that could cause breakdowns or
serious accidents). The Manufacturer cannot
be held responsible if this advice is not
followed.
–
Any modification or adaptation not intended
or authorised by PEUGEOT
or carried out
without meeting the technical requirements
defined by the Manufacturer will result in the
suspension of the commercial warranty.
Installation of accessory radio
communication transmitters
Before installing a radio communication
transmitter with an external aerial, you must
without fail contact a PEUGEOT dealer for
the specification of transmitters which can
be fitted (frequency, maximum power, aerial
position, specific installation requirements),
in line with the Vehicle Electromagnetic
Compatibility Directive (2004/104/EC).
Declarations of conformity for radio
equipment
The relevant certificates are available on the
http://public.servicebox.peugeot.com/APddb/
website.
Hazard warning lamps
► Pressing the red button causes all the
direction indicators to flash.
They can operate with the ignition off.
Automatic operation of hazard warning lamps
When braking in an emergency, depending on
the rate of deceleration, the hazard warning
lamps come on automatically. They switch off
automatically when you next accelerate.
It is also possible to switch them off by pressing
the button.
Emergency or assistance
call (type 1)
Peugeot Connect SOS
In an emergency, press button 1 for more than 2
seconds.
The lighting of the indicator lamp and a voice
message confirm that the call has been made to
the “Peugeot Connect SOS” call centre.*.
Pressing again immediately cancels the request.
The lamp remains lit until the call is ended.
"Peugeot Connect SOS" immediately geolocates
your vehicle and contacts you in your
language**, and - if necessary - requests that
relevant emergency services be dispatched**.
* In accordance with the general conditions of use of the service, available from dealers an\
d subject to technological and technical limitations.
** Depending on the geographic coverage of "Peugeot Connect SOS", "Peugeot Connect Assistance" and the official national language chosen by the
owner of the vehicle.
The list of countries covered and PEUGEOT CONNECT services provided is available from dealers or on the website for your \
country.
*** Depending on the geographic coverage of "Peugeot Connect SOS", "Peugeot Connect Assistance" and the official national language chosen by the
owner of the vehicle.
The list of countries covered and PEUGEOT CONNECT services provided is available from dealers or on the website for your \
country.
Page 65 of 244

63
Safety
5With GTi version
► Press this button to deactivate DSC
and ASR.
Except GT
i version
► Select " Traction control " from the
"Driving functions " menu on the touch
screen to deactivate ASR.
Deactivation is confirmed when this
indicator lamp is displayed on the
instrument panel accompanied by a message
and, depending on version, the lighting of the
indicator lamp in the button.
Reactivate the system(s) when normal grip is
restored.
This/these system(s) is/are reactivated
automatically each time the ignition is switched
off or above 31 mph (50
km/h) (except GTi
version).
Below 31 mph (50
km/h), reactivate them
manually.
With GTi version
► Press this button again to reactivate
DSC and ASR.
Except GTi version
► Select Traction control from the
Driving functions menu on the touch
screen to reactivate ASR.
Malfunction
In the event of a malfunction of these
systems, this warning lamp comes on,
accompanied by the display of a message and
an audible signal.
Contact a PEUGEOT dealer or a qualified
workshop to have the systems checked.
ASR / DSC
These systems enhance safety during
normal driving, but should not encourage
the driver to take extra risks or drive at high
speed.
It is in conditions of reduced grip (rain, snow,
ice) that the risk of loss of grip increases. It
is therefore important for your safety to keep
these systems activated in all conditions, and
particularly in difficult conditions.
Correct operation of these systems depends
on compliance with the manufacturer's
recommendations relating to the wheels
(tyres and rims), braking and electronic
components, as well as the assembly and
repair procedures used by PEUGEOT
dealers.
The use of snow tyres is recommended, to
ensure that these systems remain effective
in winter conditions. All four wheels must be
fitted with tyres approved for the vehicle.
Trailer stability assist (TSA)
When towing, this system reduces the risk of the
vehicle or trailer swaying.
Operation
The system is activated automatically when the
ignition is switched on.
The electronic stability control system (ESC)
must not have any faults.
At speeds between 37 and 99 mph (60 and
160
km/h), if the system detects oscillating trailer
movements (snaking), it applies the brakes to
stabilise the trailer and, if necessary, reduces
engine power to slow the vehicle.
This warning lamp flashes on the instrument panel and the brake lamps
light up to draw attention to this corrective action.
For information on weights and towed loads,
refer to the Engine Technical Data and Towed
Loads section or your vehicle’s registration
certificate
To ensure safe driving with a Towing device,
refer to the corresponding section.
Malfunction
If a fault occurs, this warning lamp comes
on in the instrument panel, accompanied
by a message and an audible signal.
If you wish to continue towing a trailer, reduce
your speed and drive carefully!
Contact a PEUGEOT dealer or a qualified
workshop to have the system checked.