2021 Peugeot 308 wheel size
[x] Cancel search: wheel sizePage 76 of 244

74
Safety
“ISOFIX" mountings
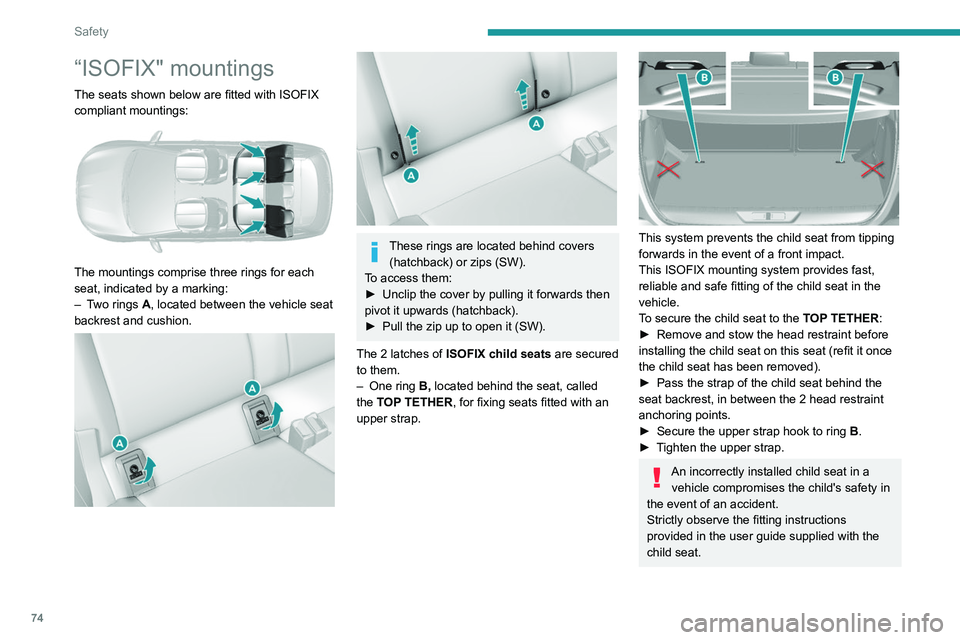
The seats shown below are fitted with ISOFIX
compliant mountings:
The mountings comprise three rings for each
seat, indicated by a marking:
–
T
wo rings A, located between the vehicle seat
backrest and cushion.
These rings are located behind covers (hatchback) or zips (SW).
To access them:
►
Unclip the cover by pulling it forwards then
pivot it upwards (hatchback).
►
Pull the zip up to open it (SW).
The 2
latches of ISOFIX child seats are secured
to them.
–
One ring
B, located behind the seat, called
the TOP TETHER, for fixing seats fitted with an
upper strap.
This system prevents the child seat from tipping
forwards in the event of a front impact.
This ISOFIX mounting system provides fast,
reliable and safe fitting of the child seat in the
vehicle.
To secure the child seat to the TOP TETHER:
►
Remove and stow the head restraint before
installing the child seat on this seat (refit it once
the child seat has been removed).
►
Pass the strap of the child seat behind the
seat backrest, in between the 2 head restraint
anchoring points.
►
Secure the upper strap hook to ring
B
.
►
T
ighten the upper strap.
An incorrectly installed child seat in a vehicle compromises the child's safety in
the event of an accident.
Strictly observe the fitting instructions
provided in the user guide supplied with the
child seat.
For information about the options for
fitting ISOFIX child seats in your vehicle,
refer to the summary table.
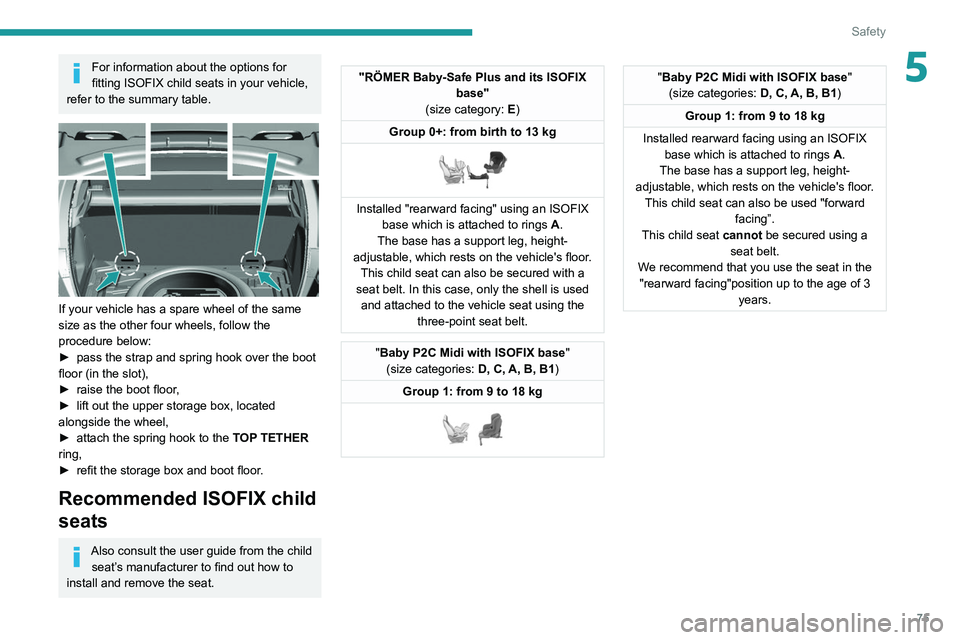
If your vehicle has a spare wheel of the same
size as the other four wheels, follow the
procedure below:
► pass the strap and spring hook over the boot
floor (in the slot),
► raise the boot floor,
► lift out the upper storage box, located
alongside the wheel,
► attach the spring hook to the TOP TETHER
ring,
► refit the storage box and boot floor.
Recommended ISOFIX child
seats
Also consult the user guide from the child
seat’s manufacturer to find out how to
install and remove the seat.
Page 77 of 244

75
Safety
5For information about the options for
fitting ISOFIX child seats in your vehicle,
refer to the summary table.
If your vehicle has a spare wheel of the same
size as the other four wheels, follow the
procedure below:
►
pass the strap and spring hook over the boot
floor (in the slot),
►
raise the boot floor
,
►
lift out the upper storage box, located
alongside the wheel,
►
attach the spring hook to the
TOP TETHER
ring,
►
refit the storage box and boot floor
.
Recommended ISOFIX child
seats
Also consult the user guide from the child seat’s manufacturer to find out how to
install and remove the seat.
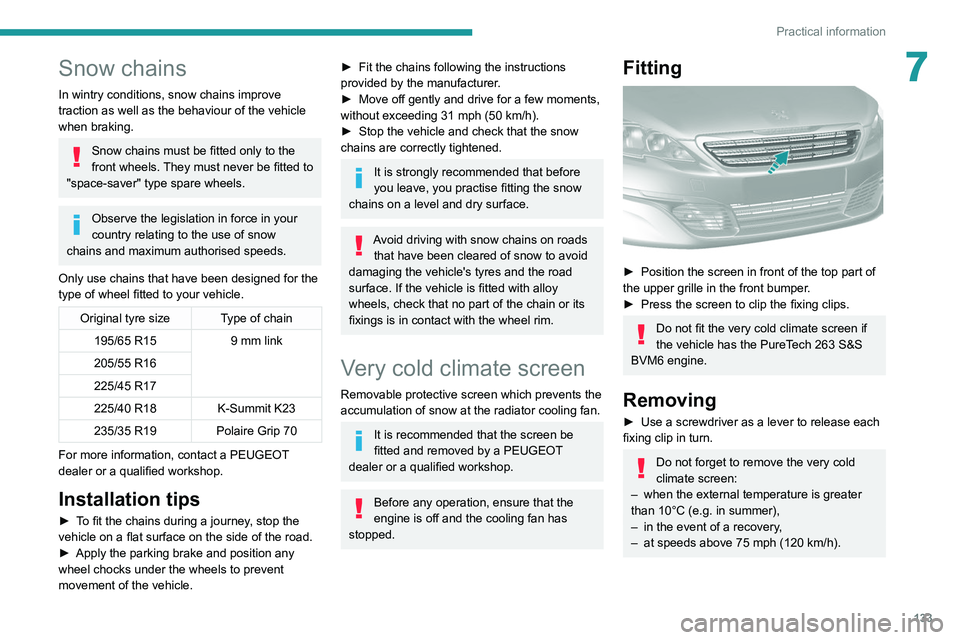
"RÖMER Baby-Safe Plus and its ISOFIX base"
(size category: E)
Group 0+: from birth to 13 kg
Installed "rearward facing" using an ISOFIX base which is attached to rings A .
The base has a support leg, height-
adjustable, which rests on the vehicle's floor. This child seat can also be secured with a
seat belt. In this case, only the shell is used and attached to the vehicle seat using the three-point seat belt.
"Baby P2C Midi with ISOFIX base "
(size categories: D, C, A, B, B1)
Group 1: from 9 to 18 kg
"Baby P2C Midi with ISOFIX base "
(size categories: D, C, A, B, B1)
Group 1: from 9 to 18 kg
Installed rearward facing using an ISOFIX base which is attached to rings A.
The base has a support leg, height-
adjustable, which rests on the vehicle's floor. This child seat can also be used "forward facing”.
This child seat cannot be secured using a seat belt.
We recommend that you use the seat in the "rearward facing"position up to the age of 3 years.
Page 134 of 244

132
Practical information
► Take care to select the pump that delivers the
correct fuel type for your vehicle's engine (see a
reminder label on the inside of the filler flap).
►
Insert the key into the filler cap, if your vehicle
has a standard key
.
►
T
urn the filler cap to the left.
► Remove the filler cap and hang it on its
carrier (on the filler flap).
►
Insert the nozzle as far as it will go (pressing
against the metal non-return valve A
).
►
Fill the tank.
Do not continue past the
third nozzle cut-off, as this may cause
malfunctions.
►
Put the filler cap back in place and close it by
turning it to the right.
►
Push the fuel filler flap to close it (your
vehicle must be unlocked).
Y
our vehicle is fitted with a catalytic converter, a
device which helps to reduce the level of harmful
emissions in exhaust gases.
For petrol engines, you must use unleaded
fuel.
The filler neck is narrower, admitting petrol
nozzles only.
If you have put in the wrong fuel for
your vehicle, you must have the fuel
tank drained and filled with the correct fuel
before starting the engine.
For the THP 225 S&S EAT8 engine, the use
of RON98 unleaded petrol is recommended to
ensure optimum engine performance.
Fuel cut-off
Your vehicle is fitted with a safety system that
cuts off the supply of fuel in the event of an
impact.
Diesel misfuel prevention
Mechanical device which prevents filling the tank
of a Diesel vehicle with petrol. It avoids the risk
of engine damage that can result from filling with
the wrong fuel.
Located in the filler neck, the misfuel prevention
device appears when the filler cap is removed.
When a petrol filler nozzle is introduced into the
fuel filler neck of a Diesel vehicle, it comes into
contact with the flap. The system remains closed
and prevents filling.
Do not persist but instead insert a Diesel
filler nozzle.
It is still possible to use a fuel can to fill
the tank slowly.
In order to ensure a good flow of fuel, do
not place the nozzle of the fuel can in direct
contact with the flap of the misfuel prevention
device.
Travelling abroad
As Diesel fuel pump nozzles may be
different in other countries, the presence
of the misfuel prevention device may make
refuelling impossible.
Before travelling abroad, it is advisable to
check with a PEUGEOT dealer if the vehicle
is suitable for the distribution equipment of the
countries visited.
Snow chains
In wintry conditions, snow chains improve
traction as well as the behaviour of the vehicle
when braking.
Snow chains must be fitted only to the
front wheels. They must never be fitted to
"space-saver" type spare wheels.
Observe the legislation in force in your
country relating to the use of snow
chains and maximum authorised speeds.
Only use chains that have been designed for the
type of wheel fitted to your vehicle. Original tyre size Type of chain195/65 R15 9 mm link
205/55 R16
225/45 R17
225/40 R18 K-Summit K23
235/35 R19 Polaire Grip 70
For more information, contact a PEUGEOT
dealer or a qualified workshop.
Installation tips
► To fit the chains during a journey, stop the
vehicle on a flat surface on the side of the road.
► Apply the parking brake and position any
wheel chocks under the wheels to prevent
movement of the vehicle.
Page 135 of 244

133
Practical information
7Snow chains
In wintry conditions, snow chains improve
traction as well as the behaviour of the vehicle
when braking.
Snow chains must be fitted only to the
front wheels. They must never be fitted to
"space-saver" type spare wheels.
Observe the legislation in force in your
country relating to the use of snow
chains and maximum authorised speeds.
Only use chains that have been designed for the
type of wheel fitted to your vehicle.
Original tyre size Type of chain 195/65 R15 9 mm link
205/55 R16
225/45 R17
225/40 R18 K-Summit K23
235/35 R19 Polaire Grip 70
For more information, contact a PEUGEOT
dealer or a qualified workshop.
Installation tips
► To fit the chains during a journey, stop the
vehicle on a flat surface on the side of the road.
►
Apply the parking brake and position any
wheel chocks under the wheels to prevent
movement of the vehicle.
► Fit the chains following the instructions
provided by the manufacturer .
►
Move off gently and drive for a few moments,
without exceeding 31
mph (50 km/h).
►
Stop the vehicle and check that the snow
chains are correctly tightened.
It is strongly recommended that before
you leave, you practise fitting the snow
chains on a level and dry surface.
Avoid driving with snow chains on roads that have been cleared of snow to avoid
damaging the vehicle's tyres and the road
surface. If the vehicle is fitted with alloy
wheels, check that no part of the chain or its
fixings is in contact with the wheel rim.
Very cold climate screen
Removable protective screen which prevents the
accumulation of snow at the radiator cooling fan.
It is recommended that the screen be
fitted and removed by a PEUGEOT
dealer or a qualified workshop.
Before any operation, ensure that the
engine is off and the cooling fan has
stopped.
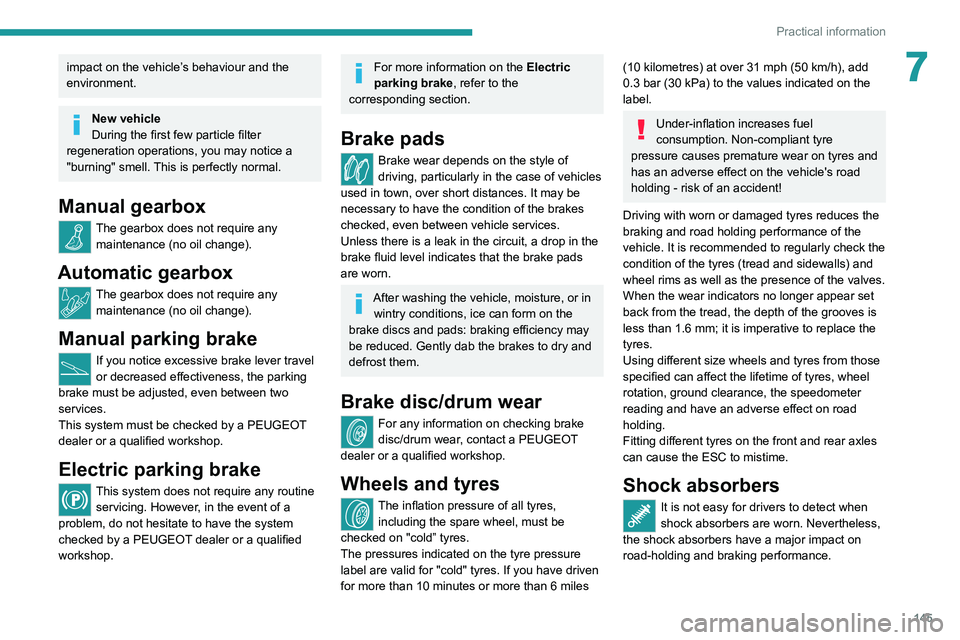
Fitting
► Position the screen in front of the top part of
the upper grille in the front bumper .
►
Press the screen to clip the fixing clips.
Do not fit the very cold climate screen if
the vehicle has the PureTech 263 S&S
BVM6 engine.
Removing
► Use a screwdriver as a lever to release each
fixing clip in turn.
Do not forget to remove the very cold
climate screen:
–
when the external temperature is greater
than 10°C (e.g. in summer),
–
in the event of a recovery
,
–
at speeds above 75 mph (120 km/h).
Page 147 of 244

145
Practical information
7impact on the vehicle’s behaviour and the
environment.
New vehicle
During the first few particle filter
regeneration operations, you may notice a
"burning" smell. This is perfectly normal.
Manual gearbox
The gearbox does not require any maintenance (no oil change).
Automatic gearbox
The gearbox does not require any maintenance (no oil change).
Manual parking brake
If you notice excessive brake lever travel
or decreased effectiveness, the parking
brake must be adjusted, even between two
services.
This system must be checked by a PEUGEOT
dealer or a qualified workshop.
Electric parking brake
This system does not require any routine servicing. However, in the event of a
problem, do not hesitate to have the system
checked by a PEUGEOT dealer or a qualified
workshop.
For more information on the Electric
parking brake, refer to the
corresponding section.
Brake pads
Brake wear depends on the style of
driving, particularly in the case of vehicles
used in town, over short distances. It may be
necessary to have the condition of the brakes
checked, even between vehicle services.
Unless there is a leak in the circuit, a drop in the
brake fluid level indicates that the brake pads
are worn.
After washing the vehicle, moisture, or in wintry conditions, ice can form on the
brake discs and pads: braking efficiency may
be reduced. Gently dab the brakes to dry and
defrost them.
Brake disc/drum wear
For any information on checking brake
disc/drum wear, contact a PEUGEOT
dealer or a qualified workshop.
Wheels and tyres
The inflation pressure of all tyres, including the spare wheel, must be
checked on "cold” tyres.
The pressures indicated on the tyre pressure
label are valid for "cold" tyres. If you have driven
for more than 10 minutes or more than 6 miles
(10 kilometres) at over 31 mph (50 km/h), add
0.3 bar (30 kPa) to the values indicated on the
label.
Under-inflation increases fuel
consumption. Non-compliant tyre
pressure causes premature wear on tyres and
has an adverse effect on the vehicle's road
holding - risk of an accident!
Driving with worn or damaged tyres reduces the
braking and road holding performance of the
vehicle. It is recommended to regularly check the
condition of the tyres (tread and sidewalls) and
wheel rims as well as the presence of the valves.
When the wear indicators no longer appear set
back from the tread, the depth of the grooves is
less than 1.6 mm; it is imperative to replace the
tyres.
Using different size wheels and tyres from those
specified can affect the lifetime of tyres, wheel
rotation, ground clearance, the speedometer
reading and have an adverse effect on road
holding.
Fitting different tyres on the front and rear axles
can cause the ESC to mistime.
Shock absorbers
It is not easy for drivers to detect when
shock absorbers are worn. Nevertheless,
the shock absorbers have a major impact on
road-holding and braking performance.