2021 NISSAN FRONTIER belt
[x] Cancel search: beltPage 130 of 492
NISSAN Intelligent Key®
warning light (if so
equipped)
Af ter the ignition switch is placed in the ON
position, this light comes on for about 2
seconds and then turns off. This light illumi-
nates or blinks as follows:
• The light blinks in yellow when the door isclosed with the Intelligent Key lef t outside
the vehicle and the ignition switch in the
ON position. Make sure that the Intelligent
Key is inside the vehicle.
• The light blinks in green when the Intelli- gent Key battery is running out of power.
Replace the battery with a new one. For
additional information, refer to “Battery”
in the “Do-it-yourself ” section of this
manual.
• The light illuminates in yellow when it warns of a malfunction with the electrical
steering lock system or the Intelligent Key
system.
If the warning light illuminates in yellow
while the engine is stopped, it may be im-
possible to free the steering lock or to start
the engine. If the light comes on while the
engine is running, you can drive the vehicle.
However, in these cases, have the vehicle
checked and repaired as soon as possible. It is recommended that you visit a NISSAN
dealer for this service.
For additional information, refer to “NISSAN
Intelligent Key®” in the “Pre-driving checks
and adjustments” section of this manual.
Seat belt warning light and
chime
The light and chime remind you to fasten
your seat belts. The light illuminates when-
ever the ignition switch is placed in the ON
position and remains illuminated until the
driver's seat belt is fastened. At the same
time, the chime sounds for about 6 sec-
onds unless the driver's seat belt is se-
curely fastened.
The seat belt warning light may also illumi-
nate if the front passenger's seat belt is not
fastened when the front passenger's seat
is occupied. For 7 seconds af ter the ignition
switch is placed in the ON position, the sys-
tem does not activate the warning light for
the front passenger.
For additional information, refer to “Seat
belts” in the “Safety—Seats, seat belts and
supplemental restraint system” section of
this manual.
Shif t P (Park) warning light
(if so equipped)
This light blinks red and the key reminder
chime sounds if the shif t lever is in any
position other than P (Park) and the ignition
switch is in the OFF position. Return the
shif t lever to P (Park) with the ignition
switch in the OFF position and the warning
light along with the chime will turn off. For
additional information, refer to “NISSAN In-
telligent Key®” in the “Pre-driving checks
and adjustments” section of this manual.
Supplemental air bag
warning light
When the ignition switch is placed in the ON
position, the supplemental air bag warning
light illuminates for about 7 seconds and
then turns off. This means the system is
operational.
If any of the following conditions occur, the
front air bag, side air bag, curtain air bag,
and pretensioner seat belt systems need
servicing:
• The supplemental air bag warning light
remains on af ter approximately 7 sec-
onds.
• The supplemental air bag warning light flashes intermittently.
2-20Instruments and controls
Page 131 of 492
• The supplemental air bag warning lightdoes not come on at all.
It is recommended that you visit a NISSAN
dealer for these services.
Unless checked and repaired, the supple-
mental restraint system (air bag system)
and/or the pretensioner(s) may not func-
tion properly. For additional information, re-
fer to “Supplemental Restraint System
(SRS)” in the “Safety—Seats, seat belts and
supplemental restraint system” section of
this manual.4WD shif t indicator light
(
model)
The light should turn off within 1 second
af ter placing the ignition switch in the ON
position.
While the engine is running, the 4WD shif t
indicator light will illuminate the position
selected by the 4WD shif t switch.
The 4WD shif t indicator light may blink
while shif ting from one drive mode to
the other.
CRUISE indicator light
The light comes on when the cruise control
ON/OFF switch is pushed. The light goes
out when the ON/OFF switch is pushed
again. When the CRUISE indicator light
comes on, the cruise control system is op-
erational. For additional information, refer
to “Cruise control” in the “Starting and driv-
ing” section of this manual.
Electronic locking rear
differential (E-Lock) system
ON indicator light (if so
equipped)
This light comes on when the electronic
locking rear differential (E-Lock) system
clutch is fully engaged.
The indicator light flashes when the sys-
tem is first turned on. When the system fully
engages, the light remains on. If the switch
is on and the indicator light continues to
flash, the system is not engaged.
For additional information, refer to “Electronic
locking rear differential (E-Lock) system
switch” in this section and “Electronic locking
rear differential (E-Lock) system” in the “Start-
ing and driving” section of this manual.
Engine start operation
indicator light (if so
equipped)
For vehicles equipped with push-button igni-
tion this indicator illuminates when the igni-
tion switch is in the LOCK, OFF or ON position
with the shif t lever in the P (Park) position.
This indicator means that the engine will
start by pushing the push-button ignition
switch with the brake pedal depressed.
Instruments and controls2-21
Page 132 of 492
Front passenger air bag
status light
The front passenger air bag status lightwill be lit and the passenger front air
bag will be off depending on how the front
passenger seat is being used.
For additional information, refer to “Front
passenger air bag and status light” in the
“Safety — Seats, seat belts and supplemen-
tal restraint system” section of this manual.
High beam indicator light
(blue)
This blue light comes on when the head-
light high beams are on and goes out when
the low beams are selected.
The high beam indicator light also comes
on when the passing signal is activated.
Hill descent control system
ON indicator light (if so
equipped)
When the ignition switch is placed in the ON
position, this light comes on briefly and
then turns off.
The light comes on when the hill descent
control system is activated. If the hill descent control switch is on and
the indicator light blinks, the system is not
engaged.
If the indicator light does not come on
when the hill descent switch is on, the sys-
tem may not be functioning properly. Have
the system checked. It is recommended
that you visit a NISSAN dealer for this ser-
vice.
For additional information, refer to “Hill de-
scent control switch” in this section and “Hill
descent control system” in the “Starting
and driving” section of this manual.
Malfunction Indicator Light
(MIL)
If this indicator light comes on steady or
blinks while the engine is running, it may
indicate a potential emission control mal-
function.
The MIL may also come on steady if the
fuel-filler cap is loose or missing, or if the
vehicle runs out of fuel. Check to make sure
the fuel-filler cap is installed and closed
tightly, and that the vehicle has at least 3
gal (11.4 L) of fuel in the fuel tank.
Af ter a few driving trips, the
light
should turn off if no other potential emis-
sion control system malfunction exists. If this indicator light comes on steady for 20
seconds and then blinks for 10 seconds
when the engine is not running, it indicates
that the vehicle is not ready for an emission
control system inspection/maintenance
test. For additional information, refer to
“Readiness for inspection/maintenance
(I/M) test” in the “Technical and consumer
information” section of this manual.
Operation
The MIL will come on in one of two ways:
• MIL on steady — An emission control sys-
tem malfunction has been detected.
Check the fuel-filler cap if the LOOSE FUEL
CAP warning appears in the trip com-
puter. If the fuel-filler cap is loose or miss-
ing, tighten or install the cap and con-
tinue to drive the vehicle. The
light
should turn off af ter a few driving trips. If
the
light does not turn off af ter a few
driving trips, have the vehicle inspected. It
is recommended that you visit a NISSAN
dealer for this service. You do not need to
have your vehicle towed to the dealer.
• MIL blinking — An engine misfire has been detected which may damage the emis-
sion control system. To reduce or avoid
emission control system damage:– Do not drive at speeds above 45 mph (72 km/h).
2-22Instruments and controls
Page 153 of 492
To access the under-seat storage bins:
For King Cab® models, lif t up the jump seat.
For additional information, refer to “Jump
seat” in the “Safety—Seats, seat belts and
supplemental restraint system” section of
this manual.
For Crew Cab models, lif t up the rear bench
seat. For additional information, refer to
“Folding the rear bench seat down” in the
“Safety—Seats, seat belts and supplemen-
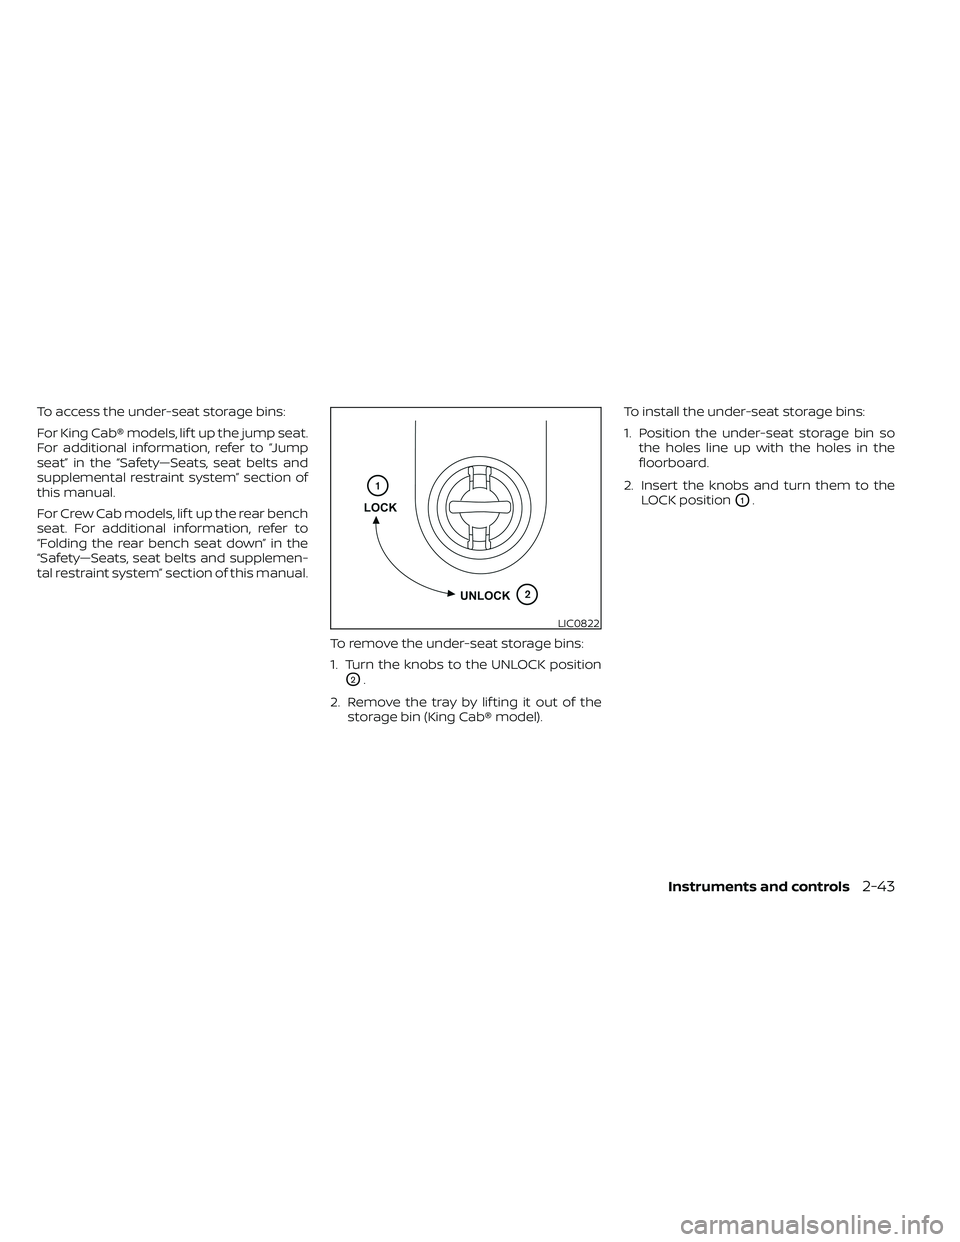
tal restraint system” section of this manual.To remove the under-seat storage bins:
1. Turn the knobs to the UNLOCK position
O2.
2. Remove the tray by lif ting it out of the storage bin (King Cab® model). To install the under-seat storage bins:
1. Position the under-seat storage bin so
the holes line up with the holes in the
floorboard.
2. Insert the knobs and turn them to the LOCK position
O1.
LIC0822
Page 314 of 492
FCC Notice:
For USA:
This device complies with Part 15 of the
FCC Rules. Operation is subject to the fol-
lowing two conditions: (1) This device
may not cause harmful interference, and
(2) this device must accept any interfer-
ence received, including interference
that may cause undesired operation.
NOTE:
Changes or modifications not ex-
pressly approved by the party re-
sponsible for compliance could void
the user's authority to operate the
equipment.
For Canada:
This device complies with Industry
Canada licence-exempt RSS standard(s).
Operation is subject to the following two
conditions: (1) this device may not cause
interference, and (2) this device must ac-
cept any interference, including interfer-
ence that may cause undesired opera-
tion of the device.
ON-PAVEMENT AND OFF-ROAD
DRIVING PRECAUTIONS
Utility vehicles have a significantly
higher rollover rate than other types of
vehicles.
They have higher ground clearance than
passenger cars to make them capable of
performing in a variety of on-pavement
and off-road applications. This gives them
a higher center of gravity than ordinary ve-
hicles. An advantage of higher ground
clearance is a better view of the road, allow-
ing you to anticipate problems. However,
they are not designed for cornering at the
same speeds as conventional 2-Wheel
Drive vehicles any more than low-slung
sports cars are designed to perform satis-
factorily under off-road conditions. If at all
possible, avoid sharp turns at high speeds.
As with other vehicles of this type, failure to
operate this vehicle correctly may result in
loss of control or vehicle rollover. In a roll-
over crash, an unbelted person is signifi-
cantly more likely to die than a person
wearing a seat belt.
For additional information, refer to “Driving
safety precautions” in this section.
AVOIDING COLLISION AND
ROLLOVER
Page 315 of 492
Seat belts help reduce the risk of injury in
collisions and rollovers.In a rollover crash,
an unbelted person is significantly more
likely to die than a person wearing a seat
belt..
OFF-ROAD RECOVERY
While driving, the right side or lef t side
wheels may unintentionally leave the road
surface. If this occurs, maintain control of
the vehicle by following the procedure be-
low. Please note that this procedure is only
a general guide. The vehicle must be driven
as appropriate based on the conditions of
the vehicle, road and traffic.
1. Remain calm and do not overreact.
2. Do not apply the brakes.
3. Maintain a firm grip on the steering wheel with both hands and try to hold a
straight course.
4. When appropriate, slowly release the ac- celerator pedal to gradually slow the
vehicle.
5. If there is nothing in the way, steer the vehicle to follow the road while vehicle
speed is reduced. Do not attempt to
drive the vehicle back onto the road sur-
face until vehicle speed is reduced. 6. When it is safe to do so, gradually turn
the steering wheel until both tires return
to the road surface. When all tires are on
the road surface, steer the vehicle to
stay in the appropriate driving lane.
• If you decide that it is not safe to return the vehicle to the road surface based
on vehicle, road or traffic conditions,
gradually slow the vehicle to a stop in
a safe place off the road.
RAPID AIR PRESSURE LOSS
Rapid air pressure loss or a “blow-out” can
occur if the tire is punctured or is damaged
due to hitting a curb or pothole. Rapid air
pressure loss can also be caused by driving
on under-inflated tires.
Rapid air pressure loss can affect the han-
dling and stability of the vehicle, especially
at highway speeds.
Help prevent rapid air pressure loss by
maintaining the correct air pressure and
visually inspecting the tires for wear and
damage. For additional information, refer
to “Wheels and tires” in the “Do-it-yourself ”
section of this manual. If a tire rapidly loses
air pressure or “blows-out” while driving,
maintain control of the vehicle by following
the procedure below. Please note that this
procedure is only a general guide. The ve- hicle must be driven as appropriate based
on the conditions of the vehicle, road and
traffic.
Page 317 of 492
•If your engine stalls or you cannot
make it to the top of a steep hill,
never attempt to turn around. Your
vehicle could tip or roll over. Always
back straight down in R (Reverse)
gear. Never back down in N (Neutral),
using only the brake, as this could
cause loss of control.
• Heavy braking going down a hill
could cause your brakes to overheat
and fade, resulting in loss of control
and an accident. Apply brakes lightly
and use a low gear to control your
speed. Use the hill descent control
feature (if so equipped).
• Unsecured cargo can be thrown
around when driving over rough ter-
rain. Properly secure all cargo so it
will not be thrown forward and cause
injury to you or your passengers.
• To avoid raising the center of gravity
excessively, do not exceed the rated
capacity of the roof rack (if so
equipped) and evenly distribute the
load. Secure heavy loads in the cargo
area as far forward and as low as
possible. Do not equip the vehicle
with tires larger than specified in this
manual. This could cause your ve-
hicle to roll over. •
Do not grip the inside or spokes of
the steering wheel when driving off-
road. The steering wheel could move
suddenly and injure your hands. In-
stead drive with your fingers and
thumbs on the outside of the rim.
• Before operating the vehicle, ensure
that the driver and all passengers
have their seat belts fastened.
• Always drive with the floor mats in
place as the floor may become hot.
• Lower your speed when encounter-
ing strong crosswinds. With a higher
center of gravity, your NISSAN is more
affected by strong side winds. Slower
speeds ensure better vehicle control.
• Do not drive beyond the perfor-
mance capability of the tires, even
with 4WD engaged (if so equipped).
• For 4WD equipped vehicles, do not
attempt to raise two wheels off the
ground and shif t the transmission to
any drive or reverse position with the
engine running. Doing so may result
in drivetrain damage or unexpected
vehicle movement which could result
in serious vehicle damage or per-
sonal injury. •
Do not attempt to test a 4WD
equipped vehicle on a 2-wheel dyna-
mometer (such as the dynamom-
eters used by some states for emis-
sions testing), or similar equipment
even if the other two wheels are
raised off the ground. Make sure you
inform test facility personnel that
your vehicle is equipped with 4WD
before it is placed on a dynamom-
eter. Using the wrong test equipment
may result in drivetrain damage or
unexpected vehicle movement
which could result in serious vehicle
damage or personal injury.
• Accelerating quickly, sharp steering
maneuvers or sudden braking may
cause loss of control.
• If at all possible, avoid sharp turning
maneuvers, particularly at high
speeds. Your NISSAN 4WD vehicle has
a higher center of gravity than a pas-
senger car. The vehicle is not de-
signed for cornering at the same
speeds as passenger cars. Failure to
operate this vehicle correctly could
result in loss of control and/or a roll-
over accident.
Starting and driving5-9
Page 318 of 492
•Always use tires of the same type,
size, brand, construction (bias, bias-
belted, or radial), and tread pattern
on all four wheels. Install tire chains
on the rear wheels when driving on
slippery roads and drive carefully.
• Be sure to check the brakes immedi-
ately af ter driving in mud or water.
For additional information, refer to
“Wet brakes” in this section.
• Avoid parking your vehicle on steep
hills. If you get out of the vehicle and
it rolls forward, backward or side-
ways, you could be injured.
• Whenever you drive off-road through
sand, mud or water as deep as the
wheel hub, more frequent mainte-
nance may be required. For addi-
tional information, refer to “Mainte-
nance under severe operating
conditions” in the “Maintenance and
schedules” section of this manual.
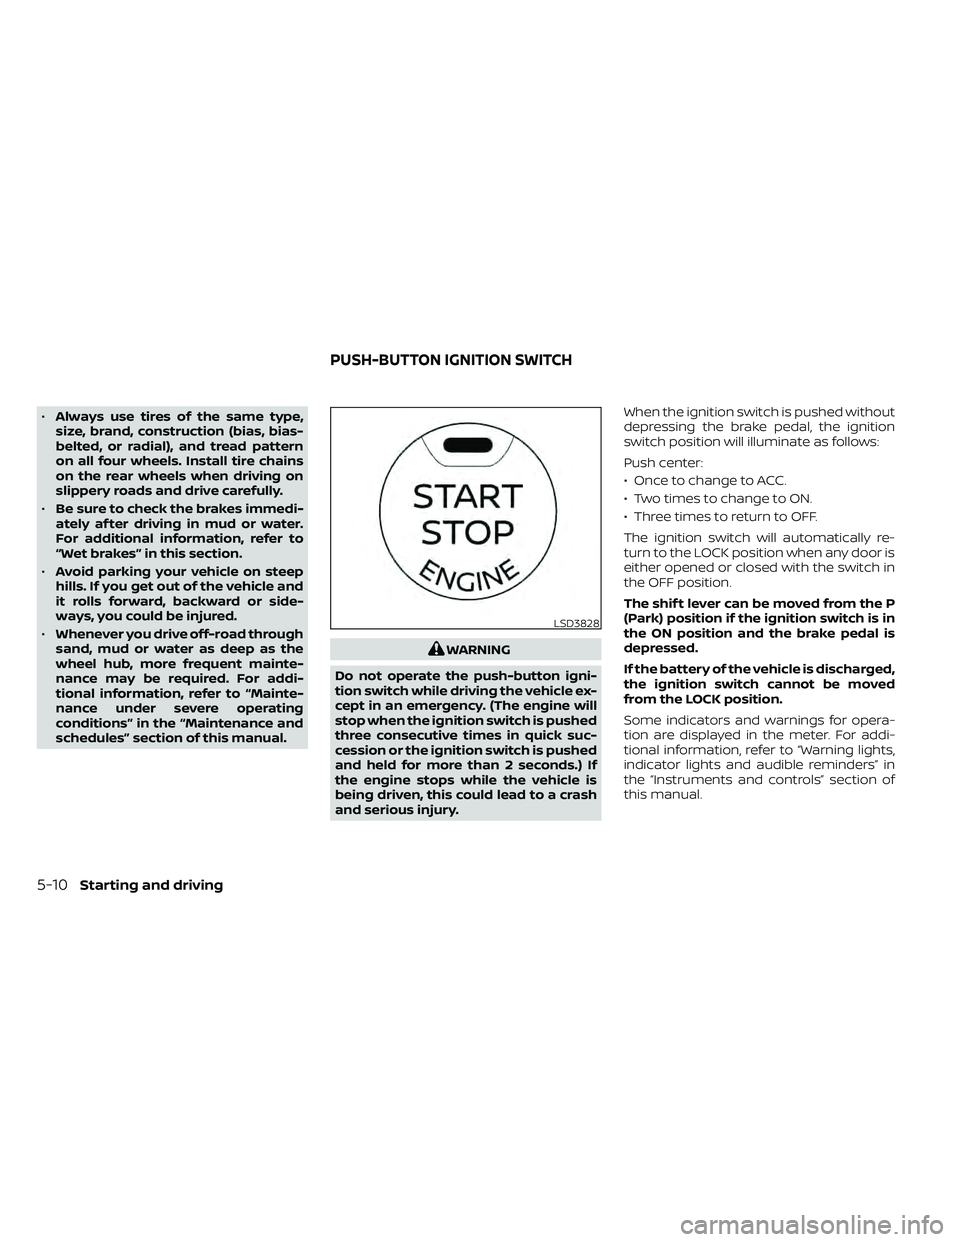
WARNING
Do not operate the push-button igni-
tion switch while driving the vehicle ex-
cept in an emergency. (The engine will
stop when the ignition switch is pushed
three consecutive times in quick suc-
cession or the ignition switch is pushed
and held for more than 2 seconds.) If
the engine stops while the vehicle is
being driven, this could lead to a crash
and serious injury. When the ignition switch is pushed without
depressing the brake pedal, the ignition
switch position will illuminate as follows:
Push center:
• Once to change to ACC.
• Two times to change to ON.
• Three times to return to OFF.
The ignition switch will automatically re-
turn to the LOCK position when any door is
either opened or closed with the switch in
the OFF position.
The shif t lever can be moved from the P
(Park) position if the ignition switch is in
the ON position and the brake pedal is
depressed.
If the battery of the vehicle is discharged,
the ignition switch cannot be moved
from the LOCK position.
Some indicators and warnings for opera-
tion are displayed in the meter. For addi-
tional information, refer to “Warning lights,
indicator lights and audible reminders” in
the “Instruments and controls” section of
this manual.
LSD3828
PUSH-BUTTON IGNITION SWITCH