2021 NISSAN FRONTIER change wheel
[x] Cancel search: change wheelPage 4 of 492

For descriptions specified for 4-wheel drive
models, amark is placed at the be-
ginning of the applicable sections/items.
As with other vehicles with features for
off-road use, failure to operate 4-wheel
drive models correctly may result in loss
of control or a collision. For additional
information, refer to “Driving safety pre-
cautions” in the “Starting and driving”
section of this manual.
ON-PAVEMENT AND OFF-ROAD DRIVING
This vehicle will handle and maneuver
differently from an ordinary passenger
car because it has a higher center of
gravity for off-road use. As with other
vehicles with features of this type, fail-
ure to operate this vehicle correctly may
result in loss of control or an accident.
For additional information, refer to “On-
pavement and off-road driving precau-
tions”, “Avoiding collision and roll- over”
and “Driving safety precautions” in the
“Starting and driving” section of this
manual.
MODIFICATION OF YOUR VEHICLE
This vehicle should not be modified.
Modification could affect its perfor-
mance, safety, emissions or durability
and may even violate governmental
regulations. In addition, damage or per-
formance problems resulting from
modifications may not be covered un-
der NISSAN warranties.
WARNING
Installing an af termarket On-Board Di-
agnostic (OBD) plug-in device that uses
the port during normal driving, for ex-
ample remote insurance company
monitoring, remote vehicle diagnos-
tics, telematics or engine reprogram-
ming, may cause interference or dam-
age to vehicle systems. We do not
recommend or endorse the use of any
af termarket OBD plug-in devices, un-
less specifically approved by NISSAN.
The vehicle warranty may not cover
damage caused by any af termarket
plug-in device. This manual includes information for all
features and equipment available on this
model. Features and equipment in your ve-
hicle may vary depending on model, trim
level, options selected, order, date of pro-
duction, region or availability. Therefore,
you may find information about features or
equipment that are not included or in-
stalled on your vehicle.
All information, specifications and illustra-
tions in this manual are those in effect at
the time of printing. NISSAN reserves the
right to change specifications, perfor-
mance, design or component suppliers
without notice and without obligation.
From time to time, NISSAN may update or
revise this manual to provide Owners with
the most accurate information currently
available. Please carefully read and retain
with this manual all revision updates sent
to you by NISSAN to ensure you have ac-
cess to accurate and up-to-date informa-
tion regarding your vehicle. Current ver-
sions of vehicle Owner's Manuals and any
updates can also be found in the Owner
section of the NISSAN website at
https://
owners.nissanusa.com/nowners/
navigation/manualsGuide . If you have
questions concerning any information in
WHEN READING THE MANUAL
Page 103 of 492
seat, contrary to the instructions in this
manual. Always be sure that you and all
vehicle occupants are seated and re-
strained properly.
Using the front passenger air bag status
light, you can monitor when the front pas-
senger air bag is automatically turned OFF
with the seat occupied. The light will not
illuminate when the front passenger seat is
unoccupied.
If an adult occupant is in the seat but the
front passenger air bag status light is illu-
minated (indicating that the air bag is OFF),
it could be that the person is a small adult,
or is not sitting on the seat properly or not
using the seat belt properly.
If a child restraint must be used in the front
seat, the front passenger air bag status light
may or may not be illuminated, depending
on the size of the child and the type of child
restraint being used. If the air bag status light
is not illuminated (indicating that the air bag
might inflate in a crash), it could be that the
child restraint or seat belt is not being used
properly. Make sure that the child restraint is
installed properly, the seat belt is used prop-
erly and the occupant is positioned properly.
If the air bag status light is not illuminated,
reposition the occupant or child restraint in a
rear seat.
If the front passenger air bag status light
will not illuminate even though you believe
that the child restraint, the seat belts and
the occupant are properly positioned, the
system may be sensing an unoccupied
seat (in which case the air bag is OFF). A
NISSAN dealer can check that the system is
OFF by using a special tool. However, until
you have confirmed with a dealer that your
air bag is working properly, reposition the
occupant or child restraint in a rear seat.
The NISSAN Advanced Air Bag System and
front passenger air bag status light will
take a few seconds to register a change in
the passenger seat status. For example, if a
large adult who is sitting in the front pas-
senger seat exits the vehicle, the front pas-
senger air bag status light will go from OFF
to ON for a few seconds and then to OFF.
This is normal system operation and does
not indicate a malfunction.
If a malfunction occurs in the front passen-
ger air bag system, the supplemental air
bag warning light
, located in the me-
ter and gauges area of the instrument
panel, will blink. Have the system checked. It
is recommended that you visit a NISSAN
dealer for this service. Other supplemental front-impact air
bag precautions
WARNING
• Do not place any objects on the
steering wheel pad or on the instru-
ment panel. Also, do not place any
objects between any occupant and
the steering wheel or instrument
panel. Such objects may become
dangerous projectiles and cause in-
jury if the front air bags inflate.
• Immediately af ter inflation, several
front air bag system components will
be hot. Do not touch them; you may
severely burn yourself.
• No unauthorized changes should be
made to any components or wiring
of the supplemental air bag system.
This is to prevent accidental inflation
of the supplemental air bag or dam-
age to the supplemental air bag
system.
• Do not make unauthorized changes
to your vehicle's electrical system,
suspension system or front end
structure. This could affect proper
operation of the front air bag system.
Safety-Seats, seat belts and supplemental restraint system1-81
Page 104 of 492
•Tampering with the front air bag sys-
tem may result in serious personal
injury. Tampering includes changes
to the steering wheel and the instru-
ment panel assembly by placing ma-
terial over the steering wheel pad
and above the instrument panel or
by installing additional trim material
around the air bag system.
• Modif ying or tampering with the
front passenger seat may result in
serious personal injury. For example,
do not change the front seats by
placing material on the seat cushion
or by installing additional trim mate-
rial, such as seat covers, on the seat
that are not specifically designed to
assure proper air bag operation. Ad-
ditionally, do not stow any objects
under the front passenger seat or the
seat cushion and seatback. Such ob-
jects may interfere with the proper
operation of the occupant classifica-
tion sensor (pressure sensor).
• No unauthorized changes should be
made to any components or wiring
of the seat belt system. This may af-
fect the front air bag system. Tam-
pering with the seat belt system may
result in serious personal injury. •
It is recommended that you visit a
NISSAN dealer for work on and
around the front air bag. It is also rec-
ommended that you visit a NISSAN
dealer for installation of electrical
equipment. The Supplemental Re-
straint System (SRS) wiring har-
nesses* should not be modified or
disconnected. Unauthorized electri-
cal test equipment and probing de-
vices should not be used on the air
bag system.
• A cracked windshield should be re-
placed immediately by a qualified re-
pair facility. A cracked windshield
could affect the function of the
supplemental air bag system.
*The SRS wiring harness connectors are
yellow and orange for easy identifica-
tion.
When selling your vehicle, we request that
you inform the buyer about the front air
bag system and guide the buyer to the
appropriate sections in this Owner's
Manual.
Front seat-mounted side-impact
supplemental air bag and
roof-mounted curtain
side-impact and rollover
supplemental air bag systems
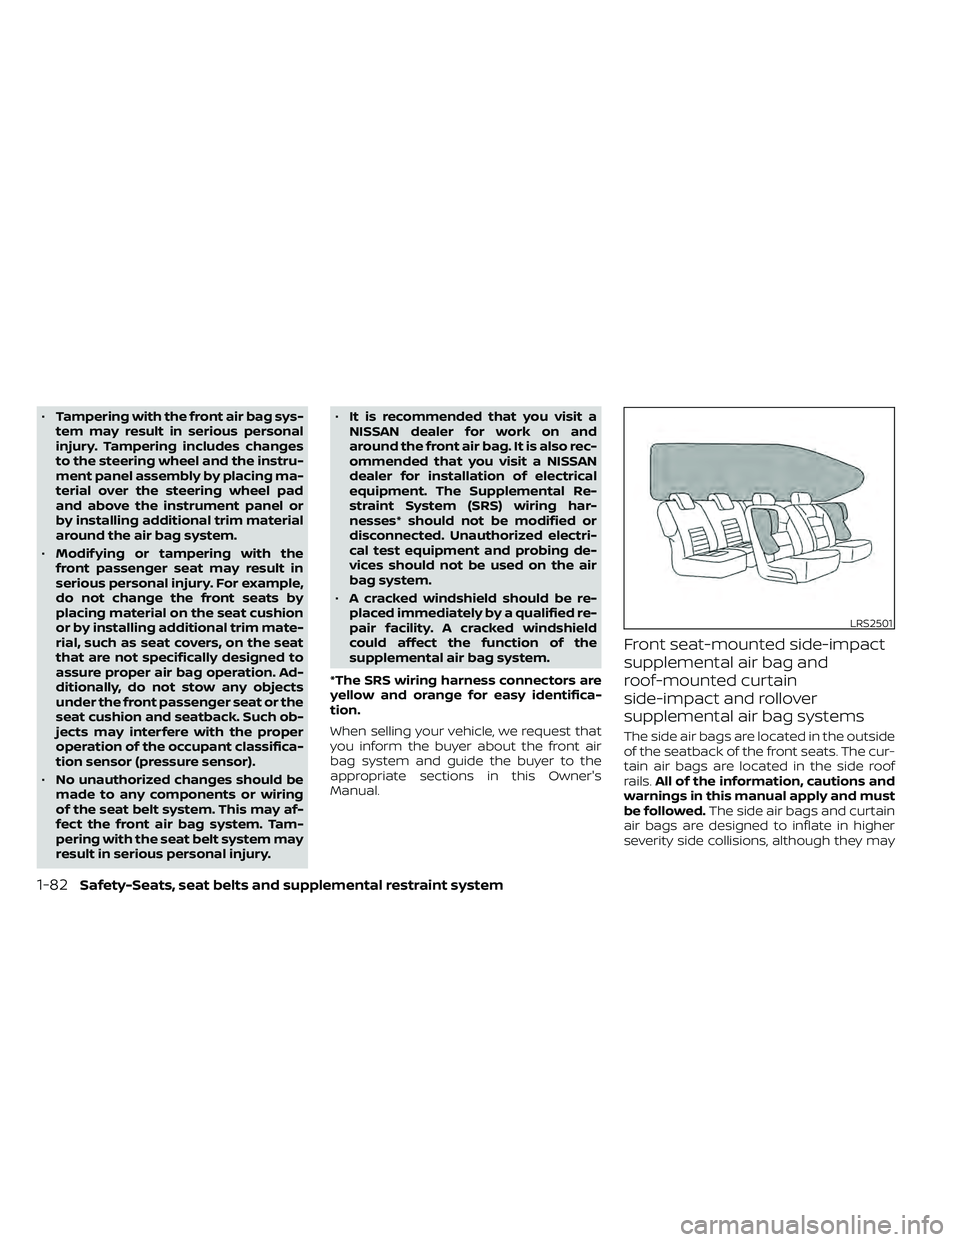
The side air bags are located in the outside
of the seatback of the front seats. The cur-
tain air bags are located in the side roof
rails. All of the information, cautions and
warnings in this manual apply and must
be followed. The side air bags and curtain
air bags are designed to inflate in higher
severity side collisions, although they may
LRS2501
1-82Safety-Seats, seat belts and supplemental restraint system
Page 116 of 492
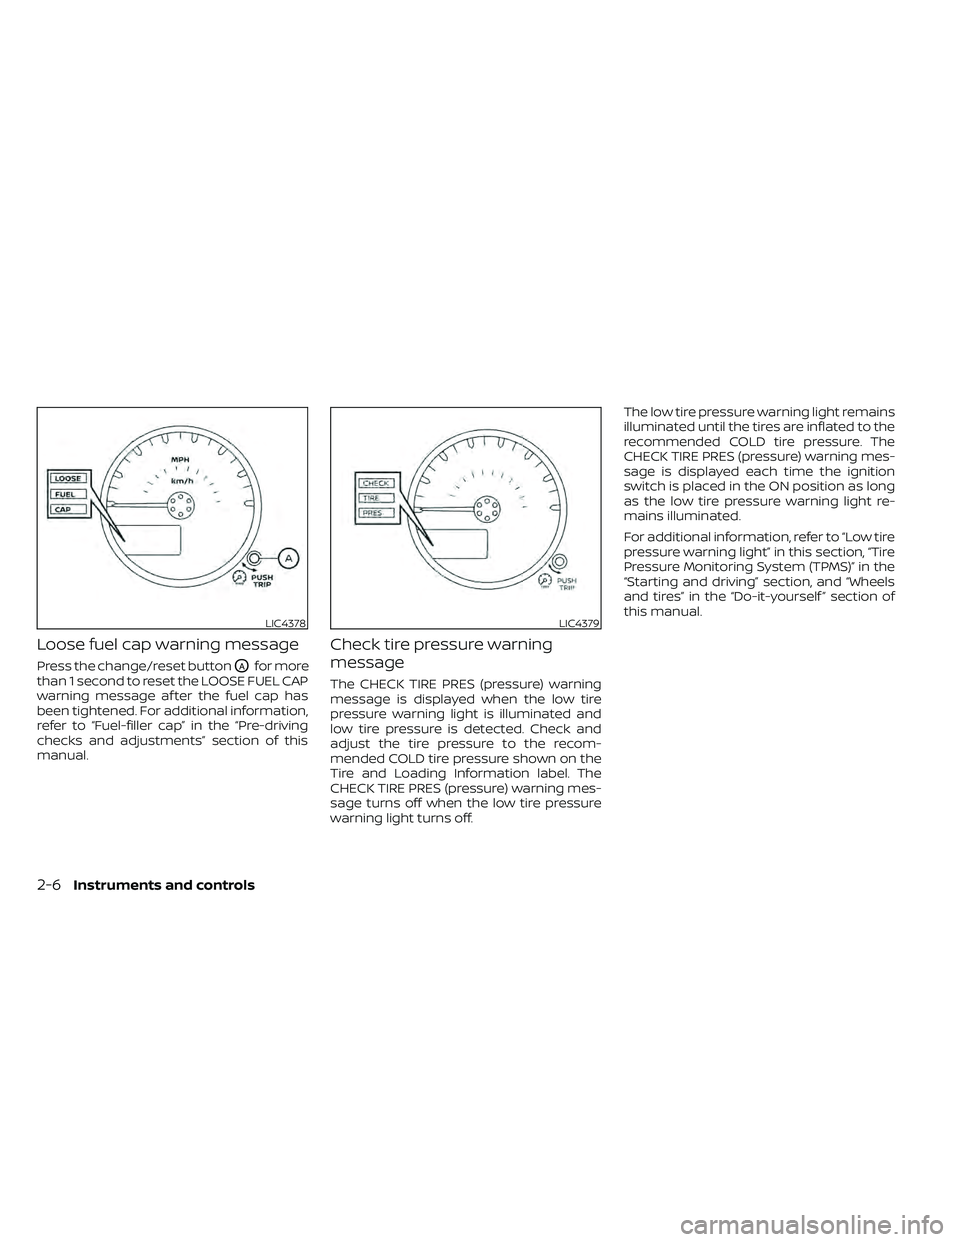
Loose fuel cap warning message
Press the change/reset buttonOAfor more
than 1 second to reset the LOOSE FUEL CAP
warning message af ter the fuel cap has
been tightened. For additional information,
refer to “Fuel-filler cap” in the “Pre-driving
checks and adjustments” section of this
manual.
Check tire pressure warning
message
The CHECK TIRE PRES (pressure) warning
message is displayed when the low tire
pressure warning light is illuminated and
low tire pressure is detected. Check and
adjust the tire pressure to the recom-
mended COLD tire pressure shown on the
Tire and Loading Information label. The
CHECK TIRE PRES (pressure) warning mes-
sage turns off when the low tire pressure
warning light turns off. The low tire pressure warning light remains
illuminated until the tires are inflated to the
recommended COLD tire pressure. The
CHECK TIRE PRES (pressure) warning mes-
sage is displayed each time the ignition
switch is placed in the ON position as long
as the low tire pressure warning light re-
mains illuminated.
For additional information, refer to “Low tire
pressure warning light” in this section, “Tire
Pressure Monitoring System (TPMS)” in the
“Starting and driving” section, and “Wheels
and tires” in the “Do-it-yourself ” section of
this manual.
LIC4378LIC4379
2-6Instruments and controls
Page 243 of 492
FM radio operation
Press theMENU button and touch the
“FM” key or press the AUDIO button and
select FM on the bottom of the Launch Bar
to bring up the FM display screen.
If another audio source is playing when the
“FM” key is pressed, the audio source play-
ing will automatically be turned off and the
last radio station played will begin playing.
The FM stereo indicator (STEREO) is shown
on the screen during FM stereo reception.
When the stereo broadcast signal is weak,
the radio automatically changes from ste-
reo to monaural reception.
FM Menu
Touch the “FM Menu” key to display the FM
Menu screen options:
• SCAN: To scan tune the stations, touch the “FM Menu” key on the radio screen
and then touch the “SCAN” key. The sta-
tions will be tuned from low to high fre-
quencies and stop at each broadcasting
stations for several seconds. Touching
the “SCAN” key again during this period of
several seconds will stop tuning and the
radio will remain tuned to that station. • Refresh: Touch the “Refresh” key to up-
date the station list displayed on the right
side of the FM Menu screen.
• RDS Info: Radio station and song informa- tion can be displayed on the FM display
screen.
orbuttons to tune
from low to high or high to low frequencies
and to stop at the next broadcasting sta-
tion.
1 to 12 Station memory operations
Up to 12 stations can be registered in the
preset list.
1. Select the FM radio band.
2. Tune to the station you wish to store.
3. Touch and hold one of the preset num- bers in the preset list.
The information such as frequency will be
displayed on the preset list.
To select and listen to the preset stations,
push
oron the steering wheel
briefly or touch a preferred station on the
preset list on the radio screen.
Auxiliary (AUX) devices operation
Connecting auxiliary devices
Connect an AUX device into the AUX input
jack located on the center console below
the heater and air conditioner controls.
The AUX input jack accepts any standard
analog audio input such as from a portable
cassette player, CD player, MP3 player or
phone.
Insert a 1/8 in (3.5 mm) stereo mini plug in
the audio input jack. If a cable with a mono
plug is used, the audio output may not
function normally.
Activation and playing
Turn on the AUX device. Connect an AUX
cable to the AUX device and the AUX input
jack. Select AUX mode from the audio
source menu screen or by pressing the
Source button on the steering wheel.
Monitor, climate, audio, phone and voice recognition systems4-47
Page 267 of 492
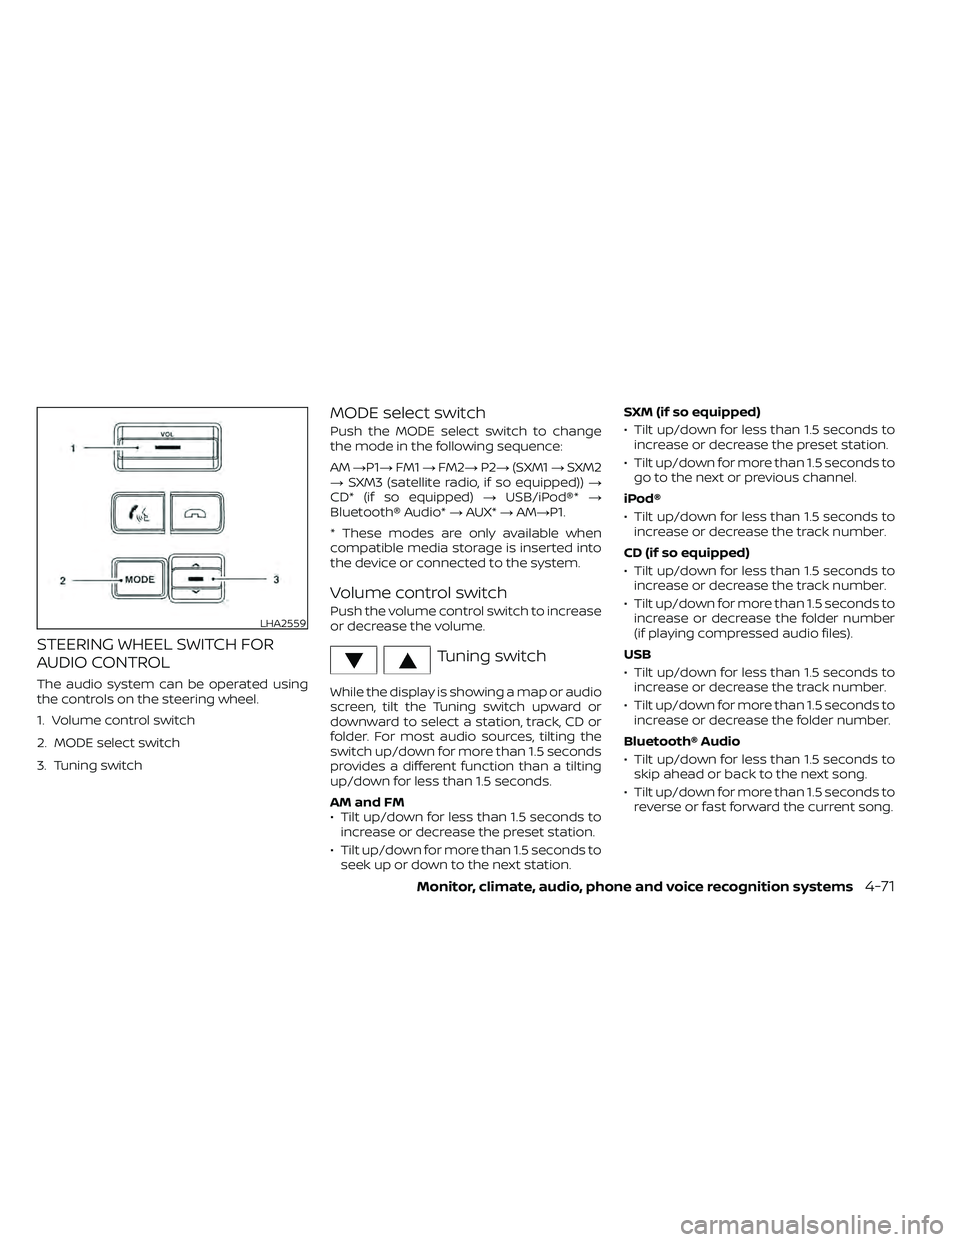
STEERING WHEEL SWITCH FOR
AUDIO CONTROL
The audio system can be operated using
the controls on the steering wheel.
1. Volume control switch
2. MODE select switch
3. Tuning switch
MODE select switch
Push the MODE select switch to change
the mode in the following sequence:
AM→P1→ FM1→FM2→ P2→(SXM1 →SXM2
→ SXM3 (satellite radio, if so equipped)) →
CD* (if so equipped) →USB/iPod®* →
Bluetooth® Audio* →AUX* →AM→P1.
* These modes are only available when
compatible media storage is inserted into
the device or connected to the system.
Volume control switch
Push the volume control switch to increase
or decrease the volume.
Tuning switch
While the display is showing a map or audio
screen, tilt the Tuning switch upward or
downward to select a station, track, CD or
folder. For most audio sources, tilting the
switch up/down for more than 1.5 seconds
provides a different function than a tilting
up/down for less than 1.5 seconds.
AM and FM
• Tilt up/down for less than 1.5 seconds to increase or decrease the preset station.
• Tilt up/down for more than 1.5 seconds to seek up or down to the next station. SXM (if so equipped)
• Tilt up/down for less than 1.5 seconds to
increase or decrease the preset station.
• Tilt up/down for more than 1.5 seconds to go to the next or previous channel.
iPod®
• Tilt up/down for less than 1.5 seconds to increase or decrease the track number.
CD (if so equipped)
• Tilt up/down for less than 1.5 seconds to increase or decrease the track number.
• Tilt up/down for more than 1.5 seconds to increase or decrease the folder number
(if playing compressed audio files).
USB
• Tilt up/down for less than 1.5 seconds to increase or decrease the track number.
• Tilt up/down for more than 1.5 seconds to increase or decrease the folder number.
Bluetooth® Audio
• Tilt up/down for less than 1.5 seconds to skip ahead or back to the next song.
• Tilt up/down for more than 1.5 seconds to reverse or fast forward the current song.
LHA2559
Page 296 of 492
MAKING A CALL
To make a call, follow the procedure below:
1. Press the
button on the control
panel. The “Phone” screen will appear on
the display.
2. Select one of the following options to make a call:
• “Phonebook”: Select the name from an entry stored in the vehicle phonebook.
• “Call Lists”: Select the name from the in- coming, outgoing or missed.
• “Redial”: Dial the last outgoing call from the vehicle.
•“
”: Input the phone number manually
using a keypad displayed on the screen.
For additional information, refer to “How
to use the touch-screen” in this section.
RECEIVING A CALL
When a call is placed to the connected
phone, the display will change to phone
mode.
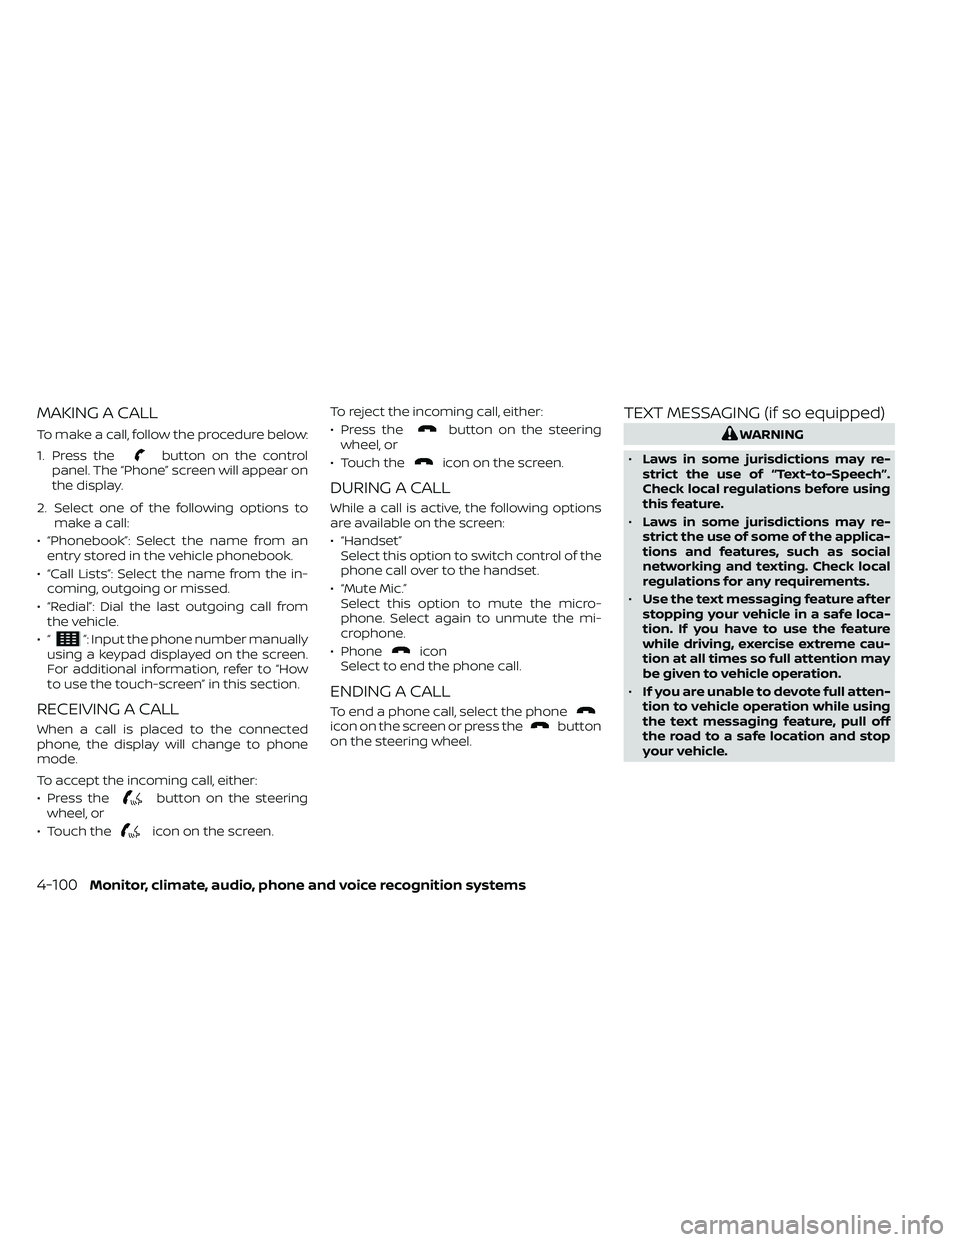
To accept the incoming call, either:
• Press the
button on the steering
wheel, or
• Touch the
icon on the screen. To reject the incoming call, either:
• Press the
button on the steering
wheel, or
• Touch the
icon on the screen.
DURING A CALL
While a call is active, the following options
are available on the screen:
• “Handset” Select this option to switch control of the
phone call over to the handset.
• “Mute Mic.” Select this option to mute the micro-
phone. Select again to unmute the mi-
crophone.
• Phone
icon
Select to end the phone call.
ENDING A CALL
To end a phone call, select the phoneicon on the screen or press thebutton
on the steering wheel.
TEXT MESSAGING (if so equipped)
Page 302 of 492
The NISSAN Voice Recognition System al-
lows hands-free operation of the systems
equipped on this vehicle, such as the
phone and navigation systems.
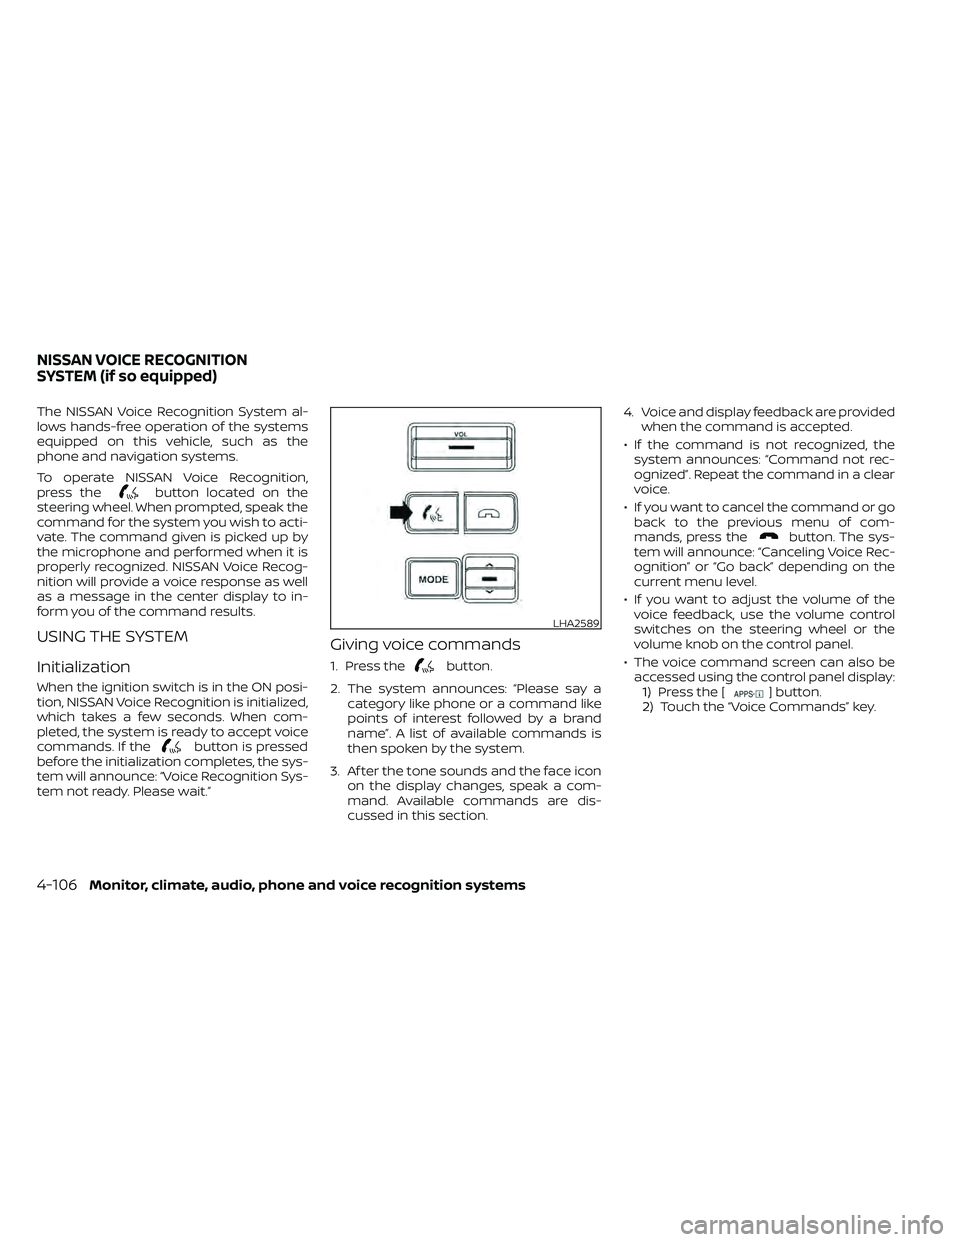
To operate NISSAN Voice Recognition,
press the
button located on the
steering wheel. When prompted, speak the
command for the system you wish to acti-
vate. The command given is picked up by
the microphone and performed when it is
properly recognized. NISSAN Voice Recog-
nition will provide a voice response as well
as a message in the center display to in-
form you of the command results.
USING THE SYSTEM
Initialization
When the ignition switch is in the ON posi-
tion, NISSAN Voice Recognition is initialized,
which takes a few seconds. When com-
pleted, the system is ready to accept voice
commands. If the
button is pressed
before the initialization completes, the sys-
tem will announce: “Voice Recognition Sys-
tem not ready. Please wait.”
Giving voice commands
1. Press thebutton.
2. The system announces: “Please say a category like phone or a command like
points of interest followed by a brand
name”. A list of available commands is
then spoken by the system.
3. Af ter the tone sounds and the face icon on the display changes, speak a com-
mand. Available commands are dis-
cussed in this section. 4. Voice and display feedback are provided
when the command is accepted.
• If the command is not recognized, the system announces: “Command not rec-
ognized”. Repeat the command in a clear
voice.
• If you want to cancel the command or go back to the previous menu of com-
mands, press the
button. The sys-
tem will announce: “Canceling Voice Rec-
ognition” or “Go back” depending on the
current menu level.
• If you want to adjust the volume of the voice feedback, use the volume control
switches on the steering wheel or the
volume knob on the control panel.
• The voice command screen can also be accessed using the control panel display:1.1) Press the [
] button.
2.2) Touch the “Voice Commands” key.
LHA2589
NISSAN VOICE RECOGNITION
SYSTEM (if so equipped)