2021 NISSAN FRONTIER maintenance
[x] Cancel search: maintenancePage 3 of 492
This manual was prepared to help you un-
derstand the operation and maintenance
of your vehicle so that you may enjoy many
miles (kilometers) of driving pleasure.
Please read through this manual before
operating your vehicle.
A separate Warranty Information Book-
let explains details about the warranties
covering your vehicle. The “Maintenance
and schedules” section of this manual
explains details about maintaining and
servicing your vehicle. Additionally, a
separate Customer Care/Lemon Law
Booklet (U.S. only) will explain how to re-
solve any concerns you may have with
your vehicle, and clarif y your rights un-
der your state's lemon law.
When you require any service or have any
questions, a NISSAN dealer will be glad to
assist you with the extensive resources
available to them.
In addition to factory-installed options,
your vehicle may also be equipped with
additional accessories installed prior to de-
livery. It is recommended that you visit a
NISSAN dealer for details concerning the
particular accessories with which your ve-
hicle is equipped. It is important that you
familiarize yourself with all disclosures,
warnings, cautions and instructions con-cerning proper use of such accessories
prior to operating the vehicle and/or ac-
cessory. It is recommended that you visit a
NISSAN dealer for details concerning the
particular accessories with which your ve-
hicle is equipped.
Before driving your vehicle, please read this
Owner's Manual carefully. This will ensure
familiarity with controls and maintenance
requirements assisting you in the safe op-
eration of your vehicle.
Page 9 of 492
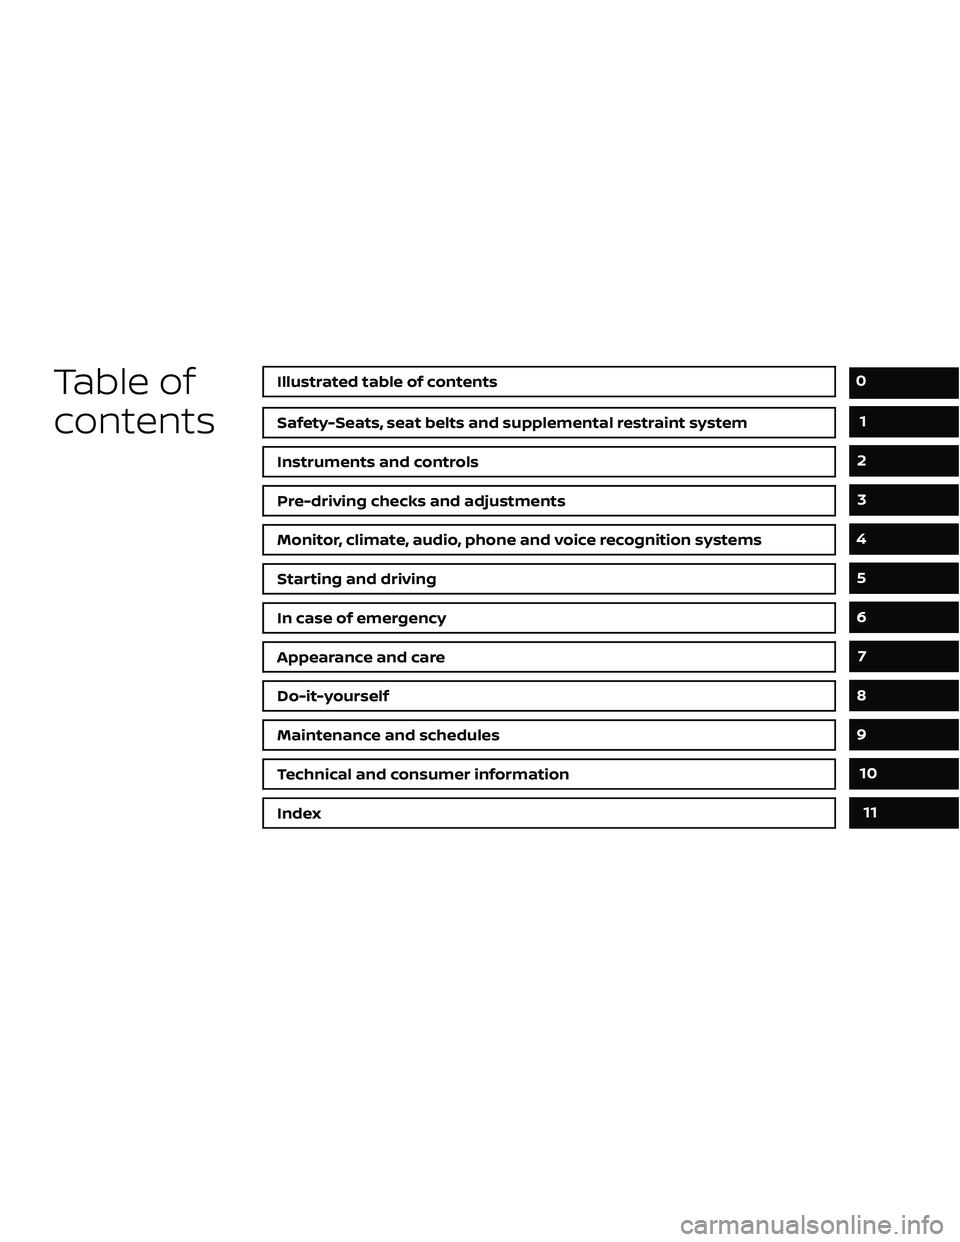
Table of
contents
Safety-Seats, seat belts and supplemental restraint system
Instruments and controls
Pre-driving checks and adjustments
Monitor, climate, audio, phone and voice recognition systems
Starting and driving
In case of emergency
Appearance and care
Do-it-yourself
Maintenance and schedules
Technical and consumer information
Index
0
1
2
3
4
5
6
7
8
9
10
11
Page 22 of 492

1 Safety-Seats, seat belts and
supplemental restraint system
Seats............................................ 1-2Front manual seat adjustment
(if so equipped) ................................1-3
Front power seat adjustment
(if so equipped) ............................... 1-5
Rear bench seat (if so equipped) ............. 1-6
Jump seat (if so equipped) ....................1-7
Armrest (if so equipped) .......................1-7
Flexible seating ................................1-7
Head restraints/headrests ......................1-10
Adjustable head restraint/headrest
components ................................. 1-11
Non-adjustable head restraint/headrest
components................................. 1-12
Remove...................................... 1-12
Install ........................................ 1-13
Adjust ........................................ 1-13
Front-seat active head restraints .............1-14
Seatbelts ....................................... 1-15
Precautions on seat belt usage ...............1-15
Seat belt warning light and chime ............1-18
Pregnant women ............................ 1-18
Injured persons .............................. 1-18Three-point type seat belt with
retractor .....................................
1-19
Seat belt extenders ......................... 1-24
Seat belt maintenance ......................1-24
Child safety .................................... 1-25
Infants ...................................... 1-26
Small children ............................... 1-26
Larger children .............................. 1-26
Child restraints ................................. 1-28
Precautions on child restraints ..............1-28
LATCH (Lower Anchors and Tethers for
CHildren) system ............................ 1-30
Rear-facing child restraint installation
using LATCH (Crew Cab models) .............1-34
Rear-facing child restraint installation
using LATCH — jump seat
(King Cab® models) .......................... 1-36
Rear-facing child restraint installation
using the seat belts (Crew Cab models) .....1-39
Rear-facing child restraint installation
using the seat belts — jump seat
(King Cab® models) .......................... 1-42
Page 132 of 492
Front passenger air bag
status light
The front passenger air bag status lightwill be lit and the passenger front air
bag will be off depending on how the front
passenger seat is being used.
For additional information, refer to “Front
passenger air bag and status light” in the
“Safety — Seats, seat belts and supplemen-
tal restraint system” section of this manual.
High beam indicator light
(blue)
This blue light comes on when the head-
light high beams are on and goes out when
the low beams are selected.
The high beam indicator light also comes
on when the passing signal is activated.
Hill descent control system
ON indicator light (if so
equipped)
When the ignition switch is placed in the ON
position, this light comes on briefly and
then turns off.
The light comes on when the hill descent
control system is activated. If the hill descent control switch is on and
the indicator light blinks, the system is not
engaged.
If the indicator light does not come on
when the hill descent switch is on, the sys-
tem may not be functioning properly. Have
the system checked. It is recommended
that you visit a NISSAN dealer for this ser-
vice.
For additional information, refer to “Hill de-
scent control switch” in this section and “Hill
descent control system” in the “Starting
and driving” section of this manual.
Malfunction Indicator Light
(MIL)
If this indicator light comes on steady or
blinks while the engine is running, it may
indicate a potential emission control mal-
function.
The MIL may also come on steady if the
fuel-filler cap is loose or missing, or if the
vehicle runs out of fuel. Check to make sure
the fuel-filler cap is installed and closed
tightly, and that the vehicle has at least 3
gal (11.4 L) of fuel in the fuel tank.
Af ter a few driving trips, the
light
should turn off if no other potential emis-
sion control system malfunction exists. If this indicator light comes on steady for 20
seconds and then blinks for 10 seconds
when the engine is not running, it indicates
that the vehicle is not ready for an emission
control system inspection/maintenance
test. For additional information, refer to
“Readiness for inspection/maintenance
(I/M) test” in the “Technical and consumer
information” section of this manual.
Operation
The MIL will come on in one of two ways:
• MIL on steady — An emission control sys-
tem malfunction has been detected.
Check the fuel-filler cap if the LOOSE FUEL
CAP warning appears in the trip com-
puter. If the fuel-filler cap is loose or miss-
ing, tighten or install the cap and con-
tinue to drive the vehicle. The
light
should turn off af ter a few driving trips. If
the
light does not turn off af ter a few
driving trips, have the vehicle inspected. It
is recommended that you visit a NISSAN
dealer for this service. You do not need to
have your vehicle towed to the dealer.
• MIL blinking — An engine misfire has been detected which may damage the emis-
sion control system. To reduce or avoid
emission control system damage:– Do not drive at speeds above 45 mph (72 km/h).
2-22Instruments and controls
Page 203 of 492
Touch-screen maintenance
If you clean the display screen, use a dry,
sof t cloth. If additional cleaning is neces-
sary, use a small amount of neutral deter-
gent with a sof t cloth. Never spray the
screen with water or detergent. Dampen
the cloth first and then wipe the screen.
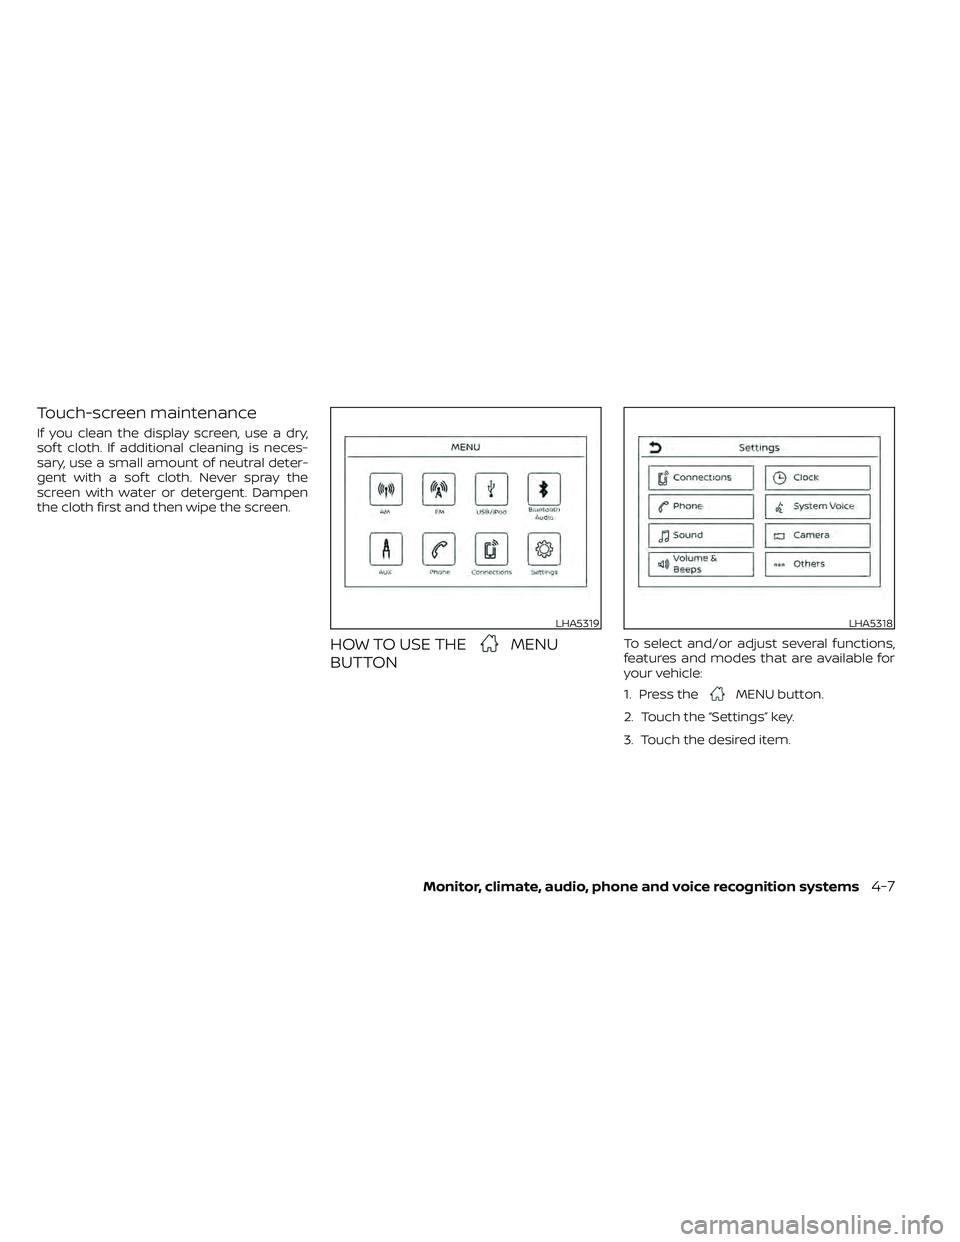
HOW TO USE THEMENU
BUTTONTo select and/or adjust several functions,
features and modes that are available for
your vehicle:
1. Press the
MENU button.
2. Touch the “Settings” key.
3. Touch the desired item.
LHA5319LHA5318
Page 208 of 492
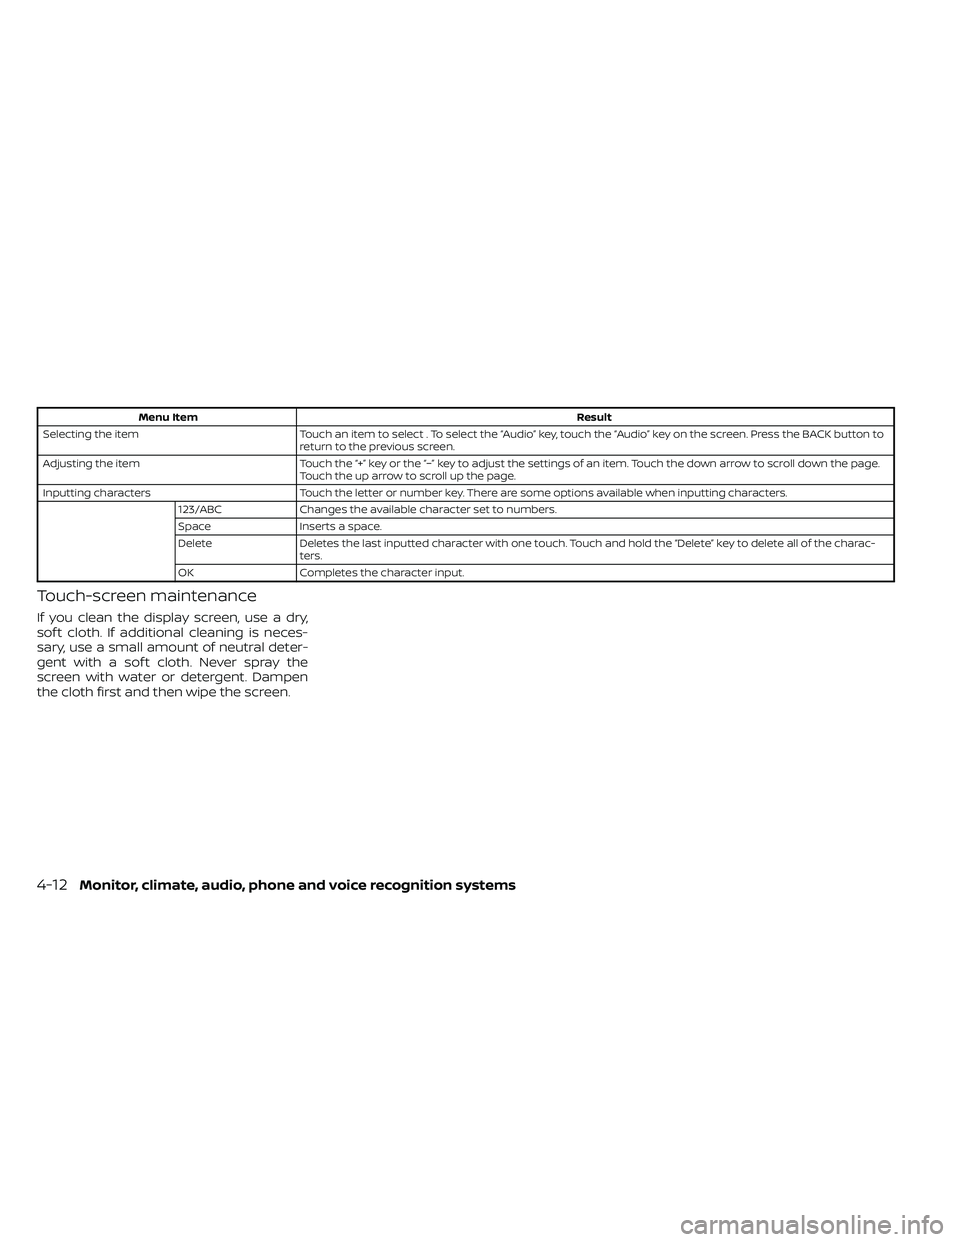
Menu ItemResult
Selecting the item Touch an item to select . To select the “Audio” key, touch the “Audio” key on the screen. Press the BACK button to
return to the previous screen.
Adjusting the item Touch the “+” key or the “−” key to adjust the settings of an item. Touch the down arrow to scroll down the page.
Touch the up arrow to scroll up the page.
Inputting characters Touch the letter or number key. There are some options available when inputting characters.
123/ABC Changes the available character set to numbers.
Space Inserts a space.
Delete Deletes the last inputted character with one touch. Touch and hold the “Delete” key to delete all of the charac-
ters.
OK Completes the character input.
Touch-screen maintenance
If you clean the display screen, use a dry,
sof t cloth. If additional cleaning is neces-
sary, use a small amount of neutral deter-
gent with a sof t cloth. Never spray the
screen with water or detergent. Dampen
the cloth first and then wipe the screen.
4-12Monitor, climate, audio, phone and voice recognition systems
Page 217 of 492
•Objects viewed in the RearView
Monitor differ from actual distance
because a wide-angle lens is used.
• Objects in the RearView Monitor will
appear visually opposite compared
to when viewed in the rearview and
outside mirrors.
• Use the displayed lines as a refer-
ence. The lines are highly affected by
the number of occupants, fuel level,
vehicle position, road conditions and
road grade.
• Make sure that the tailgate is se-
curely closed when backing up.
• Do not put anything on the rearview
camera. The rearview camera is in-
stalled on the tailgate.
• When washing the vehicle with high
pressure water, be sure not to spray it
around the camera. Otherwise, water
may enter the camera unit causing
water condensation on the lens, a
malfunction, fire or an electric shock.
• Do not strike the camera. It is a preci-
sion instrument. Otherwise, it may
malfunction or cause damage result-
ing in a fire or an electric shock. The following are operating limitations and
do not represent a system malfunction:
• When the temperature is extremely high
or low, the screen may not clearly display
objects.
• When strong light directly shines on the camera, objects may not be displayed
clearly.
• Vertical lines may be seen in objects on the screen. This is due to strong reflected
light from the bumper.
• The screen may flicker under fluorescent light.
• The colors of objects on the RearView Monitor may differ somewhat from the
actual color of objects.
• Objects on the monitor may not be clear in a dark environment.
• There may be a delay when switching between views.
• If dirt, rain or snow accumulate on the camera, RearView Monitor may not dis-
play objects clearly. Clean the camera.
• Do not use wax on the camera lens. Wipe off any wax with a clean cloth dampened
with a diluted mild cleaning agent, then
wipe with a dry cloth.
SYSTEM MAINTENANCE
LHA3671
Page 311 of 492
THREE-WAY CATALYST
The three-way catalyst is an emission con-
trol device installed in the exhaust system.
Exhaust gases in the three-way catalyst
are burned at high temperatures to help
reduce pollutants.
CAUTION
• Do not use leaded gasoline. Deposits
from leaded gasoline will seriously
reduce the three-way catalyst's abil-
ity to help reduce exhaust pollutants. •
Keep your engine tuned up. Malfunc-
tions in the ignition, fuel injection, or
electrical systems can cause overrich
fuel flow into the three-way catalyst,
causing it to overheat. Do not keep
driving if the engine misfires, or if no-
ticeable loss of performance or other
unusual operating conditions are de-
tected. Have the vehicle inspected
promptly. It is recommended that
you visit a NISSAN dealer for this
service.
• Avoid driving with an extremely low
fuel level. Running out of fuel could
cause the engine to misfire, damag-
ing the three-way catalyst.
• Do not race the engine while warm-
ing it up.
• Do not push or tow your vehicle to
start the engine.
TIRE PRESSURE MONITORING
SYSTEM (TPMS)
Each tire, including the spare (if provided),
should be checked monthly when cold and
inflated to the inflation pressure recom-
mended by the vehicle manufacturer on
the vehicle placard or tire inflation pressure
label. (If your vehicle has tires of a different
size than the size indicated on the vehicle placard or tire inflation pressure label, you
should determine the proper tire inflation
pressure for those tires.)
As an added safety feature, your vehicle
has been equipped with a Tire Pressure
Monitoring System (TPMS) that illuminates
a low tire pressure telltale when one or
more of your tires is significantly under-
inflated. Accordingly, when the low tire
pressure telltale illuminates, you should
stop and check your tires as soon as pos-
sible, and inflate them to the proper pres-
sure. Driving on a significantly under-
inflated tire causes the tire to overheat and
can lead to tire failure. Under-inflation also
reduces fuel efficiency and tire tread life,
and may affect the vehicle’s handling and
stopping ability.
Please note that the TPMS is not a substi-
tute for proper tire maintenance, and it is
the driver’s responsibility to maintain cor-
rect tire pressure, even if under-inflation
has not reached the level to trigger illumi-
nation of the TPMS low tire pressure telltale.
Your vehicle has also been equipped with a
TPMS malfunction indicator to indicate
when the system is not operating properly.
The TPMS malfunction indicator is com-
bined with the low tire pressure telltale.
When the system detects a malfunction,
Starting and driving5-3