2021 MERCEDES-BENZ GLE COUPE ignition
[x] Cancel search: ignitionPage 199 of 525
-
The vehicle is stationary for a lengt hy
period.
When the electric parking brake is applied, the
re d0024 indicator lamp lights up in the instru‐
ment clus ter.
% The electric parking brake is not automati‐
cally applied if the engine is switched off by
th e ECO start/ stop function.
Fu nction of the electric pa rking brake
(releasing automatically)
The electric parking brake is released when
th efo llowing conditions are fulfilled:
R The driver's door is closed.
R The engine is running.
R The transmission is in position 005Bor005E and
yo u depress the accelera tor pedal or you
shift from transmission position 005Dto005B or
005E when on le velground.
R Ifth e transmission is in position 005E,theta il‐
ga te must be closed.
R The seat belt tongue is inser ted into the seat
belt buckle of the driver's seat. When
the electric parking brake is released, the
re d0024 indicator lamp in the instrument clus‐
te r goes out.
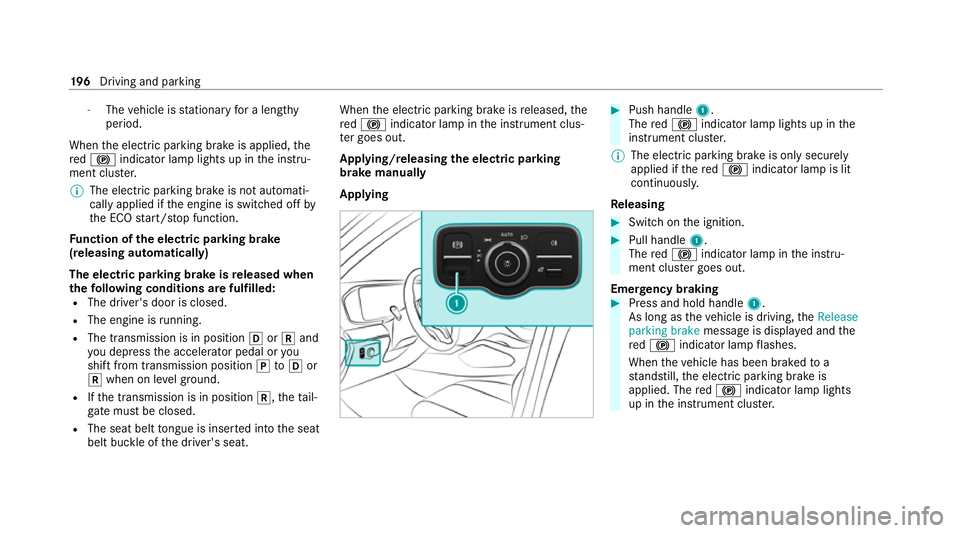
Applying/releasing the electric pa rking
brake manually
Applying #
Push handle 1.
The red0024 indicator lamp lights up in the
instrument clus ter.
% The electric parking brake is only securely
applied if there d0024 indicator lamp is lit
continuously.
Re leasing #
Swit chon the ignition. #
Pull handle 1.
The red0024 indicator lamp in the instru‐
ment clus ter goes out.
Emer gency braking #
Press and hold handle 1.
As long as theve hicle is driving, theRelease
parking brake message is displa yed and the
re d0024 indicator lamp flashes.
When theve hicle has been braked to a
st andstill, the electric parking brake is
applied. The red0024 indicator lamp lights
up in the instrument clus ter. 19 6
Driving and pa rking
Page 200 of 525
Information on collision de
tection on a
pa rked vehicle If a collision is de
tected when theto w- aw ay pro‐
te ction is primed on a loc kedve hicle, you will
re cei vea notification in the multimedia sy stem
when you swit chon the ignition.
Yo u will recei veinformation about thefo llowing
points:
R The area of theve hicle that may ha vebeen
damaged.
R The forc e of the impact.
The following situations can lead toinadver tent
acti vation:
R The pa rked vehicle is mo ved, e.g. in a two-
st or ey garage.
% Deactivate tow- aw ay protection in order to
pr eve nt inadver tent acti vation. If you deacti‐
va te tow- aw ay protection, collision de tection
will also be deactivated. Sy
stem limits
De tection may be restricted in thefo llowing sit‐
uations:
R theve hicle is damaged without impact, e.g. if
an outside mir ror is torn off or the paint is
damaged byakey
R an impact occurs at low speed
R the electric parking brake is not applied Note
s on parking up theve hicle If
yo u lea vetheve hicle par ked up for longer than
six weeks, it may suf fer dama gethro ugh disuse.
The 12V battery may also be impaired or dam‐
aged byheavy discharging.
% Further information can be obtained at a
qu alified specialist workshop.
* NO
TEPlug-in hybrid #
Obser vethe no tes about the high-volt‐
age battery in the Supplement. Yo u
could otherwise failto recognise dan‐
ge rs. St
andby mode (extension of the star ter bat‐
te ry 's period out of use) St
andby mode function
% This function is not available for all models.
If standby mode is activated, ene rgy loss will be
minimised during extended pe riods of non-oper‐
ation.
St andby mode is characterised bythefo llowing:
R The star ter battery is preser ved.
R The maximum non-operational time appears
inthe media displa y.
R The connection toonline services is inter rup‐
te d.
R The ATA (anti-theft alarm sy stem) is una vaila‐
ble.
R The interior pr otection and tow- aw ay protec‐
tion functions are not available.
R The function for de tecting collisions on a
pa rked vehicle is not available. Driving and parking
197
Page 201 of 525
If
th efo llowing conditions are fulfilled, standby
mode can be activated or deactivated using the
multimedia sy stem:
R The engine is switched off.
R The ignition is switched on.
Exceeding theve hicle's displa yed non-opera‐
tional time may cause incon venience, i.e. it can‐
not be guaranteed that thest ar ter battery will
re liably start the engine.
The star ter battery must be charge dfirs t in the
fo llowing situations:
R The vehicle's non-operational time must be
ex tended.
R The Battery charge insufficient for standby
mode messa geappears in the media displa y.
% Standby mode is automatically deactivated
when the ignition is switched on.
Ac tivating/deactivating standby mode (park‐
ing up theve hicle)
Re quirements:
R The engine is switched off. Multimedia sy
stem:
4 © 5
Settings 5
Vehicle #
Activate or deacti vate Standby mode. #
Select Yes. Driving and driving saf
ety sy stems Driving sy
stems and your responsibility Yo
ur vehicle is equipped with driving sy stems
which assist you in driving, parking and manoeu‐
vring theve hicle. The driving sy stems are only
aids. They are not a substitute foryo ur attention
to the sur roundings and do not relie ve you of
yo ur responsibility per taining toroad traf fic la w.
The driver is alw aysre sponsible for maintaining
a safe dis tance totheve hicle in front, forve hicle
speed, for braking in good time and forst ay ing
in lane. Pay attention tothe tra ffic conditions at
all times and inter vene when necessary . Be
aw are of the limitations rega rding the safe use of
th ese sy stems.
Driving sy stems can neither reduce therisk of
accident if youfa ilto adapt your driving style nor
ove rride the la wsof ph ysics. They cannot alw aysta
ke into account road, weather or traf fic condi‐
tions. In
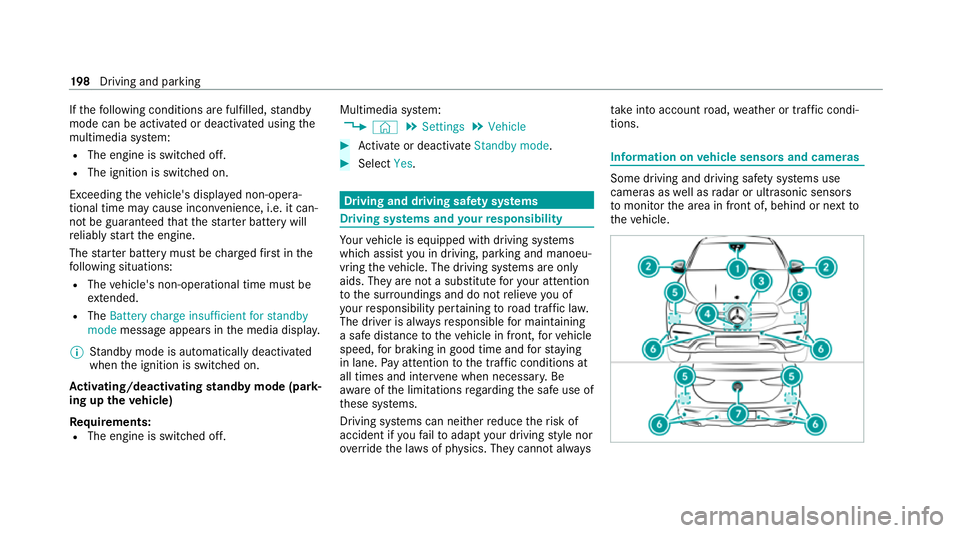
fo rm ation on vehicle sensors and cameras Some driving and driving saf
ety sy stems use
cameras as well as radar or ultrasonic sensors
to monitor the area in front of, behind or next to
th eve hicle. 19 8
Driving and pa rking
Page 230 of 525
ated at speeds below
15km/h be fore you ha ve
left the lane in which you are driving. &
WARNING Risk of accident despite Eva‐
si ve Steering Assist
Evasive Steering Assist cann otalw aysre cog‐
nise objects or compl extraf fic situations
clear ly.
Moreo ver,th esteering support pr ovided by
Evasive Steering Assist is not suf ficient to
avo id a collision. #
Alw ays pay careful attention tothe traf‐
fi c situation; do not rely on Ev asive
St eering Assist alone. #
Be prepared tobrake or swer veif nec‐
essar y. #
End the support byactively steering in
non-critical situations. #
Drive at an appropriate speed if there
are pedestrians close tothe path of
yo ur vehicle. Sy
stem limits
Fu ll sy stem per form ance is not available for a
fe w seconds af ter switching on the ignition or
af te r driving off.
If Ac tive Brake Assi stis impaired or inopera tive
due toa malfunction, the00C7 warning lamp
appears in the multifunction displa y.
The sy stem may be impaired or may not func‐
tion, particular lyin thefo llowing situations:
R In sno w,rain, fog, heavy spr ay, if there is
gl are, in direct sunlight or in greatlyvarying
light conditions.
R Ifth e sensors are dirty, mis ted up, damaged
or co vered.
R Ifth e sensors are impaired due tointer fer‐
ence from other radar sources, e.g. strong
ra dar reflections in multi-s torey car par ks.
R If a loss of tyre pressure or a defective tyre
has been de tected and displaye d.
R If DSR is active.
R In complex tra ffic situations where objects
cannot alw ays be clearly identified. R
If pedestrians or vehicles mo vequickly into
th e sensor de tection range.
R If pede strians are hidden by other objects.
R Ifth e typical outline of a pedestrian cann ot
be distinguished from the bac kground.
R If a pedestrian is not de tected as such , e.g.
due tospecial clo thing or other objects.
R Ifth e driver's seat belt is not fastened.
R On bends with a tight radius.
% The Active Brake Assi stsensors adjust auto‐
matically while a cer tain dis tance is being
driven af terth eve hicle has been delivered.
Ac tive Brake Assi stis una vailable or only
partially available during thete ach-in proc‐
ess.
Ac tivating/deactivating Active Brake Assi st
Re quirements:
R The ignition is switched on. Driving and parking
227
Page 243 of 525
Ra
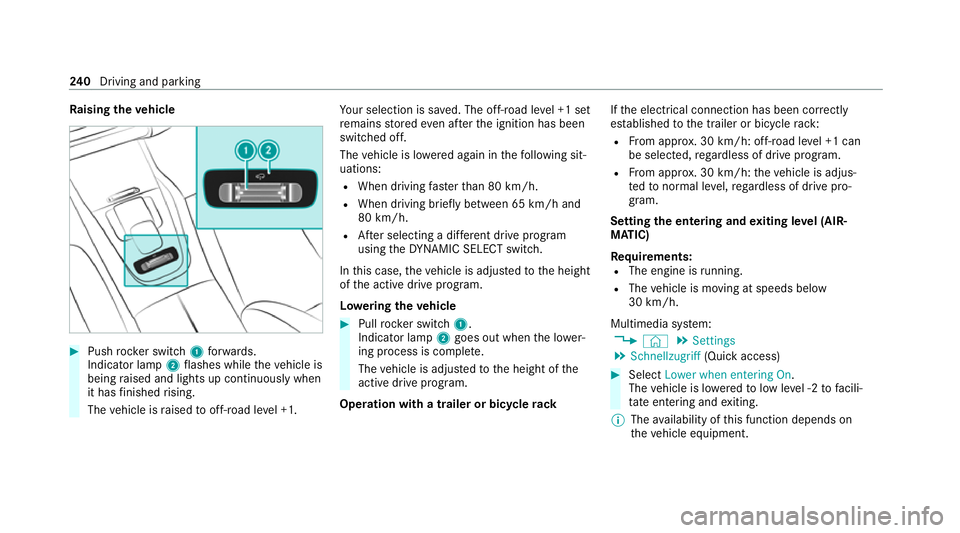
ising theve hicle #
Push rocker switch 1forw ards.
Indicator lamp 2flashes while theve hicle is
being raised and lights up continuously when
it has finished rising.
The vehicle is raised tooff-road le vel +1. Yo
ur selection is sa ved. The off-road le vel +1 set
re mains stored even af terth e ignition has been
switched off.
The vehicle is lo wered again in thefo llowing sit‐
uations:
R When driving fasterthan 80 km/h.
R When driving brief ly between 65 km/ h and
80 km/h.
R After selecting a dif fere nt drive program
using theDY NA MIC SELECT switch.
In this case, theve hicle is adjus tedto the height
of the active drive program.
Lo weri ngtheve hicle #
Pull rock er switch 1.
Indicator lamp 2goes out when the lo wer‐
ing process is comple te.
The vehicle is adjus tedto the height of the
active drive program.
Operation with a trailer or bicycle rackIf
th e electrical connection has been cor rectly
es tablished tothe trailer or bicycle rack:
R From appr ox. 30 km/h: off-road le vel +1 can
be selec ted, rega rdless of drive program.
R From appr ox. 30 km/h: theve hicle is adjus‐
te dto normal le vel,re ga rdless of drive pro‐
gram.
Setting the entering and exiting le vel (AIR‐
MATIC)
Re quirements:
R The engine is running.
R The vehicle is moving at speeds below
30 km/h.
Multimedia sy stem:
4 © 5
Settings
5 Schnellzugriff (Quick access) #
Select Lower when entering On.
The vehicle is lo weredto low le vel -2 tofacili‐
ta te entering and exiting.
% The availability of this function depends on
th eve hicle equipment. 240
Driving and pa rking
Page 249 of 525
#
When leaving theve hicle, make sure
th at nobody is in the vicinity of the
wheel ar ches or the underbody. Re
quirements:
R The vehicle has been star ted.
R The vehicle is being driven no fasterthan
65 km/h. Ra
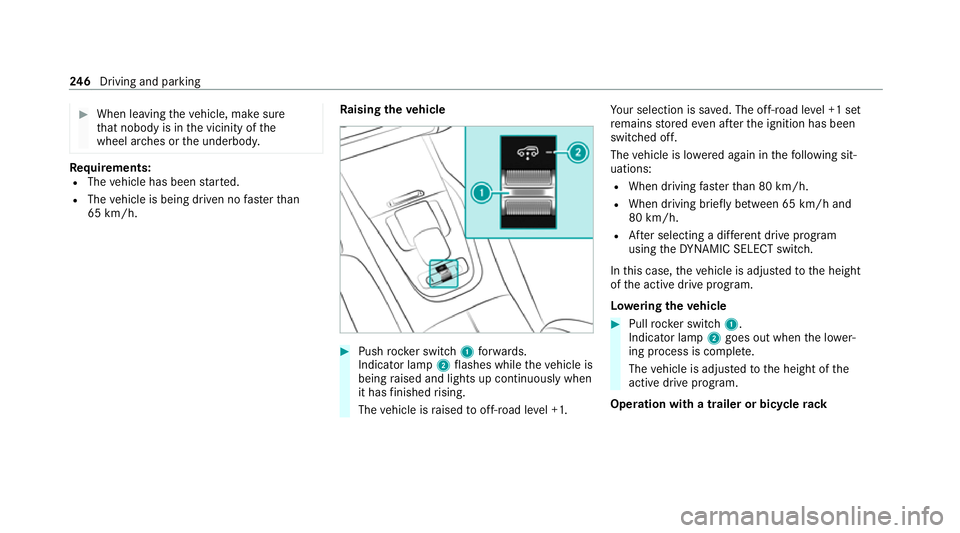
ising theve hicle #
Push rocker switch 1forw ards.
Indicator lamp 2flashes while theve hicle is
being raised and lights up continuously when
it has finished rising.
The vehicle is raised tooff-road le vel +1. Yo
ur selection is sa ved. The off-road le vel +1 set
re mains stored even af terth e ignition has been
switched off.
The vehicle is lo wered again in thefo llowing sit‐
uations:
R When driving fasterthan 80 km/h.
R When driving brief ly between 65 km/ h and
80 km/h.
R After selecting a dif fere nt drive program
using theDY NA MIC SELECT switch.
In this case, theve hicle is adjus tedto the height
of the active drive program.
Lo weri ngtheve hicle #
Pull rock er switch 1.
Indicator lamp 2goes out when the lo wer‐
ing process is comple te.
The vehicle is adjus tedto the height of the
active drive program.
Operation with a trailer or bicycle rack246
Driving and pa rking
Page 250 of 525
If
th e electrical connection has been cor rectly
es tablished tothe trailer or bicycle rack:
R From appr ox. 30 km/h: off-road le vel +1 can
be selec ted, rega rdless of drive program.
R From appr ox. 30 km/h: theve hicle is adjus‐
te dto normal le vel,re ga rdless of drive pro‐
gram.
Setting Off-road Assist
Re quirements:
R theve hicle is stationar y.
R theve hicle is set tooff-road le vel 1 or 2
R the Off-road or Off-road Plus (only vehicles
with Off-road pac kage ) drive prog ram has
been selected
R the ignition is switched on
R all doors and the bonn etare closed
R the transmission is not engaged in position
005D
R there is no trailer coupled
R theve hicle is outdoors R
the de tected late ral inclination of theve hicle
must not exceed appr ox.15 °
R the sy stem is within its operating temp era‐
ture
R the on-board voltage is suf ficiently high
Multimedia sy stem:
4 © 5
Settings 5
Assistance
5 Offroad Assist
Re covery mode
Re covery mode assist sth e driver when pulling
aw ay on rough terrain, such as sand or sn ow. #
Select Free driving mode. #
Select Start.
Re covery mode is activated. #
Select Stoptostop reco very mode.
Re covery mode is auto maticallydeactivated in
th efo llowing situations:
R you are actually tr avelling fasterthan
15 km/h
R afte r a running time of 30 seconds R
it is de tected that an object has hit the
underbody of theve hicle hard
R not all conditions are met
% Further information on reco very mode
(/ page 244).
Individual wheel control
Individual wheel control enables theve hicle le vel
to be set separately for each wheel. #
Select Individual wheel control. #
Set theve hicle le velfo rth e desired wheel.
% You can also use theto uchsc reen toset the
le ve lfo r two or more wheels at the same
time. #
Select Resettoset all wheels tothe default
setting.
Individual wheel control is automatically deacti‐
va ted in thefo llowing situations:
R you are tra velling fasterthan 15 km/h
R it is de tected that an object has hit the
underbody of theve hicle hard
R not all conditions are met Driving and parking
247
Page 256 of 525
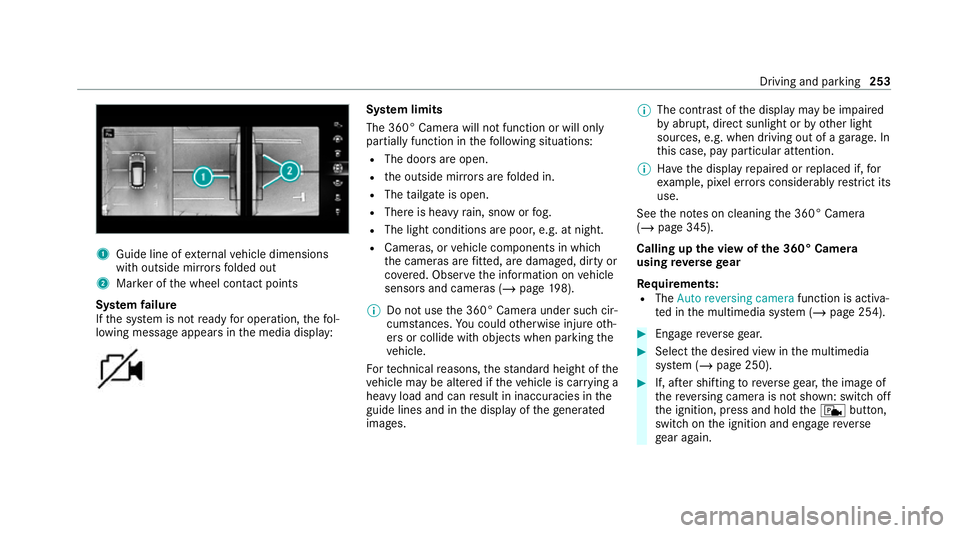
1
Guide line of extern al vehicle dimensions
with outside mir rors folded out
2 Marker of the wheel conta ct points
Sy stem failure
If th e sy stem is not ready for operation, thefo l‐
lowing message appears in the media display: Sy
stem limits
The 360° Camera will not function or will only
partially function in thefo llowing situations:
R The doors are open.
R the outside mir rors are folded in.
R The tailgate is open.
R There is heavy rain, snow or fog.
R The light conditions are poor, e.g. at night.
R Cameras, or vehicle components in which
th e cameras are fitted, are dama ged, dirty or
co vered. Obser vethe information on vehicle
sensors and cameras (/ page198).
% Do not use the 360° Camera under such cir‐
cums tances. You could otherwise injure oth‐
ers or collide with objects when parking the
ve hicle.
Fo rte ch nical reasons, thest andard height of the
ve hicle may be altered if theve hicle is car rying a
heavy load and can result in inaccuracies in the
guide lines and in the display of thege nerated
ima ges. %
The contra stof the display may be impaired
by abrupt, direct sunlight or by other light
sources, e.g. when driving out of a garage . In
th is case, pay particular attention.
% Have the display repaired or replaced if, for
ex ample, pixel er rors considerably restrict its
use.
See the no tes on cleaning the 360° Camera
(/ page 345).
Calling up the view of the 360° Camera
using reve rsege ar
Re quirements:
R The Auto reversing camera function is activa‐
te d in the multimedia sy stem (/ page 254). #
Enga gereve rsege ar. #
Select the desired view in the multimedia
sy stem (/ page 250). #
If, af ter shifting toreve rsege ar, the image of
th ere ve rsing camera is not shown: switch off
th e ignition, press and hold thec button,
switch on the ignition and engage reve rse
ge ar again. Driving and parking
253