2021 MERCEDES-BENZ GLE COUPE ignition
[x] Cancel search: ignitionPage 98 of 525
#
If somebody becomes trapped, briefly
push the sliding sunroof button for‐
wa rds or backwards. %
By pushing or pulling the0057 button, you
can inter rupt the automatic functions "Rain
closing function when driving" and "Auto‐
matic lo wering". Re
ctifying problems with the sliding sunroof &
WARNING Risk of becoming trapped or
fa tal injuries when the sliding sunroof is
closed again
If th e sliding sunroof is closed again immedi‐
ately af ter it has been bloc ked or reset, it will
close with increased forc e. #
Make sure that no parts of the body are
in the closing area. #
Release the button immediately if
somebody becomes trapped.
or #
Brief lypress the button in any direction
during the automatic closing process.
The closing process will be stopped. The sliding sunroof cannot be closed and
you
cann otsee the cause.
% The term "sliding sun roof" also refers to the
panorama sliding sunroof.
If th e sliding sunroof is obstructed during closing
and reopens again slightly: #
Immediately af ter auto matic reve rsing, pull
and hold the0057 button down again tothe
point of resis tance until the sliding sunroof is
closed.
The sliding sunroof will be closed with
increased forc e.
If th e sliding sunroof is obstructed again and
opens again slightly: #
Repeat the pr evious step.
The sliding sunroof will be closed again with
increased forc e. Ve
hicles with a panorama sliding sunroof:
th e sliding sunroof or thero ller sunblind is
not operating smoo thly. #
Reset the sliding sunroof and thero ller sun‐
blind.
Re setting the sliding sunroof and thero ller
sunblind #
Pull and hold the0057 button little bylittle
until the sliding sunroof is fully closed. #
Pull and hold the0057 button little bylittle
until thero ller sunblind is fully closed. #
Use automatic operation tofully open and
th en close the sliding sunroof. Anti-theft pr
otection Fu
nction of the immobiliser The immobiliser pr
events your vehicle from
being star ted without the cor rect key.
The immobiliser is automatically activated when
th e ignition is switched off and deactivated when
th e ignition is switched on. Opening and closing
95
Page 103 of 525
#
When leaving theve hicle, alw aysta ke
th eke y with you and lock theve hicle. #
Never lea vechildren unat tended in the
ve hicle. Yo
u can adjust the seats when the ignition is
switched off. &
WARNING Risk of becoming trapped
du ring seat adjustment
When you adjust a seat, you or other vehicle
occupants could become trapped, e.g. on the
seat guide rail. #
Make sure when adjusting a seat that
no one has any body parts in the sweep
of the seat. Obser
vethe saf ety no tes on "Airbags" and "Chil‐
dren in theve hicle". &
WARNING Risk of injury ifve hicle set‐
tings are adjus ted while theve hicle is in
motion
Yo u could lose cont rol of theve hicle in par‐
ticular in thefo llowing situations:
R Ifyo u adjust the driver's seat, the head
re stra ints, thesteering wheel or the mir‐
ro r while theve hicle is in motion.
R Ifyo ufast enyour seat belt while theve hi‐
cle is in motion. #
Before starting the engine: adjust the
driver's seat, head restra ints, steering
wheel and mir ror in particular and fas‐
te nyo ur seat belt. &
WARNING Risk of becoming trapped if
th e seat height is adjus ted carelessly
If yo u adjust the seat height carelessly, you
or other vehicle occupants could be trapped
and thereby injured. Children in particular could acciden
tally
press the electrical seat adjustment buttons
and become trapped. #
While moving the seats, make sure that
hands or other body parts do not get
under the le ver assembly of the seat
adjustment sy stem. &
WARNING Risk of injury duetohead
re stra ints not being fitted or being adjus‐
te d incor rectly
If head restra ints ha venot been ins talled or
ha ve not been adjus ted cor rectly, there is an
increased risk of injury in the head and neck
area, e.g. in theev ent of an accident or when
braking. #
Alw ays drive with the head restra ints
fi tted. #
Before driving off, ma kesure forev ery
ve hicle occupant that the cent reofthe
head restra int supports the back of the
head at about eye le vel. 100
Seats and stowing
Page 113 of 525
Ste
ering wheel Ad
justing the steering wheel manually &
WARNING Risk of injury ifve hicle set‐
tings are adjus ted while theve hicle is in
motion
Yo u could lose cont rol of theve hicle in par‐
ticular in thefo llowing situations:
R Ifyo u adjust the driver's seat, the head
re stra ints, thesteering wheel or the mir‐
ro r while theve hicle is in motion.
R Ifyo ufast enyour seat belt while theve hi‐
cle is in motion. #
Before starting the engine: adjust the
driver's seat, head restra ints, steering
wheel and mir ror in particular and fas‐
te nyo ur seat belt. &
WARNING Risk of entrapment forch il‐
dren when adjusting thesteering wheel
Children could injure themselves if they
adjust thesteering wheel. #
Never lea vechildren unat tended in the
ve hicle. #
When leaving theve hicle, alw aysta ke
th eke y with you and lock theve hicle. #
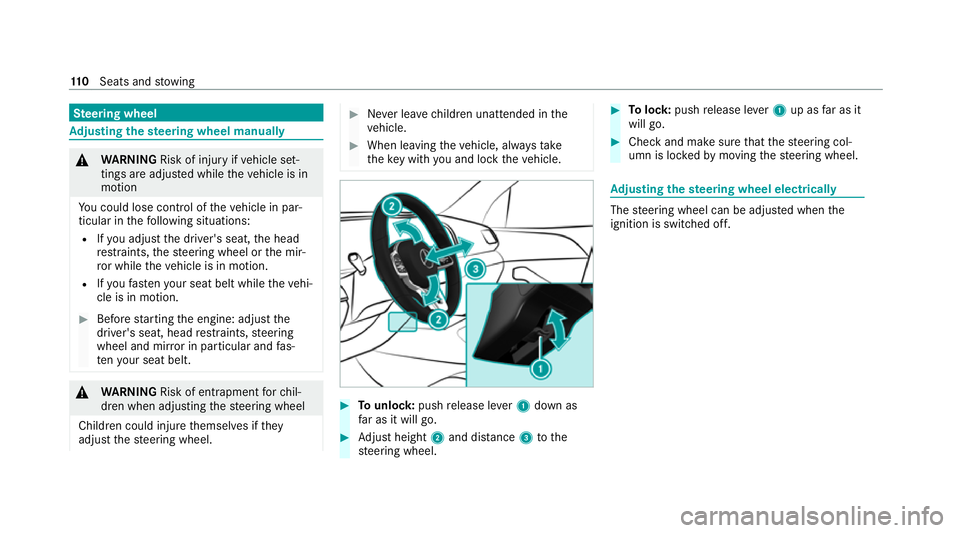
Tounlo ck:push release le ver1 down as
fa r as it will go. #
Adjust height 2and di stance 3tothe
st eering wheel. #
Tolock: pushrelease le ver1 up as far as it
will go. #
Check and make sure that thesteering col‐
umn is loc kedby moving thesteering wheel. Ad
justing the steering wheel electrically The
steering wheel can be adjus ted when the
ignition is switched off. 11 0
Seats and stowing
Page 114 of 525
1
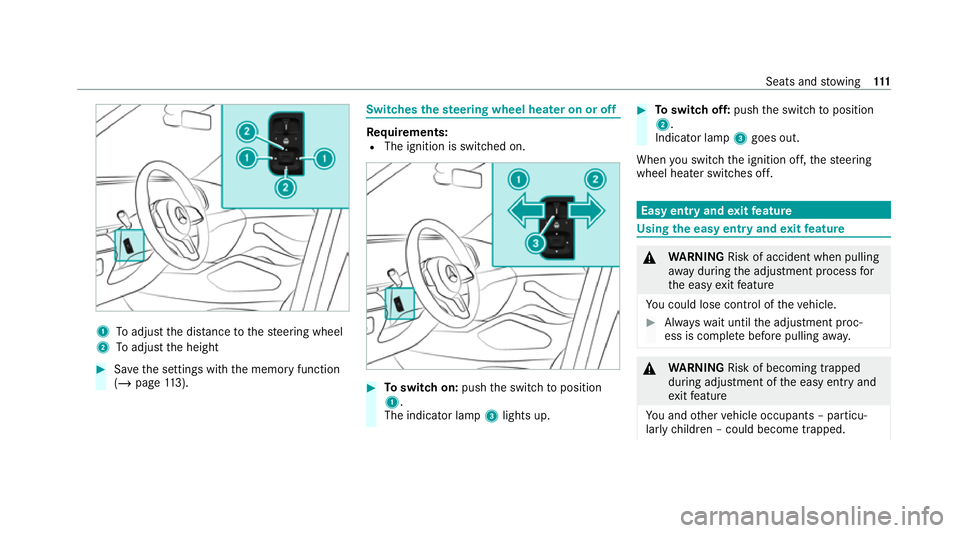
Toadjust the dis tance tothesteering wheel
2 Toadjust the height #
Save the settings with the memory function
(/ page 113). Swi
tches the steering wheel heater on or off Re
quirements:
R The ignition is switched on. #
Toswitch on: pushthe switch toposition
1.
The indicator lamp 3lights up. #
Toswitch off: pushthe switch toposition
2.
Indicator lamp 3goes out.
When you swit ch the ignition off, thesteering
wheel heater switches off. Easy entry and
exitfeature Using
the easy entry and exitfeature &
WARNING Risk of accident when pulling
aw ay during the adjustment process for
th e easy exitfeature
Yo u could lose cont rol of theve hicle. #
Alw ayswa it until the adjustment proc‐
ess is comple tebefore pulling away. &
WARNING Risk of becoming trapped
du ring adjustment of the easy entry and
ex itfeature
Yo u and other vehicle occupants – particu‐
lar lych ildren – could become trapped. Seats and
stowing 111
Page 115 of 525
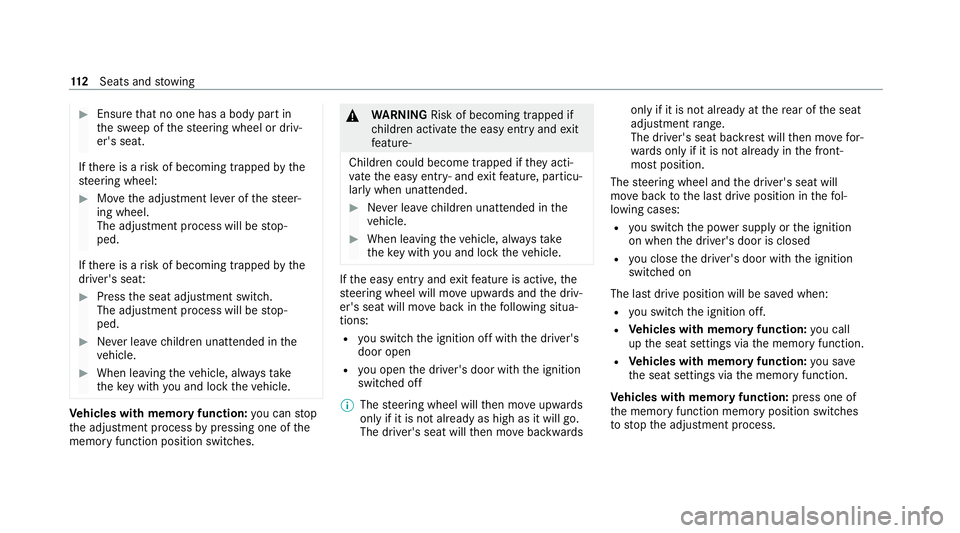
#
Ensu rethat no one has a body part in
th e sweep of thesteering wheel or driv‐
er's seat.
If th ere is a risk of becoming trapped bythe
st eering wheel: #
Movethe adjustment le ver of thesteer‐
ing wheel.
The adjustment process will be stop‐
ped.
If th ere is a risk of becoming trapped bythe
driver's seat: #
Press the seat adjustment switch.
The adjustment process will be stop‐
ped. #
Never lea vechildren unat tended in the
ve hicle. #
When leaving theve hicle, alw aysta ke
th eke y with you and lock theve hicle. Ve
hicles with memory function: you can stop
th e adjustment process bypressing one of the
memory function position switches. &
WARNING Risk of becoming trapped if
ch ildren activate the easy entry andexit
fe ature‑
Children could become trapped if they acti‐
va te the easy entry ‑ andexitfeature, particu‐
lar lywhen unat tended. #
Never lea vechildren unat tended in the
ve hicle. #
When leaving theve hicle, alw aysta ke
th eke y with you and lock theve hicle. If
th e easy entry andexitfeature is active, the
st eering wheel will mo veupwards and the driv‐
er's seat will mo veback in thefo llowing situa‐
tions:
R you swit chthe ignition off with the driver's
door open
R you open the driver's door with the ignition
switched off
% The steering wheel will then mo veupwards
on ly if it is not already as high as it will go.
The driver's seat will then mo vebackwards only if it is not already at
there ar of the seat
adjustment range.
The driver's seat ba ckrest will then mo vefor‐
wa rds only if it is not already in the front‐
most position.
The steering wheel and the driver's seat will
mo veback tothe last drive position in thefo l‐
lowing cases:
R you swit chthe po wer supp lyor the ignition
on when the driver's door is closed
R you close the driver's door with the ignition
switched on
The last drive position will be sa ved when:
R you swit chthe ignition off.
R Vehicles with memory function: you call
up the seat settings via the memory function.
R Vehicles with memory function: you sa ve
th e seat settings via the memory function.
Ve hicles with memory function: press one of
th e memory function memory position switches
to stop the adjustment process. 11 2
Seats and stowing
Page 131 of 525
cup holder's me
tal inse rtwhen thewa rning
lamp is lit. #
Toswitch off: press button 2repeatedly
until the indicator lamp on the button goes
out.
% Clean there mo vable rubber mat only with
clean, luk ewarmwate r and the cup holder
only with a soft clo th.Soc
kets Using the
12V so cket Re
quirements:
R Only connect devices up toa maximum of
24 0 W (20 A).
Depending on theve hicle equipment, theve hicle
has thefo llowing 12V soc kets:
R inthestow age compartment in the front
cent reconsole
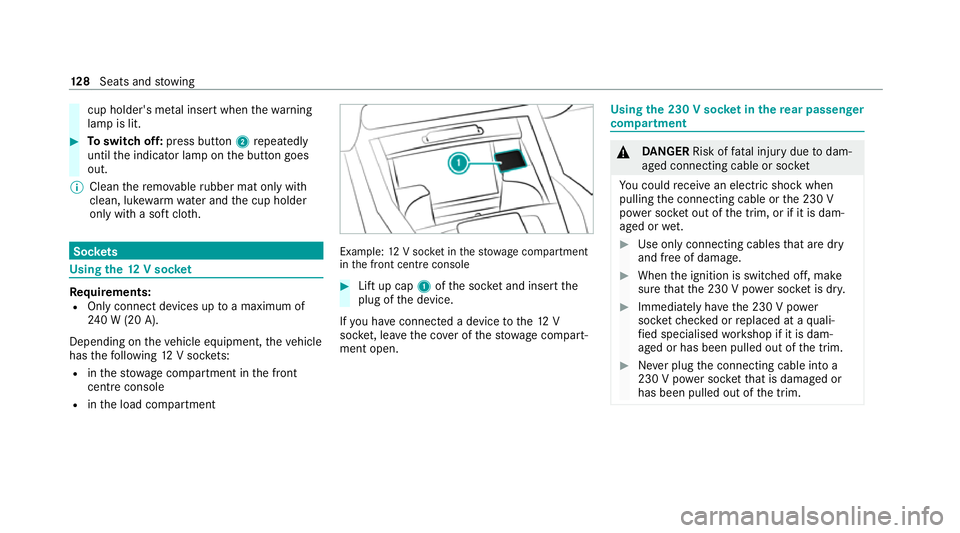
R inthe load compartment Example:
12V soc ket in thestow age compartment
in the front cent reconsole #
Lift up cap 1ofthe soc ket and insert the
plug of the device.
If yo u ha veconnected a device tothe12 V
soc ket, le ave the co ver of thestow age compart‐
ment open. Using
the 230 V soc ket in the rear passenger
comp artment &
DANG ER Risk of fata l injury due todam‐
aged connecting cable or soc ket
Yo u could recei vean electric shock when
pulling the connecting cable or the 230 V
po we r soc ket out of the trim, or if it is dam‐
aged or wet. #
Use only connecting cables that are dry
and free of damage. #
When the ignition is switched off, make
sure that the 230 V po wer soc ket is dr y. #
Immedia tely ha ve the 230 V po wer
soc ketch ecked or replaced at a quali‐
fi ed specialised workshop if it is dam‐
aged or has been pulled out of the trim. #
Never plug the connecting cable into a
230 V po wer soc ketth at is damaged or
has been pulled out of the trim. 12 8
Seats and stowing
Page 132 of 525
&
DANG ER Risk of fata l injury due toincor‐
re ct handling of the soc ket
Yo u could recei vean electric shock in partic‐
ular:
R ifyo ure ach into the soc ket.
R ifyo u insert unsuitable devices or objects
into the soc ket. #
Do not reach into the soc ket. #
Only connect suitable devices tothe
soc ket. Re
quirements:
R Only connect devices with a suitable plug
which con form sto thest andards specific to
th e count ryyou are in.
R Only connect devices uptoa maximum of
15 0 W (0.65 A).
R Do not use multiple soc ket outlets.
Depending on theve hicle equipment, the design
of the cent reconsole and stowage compartment
may dif fer. #
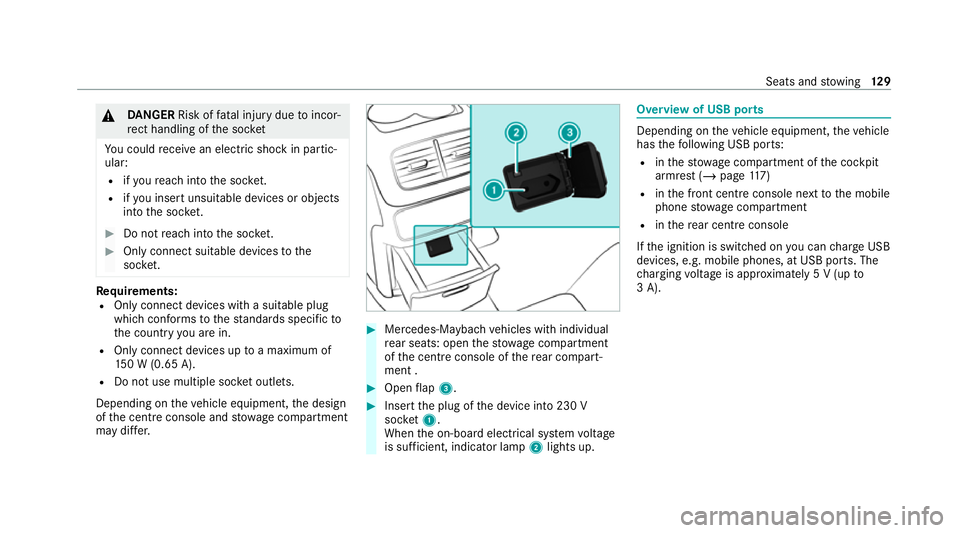
Mercedes-Maybach vehicles with individual
re ar seats: open thestow age compartment
of the cent reconsole of there ar compart‐
ment . #
Open flap 3. #
Insert the plug of the device into 230 V
soc ket1.
When the on-board electrical sy stem voltage
is suf ficient, indicator la mp2lights up. Overview of USB ports
Depending on
theve hicle equipment, theve hicle
has thefo llowing USB ports:
R inthestow age compartment of the cockpit
armrest (/ page117)
R inthe front cent reconsole next tothe mobile
phone stowage compartment
R inthere ar centre console
If th e ignition is switched on you can charge USB
devices, e.g. mobile phones, at USB ports. The
ch arging voltage is appr oximately 5 V (up to
3 A). Seats and
stowing 12 9
Page 134 of 525
R
Depending on theve hicle equipment, the
mobile phone is connected totheve hicle's
ex terior aerial via thech arging module.
R The charging function and wireless connec‐
tion of the mobile phone totheve hicle's
ex terior aerial are only available if the ignition
is switched on.
R Small mobile phones may not be able tobe
ch arge d in everyposition of the mobile
phone stowage compartment.
R Largemobile phones which do not rest flat in
th e mobile phone stowage compartment may
not be able tobe charge d or connec ted with
th eve hicle's exterior aerial.
R The mobile phone may heat up during the
ch arging process. This may also depend on
th e applications (apps) cur rently open in the
bac kground.
R Toensure more ef ficient charging and con‐
nection with theve hicle's exterior aerial,
re mo vethe pr otective co ver from the mobile
phone. Pr otective co vers which are neces‐
sary for wireless charging are an exception. Wire
lesscharging of a mobile phone in the
cockpit Re
quirements:
R The mobile phone is suitable for wireless
ch arging.
% A list of compatible mobile phones can be
found at: https://www.mercedes-benz-
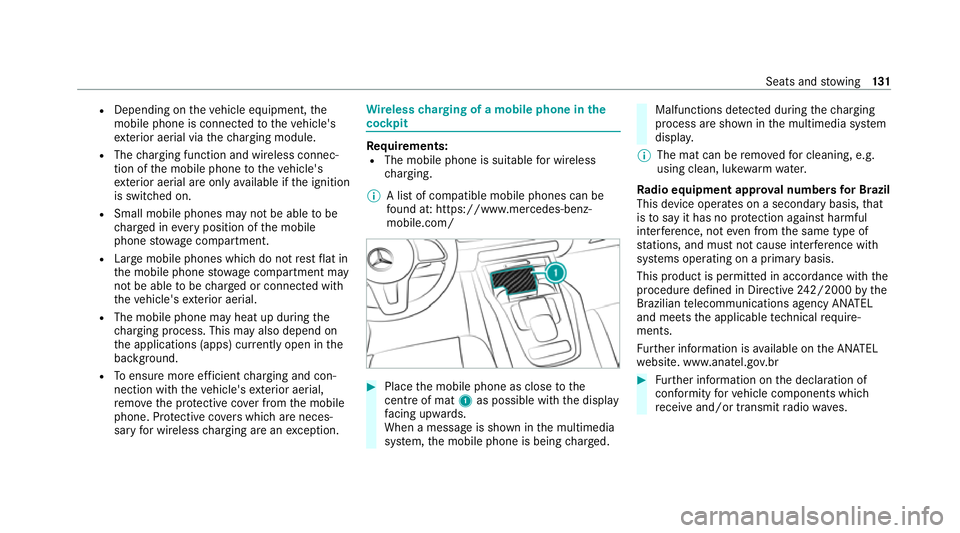
mobile.com/ #
Place the mobile phone as close tothe
centre of mat 1as possible with th e display
fa cing up wards.
When a message is shown in the multimedia
sy stem, the mobile phone is being charge d. Malfunctions de
tected duri ngthech arging
process are shown in the multimedia sy stem
displa y.
% The mat can be remo vedfo r cleaning, e.g.
using clean, luk ewarmwate r.
Ra dio equipment appr oval numbers for Brazil
This device operates on a secondary basis, that
is to say it has no pr otection against harmful
inter fere nce, not even from the same type of
st ations, and must not cause inter fere nce wi th
sy stems operating on a primary basis.
This product is permitted in accordance with the
procedure defined in Directive 242/2000 bythe
Brazilian telecommunications agency AN ATEL
and meets the applicable tech nical requ ire‐
ments.
Fu rther information is available on the AN ATEL
we bsite. www.anatel.go v.br #
Further information on the declaration of
confo rmity forve hicle components which
re cei veand/or transmit radio wav es. Seats and
stowing 131