Page 452 of 630
07
7-93
Navigation-based Smart Cruise Control
will help drive at a safe speed according
to the road conditions when driving on
highways (or motorways) by using road
information from the navigation system
while Smart Cruise Control is operating.
Information
• Navigation-based Smart Cruise Control
is available only on controlled access
road of certain highways.
ÃControlled access r
oad indicates
roads with limited entrances and
exits that allow uninterrupted high
speed traffic flow. Only passenger
cars and motorcycles are allowed on
controlled access roads.
Available highway (Controlled access road)
USA Select Interstate Highway
and U.S. (Federal) and State Highways
Canada Select Provincial and Territorial
Highways
• Additional highways may be expanded
by future navigation updates.
Information
Navigation-based Smart Cruise Control
operates on main roads of highways (or
motorways), and does not operate on
interchanges or junctions.
Highway Curve Zone Auto Slowdown
If vehicle speed is high, Highway Curve
Zone Auto Slowdown function will
temporarily decelerate your vehicle
or limit acceleration to help you drive
safely on a curve based on the curve
information from the navigation.
Highway Set Speed Auto Change
Highway Set Speed Auto Change
function automatically changes Smart
Cruise Control set speed based on
the speed limit information from the
navigation.
Navigation-based Smart Cruise
Control Settings
Setting features
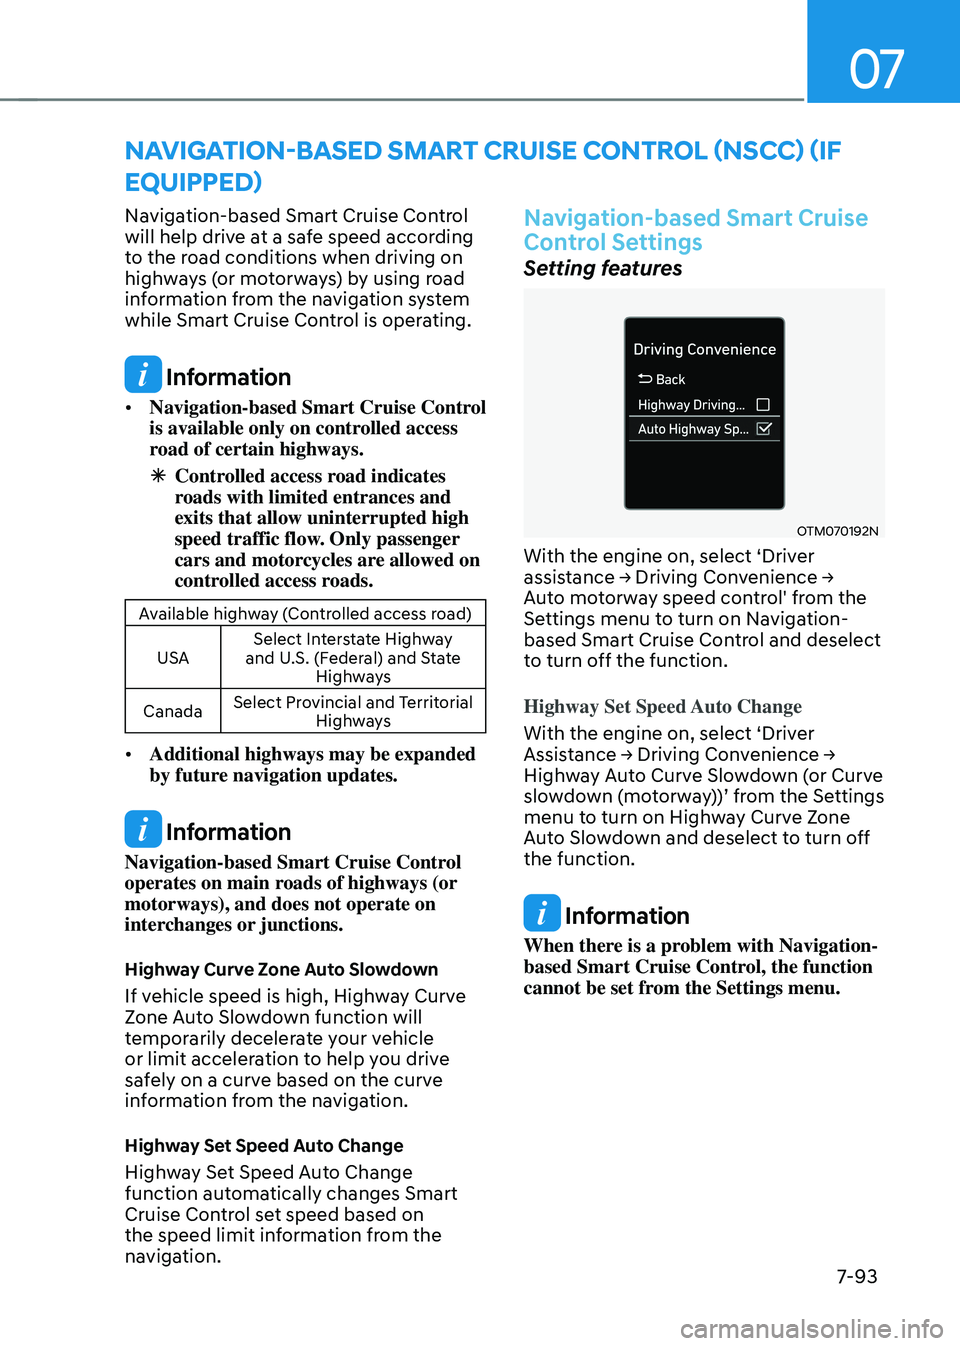
OTM070192N
With the engine on, select ‘Driver
assistance → Driving Con
venience → Aut
o motorway speed control' from the
Settings menu to turn on Navigation-
based Smart Cruise Control and deselect
to turn off the function.
Highway Set Speed Auto Change
With the engine on, select ‘Driver
Assistance
→ Driving Con
venience
→ Highw
ay Auto Curve Slowdown (or Curve
slowdown
(
motorway))’
fr
om
the Se
ttings
menu to turn on High
way Curve Zone
Auto Slowdown and deselect to turn off
the function.
Information
When there is a problem with Navigation-
based Smart Cruise Control, the function
cannot be set from the Settings menu.
navigation-Based smart Cruise Control (nsCC) (iF
equipped)
Page 459 of 630
Driver assistance system
7-100
lane Following assist (lFa)
Lane Following Assist is designed to help
detect lane markings and/or vehicles on
the
r
oad,
and assis
ts
the driv
er’s
s
teering
to help cen
ter the vehicle in the lane.
Detecting sensor
ONX4070075[1] : Front view camera
The front view camera is used as a
detecting sensor to help detect lane
markings and vehicles in front.
Refer to the picture above for the
detailed location of the detecting sensor.
CAUTION
For more details on the precautions
of the front view camera, refer to
“Forward Collision-Avoidance Assist
(FCA)” section in chapter 7.
Lane Following Assist Settings
Setting features
OCN7060087
Turning Lane Following Assist ON/OFF
With the engine on, shortly press the
Lane Driving Assist button located on the
steering wheel to turn on Lane Following
Assist. The grey or green
indicator
light will illuminate on the cluster.
Press the button again to turn off the
function.
Page 460 of 630
07
7-101
OTM070141N
Warning volume
With the engine on, select ‘Driver
assistance
→ w
arning
V
olume’
fr
om
the Settings menu t
o change the Warning
Volume
t
o
‘High
’,
‘M
edium’
or ‘L
ow’
f
or
Hands-o
ff warning.
If you change the Warning volume,
the Warning volume of other Driver
Assistance systems may change.
Lane Following Assist Operation
Warning and control
OTMA070008
Lane Following Assist
If the vehicle ahead and/or both lane
markings are detected and your vehicle
speed is below 120 mph (200 km/h), the
green
indicator light will illuminate
on the cluster, and Lane Following Assist
will help center the vehicle in the lane by
assisting the steering wheel.
CAUTION
When the steering wheel is not assisted,
the green indicator light will blink
and change to white.
Page 464 of 630
07
7-105
Highway Driving Assist Settings
Setting features
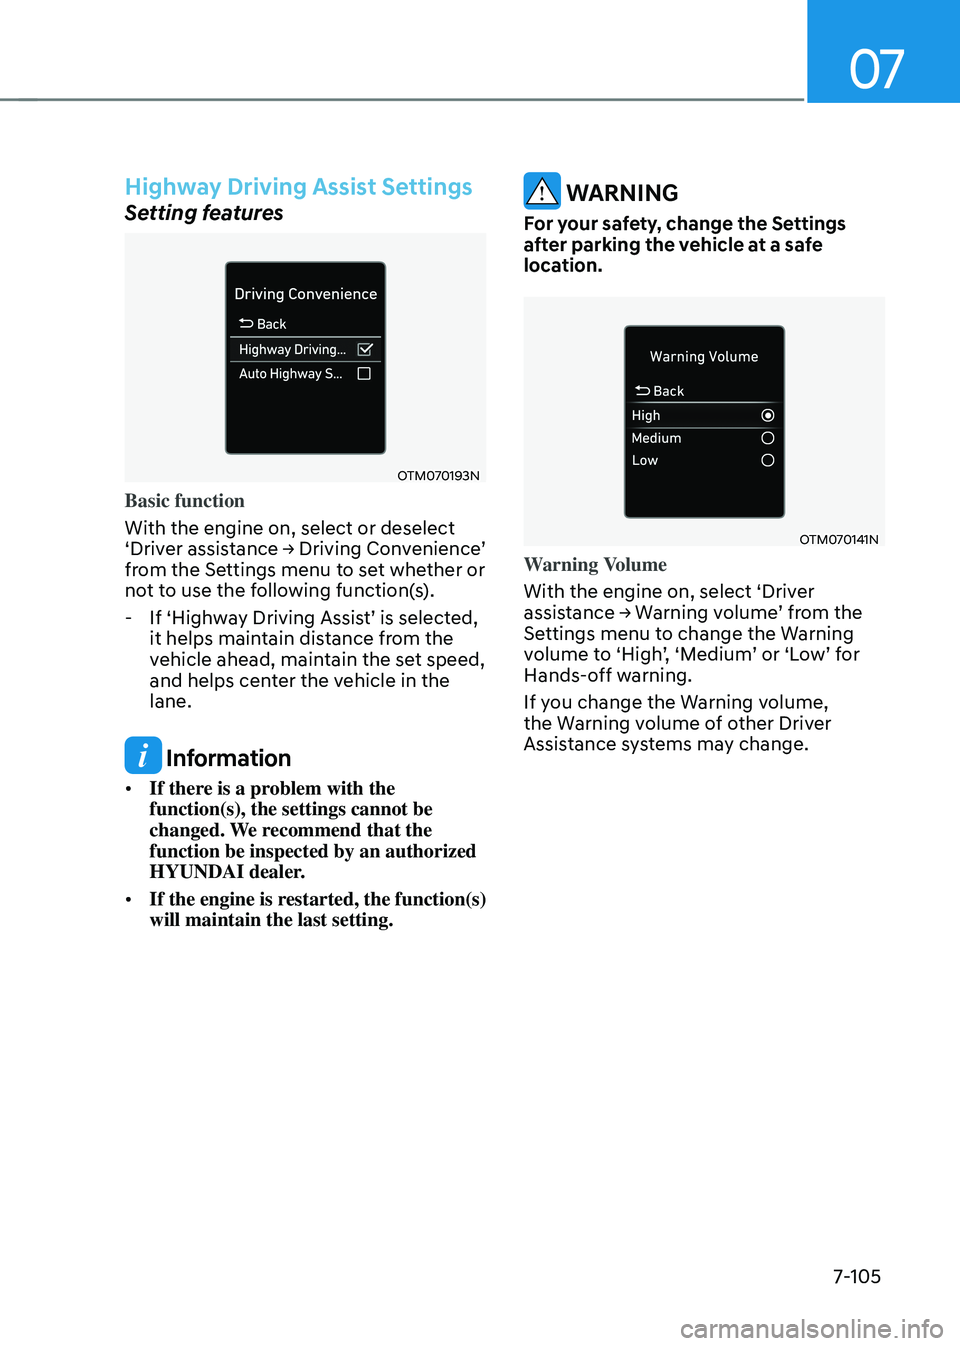
OTM070193N
Basic function
With the engine on, select or deselect
‘Driver
assis
tance
→ Driving Con
venience’
from the Se
ttings menu to set whether or
not to use the following function(s).
- If ‘High
way
Driving Assis
t’
is select
ed,
it helps maintain dis
tance from the
vehicle ahead, maintain the set speed,
and helps center the vehicle in the
lane.
Information
• If there is a problem with the
function(s), the settings cannot be
changed. We recommend that the
function be inspected by an authorized
HYUNDAI dealer.
• If the engine is restarted, the function(s)
will maintain the last setting.
WARNING
For your safety, change the Settings
after parking the vehicle at a safe
location.
OTM070141N
Warning Volume
With the engine on, select ‘Driver
assistance
→ W
arning
v
olume’
fr
om
the Settings menu t
o change the Warning
volume
t
o
‘High
’,
‘M
edium’
or ‘L
ow’
f
or
Hands-o
ff warning.
If you change the Warning volume,
the Warning volume of other Driver
Assistance systems may change.
Page 468 of 630
07
7-109
• Highway Driving Assist may
inadvertently operate or turn off
depending on road conditions
(navigation information) and
surroundings.
• Lane Following Assist function may
be temporarily disabled when the
front view camera cannot detect
lanes properly or the hands-off
warning is on.
• You may not hear the warning sound
of Highway Driving Assist if the
surrounding is noisy.
• If the vehicle is driven at high speed
above a certain speed at a curve,
your vehicle may drive to one side or
may depart from the driving lane.
• When you are towing a trailer or
another vehicle, we recommend that
Highway Driving Assist is turned off
due to safety reasons.
• The hands–off warning message
may appear early or late depending
on how the steering wheel is held or
road conditions. Always have your
hands on the steering wheel while
driving.
• For your safety, please read the
owner's manual before using the
Highway Driving Assist.
• Highway Driving Assist will not
operate when the engine is started,
or when the detecting sensors or
navigation is being initialized.Limitations of Highway Driving
Assist
Highway Driving Assist may not operate
normally, or may not operate under the
following circumstances:
• The map information and the
actual road is different because the
navigation is not updated
• The map information and the actual
road is different because of real-time
GPS data or map information error
• The infotainment system is overloaded
by simultaneously performing
functions such as route search, video
playback, voice recognition, etc.
• GPS signals are blocked in areas such
as a tunnel
• The driver goes off course or the
route to the destination is changed or
canceled by resetting the navigation
• The vehicle enters a service station or
rest area
• Android Auto or Car Play is operating
• The navigation cannot detect the
current vehicle position (ex: elevated
roads including overpass adjacent to
general roads or nearby roads exist in
a parallel way)
Information
For more details on the limitations of
the front view camera, front radar, front
corner radar and rear corner radar, refer
to “Forward Collision-Avoidance Assist
(FCA)” section in chapter 7.
Page 471 of 630
Driver assistance system
7-112
Rear View Monitor Settings
Camera settings
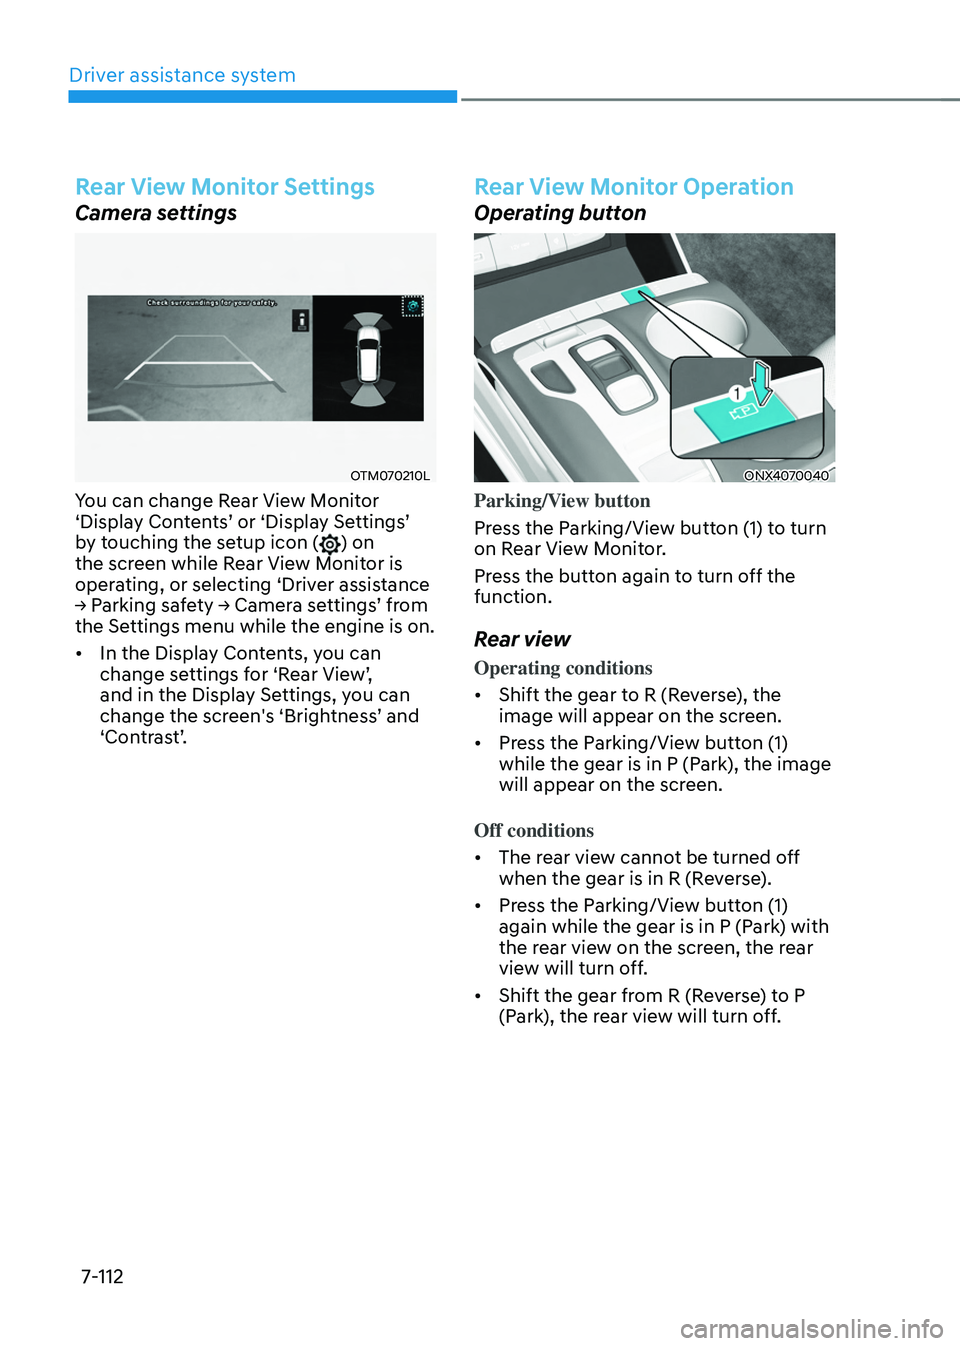
OTM070210L
You can change Rear View Monitor
‘Display Contents’ or ‘Displa y Se ttings’ by t
ouching the setup icon (
) on
the screen while Rear View Monitor is
operating, or selecting ‘Driver assistance
→
P
arking
sa
fety
→ Camer
a
se
ttings’
fr
om
the Settings menu while the engine is on.
• In the Displa
y Contents, you can
change
se
ttings
f
or
‘R
ear
Vie
w’,
and in the Display Se
ttings, you can
change
the scr
een's
‘Brigh
tness’
and ‘Contr
ast’.
Rear View Monitor Operation
Operating button
ONX4070040
Parking/View button
Press the Parking/View button (1) to turn
on Rear View Monitor.
Press the button again to turn off the
function.
Rear view
Operating conditions
• Shift the gear to R (Reverse), the
image will appear on the screen.
• Press the Parking/View button (1)
while the gear is in P (Park), the image
will appear on the screen.
Off conditions
• The rear view cannot be turned off
when the gear is in R (Reverse).
• Press the Parking/View button (1)
again while the gear is in P (Park) with
the rear view on the screen, the rear
view will turn off.
• Shift the gear from R (Reverse) to P
(Park), the rear view will turn off.
Page 475 of 630
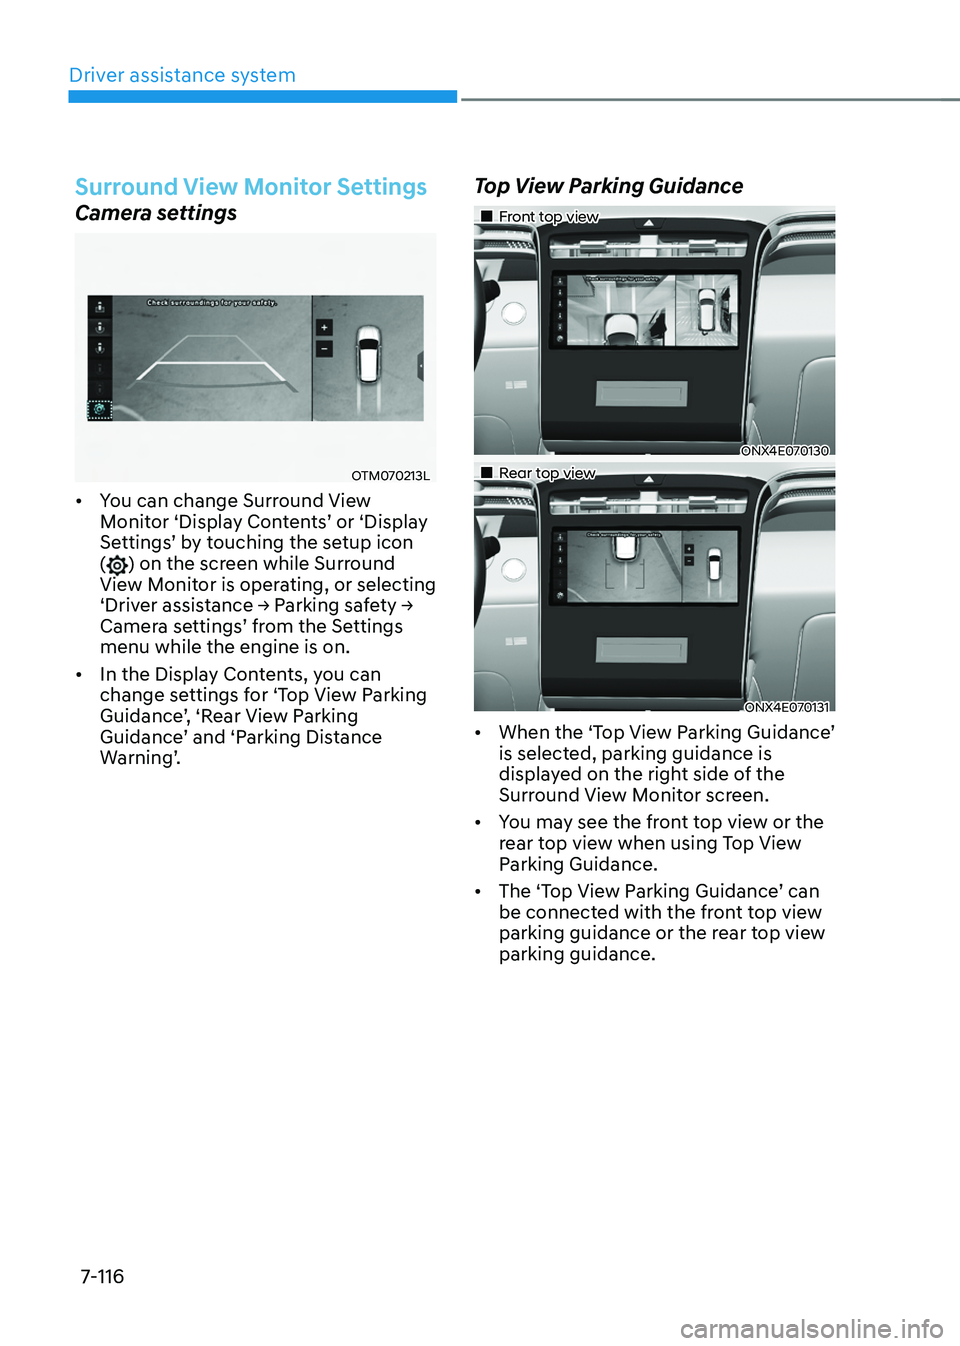
Driver assistance system
7-116
Surround View Monitor Settings
Camera settings
OTM070213L
• You can change Surround View
Monitor ‘Displa
y Con tents’ or ‘Displa y Settings
’
b
y
t
ouching
the se
tup
icon () on the screen while Surround
View Monitor is operating, or selecting
‘Driver
assis
tance
→ P
arking
sa
fety
→ Camera se
ttings’
fr
om
the Se
ttings
menu while the engine is on.
• In the Display Con
tents, you can
change settings for ‘Top View Parking
Guidance’,
‘R
ear
Vie
w
P
arking
Guidance’ and ‘P
arking
Dis
tance
Warning’
.
Top View Parking Guidance
„„Front top view
ONX4E070130
„„Rear top view
ONX4E070131
• When the ‘T op Vie w P arking Guidance ’ is selected, parking guidance is
displa
yed on the right side of the
Surround View Monitor screen.
• You may see the front top view or the
rear top view when using Top View
Parking Guidance.
• The
‘T
op
Vie
w
P
arking
Guidance
’
can be connected with the fr
ont top view
parking guidance or the rear top view
parking guidance.
Page 476 of 630
07
7-117
Rear View Parking Guidance
OTM070216L
• When the ‘Rear View Parking
Guidance’ is select
ed, parking guidance is display
ed in the rear view.
• The horizontal guideline of the Rear
View Parking Guidance shows the
distance of 1.6 ft (0.5 m), 3.3 ft (1 m)
and 7.6 ft (2.3 m) from the vehicle.
Parking Distance Warning
OTM070217L
• When the ‘P arking dis tance w arning’ is selected, parking dis
tance warning
is displayed on the right side of the
Surround View Monitor screen.
• The image will be displayed only when
Parking Distance Warning is warning
the driver.
Surround View Monitor Auto On
With the engine on, select ‘Driver
assistance → P
arking sa fety → Surr ound view monit
or
aut
o
on
’
fr
om
the Se
ttings
menu to use the function.
T
o use this function, refer to “System
Operation”.