2021 FORD EXPLORER center console
[x] Cancel search: center consolePage 221 of 577
Vehicles with Automatic Transmission
You cannot turn the system on or off.
When you switch the ignition on, the
system automatically turns on.
AUTO HOLD
WARNING: The system does not
replace the parking brake. When you
leave your vehicle, always apply the
parking brake. WARNING:
You must remain in
your vehicle when the system turns on.
At all times, you are responsible for
controlling your vehicle, supervising the
system and intervening, if required.
Failure to take care may result in the loss
of control of your vehicle, serious
personal injury or death. WARNING:
The system turns off if
there is a malfunction or if you
excessively rev the engine.
The system is designed to apply the brakes
to hold your vehicle at a standstill after you
stop your vehicle and release the brake
pedal. This could be beneficial in certain
situations, for example when waiting on a
hill or in traffic.
Switching Auto Hold On and Off Press the button on the center
console. The button illuminates
when you switch the system on.
Note: You can only switch the system on
after you close the driver door, and start the
engine.
Note: The system remembers the last
setting when you start your vehicle. Make sure you switch the system off before
towing with your vehicle or before using an
automatic car wash.
Using Auto Hold
1. Use the brakes to bring your vehicle to
a complete stop. The auto hold active
indicator illuminates in the information
display.
2. Release the brake pedal. The system holds your vehicle at a standstill. The
auto hold active indicator remains
illuminated in the information display.
Note: The system only activates if you
apply enough brake pressure. If your vehicle
is on a steep slope, you might need to press
the brake pedal harder before the system
activates.
Note: Under certain conditions, the system
could apply the electric parking brake. The
brake system warning lamp illuminates. The
electric parking brake releases when you
press the accelerator pedal. See Electric
Parking Brake (page 215).
Note: If auto-start-stop turns off the
engine, auto hold remains active.
Note: The system deactivates if you shift
into reverse (R) and press the brake pedal.
3. Pull away in the normal manner. The system releases the brakes and the
auto hold active indicator turns off.
Auto Hold Indicator
The auto hold indicator illuminates in the
information display when the system is on
and is either active or unavailable. Illuminates when the system is
active. Your vehicle remains
stationary after you release the
brake pedal.
218
Explorer (CTW), enUSA, Edition date: 202007, Second-Printing BrakesE297843 E197933
Page 227 of 577
PRINCIPLE OF OPERATION
The traction control system helps avoid
drive wheel spin and loss of traction.
If your vehicle begins to slide, the system
applies the brakes to individual wheels
and, when needed, reduces engine power
at the same time. If the wheels spin when
accelerating on slippery or loose surfaces,
the system reduces engine power in order
to increase traction.
USING TRACTION CONTROL
WARNING: The stability and
traction control light illuminates steadily
if the system detects a failure. Make sure
you did not manually disable the traction
control system using the information
display controls or the switch. If the
stability control and traction control light
is still illuminating steadily, have the
system serviced by an authorized dealer
immediately. Operating your vehicle with
the traction control disabled could lead
to an increased risk of loss of vehicle
control, vehicle rollover, personal injury
and death.
The system automatically turns on each
time you switch the ignition on.
If your vehicle is stuck in mud or snow,
switching traction control off may be
beneficial as this allows the wheels to spin.
Note: When you switch traction control off,
stability control remains fully active.
Switching the System Off
When you switch the system off or on, a
message appears in the information
display showing system status.
You can switch the system off by using the
switch. Using a Switch
(If Equipped)
Use the traction control switch on the
center console near the shifter to switch
the system off or on. The traction control switch.
System Indicator Lights and
Messages The stability and traction control
light:
• Temporarily illuminates on engine
start-up.
• Flashes when a driving condition
activates either of the systems.
• Illuminates if a problem occurs in either
of the systems. The stability and traction control
off light temporarily illuminates
on engine start-up and stays on
when you switch the traction control
system off.
224
Explorer (CTW), enUSA, Edition date: 202007, Second-Printing Traction ControlE297971 E138639 E130458
Page 228 of 577

PRINCIPLE OF OPERATION
WARNING: Vehicle modifications
involving braking system, aftermarket
roof racks, suspension, steering system,
tire construction and wheel and tire size
may change the handling characteristics
of your vehicle and may adversely affect
the performance of the electronic
stability control system. In addition,
installing any stereo loudspeakers may
interfere with and adversely affect the
electronic stability control system. Install
any aftermarket stereo loudspeaker as
far as possible from the front center
console, the tunnel, and the front seats
in order to minimize the risk of interfering
with the electronic stability control
sensors. Reducing the effectiveness of
the electronic stability control system
could lead to an increased risk of loss of
vehicle control, vehicle rollover, personal
injury and death. WARNING:
Remember that even
advanced technology cannot defy the
laws of physics. It’ s always possible to
lose control of a vehicle due to
inappropriate driver input for the
conditions. Aggressive driving on any
road condition can cause you to lose
control of your vehicle increasing the risk
of personal injury or property damage.
Activation of the electronic stability
control system is an indication that at
least some of the tires have exceeded
their ability to grip the road; this could
reduce the operator ’s ability to control
the vehicle potentially resulting in a loss
of vehicle control, vehicle rollover,
personal injury and death. If your
electronic stability control system
activates, SLOW DOWN.
The system automatically turns on each
time you switch the ignition on. If a driving condition activates either the
stability control or the traction control
system you may experience the following
conditions:
•
The stability and traction control light
flashes.
• Your vehicle slows down.
• Reduced engine power.
• A vibration in the brake pedal.
• The brake pedal is stiffer than usual.
• If the driving condition is severe and
your foot is not on the brake, the brake
pedal may move as the systems
applies higher brake forces.
The stability control system has several
features built into it to help you maintain
control of your vehicle:
Electronic Stability Control
The system enhances your vehicle ’s ability
to prevent skids or lateral slides by
applying brakes to one or more of the
wheels individually and, if necessary,
reducing engine power.
Roll Stability Control
The system enhances your vehicle ’s ability
to prevent rollovers by detecting your
vehicle ’s roll motion and the rate at which
it changes by applying the brakes to one
or more wheels individually.
Curve Control
The system enhances your vehicle ’s ability
to follow the road when cornering severely
or avoiding objects in the roadway. Curve
Control operates by reducing engine power
and, if necessary, applying brakes to one
or more of the wheels individually.
225
Explorer (CTW), enUSA, Edition date: 202007, Second-Printing Stability Control
Page 231 of 577
WHAT IS HILL DESCENT
CONTROL
WARNING: Hill descent control
cannot control descent in all surface
conditions and circumstances, such as
ice or extremely steep grades. Hill
descent control is a driver assist system
and cannot substitute for good judgment
by the driver. Failure to do so may result
in loss of vehicle control, crash or serious
injury. WARNING:
The system does not
replace the parking brake. When you
leave your vehicle, always apply the
parking brake and shift the transmission
into park (P) for automatic transmission
or first gear for manual transmission.
Note: The system does not function below
3 mph (5 km/h)
.
Hill descent control allows the driver to set
and maintain vehicle speed while
descending steep slopes in various surface
conditions.
The system can maintain vehicle speeds
on downhill slopes between
3– 20 mph
(5– 32 km/h). Above 20 mph (32 km/h),
the system remains on but the descent
speed cannot be set or maintained.
The system requires a cool down interval
after a period of sustained use. The
amount of time that the system can
remain active before cooling varies with
conditions. The system provides a warning
in the message center and a tone sounds
when the system is about to disengage for
cooling. At this time, manually apply the
brakes as needed to maintain descent
speed. SWITCHING HILL DESCENT
CONTROL ON AND OFF Press the button on the center
console. A light illuminates in the
control and a tone sounds when
the system is active.
SETTING THE HILL DESCENT
SPEED WARNING:
The system does not
replace the parking brake. When you
leave your vehicle, always apply the
parking brake and shift the transmission
into park (P) for automatic transmission
or first gear for manual transmission. WARNING:
The system does not
control speed in low traction conditions
or extremely steep slopes. The system
is designed to be an aid and does not
relieve you of your responsibility to drive
with due care and attention. Failure to
follow this instruction could result in
personal injury.
To increase the descent speed, press the
accelerator pedal until you reach the speed
you prefer.
To decrease the descent speed, press the
brake pedal until you reach the speed you
prefer.
When you reach the speed you prefer,
either by accelerating or decelerating,
remove your feet from the pedals. The
system maintains the chosen vehicle
speed.
228
Explorer (CTW), enUSA, Edition date: 202007, Second-Printing Hill Descent Control
(If Equipped)
Page 239 of 577
WARNING: You are responsible for
controlling your vehicle at all times. The
system is designed to be an aid and does
not relieve you of your responsibility to
drive with due care and attention. Failure
to follow this instruction could result in
the loss of control of your vehicle,
personal injury or death.
The system assists parking into and out of
parking spaces. It uses sensors to detect
parking spaces. The system then steers,
accelerates, brakes and shifts gear as
required to maneuver into or out of a
parking space.
Using Active Park Assist The parking button is near the
transmission selector on the
center console.
Press the parking button to bring up full
screen notifications. Press either the
parking button or the soft keys on the
display screen to switch between Parallel
Park In, Perpendicular Park In or Parallel
Park Out parking modes.
Driving into a Parking Space
Note: When parking perpendicularly, the
system backs your vehicle into parking
spaces.
1. Press the active park assist button.
Note: The system does not recognize
parking space lines and centers your vehicle
between objects.
Note: The system detects other vehicles
and curbs to find a parking space.
Note: The system searches for parallel
parking spaces on the passenger side. Press
the active park assist button again to make
the system search for perpendicular spaces. 2. Use the direction indicator lever to
search for a parking space on the driver
or passenger side of your vehicle.
3. Drive your vehicle approximately 3 ft
(1 m) away from and parallel to the
other parked vehicles when searching
for a parking space.
Note: A tone sounds and a message
appears in the information display when
active park assist finds a suitable parking
space.
4. Press and hold the brake pedal.
5. Release the steering wheel and shift into neutral (N).
6. Press and hold the active park assist button.
7. Release the brake pedal to allow the vehicle to park.
Note: When parallel parking between
objects, the system parks closer to the
object in front of your vehicle to allow easier
access to your luggage compartment.
Note: When perpendicular parking, the
system aligns the front end of your vehicle
with the object next to it.
Note: When perpendicular parking, if the
system detects only one object, it allows
enough distance to open the door on either
side.
Note: You can slow down your vehicle at
any time by pressing the brake pedal.
Note: When parking is complete the vehicle
shifts into park (P).
Leaving a Parking Space
The system assists leaving only parallel
parking spaces.
1. Press the active park assist button.
2. Use the direction indicator lever to choose the direction to leave.
3. Press and hold the brake pedal.
236
Explorer (CTW), enUSA, Edition date: 202007, Second-Printing Parking AidsE146186
Page 281 of 577
WHAT IS DRIVE MODE
CONTROL
The system delivers a driving experience
through a suite of sophisticated electronic
vehicle systems. These systems optimize
steering, handling and powertrain
response. This provides a single location
to control multiple systems performance
settings.
Changing the drive mode changes the
functionality of the following systems:
•
Electric power-assisted steering
system adjusts steering effort and feel
based on the mode you select. See
Steering (page 273).
• Electronic stability control and traction
control maintain your vehicle control
in adverse conditions or high
performance driving. See
Stability
Control (page 225).
• Electronic throttle control enhances
the powertrain response to your driving
inputs.
• Transmission controls become
optimized with shift schedules tuned
to each mode.
• Four-wheel drive settings are optimized
and tuned to each mode.
• Electric vehicle mode selections may
be limited. See
Hybrid Vehicle
Operation (page 182).
The system tailors your vehicle
configuration for each mode you select.
Note: Not all settings may be available.
Note: The system has diagnostic checks
that continuously monitor the system for
proper operation. If a mode is unavailable
due to a system fault or change in gear
shifter position, the mode defaults to
Normal. SELECTING A DRIVE MODE
Note:
Drive mode changes may not be
available when the ignition is off or when
the engine is not running.
Note: Button icons shown may vary from
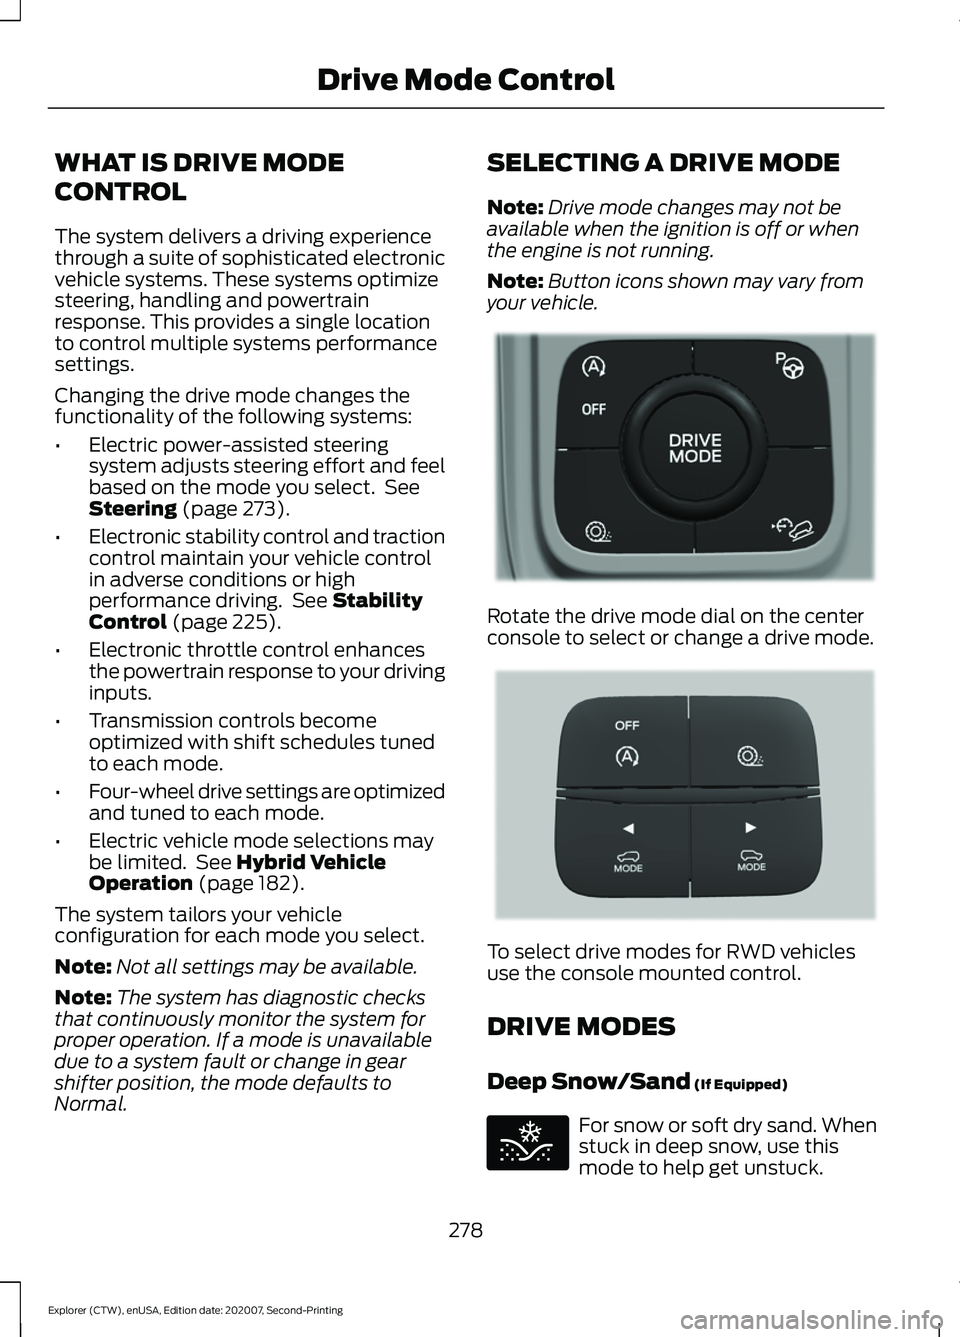
your vehicle. Rotate the drive mode dial on the center
console to select or change a drive mode.
To select drive modes for RWD vehicles
use the console mounted control.
DRIVE MODES
Deep Snow/Sand
(If Equipped)
For snow or soft dry sand. When
stuck in deep snow, use this
mode to help get unstuck.
278
Explorer (CTW), enUSA, Edition date: 202007, Second-Printing Drive Mode ControlE298238 E297643 E295420
Page 435 of 577
USB PORT (IF EQUIPPED)
WARNING: Driving while distracted
can result in loss of vehicle control, crash
and injury. We strongly recommend that
you use extreme caution when using any
device that may take your focus off the
road. Your primary responsibility is the
safe operation of your vehicle. We
recommend against the use of any
hand-held device while driving and
encourage the use of voice-operated
systems when possible. Make sure you
are aware of all applicable local laws
that may affect the use of electronic
devices while driving.
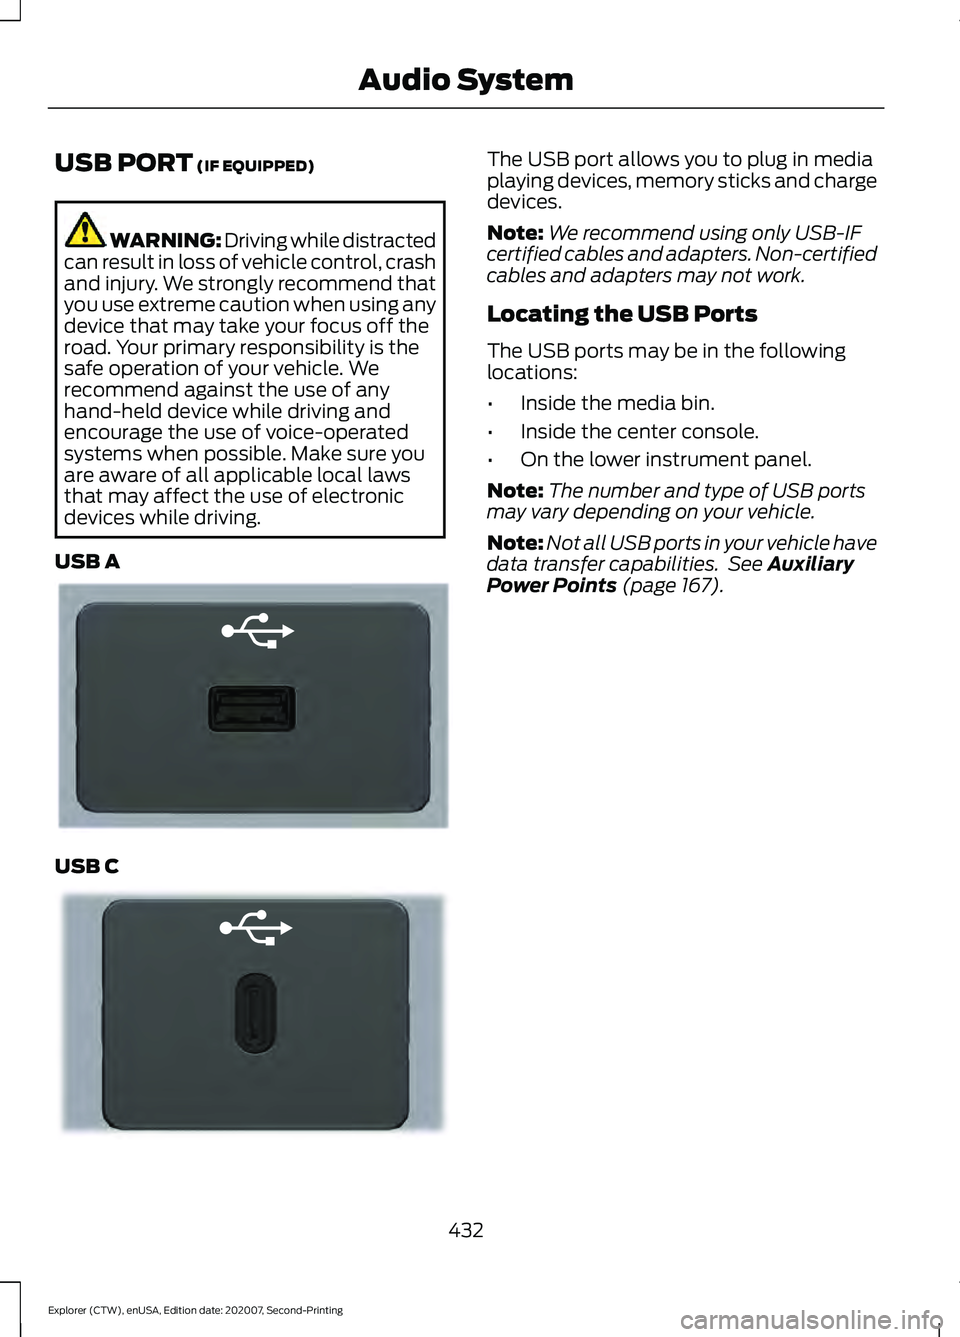
USB A USB C The USB port allows you to plug in media
playing devices, memory sticks and charge
devices.
Note:
We recommend using only USB-IF
certified cables and adapters. Non-certified
cables and adapters may not work.
Locating the USB Ports
The USB ports may be in the following
locations:
• Inside the media bin.
• Inside the center console.
• On the lower instrument panel.
Note: The number and type of USB ports
may vary depending on your vehicle.
Note: Not all USB ports in your vehicle have
data transfer capabilities. See
Auxiliary
Power Points (page 167).
432
Explorer (CTW), enUSA, Edition date: 202007, Second-Printing Audio SystemE201595 E301114
Page 453 of 577
Function
Button
Playlists
Artist
Albums
Songs
Genres
Podcasts
Audio books
Composers
This button allows you to choose a specific
letter to view within the category you are
browsing.
A-Z Jump
If available, this allows you to browse the
folders and files on your USB device.
Explore Device
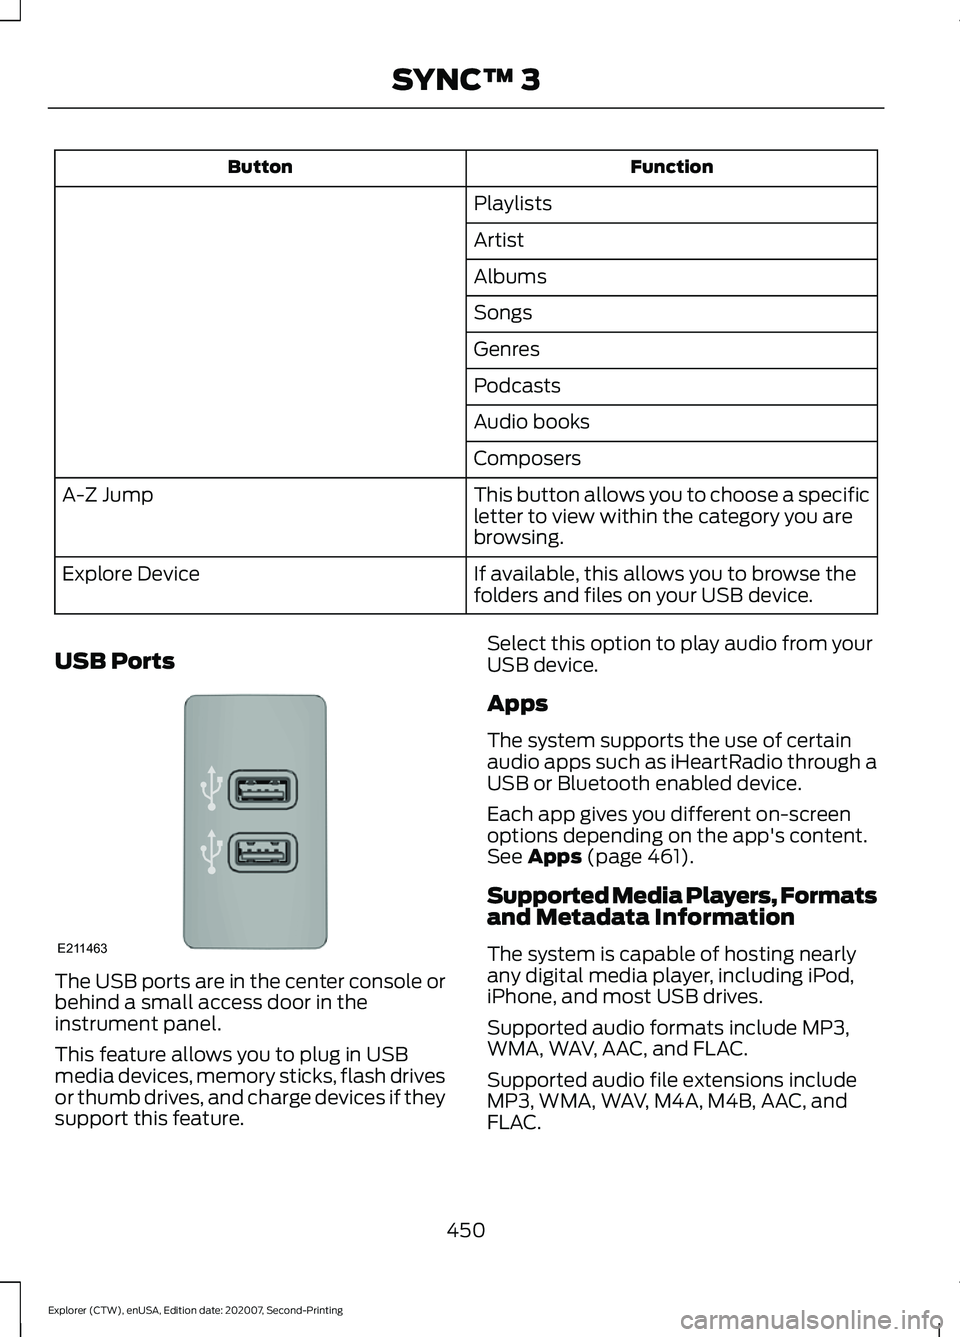
USB Ports The USB ports are in the center console or
behind a small access door in the
instrument panel.
This feature allows you to plug in USB
media devices, memory sticks, flash drives
or thumb drives, and charge devices if they
support this feature. Select this option to play audio from your
USB device.
Apps
The system supports the use of certain
audio apps such as iHeartRadio through a
USB or Bluetooth enabled device.
Each app gives you different on-screen
options depending on the app's content.
See Apps (page 461).
Supported Media Players, Formats
and Metadata Information
The system is capable of hosting nearly
any digital media player, including iPod,
iPhone, and most USB drives.
Supported audio formats include MP3,
WMA, WAV, AAC, and FLAC.
Supported audio file extensions include
MP3, WMA, WAV, M4A, M4B, AAC, and
FLAC.
450
Explorer (CTW), enUSA, Edition date: 202007, Second-Printing SYNC™ 3E211463