2021 FORD EXPLORER technical specifications
[x] Cancel search: technical specificationsPage 10 of 577

Cleaning the Interior
..................................346
Cleaning the Instrument Panel and Instrument Cluster Lens .......................
347
Cleaning Leather Seats .............................
347
Repairing Minor Paint Damage .............
348
Cleaning the Wheels .................................
348
Vehicle Storage ...........................................
348
Body Styling Kits ........................................
350
Wheels and Tires
General Information ...................................
351
Tire Care .........................................................
353
Using Summer Tires ..................................
366
Using Snow Chains ....................................
366
Tire Pressure Monitoring System .........
368
Changing a Road Wheel ...........................
374
Technical Specifications .........................
380
Capacities and Specifications
Engine Specifications - 2.3L EcoBoost™ ........................................................................\
382
Engine Specifications - 3.0L ..................
383
Engine Specifications - 3.0L, ST ...........
383
Engine Specifications - 3.3L, Gasoline ........................................................................\
385
Engine Specifications - 3.3L, Hybrid Electric Vehicle (HEV) ..........................
386
Transmission Specifications - ST ........
386
Motorcraft Parts - 2.3L EcoBoost™ .....
388
Motorcraft Parts - 3.0L ............................
389
Motorcraft Parts - 3.3L .............................
390
Vehicle Identification Number ................
391
Capacities and Specifications - 2.3L EcoBoost™ ................................................
391
Capacities and Specifications - 3.0L .......................................................................
398
Capacities and Specifications - 3.3L, Gasoline .....................................................
405
Capacities and Specifications - 3.3L, Hybrid Electric Vehicle (HEV) .............
412Bulb Specification Chart
..........................
419
Connected Vehicle
What Is a Connected Vehicle ..................
421
Connected Vehicle Requirements .........
421
Connected Vehicle Limitations ..............
421
Connecting the Vehicle to a Mobile Network .......................................................
421
Connecting the Vehicle to a Wi-Fi Network - Vehicles With: SYNC 3 ......
421
Connected Vehicle – Troubleshooting - Vehicles With: Modem ..........................
422
Connected Vehicle – Troubleshooting - Vehicles With: SYNC 3 ..........................
423
Vehicle Wi-Fi Hotspot
Creating a Vehicle Wi-Fi Hotspot .........
425
Changing the Vehicle Wi-Fi Hotspot Name or Password ................................
425
Audio System
General Information ..................................
426
Audio Unit .....................................................
426
Digital Radio ..................................................
427
Satellite Radio .............................................
429
USB Port ........................................................
432
SYNC™ 3
General Information ..................................
433
Using Voice Recognition ..........................
435
Entertainment ..............................................
441
Climate ............................................................
451
Phone ..............................................................
453
Navigation .....................................................
455
Electric Vehicle Information ...................
460
Apps .................................................................
461
Settings ..........................................................
464
SYNC™ 3 Troubleshooting ....................
466
7
Explorer (CTW), enUSA, Edition date: 202007, Second-Printing Table of Contents
Page 60 of 577
GENERAL INFORMATION ON
RADIO FREQUENCIES
This device complies with Part 15 of the
FCC Rules and with Industry Canada
license-exempt RSS standard(s).
Operation is subject to the following two
conditions: (1) This device may not cause
harmful interference, and (2) This device
must accept any interference received,
including interference that may cause
undesired operation.
WARNING: Changes or
modifications not expressively approved
by the party responsible for compliance
could void the user's authority to operate
the equipment. The term "IC:" before the
radio certification number only signifies
that Industry Canada technical
specifications were met.
The typical operating range for your
transmitter is approximately
33 ft (10 m).
Vehicles with the remote start feature will
have a greater range.
One of the following could cause a
decrease in operating range:
• Weather conditions.
• Nearby radio towers.
• Structures around the vehicle.
• Other vehicles parked next to your
vehicle.
The radio frequency used by your remote
control can also be used by other radio
transmitters, for example amateur radios,
medical equipment, wireless headphones,
wireless remote controls, cell phones,
battery chargers and alarm systems. If the
frequencies are jammed, you will not be
able to use your remote control. You can
lock and unlock the doors with the key.
Note: Make sure to lock your vehicle before
leaving it unattended. Note:
If you are in range, the remote control
will operate if you press any button
unintentionally.
Note: The remote control contains sensitive
electrical components. Exposure to moisture
or impact may cause permanent damage.
Intelligent Access
(If Equipped)
The system uses a radio frequency signal
to communicate with your vehicle and
authorize your vehicle to unlock when one
of the following conditions are met:
• You activate the front exterior door
handle switch.
• You press the luggage compartment
button.
• You press a button on the transmitter.
If excessive radio frequency interference
is present in the area or if the transmitter
battery is low, you may need to
mechanically unlock your door. You can
use the mechanical key blade in your
intelligent access key to open the driver
door in this situation. See
Remote
Control (page 57).
REMOTE CONTROL
Integrated Keyhead Transmitter
Use the key blade to start your vehicle and
unlock or lock the driver door from outside
your vehicle. The integrated keyhead
transmitter functions as a programmed
ignition key that operates all the locks and
starts your vehicle, as well as a remote
control.
57
Explorer (CTW), enUSA, Edition date: 202007, Second-Printing Keys and Remote Controls
Page 169 of 577
5. Press and hold the previously
programmed button on the visor for 2
seconds. Repeat this step up to 3 times
until the garage door moves.
Programming is now complete.
Clearing a HomeLink Device
To erase programming from the three
HomeLink buttons press and hold the two
outer HomeLink buttons until the indicator
light begins to flash. The indicator light will
begin flashing in 10 to 20 seconds, at which
time both buttons should be released.
Programming has now been erased, and
the indicator light should blink slowly to
indicate the device is in train mode when
any of the three HomeLink buttons are
pressed.
FCC and RSS-210 Industry Canada
Compliance
This device complies with Part 15 of the
FCC Rules and with RSS-210 of Industry
Canada. Operation is subject to the
following two conditions: (1) this device
may not cause harmful interference, and
(2) this device must accept any
interference received, including
interference that may cause undesired
operation. WARNING: Changes or
modifications not expressively approved
by the party responsible for compliance
could void the user's authority to operate
the equipment. The term "IC:" before the
radio certification number only signifies
that Industry Canada technical
specifications were met. This equipment complies with FCC
radiation exposure limits set forth for an
uncontrolled environment. End Users must
follow the specific operating instructions
for satisfying RF exposure compliance. This
transmitter must be at least
8 in (20 cm)
from the user and must not be co-located
or operating in conjunction with any other
antenna or transmitter.
The term “IC:” before the
certification/registration number only
signifies that Industry Canada technical
specifications were met.
166
Explorer (CTW), enUSA, Edition date: 202007, Second-Printing Garage Door Opener
(If Equipped)
Page 173 of 577
This device complies with Industry Canada
licence-exempt RSS standard(s).
Operation is subject to the following two
conditions:
•
This device may not cause interference,
and
• This device must accept any
interference, including interference that
may cause undesired operation of the
device.
Note: Changes or modifications not
expressively approved by the party
responsible for compliance could void the
user's authority to operate the equipment.
The term "IC" before the radio certification
number only signifies that Industry Canada
technical specifications were met.
170
Explorer (CTW), enUSA, Edition date: 202007, Second-Printing Auxiliary Power Points
Page 372 of 577
Please note that the TPMS is not a
substitute for proper tire maintenance, and
it is the driver
’s responsibility to maintain
correct tire pressure, even if under-inflation
has not reached the level to trigger
illumination of the TPMS low tire pressure
telltale.
Your vehicle has also been equipped with
a TPMS malfunction indicator to indicate
when the system is not operating properly.
The TPMS malfunction indicator is
combined with the low tire pressure
telltale. When the system detects a
malfunction, the telltale will flash for
approximately one minute and then remain
continuously illuminated. This sequence
will continue upon subsequent vehicle
start-ups as long as the malfunction exists.
When the malfunction indicator is
illuminated, the system may not be able
to detect or signal low tire pressure as
intended. TPMS malfunctions may occur
for a variety of reasons, including the
installation of replacement or alternate
tires or wheels on the vehicle that prevent
the TPMS from functioning properly.
Always check the TPMS malfunction
telltale after replacing one or more tires or
wheels on your vehicle to ensure that the
replacement or alternate tires and wheels
allow the TPMS to continue to function
properly.
This device complies with Part 15 of the
FCC Rules and with License exempt RSS
Standards of Industry Canada. Operation
is subject to the following two conditions:
1. This device may not cause harmful interference, and
2. This device must accept any interference received, including
interference that may cause undesired
operation. WARNING: Changes or
modifications not expressively approved
by the party responsible for compliance
could void the user's authority to operate
the equipment. The term "IC:" before the
radio certification number only signifies
that Industry Canada technical
specifications were met.
Changing Tires With a Tire
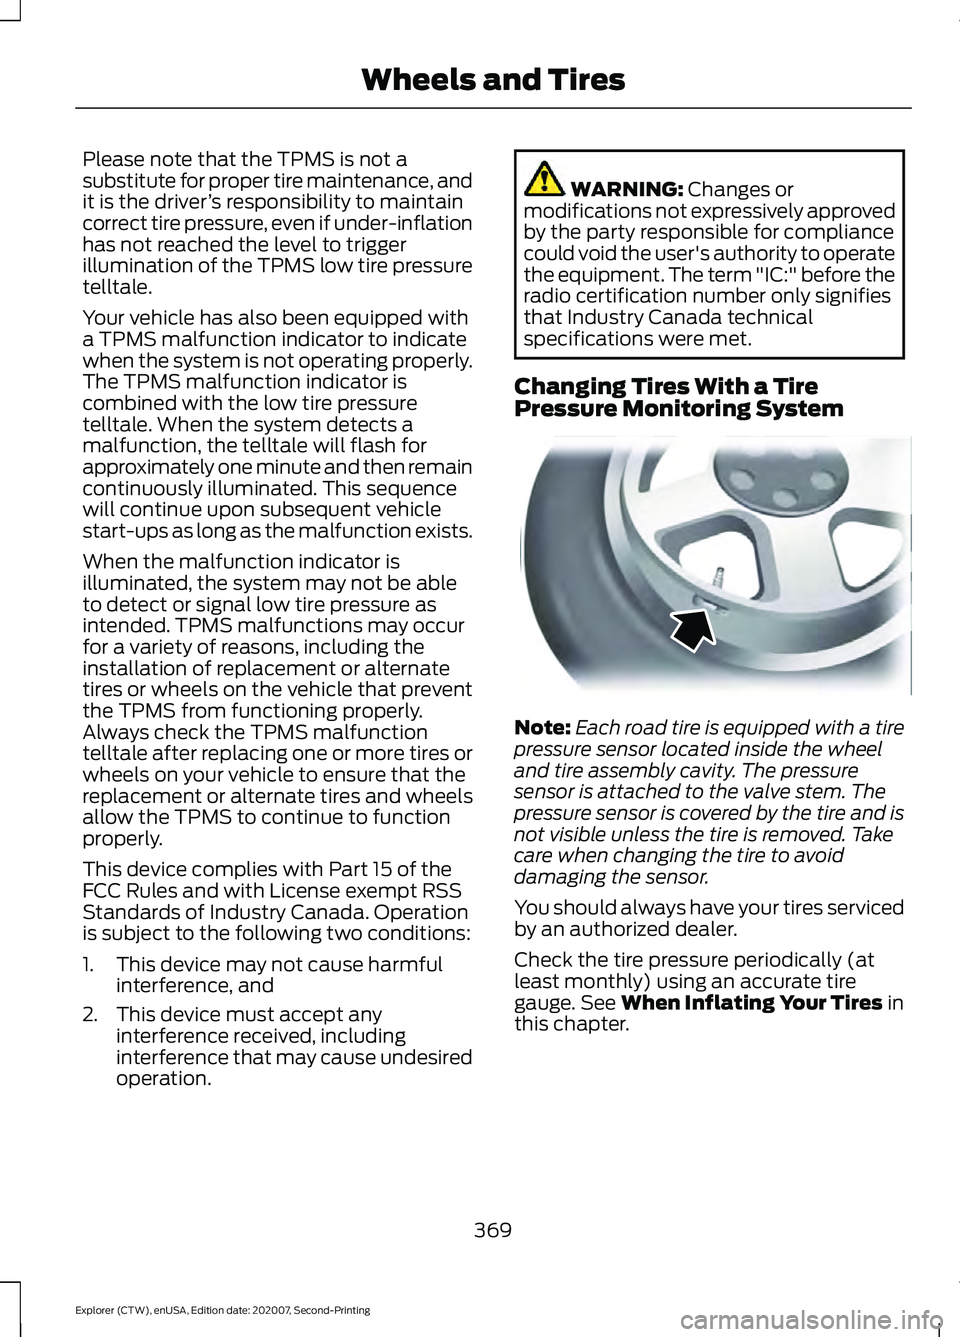
Pressure Monitoring System Note:
Each road tire is equipped with a tire
pressure sensor located inside the wheel
and tire assembly cavity. The pressure
sensor is attached to the valve stem. The
pressure sensor is covered by the tire and is
not visible unless the tire is removed. Take
care when changing the tire to avoid
damaging the sensor.
You should always have your tires serviced
by an authorized dealer.
Check the tire pressure periodically (at
least monthly) using an accurate tire
gauge. See
When Inflating Your Tires in
this chapter.
369
Explorer (CTW), enUSA, Edition date: 202007, Second-Printing Wheels and TiresE142549
Page 382 of 577
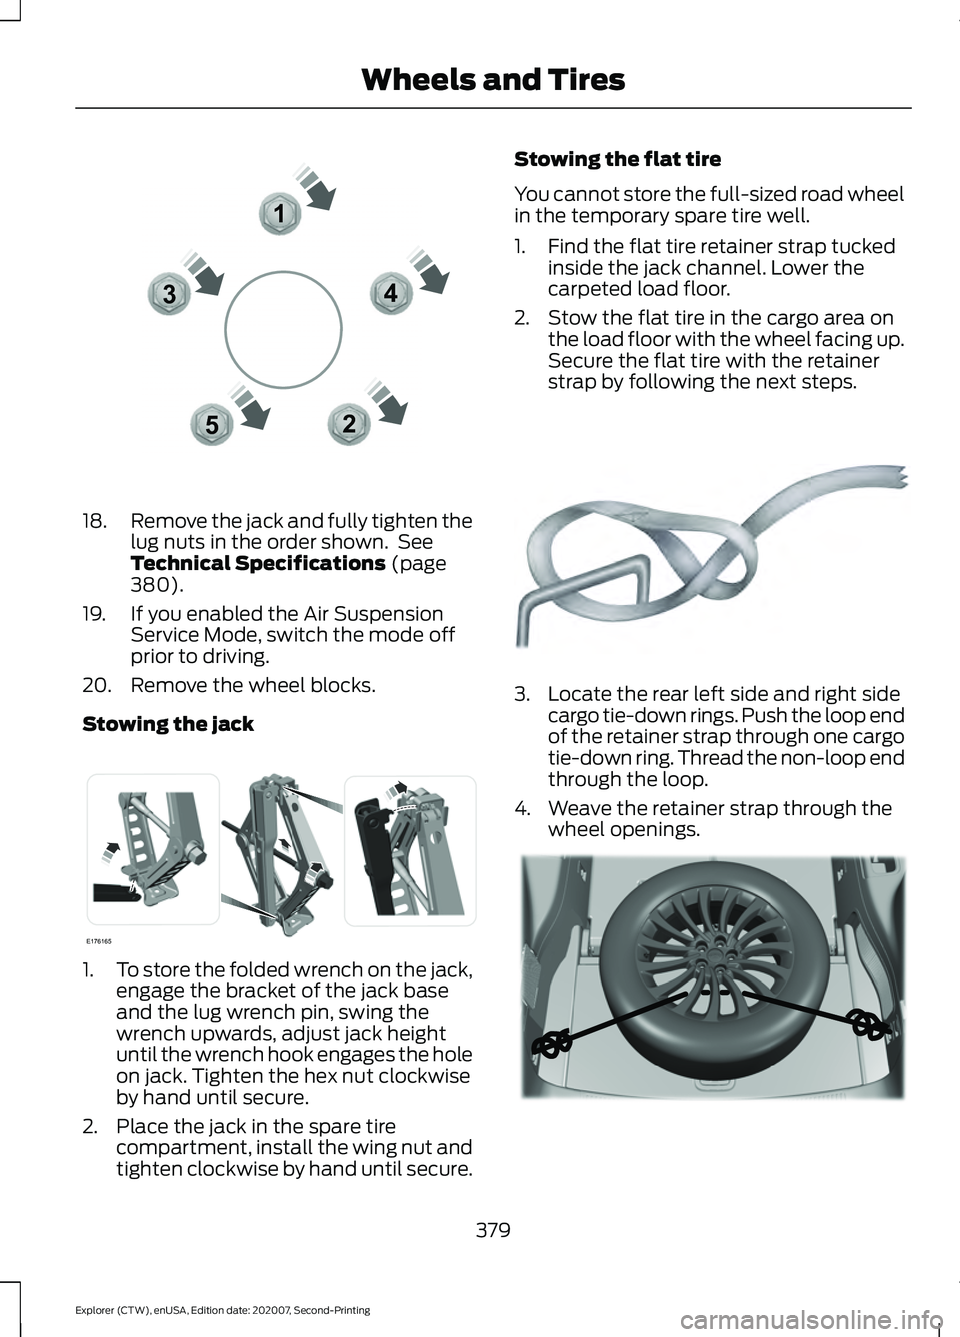
18.
Remove the jack and fully tighten the
lug nuts in the order shown. See
Technical Specifications (page
380).
19. If you enabled the Air Suspension Service Mode, switch the mode off
prior to driving.
20. Remove the wheel blocks.
Stowing the jack 1.
To store the folded wrench on the jack,
engage the bracket of the jack base
and the lug wrench pin, swing the
wrench upwards, adjust jack height
until the wrench hook engages the hole
on jack. Tighten the hex nut clockwise
by hand until secure.
2. Place the jack in the spare tire compartment, install the wing nut and
tighten clockwise by hand until secure. Stowing the flat tire
You cannot store the full-sized road wheel
in the temporary spare tire well.
1. Find the flat tire retainer strap tucked
inside the jack channel. Lower the
carpeted load floor.
2. Stow the flat tire in the cargo area on the load floor with the wheel facing up.
Secure the flat tire with the retainer
strap by following the next steps. 3. Locate the rear left side and right side
cargo tie-down rings. Push the loop end
of the retainer strap through one cargo
tie-down ring. Thread the non-loop end
through the loop.
4. Weave the retainer strap through the wheel openings. 379
Explorer (CTW), enUSA, Edition date: 202007, Second-Printing Wheels and Tires12
3
4
5E306781 E176165 E142906 E294325
Page 383 of 577
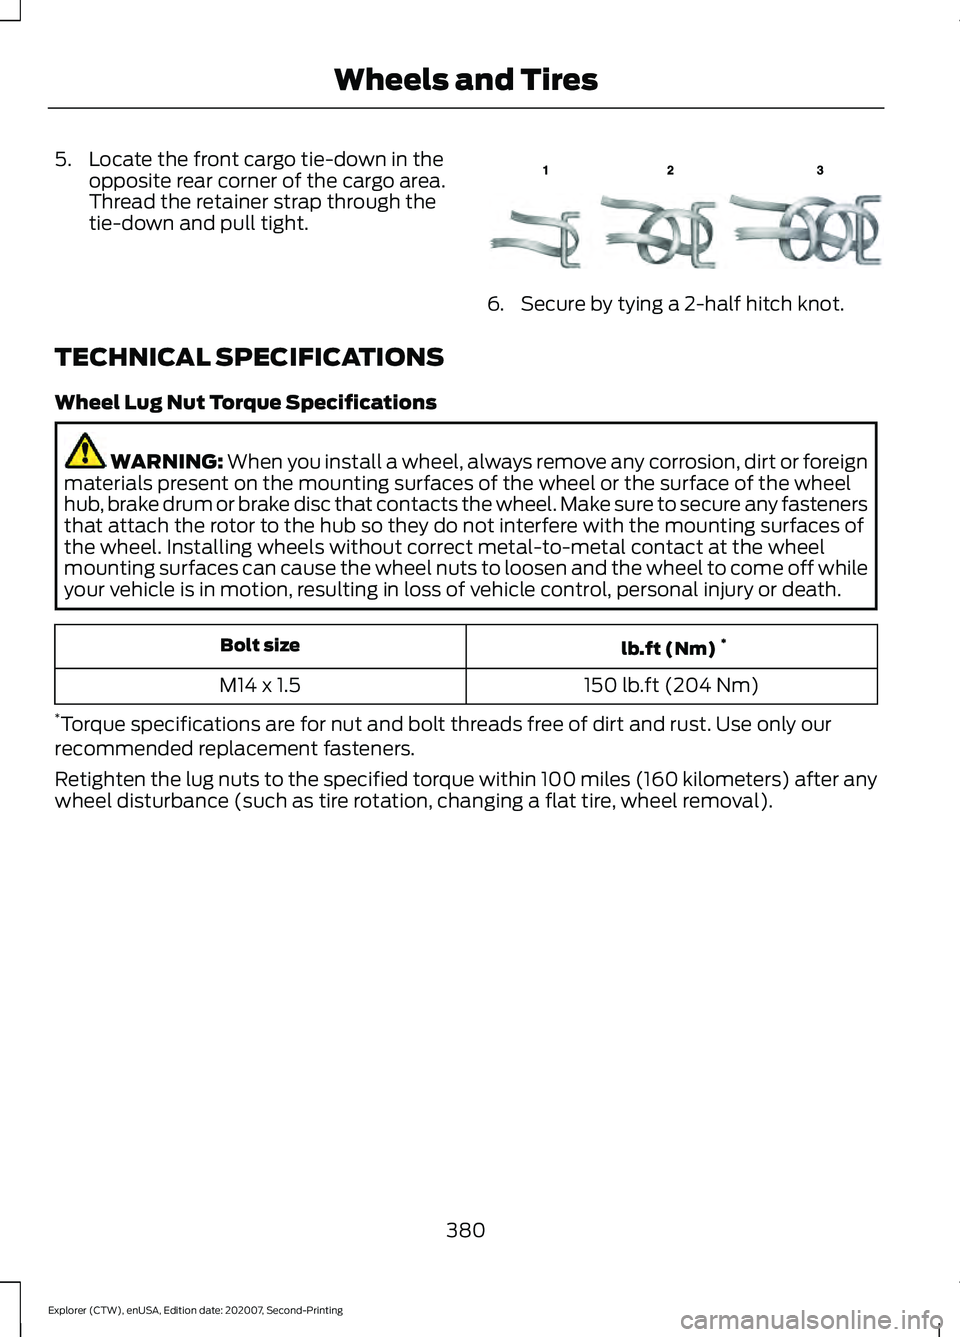
5. Locate the front cargo tie-down in the
opposite rear corner of the cargo area.
Thread the retainer strap through the
tie-down and pull tight. 6. Secure by tying a 2-half hitch knot.
TECHNICAL SPECIFICATIONS
Wheel Lug Nut Torque Specifications WARNING: When you install a wheel, always remove any corrosion, dirt or foreign
materials present on the mounting surfaces of the wheel or the surface of the wheel
hub, brake drum or brake disc that contacts the wheel. Make sure to secure any fasteners
that attach the rotor to the hub so they do not interfere with the mounting surfaces of
the wheel. Installing wheels without correct metal-to-metal contact at the wheel
mounting surfaces can cause the wheel nuts to loosen and the wheel to come off while
your vehicle is in motion, resulting in loss of vehicle control, personal injury or death. lb.ft (Nm)
*
Bolt size
150 lb.ft (204 Nm)
M14 x 1.5
* Torque specifications are for nut and bolt threads free of dirt and rust. Use only our
recommended replacement fasteners.
Retighten the lug nuts to the specified torque within 100 miles (160 kilometers) after any
wheel disturbance (such as tire rotation, changing a flat tire, wheel removal).
380
Explorer (CTW), enUSA, Edition date: 202007, Second-Printing Wheels and TiresE143746
Page 497 of 577
United Arab Emirates (U.A.E.)
United States and Canada
WARNING: Changes or
modifications not expressively approved
by the party responsible for compliance
could void the user's authority to operate
the equipment. The term "IC:" before the
radio certification number only signifies
that Industry Canada technical
specifications were met.
FCC ID: OAYSRR3B
IC: 4135A-SRR3B
IC: RSS-310 compliant, Per FCC Test report
no.: 1-8707-14-01-03
This device complies with Part 15 of the
FCC Rules and with Innovation, Science
and Economic Development Canada ’s
licence-exempt RSS(s). Operation is
subject to the following two conditions:
1. This device may not cause harmful interference, and
2. This device must accept any interference received, including
interference that may cause undesired
operation. Vietnam
Zambia
Body Control Module
Argentina
494
Explorer (CTW), enUSA, Edition date: 202007, Second-Printing Customer InformationE338020 E269693 E340205 E338547