2021 FORD EXPLORER width
[x] Cancel search: widthPage 267 of 577
Why is the feature not available (line markings are gray) when I can see the lane markings
on the road?
Transitioning between no lane markings to lane markings or vice versa.
There is standing water on the road.
Faint lane markings, for example partial yellow lane markings on concrete roads.
Lane width is too narrow or too wide.
The camera has not been calibrated after a windshield replacement.
Driving on tight roads or on uneven roads. Why does the vehicle not come back toward the middle of the lane, as expected, in the
Aid or Aid + Alert mode?
High cross winds are present.
There is a large road crown.
Rough roads, grooves or shoulder drop-offs.
Heavy uneven loading of the vehicle or improper tire inflation pressure.
The tires have been changed, or the suspension has been modified.
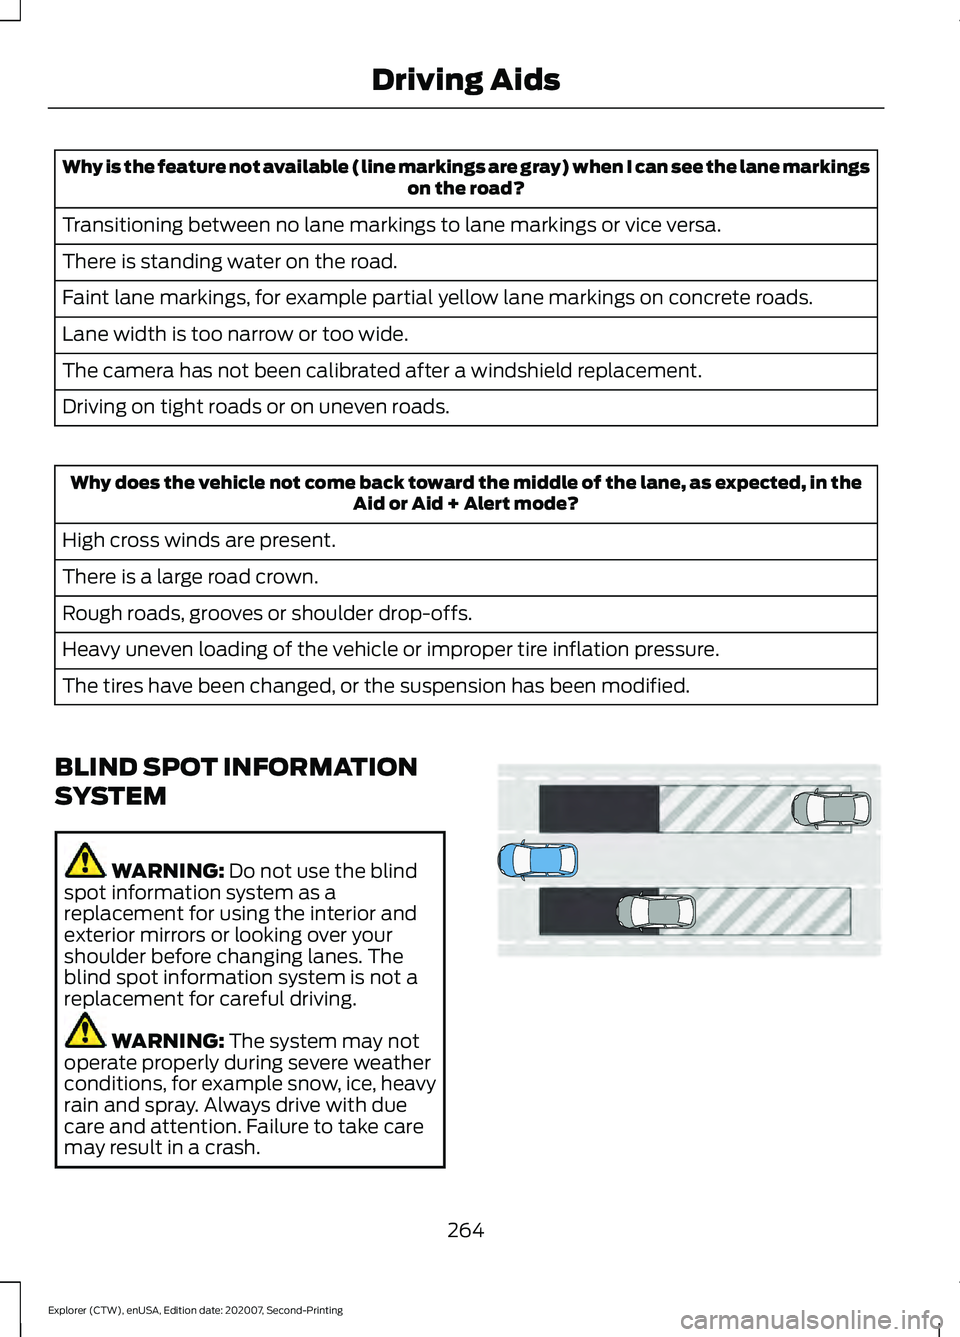
BLIND SPOT INFORMATION
SYSTEM WARNING: Do not use the blind
spot information system as a
replacement for using the interior and
exterior mirrors or looking over your
shoulder before changing lanes. The
blind spot information system is not a
replacement for careful driving. WARNING:
The system may not
operate properly during severe weather
conditions, for example snow, ice, heavy
rain and spray. Always drive with due
care and attention. Failure to take care
may result in a crash. 264
Explorer (CTW), enUSA, Edition date: 202007, Second-Printing Driving AidsE255695
Page 269 of 577
•
Information display. See General
Information (page 114).
• Touchscreen. See Settings (page 464).
When you switch the system off, a warning
lamp illuminates and the alert indicators
flash twice.
Note: The system remembers the last
setting when you start your vehicle.
Note: The system may not correctly operate
when towing a trailer. For vehicles with an
approved trailer tow module and tow bar,
the system turns off when you attach a
trailer. For vehicles with an aftermarket
trailer tow module or tow bar, we
recommend that you switch the system off
when you attach a trailer.
To permanently switch the system off,
contact an authorized dealer.
Blind Spot Information System
with Trailer Tow
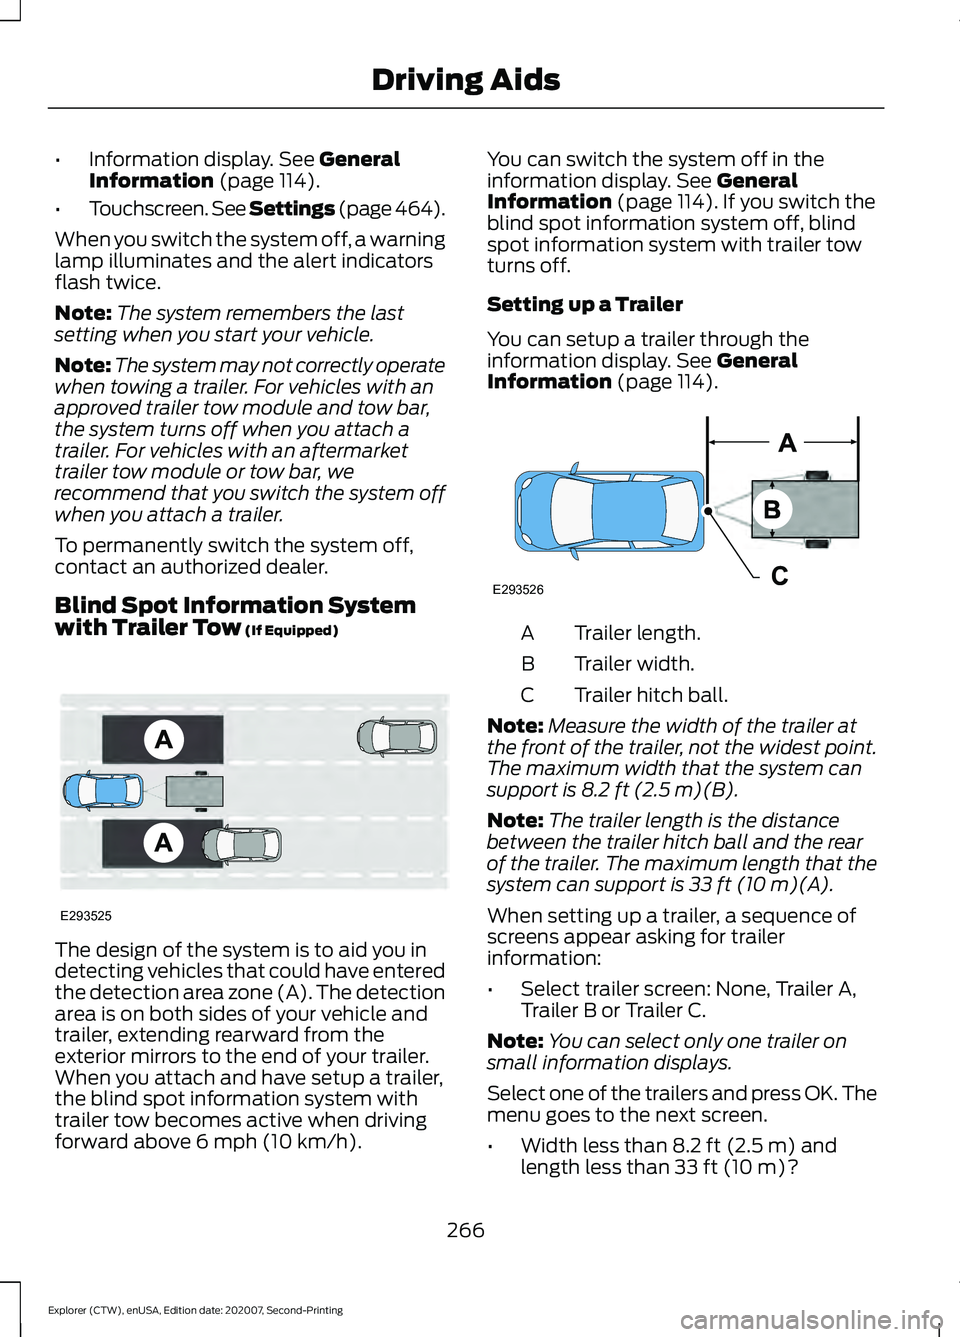
(If Equipped) The design of the system is to aid you in
detecting vehicles that could have entered
the detection area zone (A). The detection
area is on both sides of your vehicle and
trailer, extending rearward from the
exterior mirrors to the end of your trailer.
When you attach and have setup a trailer,
the blind spot information system with
trailer tow becomes active when driving
forward above
6 mph (10 km/h). You can switch the system off in the
information display.
See General
Information (page 114). If you switch the
blind spot information system off, blind
spot information system with trailer tow
turns off.
Setting up a Trailer
You can setup a trailer through the
information display.
See General
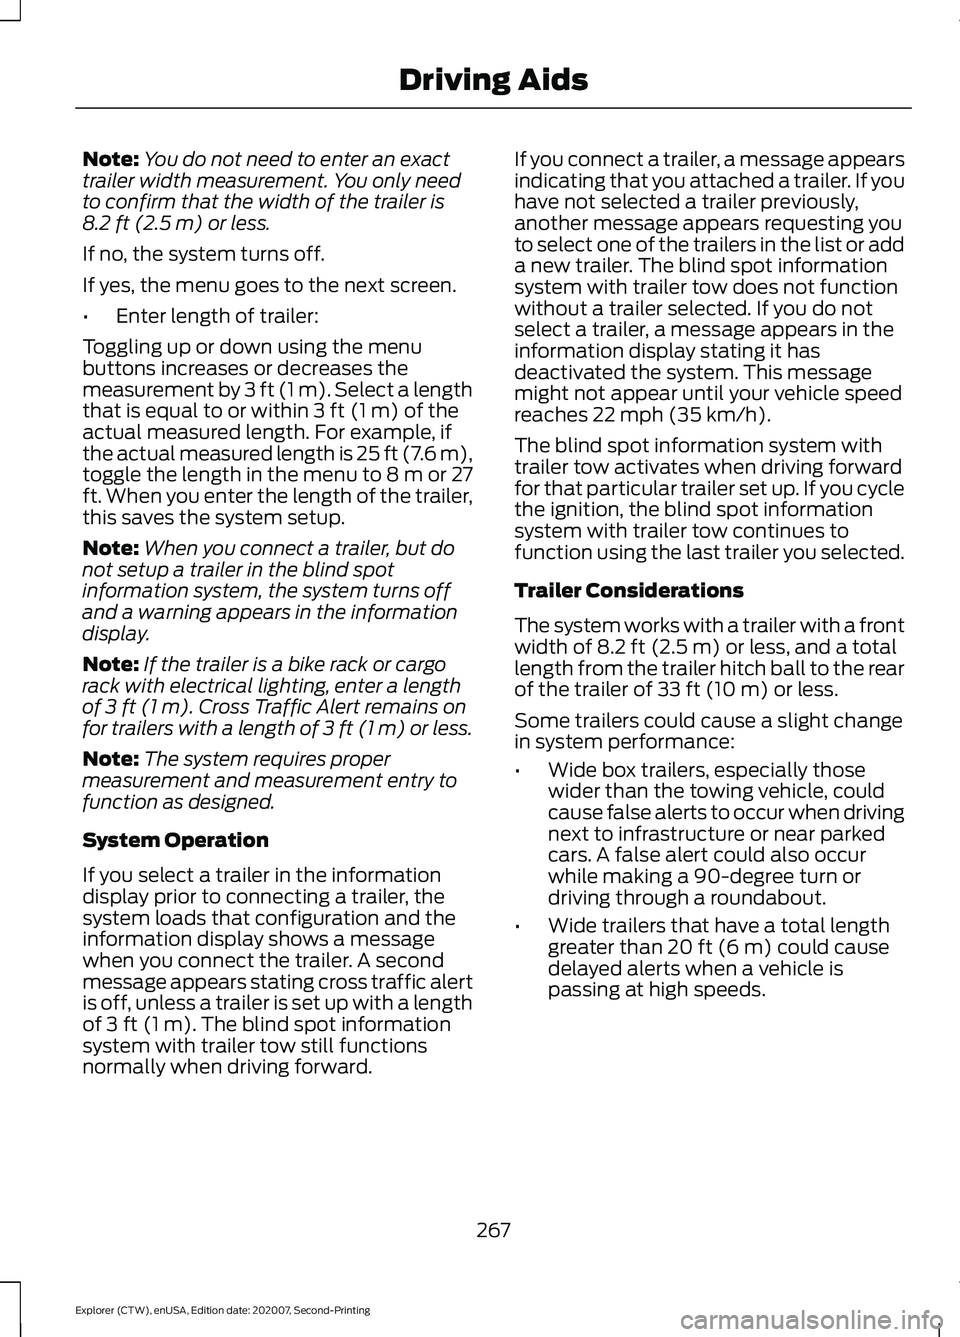
Information (page 114). Trailer length.
A
Trailer width.
B
Trailer hitch ball.
C
Note: Measure the width of the trailer at
the front of the trailer, not the widest point.
The maximum width that the system can
support is
8.2 ft (2.5 m)(B).
Note: The trailer length is the distance
between the trailer hitch ball and the rear
of the trailer. The maximum length that the
system can support is
33 ft (10 m)(A).
When setting up a trailer, a sequence of
screens appear asking for trailer
information:
• Select trailer screen: None, Trailer A,
Trailer B or Trailer C.
Note: You can select only one trailer on
small information displays.
Select one of the trailers and press OK. The
menu goes to the next screen.
• Width less than
8.2 ft (2.5 m) and
length less than 33 ft (10 m)?
266
Explorer (CTW), enUSA, Edition date: 202007, Second-Printing Driving AidsE293525 E293526
Page 270 of 577
Note:
You do not need to enter an exact
trailer width measurement. You only need
to confirm that the width of the trailer is
8.2 ft (2.5 m) or less.
If no, the system turns off.
If yes, the menu goes to the next screen.
• Enter length of trailer:
Toggling up or down using the menu
buttons increases or decreases the
measurement by
3 ft (1 m). Select a length
that is equal to or within 3 ft (1 m) of the
actual measured length. For example, if
the actual measured length is 25 ft (7.6 m),
toggle the length in the menu to 8 m or 27
ft. When you enter the length of the trailer,
this saves the system setup.
Note: When you connect a trailer, but do
not setup a trailer in the blind spot
information system, the system turns off
and a warning appears in the information
display.
Note: If the trailer is a bike rack or cargo
rack with electrical lighting, enter a length
of
3 ft (1 m). Cross Traffic Alert remains on
for trailers with a length of 3 ft (1 m) or less.
Note: The system requires proper
measurement and measurement entry to
function as designed.
System Operation
If you select a trailer in the information
display prior to connecting a trailer, the
system loads that configuration and the
information display shows a message
when you connect the trailer. A second
message appears stating cross traffic alert
is off, unless a trailer is set up with a length
of
3 ft (1 m). The blind spot information
system with trailer tow still functions
normally when driving forward. If you connect a trailer, a message appears
indicating that you attached a trailer. If you
have not selected a trailer previously,
another message appears requesting you
to select one of the trailers in the list or add
a new trailer. The blind spot information
system with trailer tow does not function
without a trailer selected. If you do not
select a trailer, a message appears in the
information display stating it has
deactivated the system. This message
might not appear until your vehicle speed
reaches
22 mph (35 km/h).
The blind spot information system with
trailer tow activates when driving forward
for that particular trailer set up. If you cycle
the ignition, the blind spot information
system with trailer tow continues to
function using the last trailer you selected.
Trailer Considerations
The system works with a trailer with a front
width of
8.2 ft (2.5 m) or less, and a total
length from the trailer hitch ball to the rear
of the trailer of
33 ft (10 m) or less.
Some trailers could cause a slight change
in system performance:
• Wide box trailers, especially those
wider than the towing vehicle, could
cause false alerts to occur when driving
next to infrastructure or near parked
cars. A false alert could also occur
while making a 90-degree turn or
driving through a roundabout.
• Wide trailers that have a total length
greater than
20 ft (6 m) could cause
delayed alerts when a vehicle is
passing at high speeds.
267
Explorer (CTW), enUSA, Edition date: 202007, Second-Printing Driving Aids
Page 271 of 577
•
Box trailers that have a width greater
than 8.2 ft (2.5 m) could cause early
alerts when you pass a vehicle.
• Clam shell or V-Nose box trailers with
a width greater than
8.2 ft (2.5 m)
could cause delayed alerts when a
vehicle traveling the same speed as
your vehicle merges lanes.
System Errors
If the system detects a fault, a warning
lamp illuminates and a message displays.
See
Information Messages (page 121).
Switching the System On and Off
You can switch the blind spot information
system with trailer tow off by not selecting
a trailer the information display.
See
General Information (page 114). In this
case, the system turns off as long as a
trailer is attached to your vehicle. As soon
as you disconnect the trailer, the blind spot
information system becomes active.
When you switch the system off, a warning
lamp illuminates and the alert indicators
flash twice.
Note: The system remembers the last
trailer setting when you start your vehicle.
You cannot switch off the blind spot
information system with trailer tow when
using MyKey, but you can still change the
trailer settings.
See MyKey ™ (page 64).
To permanently switch the system off,
contact an authorized dealer. CROSS TRAFFIC ALERT WARNING:
Do not use the cross
traffic alert system as a replacement for
using the interior and exterior mirrors or
looking over your shoulder before
reversing out of a parking space. The
cross traffic alert system is not a
replacement for careful driving. WARNING:
The system may not
operate properly during severe weather
conditions, for example snow, ice, heavy
rain and spray. Always drive with due
care and attention. Failure to take care
may result in a crash.
The system alerts you of vehicles
approaching from the sides behind your
vehicle when you shift into reverse (R).
Using Cross Traffic Alert
The system detects vehicles that approach
at a speed between
4 mph (6 km/h) and
37 mph (60 km/h). Coverage decreases
when the sensors are partially, mostly or
fully obstructed. Slowly reversing helps
increase the coverage area and
effectiveness.
The system turns on when you start the
engine and you shift into reverse (R). The
system turns off when you shift out of
reverse (R).
268
Explorer (CTW), enUSA, Edition date: 202007, Second-Printing Driving Aids
Page 356 of 577
TIRE CARE
Information About Uniform
Tire Quality Grading
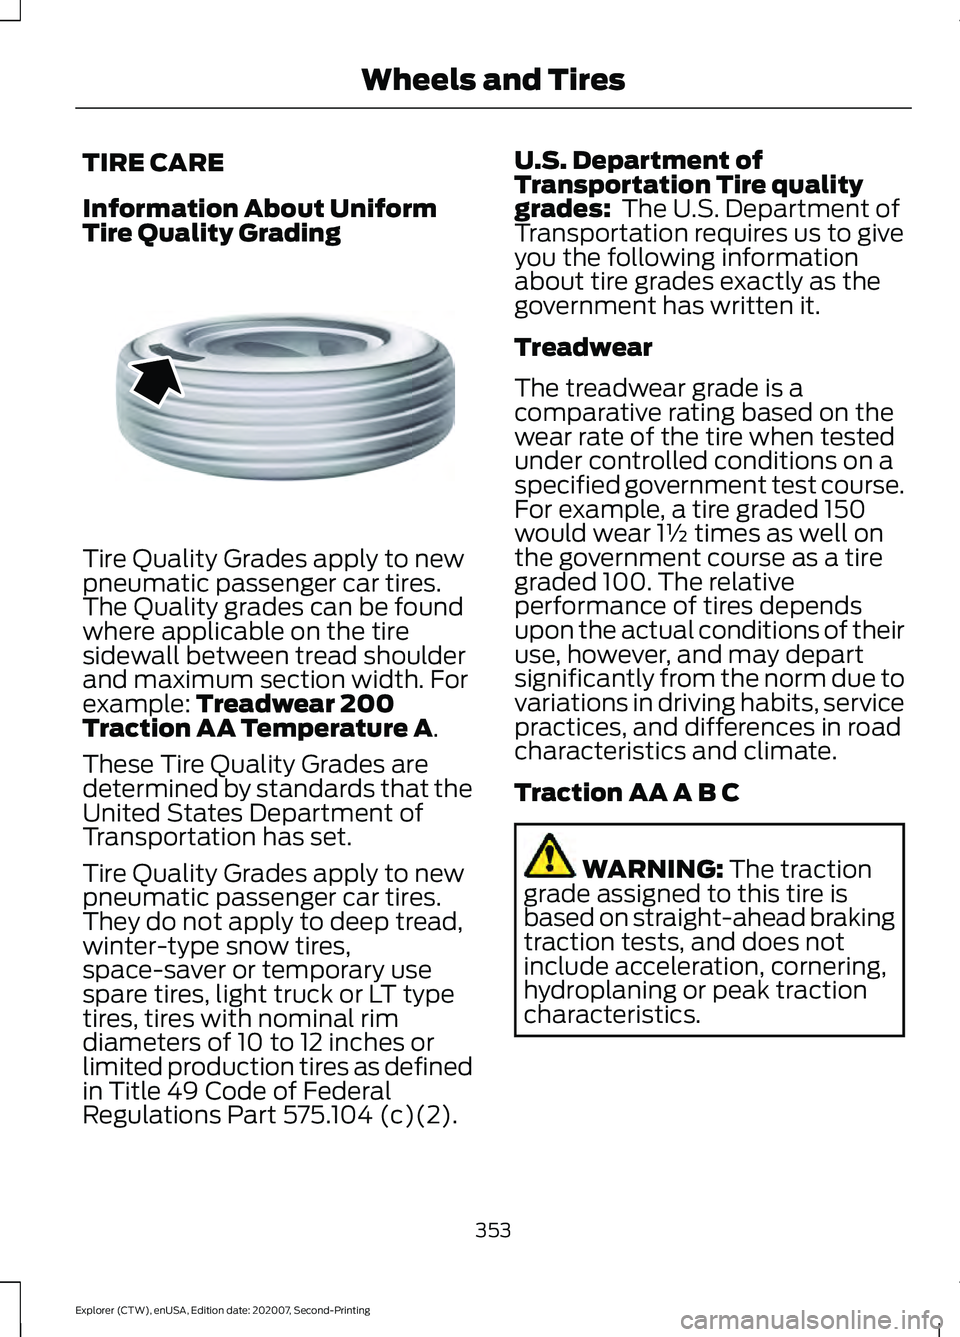
Tire Quality Grades apply to new
pneumatic passenger car tires.
The Quality grades can be found
where applicable on the tire
sidewall between tread shoulder
and maximum section width. For
example: Treadwear 200
Traction AA Temperature A.
These Tire Quality Grades are
determined by standards that the
United States Department of
Transportation has set.
Tire Quality Grades apply to new
pneumatic passenger car tires.
They do not apply to deep tread,
winter-type snow tires,
space-saver or temporary use
spare tires, light truck or LT type
tires, tires with nominal rim
diameters of 10 to 12 inches or
limited production tires as defined
in Title 49 Code of Federal
Regulations Part 575.104 (c)(2). U.S. Department of
Transportation Tire quality
grades:
The U.S. Department of
Transportation requires us to give
you the following information
about tire grades exactly as the
government has written it.
Treadwear
The treadwear grade is a
comparative rating based on the
wear rate of the tire when tested
under controlled conditions on a
specified government test course.
For example, a tire graded 150
would wear 1½ times as well on
the government course as a tire
graded 100. The relative
performance of tires depends
upon the actual conditions of their
use, however, and may depart
significantly from the norm due to
variations in driving habits, service
practices, and differences in road
characteristics and climate.
Traction AA A B C WARNING:
The traction
grade assigned to this tire is
based on straight-ahead braking
traction tests, and does not
include acceleration, cornering,
hydroplaning or peak traction
characteristics.
353
Explorer (CTW), enUSA, Edition date: 202007, Second-Printing Wheels and TiresE142542
Page 359 of 577
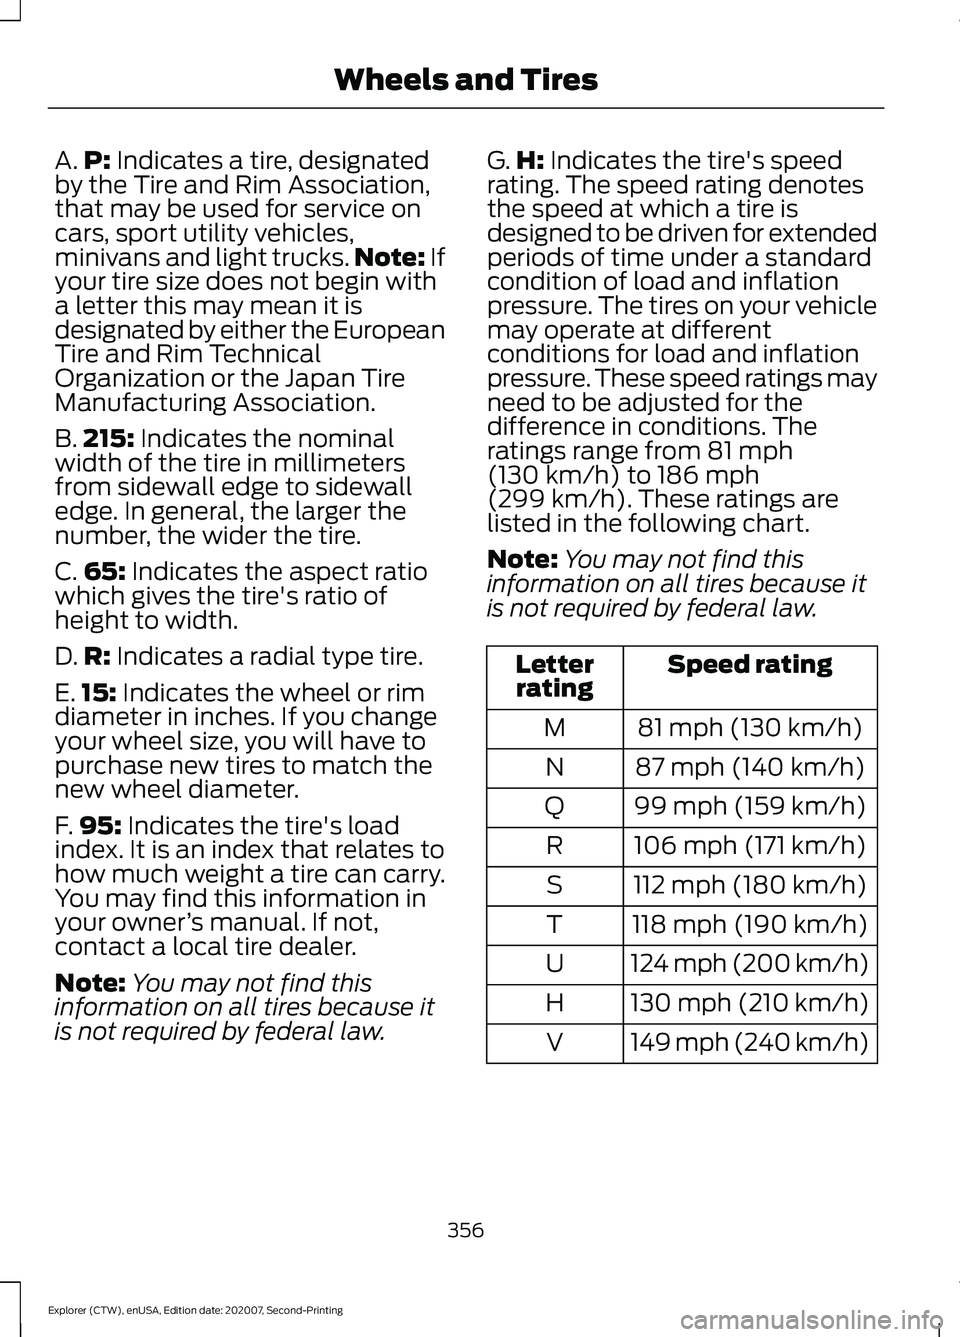
A.
P: Indicates a tire, designated
by the Tire and Rim Association,
that may be used for service on
cars, sport utility vehicles,
minivans and light trucks. Note:
If
your tire size does not begin with
a letter this may mean it is
designated by either the European
Tire and Rim Technical
Organization or the Japan Tire
Manufacturing Association.
B. 215:
Indicates the nominal
width of the tire in millimeters
from sidewall edge to sidewall
edge. In general, the larger the
number, the wider the tire.
C. 65:
Indicates the aspect ratio
which gives the tire's ratio of
height to width.
D. R:
Indicates a radial type tire.
E. 15:
Indicates the wheel or rim
diameter in inches. If you change
your wheel size, you will have to
purchase new tires to match the
new wheel diameter.
F. 95:
Indicates the tire's load
index. It is an index that relates to
how much weight a tire can carry.
You may find this information in
your owner ’s manual. If not,
contact a local tire dealer.
Note: You may not find this
information on all tires because it
is not required by federal law. G.
H:
Indicates the tire's speed
rating. The speed rating denotes
the speed at which a tire is
designed to be driven for extended
periods of time under a standard
condition of load and inflation
pressure. The tires on your vehicle
may operate at different
conditions for load and inflation
pressure. These speed ratings may
need to be adjusted for the
difference in conditions. The
ratings range from
81 mph
(130 km/h) to 186 mph
(299 km/h). These ratings are
listed in the following chart.
Note: You may not find this
information on all tires because it
is not required by federal law. Speed rating
Letter
rating
81 mph (130 km/h)
M
87 mph (140 km/h)
N
99 mph (159 km/h)
Q
106 mph (171 km/h)
R
112 mph (180 km/h)
S
118 mph (190 km/h)
T
124 mph (200 km/h)
U
130 mph (210 km/h)
H
149 mph (240 km/h)
V
356
Explorer (CTW), enUSA, Edition date: 202007, Second-Printing Wheels and Tires
Page 362 of 577
C.
Maximum Load Dual lb (kg)
at psi (kPa) cold: Indicates the
maximum load and tire pressure
when the tire is used as a dual,
defined as four tires on the rear
axle (a total of six or more tires on
the vehicle).
D. Maximum Load Single lb
(kg) at psi (kPa) cold:
Indicates
the maximum load and tire
pressure when the tire is used as
a single, defined as two tires
(total) on the rear axle.
Information on T Type Tires
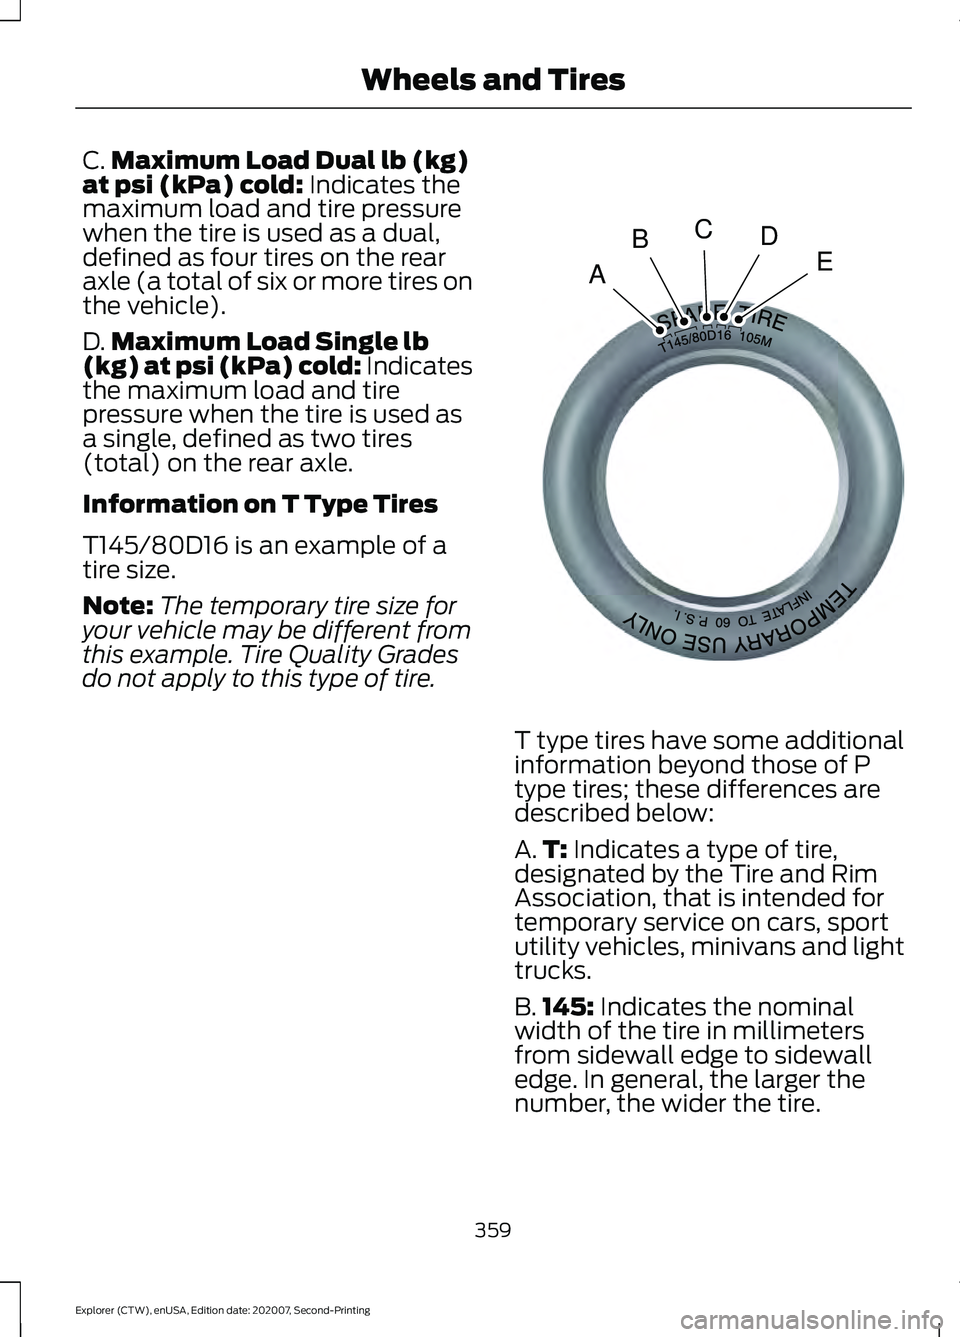
T145/80D16 is an example of a
tire size.
Note: The temporary tire size for
your vehicle may be different from
this example. Tire Quality Grades
do not apply to this type of tire. T type tires have some additional
information beyond those of P
type tires; these differences are
described below:
A.
T:
Indicates a type of tire,
designated by the Tire and Rim
Association, that is intended for
temporary service on cars, sport
utility vehicles, minivans and light
trucks.
B. 145:
Indicates the nominal
width of the tire in millimeters
from sidewall edge to sidewall
edge. In general, the larger the
number, the wider the tire.
359
Explorer (CTW), enUSA, Edition date: 202007, Second-Printing Wheels and TiresA
BCDEE142545
Page 363 of 577
C.
80: Indicates the aspect ratio
which gives the tire's ratio of
height to width. Numbers of 70 or
lower indicate a short sidewall.
D. D:
Indicates a diagonal type tire.
R:
Indicates a radial type tire.
E. 16:
Indicates the wheel or rim
diameter in inches. If you change
your wheel size, you will have to
purchase new tires to match the
new wheel diameter.
Recommended Tire Pressures
and Inflating Your Tires
Safe operation of your vehicle
requires that your tires are
properly inflated. Remember that
a tire can lose up to half of its air
pressure without appearing flat.
Every day before you drive, check
your tires. If one looks lower than
the others, use a tire gauge to
check the pressure of all tires and
adjust if required.
At least once a month and before
long trips, inspect each tire and
check the tire pressure with a tire
gauge (including spare, if
equipped). Inflate all tires to the
inflation pressure recommended
by the manufacturer. WARNING: Under-inflation
is the most common cause of
tire failures and may result in
severe tire cracking, tread
separation or blowout, with
unexpected loss of vehicle control and increased risk of
injury. Under-inflation increases
sidewall flexing and rolling
resistance, resulting in heat
buildup and internal damage to
the tire. It also may result in
unnecessary tire stress, irregular
wear, loss of vehicle control and
accidents. A tire can lose up to
half of its air pressure and not
appear to be flat!
You are strongly urged to buy a
reliable tire pressure gauge, as
automatic service station gauges
may be inaccurate. We
recommend the use of a digital or
dial-type tire pressure gauge
rather than a stick-type tire
pressure gauge. Use the
recommended cold inflation
pressure for optimum tire
performance and wear.
Under-inflation or over-inflation
may cause uneven treadwear
patterns.
Always inflate your tires to the
recommended inflation pressure
even if it is less than the maximum
inflation pressure information
found on the tire. You will find a
Tire Label containing the
manufactures recommended tire
inflation pressure by the tire size
and other important information
located on the B-Pillar or the edge
of the driver ’s door).
360
Explorer (CTW), enUSA, Edition date: 202007, Second-Printing Wheels and Tires