Page 209 of 414

207
bonnet
F Open the right hand front door.
F P ull the interior bonnet release lever A ,
located at the bottom of the door aperture. Do not open the bonnet in high winds.
When the engine is hot, handle the
exterior safety catch and the bonnet
stay with care (risk of burns).
F
U
nclip the stay C from its housing on the
back of the bonnet.
F
F
ix the stay in the notch to hold the bonnet
open.ClosingF Take the stay out of the support notch.
F C lip the stay in its housing on the back of
the bonnet.
F
L
ower the bonnet and release it at the end
of its travel.
F
P
ull on the bonnet to check that it is
secured correctly. The location of the interior bonnet
release lever prevents opening of the
bonnet while the right hand front door
is closed.
Opening
F Push the exterior safety catch B to the left
and raise the bonnet. This message appears in the instrument panel
screen if the bonnet is not fully closed.
The cooling fan may star t after
switching off the engine: take care
with articles and clothing that might
become caught by the fan blades.
be
cause of the presence of electrical
equipment under the bonnet, it is
recommended that exposure to water
(rain, washing, ...) be limited.
8
Checks
Page 210 of 414
208
Access for checking the levels of the various
fluids and the replacement of certain
components.
Petrol engines
1. Screenwash and headlamp wash fluid reservoir.
2.
C
oolant header tank.
3.
B
rake fluid reservoir.
4.
B
attery.
5.
F
usebox.
6.
A
ir filter.
7.
E
ngine oil dipstick.
8.
E
ngine oil filler cap. 1.6 litre 115
2.0 litre 150
Checks
Page 211 of 414
209
The various caps and covers allow access for
checking the levels of the various fluids, for
replacing certain components and for priming
the fuel system.
Diesel engines
1. Screenwash and headlamp wash fluid reservoir.
2.
C
oolant reservoir.
3.
B
rake fluid reservoir.
4.
B
attery.
5.
F
usebox.
6.
A
ir filter.
7.
E
ngine oil dipstick.
8.
E
ngine oil filler cap.
9.
P
riming pump*. 1.6
HDi 110
1.8 HDi 150
* According to engine.
8
Checks
Page 212 of 414

210
When the symbol begins to flash
rapidly (approximately twice per
second), there is not much fuel
remaining in your tank (approximately
5 litres).
You must fill the tank to avoid running
out of fuel.
Fuel tank
Capacity of the tank: approximately 60 litres.
Low fuel level
Filling
A label, affixed on the inside of the flap,
reminds you of the type of fuel to be used
according to your engine.
More than 5 litres of fuel must be added in
order to be registered by the fuel gauge.
Location of the cap
When the low fuel level is reached,
this indication appears in the
instrument panel screen. When it first
comes on, you have approximately
10 litres of fuel remaining.
The symbol flashes slowly (approximately
once per second).
1.
O
pening the filer flap.
2.
R
emoving the filler cap.
3.
H
ooking the filler cap.
To fill the tank safely:
F
t
he engine must be switched off,
F
p
ull the control A located at the bottom
right of the driver's seat to release the fuel
filler flap,
F
o
pen the fuel filler flap B,
F
t
urn the filler cap C to the left,
F
r
emove the filler cap C,
F
f
ill the tank, but do not continue after the
3rd cut- off of the nozzle ; this could cause
malfunctions.
When you have filled the tank:
F
r
efit the filler cap, inserting the upper
part first,
F
s
crew in the filler cap to the right,
F
c
lose the flap.
Ensure that the fuel filler flap is closed
c o r r e c t l y. This symbol indicates that the fuel
tank cap is located on the left-hand
side of the vehicle.
Opening the cap may cause an inrush of air.
This vacuum, which is completely normal, is
caused by the sealing of the fuel system.
Checks
Page 213 of 414

211
Quality of the fuel used for
petrol engines
The petrol engines are per fectly compatible
with E10 type petrol biofuels (containing 10 %
ethanol), conforming to European standards
EN 228 and EN 15376.
E85 type fuels (containing up to 85 % ethanol)
are reserved exclusively for vehicles marketed
for the use of this type of fuel (BioFlex
vehicles). The quality of the ethanol must
comply with European standard EN 15293.
For Brazil only, special vehicles are marketed
to run on fuels containing up to 100 % ethanol
(E100 type).
Quality of the fuel used for
Diesel engines
The Diesel engines are per fectly compatible
with biofuels which conform to current and
future European standards (Diesel fuel
which complies with standard EN 590 mixed
with a biofuel which complies with standard
EN 14214) available at the pumps (containing
up to 7 % Fatty Acid Methyl Ester).
The B30 biofuel can be used in certain Diesel
engines; however, this use is subject to strict
application of the special servicing conditions.
Contact a CITROËN dealer or a qualified
workshop.
The use of any other type of (bio)fuel
(vegetable or animal oils, pure or diluted,
domestic fuel...) is strictly prohibited (risk of
damage to the engine and fuel system).
1.6 litre petrol engines, even though they have
been designed to operate on 95 RON petrol,
can accept 90 RON petrol without engine
adjustments, but with a slight deterioration in
performance.
2.0 litre petrol engines can accept 90 RON or
higher petrol.
8
Checks
Page 214 of 414
212
Running out of fuel (Diesel)
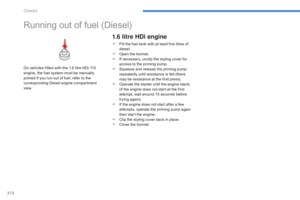
On vehicles fitted with the 1.6 litre HDi 110
engine, the fuel system must be manually
primed if you run out of fuel; refer to the
corresponding Diesel engine compartment
view.
1.6 litre HDi engine
F Fill the fuel tank with at least five litres of diesel.
F
O
pen the bonnet.
F
I
f necessary, unclip the styling cover for
access to the priming pump.
F
S
queeze and release the priming pump
repeatedly until resistance is felt (there
may be resistance at the first press).
F
O
perate the starter until the engine starts
(if the engine does not start at the first
attempt, wait around 15 seconds before
trying again).
F
I
f the engine does not start after a few
attempts, operate the priming pump again
then start the engine.
F
C
lip the styling cover back in place.
F
C
lose the bonnet.
Checks
Page 215 of 414

213
Checking levels
Take care when working under the bonnet, as certain areas of the engine may be extremely hot (risk of burns) and the cooling fan could start at
any time (even with the ignition off).
Oil level
The check of the the level is done
out with the dipstick, located under
the bonnet. Refer to the description
of your engine compartment for the
position of the dipstick.Engine oil change
Refer to the maintenance and warranty guide
for details of the interval for this operation.
In order to maintain the reliability of the engine
and emission control system, never use
additives in the engine oil.
Oil specification
The oil must be the correct grade for your
engine and conform to the manufacturer's
recommendations.
Check all of these levels regularly, in line with the maintenance and warranty guide. Top them up if necessary, unless other wise indicated.
If a level drops significantly, have the corresponding system checked by a CITROËN dealer or a qualified workshop.
Dipstick
There are two marks on the dipstick:
A = maximum
If the level is above this
mark, contact a CITROËN
dealer or a qualified
workshop.
B = minimum
Top up the level through the
oil filler orifice, using the
correct grade of oil for your
engine. The level must never
be below this mark.
This check will only be correct if the vehicle is
on level ground and the engine has been off for
more than 30 minutes.
It is normal to top up the oil level between
two services (or oil changes). CITROËN
recommends that you check the level, and top
up if necessary, every 3 000 miles (5 000 km).
After topping up the oil, the check when
switching on the ignition with the oil level
indicator in the instrument panel is not valid
during the 30 minutes after topping up.
8
Checks
Page 216 of 414

214
Coolant level
The coolant level should be between
the two marks.In addition, as the cooling system is
pressurised, wait at least one hour after
switching off the engine before carrying out any
work.
To avoid any risk of scalding, unscrew the cap
by two turns to allow the pressure to drop.
When the pressure has dropped, remove the
cap and top up the level.
Fluid specification
The coolant must conform to the
manufacturer's recommendations.
The brake fluid level should be close
to the "MA X" mark. If it is not, check
the brake pad wear.
Brake fluid level
Changing the fluid
Refer to the maintenance and warranty guide
for details of the interval for this operation.
Fluid specification
The brake fluid must conform to the
manufacturer's recommendations and meet
the
DOT3 or DOT4 standard.
The cooling fan may star t after switching
off the engine: take care with ar ticles and
clothing that might become caught by the
fan blades. When the engine is warm, the temperature of
the coolant is regulated by the fan.
Checks