2021 CHRYSLER 300 battery
[x] Cancel search: batteryPage 21 of 268
GETTING TO KNOW YOUR VEHICLE 19
TO DISARM THE SYSTEM
The Vehicle Security system can be disarmed using
any of the following methods:
Push the unlock button on the key fob.
Grab the Passive Entry door handle to unlock
the door Ú page 20.
Cycle the ignition out of the OFF position to
disarm the system.
NOTE:
The driver's door key cylinder and the trunk
button on the key fob cannot arm or disarm the
Vehicle Security system. Use of the door key
cylinder when the system is armed will sound
the alarm when the door is opened.
If Passive Entry (if equipped) is used to unlock
the trunk, the Vehicle Security system is
disarmed and the rest of the vehicle doors will
remain locked unless all doors are set to unlock
on first press within Uconnect Settings.
When the Vehicle Security system is armed, the
interior power door lock switches will not unlock
the doors.
The Vehicle Security system is designed to protect
y ou
r vehicle. However, you can create conditions
where the system will give you a false alarm. If one
of the previously described arming sequences has
occurred, the Vehicle Security system will arm,
regardless of whether you are in the vehicle or not. If you remain in the vehicle and open a door, the
alarm will sound. If this occurs, disarm the Vehicle
Security system.
If the Vehicle Security system is armed and the
b
a
ttery becomes disconnected, the Vehicle
Security system will remain armed when the
battery is reconnected; the exterior lights will flash,
and the horn will sound. If this occurs, disarm the
Vehicle Security system.
REARMING OF THE SYSTEM
If something triggers the alarm and no action is
taken to disarm it, the Vehicle Security system will
turn the horn off after a 29 second cycle (with five
seconds between cycles and up to eight cycles if
the trigger remains active) and then rearm itself.
SECURITY SYSTEM MANUAL OVERRIDE
The Vehicle Security system will not arm if you lock
the doors using the manual door lock.
TAMPER ALERT
If something has triggered the Vehicle Security
system in your absence, the horn will sound three
times and the exterior lights will blink three times
when you disarm the Vehicle Security system.
DOORS
MANUAL DOOR LOCKS
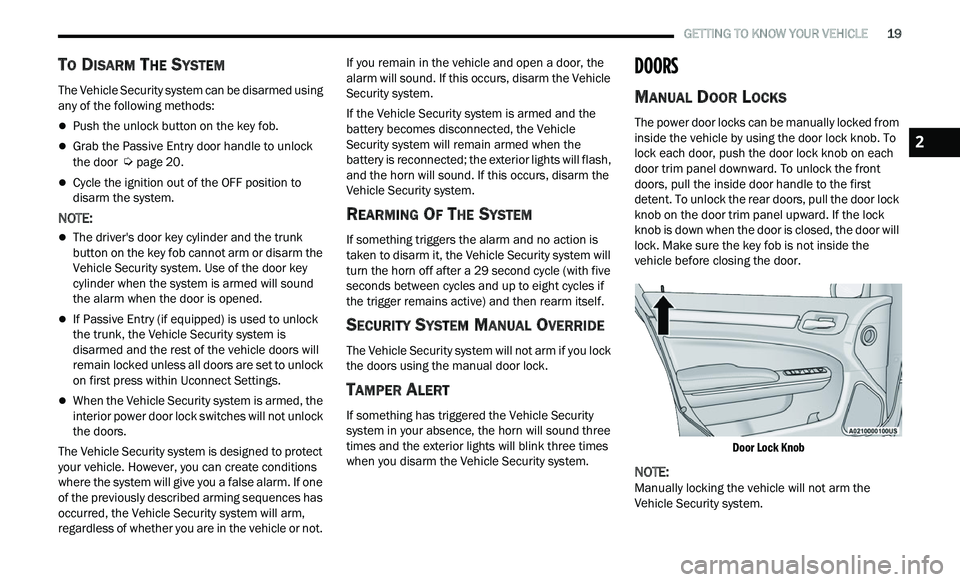
The power door locks can be manually locked from
inside the vehicle by using the door lock knob. To
lock each door, push the door lock knob on each
door trim panel downward. To unlock the front
doors, pull the inside door handle to the first
detent. To unlock the rear doors, pull the door lock
knob on the door trim panel upward. If the lock
knob is down when the door is closed, the door will
lock. Make sure the key fob is not inside the
vehicle before closing the door.
Door Lock Knob
NOTE:
Manually locking the vehicle will not arm the
V e
hicle Security system.
2
Page 24 of 268
22 GETTING TO KNOW YOUR VEHICLE
NOTE:
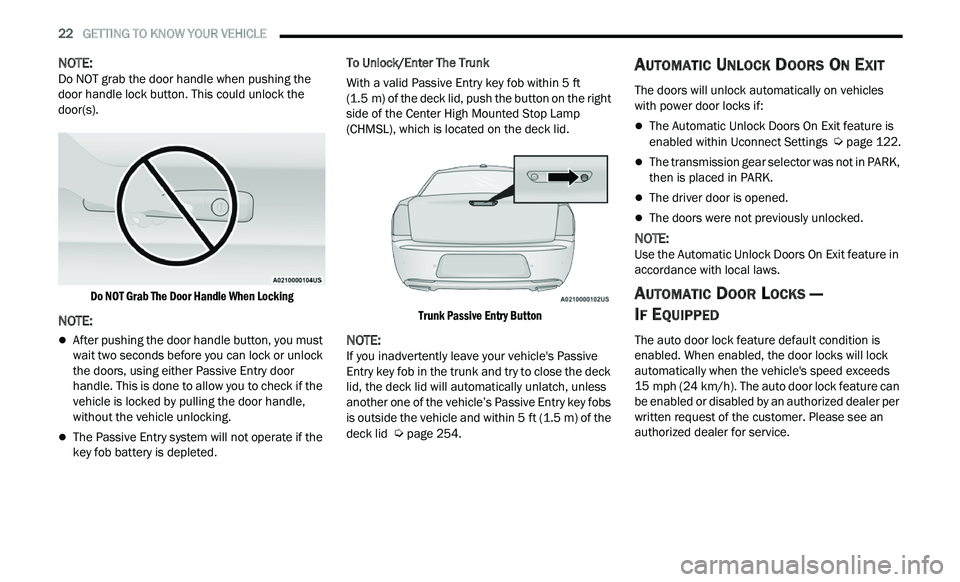
Do NOT grab the door handle when pushing the
d oor
handle lock button. This could unlock the
door(s).
Do NOT Grab The Door Handle When Locking
NOTE:
After pushing the door handle button, you must
wait two seconds before you can lock or unlock
the doors, using either Passive Entry door
handle. This is done to allow you to check if the
vehicle is locked by pulling the door handle,
without the vehicle unlocking.
The Passive Entry system will not operate if the
key fob battery is depleted. To Unlock/Enter The Trunk
With a valid Passive Entry key fob within 5
ft
( 1
.5 m) of the deck lid, push the button on the right
s i
de of the Center High Mounted Stop Lamp
(CHMSL), which is located on the deck lid.
Trunk Passive Entry Button
NOTE:
If you inadvertently leave your vehicle's Passive
E n
try key fob in the trunk and try to close the deck
lid, the deck lid will automatically unlatch, unless
another one of the vehicle’s Passive Entry key fobs
is outside the vehicle and within 5 ft (1.5 m) of the
de
ck lid Ú page 254.
AUTOMATIC UNLOCK DOORS ON EXIT
The doors will unlock automatically on vehicles
with power door locks if:
The Automatic Unlock Doors On Exit feature is
enabled within Uconnect Settings Ú page 122.
The transmission gear selector was not in PARK,
then is placed in PARK.
The driver door is opened.
The doors were not previously unlocked.
NOTE:
Use the Automatic Unlock Doors On Exit feature in
a c
cordance with local laws.
AUTOMATIC DOOR LOCKS —
I
F EQUIPPED
The auto door lock feature default condition is
enabled. When enabled, the door locks will lock
automatically when the vehicle's speed exceeds
15 mph (24 km/h). The auto door lock feature can
b e
enabled or disabled by an authorized dealer per
written request of the customer. Please see an
authorized dealer for service.
Page 39 of 268

GETTING TO KNOW YOUR VEHICLE 37
UNIVERSAL GARAGE DOOR OPENER
(HOMELINK®)
HomeLink® Buttons And Indicator Light
HomeLink® replaces up to three hand-held
transmitters that operate devices such as
garage door openers, motorized gates, lighting,
or home security systems. The HomeLink® unit
is powered by your vehicle’s 12 Volt battery.
The HomeLink® buttons that are located in the
overhead console or sunvisor designate the
three different HomeLink® channels.
To operate HomeLink®, push and release any
of the programmed HomeLink® buttons. These
buttons will activate the devices they are
programmed to with each press of the corre
-
sponding HomeLink® button.
The HomeLink® indicator light is located above
the center button.
BEFORE YOU BEGIN PROGRAMMING
H
OMELINK®
For efficient programming and accurate
transmission of the radio-frequency signal, it is
recommended that a new battery be placed in the
hand-held transmitter of the device that is being
programmed to the HomeLink® system. Make
sure your hand-held transmitter is programmed to
activate the device you are trying to program your
HomeLink® button to.
Ensure that your vehicle is parked outside of the
g a
rage before you begin programming.
It is recommended that you erase all the channels
of
your HomeLink® before you use it for the first
time.
ERASING ALL THE HOMELINK®
C
HANNELS
To erase the channels, follow this procedure:
1. P lace the ignition switch into the ON/RUN
p
osition.
2. Push and hold the two outside HomeLink® b
uttons (I and III) for up to 20 seconds, or until
the HomeLink® indicator light flashes.
NOTE:
Erasing all channels should only be performed
w h
en programming HomeLink® for the first time.
Do not erase channels when programming addi -
tional buttons.
IDENTIFYING WHETHER YOU HAVE A
R
OLLING CODE OR NON-ROLLING CODE
D
EVICE
Before programming a device to one of your
HomeLink® buttons, you must determine whether
the device has a rolling code or non-rolling code.
Rolling Code Devices
To determine if your device has a rolling code, a
g ood
indicator is its manufacturing date. Typically,
devices manufactured after 1995 have rolling
codes. A device with a rolling code will also have a
“LEARN” or “TRAIN” button located where the
antenna is attached to the device. The button may
not be immediately visible when looking at the
device. The name and color of the button may vary
slightly by manufacturer.
NOTE:
The “LEARN” or “TRAIN” button is not the button
y ou
normally use to operate the device.
Non-rolling Code Devices
Most devices manufactured before 1995 will not
h a
ve a rolling code. These devices will also not
have a “LEARN” or “TRAIN” button.
2
Page 45 of 268
GETTING TO KNOW YOUR VEHICLE 43
To activate the front fog lights, turn on the parking
lights or the low beam headlights and push the
headlight switch. To turn off the front fog lights,
either push the headlight switch a second time or
turn off the headlight switch.
NOTE:
The fog lights will operate with the low beam head -
lights or parking lights on. However, selecting the
h i
gh beam headlights will turn off the fog lights.
TURN SIGNALS
Move the multifunction lever up or down to
activate the turn signals. The arrows on each side
of the instrument cluster flash to show proper
operation.
NOTE:
If either light remains on and does not flash, or
there is a very fast flash rate, check for a defec -
tive outside light bulb.
A “Turn Signal On” message will appear in the
instrument cluster display and a continuous
chime will sound if the vehicle is driven more
than 1 mile (1.6 km) with either turn signal on.
LANE CHANGE ASSIST — IF EQUIPPED
Lightly push the multifunction lever up or down,
without moving beyond the detent, and the turn
signal will flash three times then automatically turn
off.
INTERIOR LIGHTS
The interior lights come on when a door is opened.
To protect the battery, the interior lights will turn off
au
tomatically 10 minutes after the ignition is
p l
aced in the OFF position. This will occur if the
interior lights were switched on manually or are on
because a door is open. The Battery Protection
also includes the glove compartment light and the
trunk light. To restore interior light operation after
automatic battery protection is enabled (lights off),
either place the ignition in the ON/RUN position, or
cycle the light switch.
INTERIOR COURTESY LIGHTS
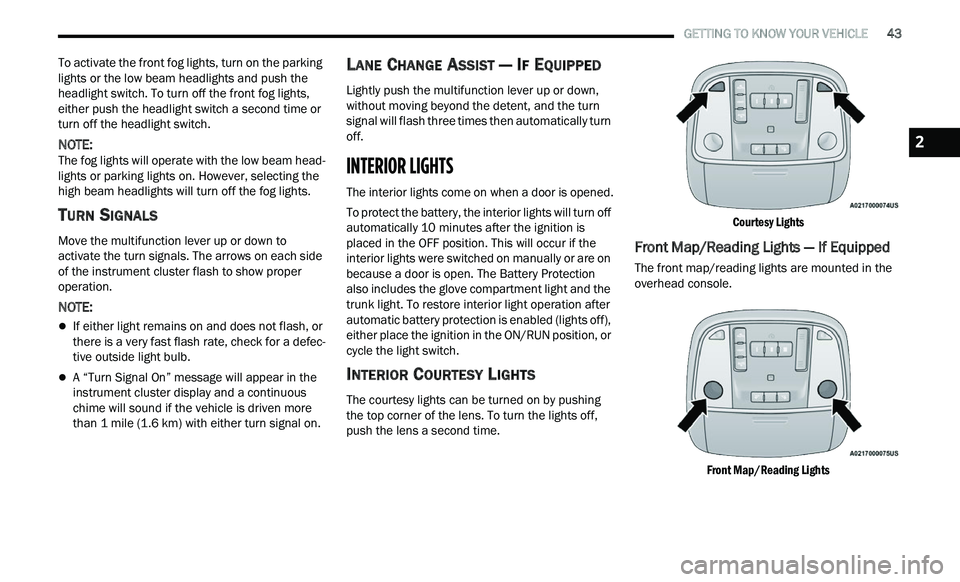
The courtesy lights can be turned on by pushing
the top corner of the lens. To turn the lights off,
push the lens a second time.
Courtesy Lights
Front Map/Reading Lights — If Equipped
The front map/reading lights are mounted in the
overhead console.
Front Map/Reading Lights
2
Page 55 of 268

GETTING TO KNOW YOUR VEHICLE 53
USB/AUX CONTROL
This feature allows an external USB device to be
plugged into the USB port.
Plugging in a smartphone device to a USB port may
ac
tivate Android Auto™ or Apple CarPlay®
features, if equipped. For further information, refer
to “Android Auto™” or “Apple CarPlay®” in the
Owner’s Manual Supplement.
AUX/USB Ports
Located on the rear of the front center console are
du
al USB “Charge Only” ports. The USB “Charge
Only” ports will recharge battery operated USB
devices when connected.
Rear USB Charging Ports
LIGHTED CUPHOLDERS — IF EQUIPPED
On some vehicles, the front cupholders are
equipped with a light ring that illuminates the
cupholders for the front passengers.
Light Ring In Front Cupholder
The rear cupholders may also be equipped with a
li
ght ring that illuminates the cupholders for the
rear passengers. The light ring is controlled by the
Dimmer Control
Ú page 44.
Light Ring In Rear Cupholder
HEATED AND COOLED CUPHOLDERS —
I
F EQUIPPED
Your vehicle may be equipped with heated and
cooled cupholders. The cupholders are designed
to help keep warm beverages warm and cool
beverages cool.
1 — USB 1 Port
2 — AUX Jack
3 — USB 2 Port
2
Page 56 of 268
54 GETTING TO KNOW YOUR VEHICLE
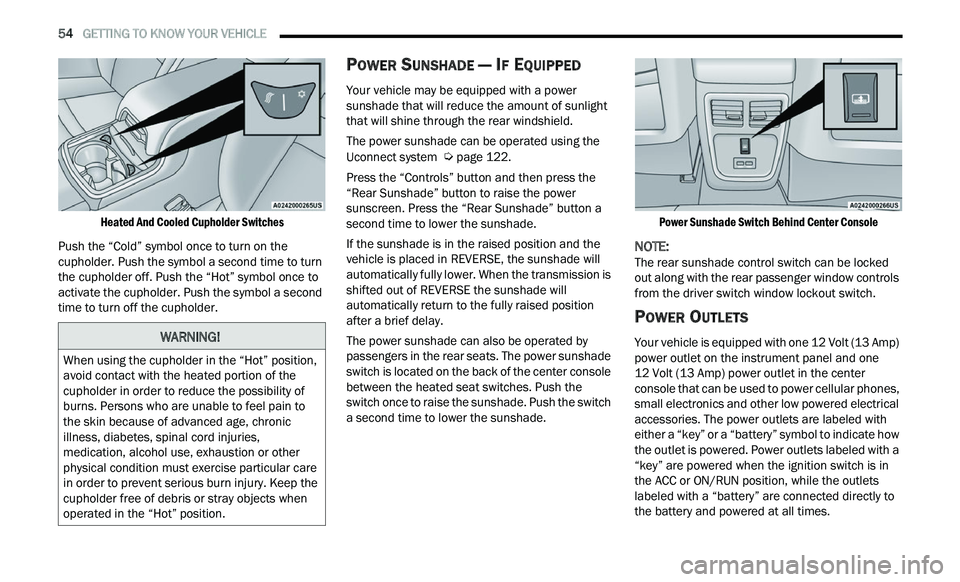
Heated And Cooled Cupholder Switches
Push the “Cold” symbol once to turn on the
cu
pholder. Push the symbol a second time to turn
the cupholder off. Push the “Hot” symbol once to
activate the cupholder. Push the symbol a second
time to turn off the cupholder.
POWER SUNSHADE — IF EQUIPPED
Your vehicle may be equipped with a power
sunshade that will reduce the amount of sunlight
that will shine through the rear windshield.
The power sunshade can be operated using the
U c
onnect system Ú page 122.
Press the “Controls” button and then press the
“ R
ear Sunshade” button to raise the power
sunscreen. Press the “Rear Sunshade” button a
second time to lower the sunshade.
If the sunshade is in the raised position and the
ve
hicle is placed in REVERSE, the sunshade will
automatically fully lower. When the transmission is
shifted out of REVERSE the sunshade will
automatically return to the fully raised position
after a brief delay.
The power sunshade can also be operated by
p a
ssengers in the rear seats. The power sunshade
switch is located on the back of the center console
between the heated seat switches. Push the
switch once to raise the sunshade. Push the switch
a second time to lower the sunshade.
Power Sunshade Switch Behind Center Console
NOTE:
The rear sunshade control switch can be locked
ou t
along with the rear passenger window controls
from the driver switch window lockout switch.
POWER OUTLETS
Your vehicle is equipped with one 12 Volt (13 Amp)
power outlet on the instrument panel and one
12 Volt (13 Amp) power outlet in the center
c on
sole that can be used to power cellular phones,
small electronics and other low powered electrical
accessories. The power outlets are labeled with
either a “key” or a “battery” symbol to indicate how
the outlet is powered. Power outlets labeled with a
“key” are powered when the ignition switch is in
the ACC or ON/RUN position, while the outlets
labeled with a “battery” are connected directly to
the battery and powered at all times.
WARNING!
When using the cupholder in the “Hot” position,
avoid contact with the heated portion of the
cupholder in order to reduce the possibility of
burns. Persons who are unable to feel pain to
the skin because of advanced age, chronic
illness, diabetes, spinal cord injuries,
medication, alcohol use, exhaustion or other
physical condition must exercise particular care
in order to prevent serious burn injury. Keep the
cupholder free of debris or stray objects when
operated in the “Hot” position.
Page 57 of 268
GETTING TO KNOW YOUR VEHICLE 55
NOTE:
All accessories connected to the “battery” powered
ou t
lets should be removed or turned off when the
vehicle is not in use to protect the battery against
discharge.
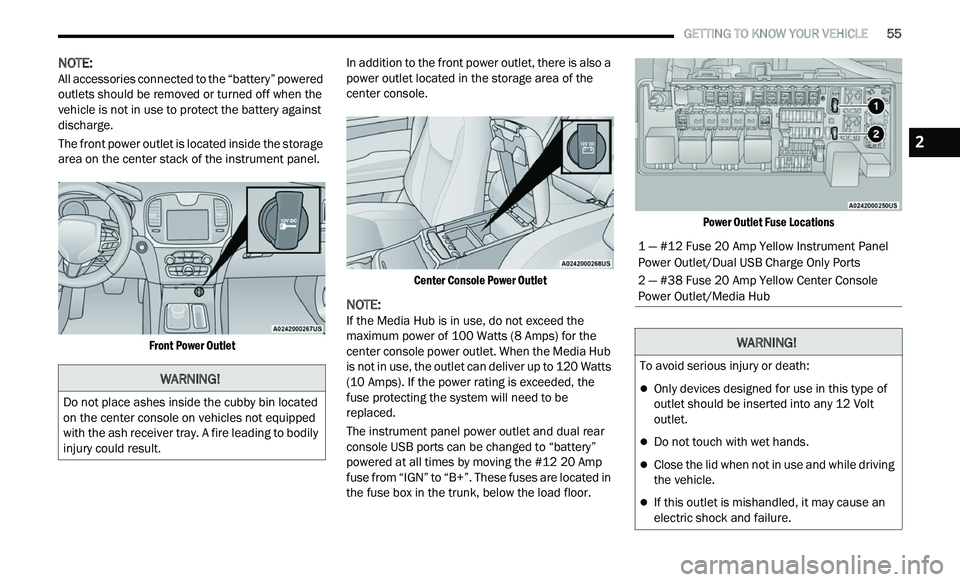
The front power outlet is located inside the storage
ar
ea on the center stack of the instrument panel.
Front Power Outlet
In addition to the front power outlet, there is also a
p
ow
er outlet located in the storage area of the
center console.
Center Console Power Outlet
NOTE:
If the Media Hub is in use, do not exceed the
m a
ximum power of 100 Watts (8 Amps) for the
center console power outlet. When the Media Hub
is not in use, the outlet can deliver up to 120 Watts
(10 Amps). If the power rating is exceeded, the
fuse protecting the system will need to be
replaced.
The instrument panel power outlet and dual rear
c on
sole USB ports can be changed to “battery”
powered at all times by moving the #12 20 Amp
fuse from “IGN” to “B+”. These fuses are located in
the fuse box in the trunk, below the load floor.
Power Outlet Fuse Locations
WARNING!
Do not place ashes inside the cubby bin located
on the center console on vehicles not equipped
with the ash receiver tray. A fire leading to bodily
injury could result.
1 — #12 Fuse 20 Amp Yellow Instrument Panel
Power Outlet/Dual USB Charge Only Ports
2 — #38 Fuse 20 Amp Yellow Center Console
Power Outlet/Media Hub
WARNING!
To avoid serious injury or death:
Only devices designed for use in this type of
outlet should be inserted into any 12 Volt
outlet.
Do not touch with wet hands.
Close the lid when not in use and while driving
the vehicle.
If this outlet is mishandled, it may cause an
electric shock and failure.
2
Page 58 of 268

56 GETTING TO KNOW YOUR VEHICLE
WINDOWS
POWER WINDOW CONTROLS
The window controls on the driver's door control all
the door windows.
Power Window Switches
The passenger door windows can also be operated
b y
using the single window controls on the
passenger door trim panel. The window controls
will operate only when the ignition is in the ACC or
ON/RUN position.
NOTE:
The power window switches will remain active for
u p
to 10 minutes after the ignition is placed in the
O F
F position. Opening either front door will cancel
this feature. The timing is programmable within
Uconnect Settings
Ú page 122.
AUTOMATIC WINDOW FEATURES
Auto-Down Feature
The driver and front passenger door power window
sw
itches have an Auto-Down feature. Push the
window switch down to the second detent, release,
and the window will go down automatically.
To stop the window from going all the way down
du
ring the Auto-Down operation, pull up or push
down on the switch briefly.
CAUTION!
Many accessories that can be plugged in draw
power from the vehicle's battery even when
not in use (i.e., cellular phones, etc.). Eventu -
ally, if plugged in long enough, the vehicle's
b a
ttery will discharge sufficiently to degrade
battery life and/or prevent the engine from
starting.
Accessories that draw higher power (i.e.,
coolers, vacuum cleaners, lights, etc.) will
degrade the battery even more quickly. Only
use these intermittently and with greater
caution.
After the use of high power draw accessories
or long periods of the vehicle not being started
(with accessories still plugged in), the vehicle
must be driven a sufficient length of time to
allow the alternator to recharge the vehicle's
battery.
Power outlets are designed for accessory
plugs only. Do not hang any type of accessory
or accessory bracket from the plug. Improper
use of the power outlet can cause damage.
WARNING!
Never leave children unattended in a vehicle, and
do not let children play with power windows. Do
not leave the key fob in or near the vehicle, or in a
location accessible to children, and do not leave
the ignition of a vehicle equipped with Keyless
Enter ‘n Go™ in the ACC or ON/RUN position.
Occupants, particularly unattended children, can
become entrapped by the windows while operat -
ing the power window switches. Such entrapment
m a
y result in serious injury or death.