2021 ALFA ROMEO STELVIO brake
[x] Cancel search: brakePage 114 of 280
STARTING AND OPERATING
112
ahead. The offset vehicle may move in and out
of the line of travel, which can cause your
vehicle to brake or accelerate unexpectedly.
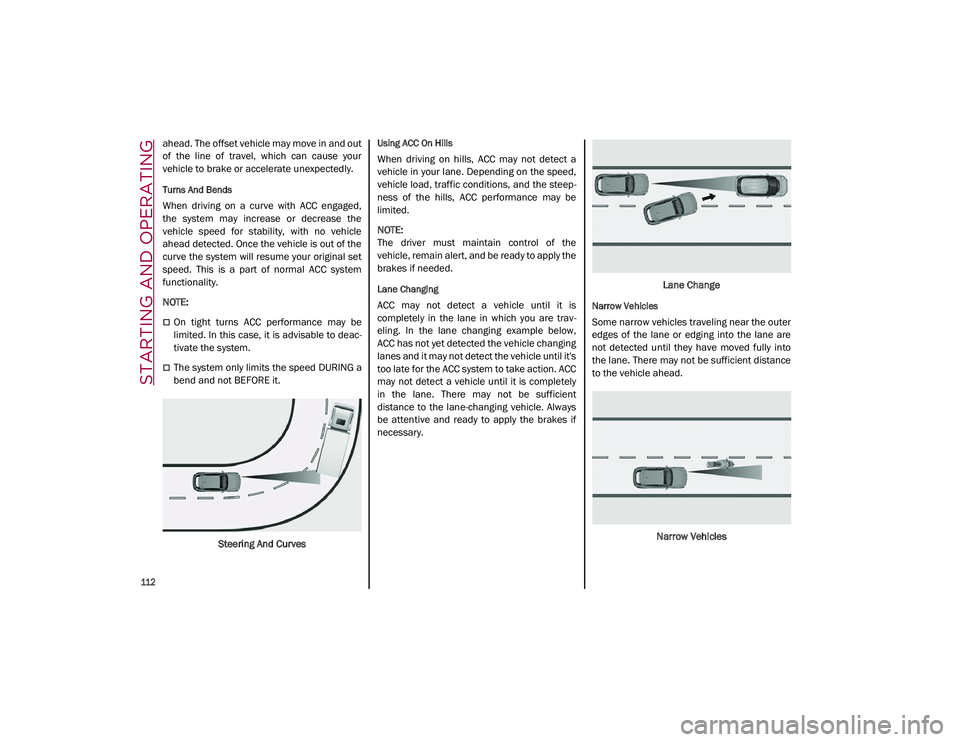
Turns And Bends
When driving on a curve with ACC engaged,
the system may increase or decrease the
vehicle speed for stability, with no vehicle
ahead detected. Once the vehicle is out of the
curve the system will resume your original set
speed. This is a part of normal ACC system
functionality.
NOTE:
On tight turns ACC performance may be
limited. In this case, it is advisable to deac-
tivate the system.
The system only limits the speed DURING a
bend and not BEFORE it.
Steering And Curves
Using ACC On Hills
When driving on hills, ACC may not detect a
vehicle in your lane. Depending on the speed,
vehicle load, traffic conditions, and the steep -
ness of the hills, ACC performance may be
limited.
NOTE:
The driver must maintain control of the
vehicle, remain alert, and be ready to apply the
brakes if needed.
Lane Changing
ACC may not detect a vehicle until it is
completely in the lane in which you are trav -
eling. In the lane changing example below,
ACC has not yet detected the vehicle changing
lanes and it may not detect the vehicle until it's
too late for the ACC system to take action. ACC
may not detect a vehicle until it is completely
in the lane. There may not be sufficient
distance to the lane-changing vehicle. Always
be attentive and ready to apply the brakes if
necessary. Lane ChangeNarrow Vehicles
Some narrow vehicles traveling near the outer
edges of the lane or edging into the lane are
not detected until they have moved fully into
the lane. There may not be sufficient distance
to the vehicle ahead.
Narrow Vehicles
21_GU_OM_EN_USC_t.book Page 112
Page 115 of 280
113
Stationary Objects And Vehicles
The ACC system can detect stationary vehicles
when the vehicle is traveling at speeds
between 2 mph and 35 mph (4 km/h and
60 km/h). The driver should always be atten -
tive and be ready to press the brakes if neces -
sary.
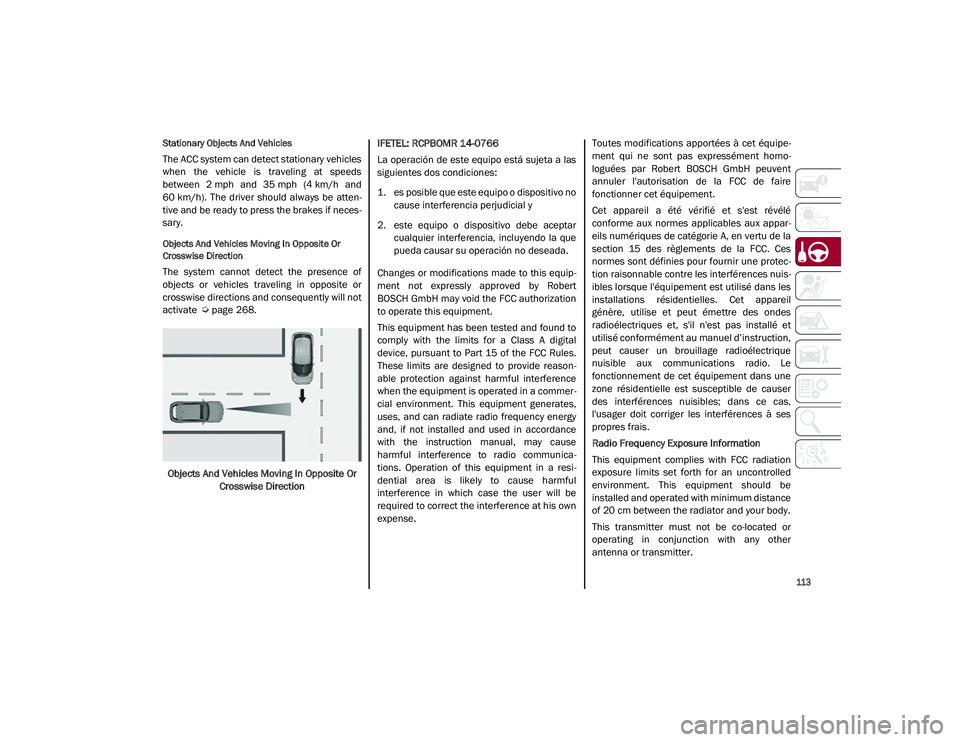
Objects And Vehicles Moving In Opposite Or
Crosswise Direction
The system cannot detect the presence of
objects or vehicles traveling in opposite or
crosswise directions and consequently will not
activate
Ú
page 268.
Objects And Vehicles Moving In Opposite Or Crosswise Direction IFETEL: RCPBOMR 14-0766
La operación de este equipo está sujeta a las
siguientes dos condiciones:
1. es posible que este equipo o dispositivo no
cause interferencia perjudicial y
2. este equipo o dispositivo debe aceptar cualquier interferencia, incluyendo la que
pueda causar su operación no deseada.
Changes or modifications made to this equip -
ment not expressly approved by Robert
BOSCH GmbH may void the FCC authorization
to operate this equipment.
This equipment has been tested and found to
comply with the limits for a Class A digital
device, pursuant to Part 15 of the FCC Rules.
These limits are designed to provide reason -
able protection against harmful interference
when the equipment is operated in a commer -
cial environment. This equipment generates,
uses, and can radiate radio frequency energy
and, if not installed and used in accordance
with the instruction manual, may cause
harmful interference to radio communica -
tions. Operation of this equipment in a resi -
dential area is likely to cause harmful
interference in which case the user will be
required to correct the interference at his own
expense. Toutes modifications apportées à cet équipe
-
ment qui ne sont pas expressément homo -
loguées par Robert BOSCH GmbH peuvent
annuler l'autorisation de la FCC de faire
fonctionner cet équipement.
Cet appareil a été vérifié et s'est révélé
conforme aux normes applicables aux appar -
eils numériques de catégorie A, en vertu de la
section 15 des règlements de la FCC. Ces
normes sont définies pour fournir une protec -
tion raisonnable contre les interférences nuis -
ibles lorsque l'équipement est utilisé dans les
installations résidentielles. Cet appareil
génère, utilise et peut émettre des ondes
radioélectriques et, s'il n'est pas installé et
utilisé conformément au manuel d’instruction,
peut causer un brouillage radioélectrique
nuisible aux communications radio. Le
fonctionnement de cet équipement dans une
zone résidentielle est susceptible de causer
des interférences nuisibles; dans ce cas,
l'usager doit corriger les interférences à ses
propres frais.
Radio Frequency Exposure Information
This equipment complies with FCC radiation
exposure limits set forth for an uncontrolled
environment. This equipment should be
installed and operated with minimum distance
of 20 cm between the radiator and your body.
This transmitter must not be co-located or
operating in conjunction with any other
antenna or transmitter.
21_GU_OM_EN_USC_t.book Page 113
Page 116 of 280
STARTING AND OPERATING
114
Déclaration d’exposition aux radiations
Cet équipement est conforme aux limites
d'exposition aux rayonnements IC établies
pour un environnement non contrôlé. Cet équi-
pement doit être installé et utilisé avec un
minimum de 20 cm de distance entre la
source de rayonnement et votre corps.
Ce transmetteur ne doit pas etre place au
meme endroit ou utilise simultanement avec
un autre transmetteur ou antenne.
HIGHWAY ASSIST SYSTEM
(HAS) — IF EQUIPPED
The Highway Assist System (HAS) is a driving
assistance system that is only available when
driving on highways. The system operates up
to speeds of 90 mph (145 km/h) when hori -
zontal signs are detected.
The system uses information from the front
camera and radar to help keep the vehicle in
the center of the lane and at a constant speed.
The HAS system combines Adaptive Cruise
Control (ACC) functions with lane centering
logic to control the trajectory of the vehicle.
The HAS system requires the driver’s hands to
remain on the steering wheel.
Once HAS is activated, a dedicated screen will
appear on the instrument cluster display.
To Activate/Deactivate
To Activate
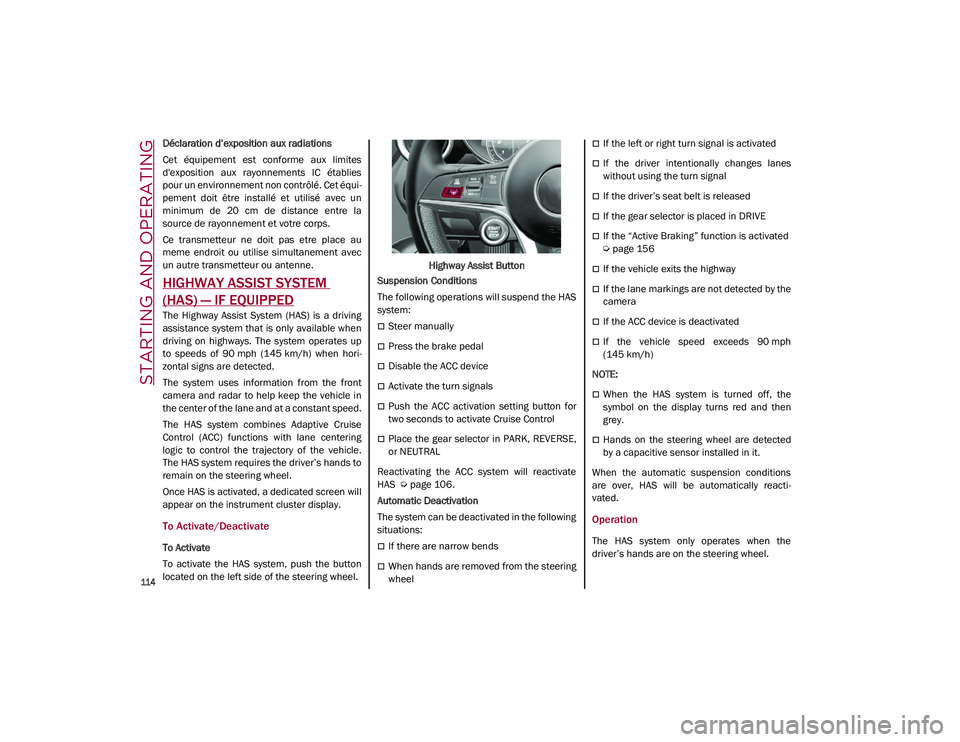
To activate the HAS system, push the button
located on the left side of the steering wheel. Highway Assist Button
Suspension Conditions
The following operations will suspend the HAS
system:
Steer manually
Press the brake pedal
Disable the ACC device
Activate the turn signals
Push the ACC activation setting button for
two seconds to activate Cruise Control
Place the gear selector in PARK, REVERSE,
or NEUTRAL
Reactivating the ACC system will reactivate
HAS
Ú
page 106.
Automatic Deactivation
The system can be deactivated in the following
situations:
If there are narrow bends
When hands are removed from the steering
wheel
If the left or right turn signal is activated
If the driver intentionally changes lanes
without using the turn signal
If the driver’s seat belt is released
If the gear selector is placed in DRIVE
If the “Active Braking” function is activated
Ú
page 156
If the vehicle exits the highway
If the lane markings are not detected by the
camera
If the ACC device is deactivated
If the vehicle speed exceeds 90 mph
(145 km/h)
NOTE:
When the HAS system is turned off, the
symbol on the display turns red and then
grey.
Hands on the steering wheel are detected
by a capacitive sensor installed in it.
When the automatic suspension conditions
are over, HAS will be automatically reacti -
vated.
Operation
The HAS system only operates when the
driver’s hands are on the steering wheel.
21_GU_OM_EN_USC_t.book Page 114
Page 119 of 280
117
(Continued)
Either the camera or radar are damaged,
covered, or obstructed (e.g. by mud, ice,
snow, etc.)
When driving on hills or roads with narrow
bends
Near highway toll booths
When the highway entrance or exit is wider
than 20 ft (6 m)
If the camera is exposed to glare caused by
reflections or direct sunlight
If the navigation system information is
unavailable or being recalculated
NOTE:
If the vehicle approaches a bend that is too
narrow with respect to the current speed,
the HAS system will disable.
If damage to the windshield occurs, have
the windshield replaced by an authorized
dealer as soon as possible.
TRAFFIC JAM ASSIST (TJA)
SYSTEM — IF EQUIPPED
The Traffic Jam Assist (TJA) system can be acti -
vated on all road types. The system uses a
camera to detect lane markings and keep the
vehicle in the center of the lane.
When the system is unable to detect lane
markings, it will still operate using surrounding
traffic. This can occur in congested traffic
scenarios, when the vehicles ahead or
surrounding obstruct the visibility of the lane
markings. When the speed is below 12 mph
(20 km/h), the system can use a lock-on
strategy that allows the vehicle to automati -
cally follow the vehicle ahead.
The TJA system combines Adaptive Cruise
Control (ACC) functions with Lane Departure
Warning functions to maintain vehicle speed
and steering wheel behavior.
NOTE:
Do not use the TJA system while driving in
urban areas.
To Activate/Deactivate
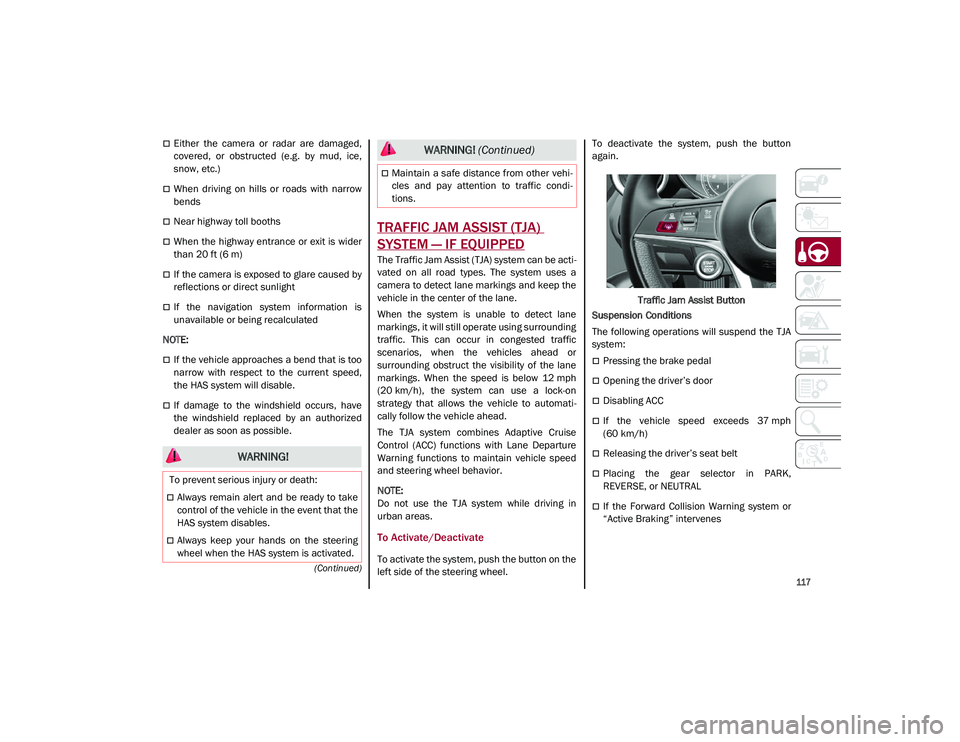
To activate the system, push the button on the
left side of the steering wheel. To deactivate the system, push the button
again.
Traffic Jam Assist Button
Suspension Conditions
The following operations will suspend the TJA
system:
Pressing the brake pedal
Opening the driver’s door
Disabling ACC
If the vehicle speed exceeds 37 mph
(60 km/h)
Releasing the driver’s seat belt
Placing the gear selector in PARK,
REVERSE, or NEUTRAL
If the Forward Collision Warning system or
“Active Braking” intervenes
WARNING!
To prevent serious injury or death:
Always remain alert and be ready to take
control of the vehicle in the event that the
HAS system disables.
Always keep your hands on the steering
wheel when the HAS system is activated.
Maintain a safe distance from other vehi -
cles and pay attention to traffic condi -
tions.
WARNING! (Continued)
21_GU_OM_EN_USC_t.book Page 117
Page 125 of 280
123
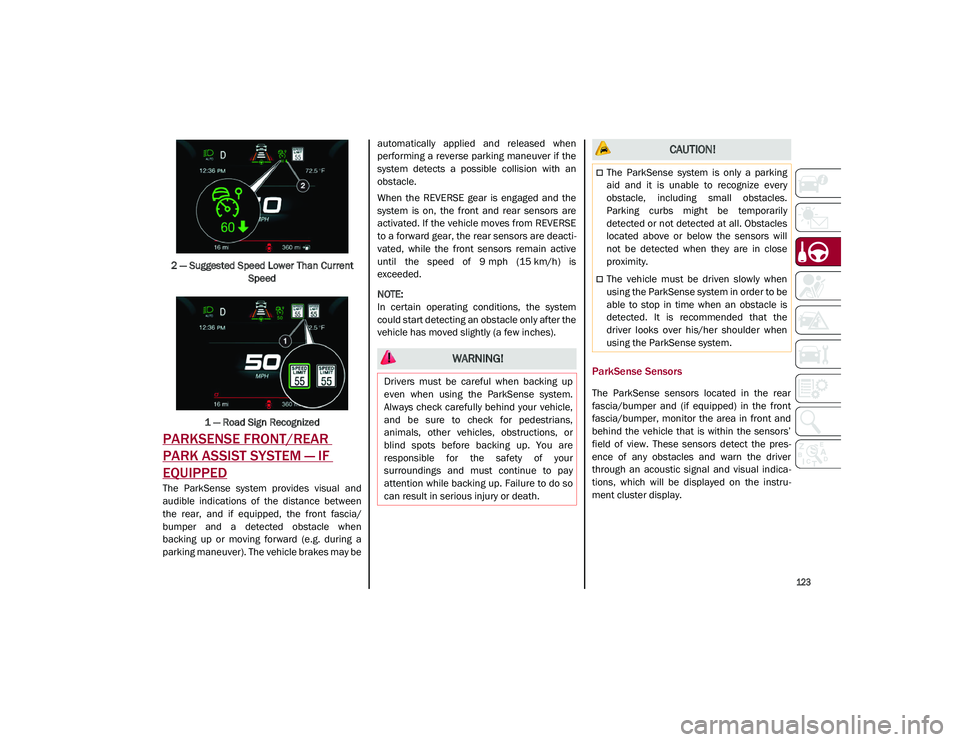
2 — Suggested Speed Lower Than Current Speed
1 — Road Sign Recognized
PARKSENSE FRONT/REAR
PARK ASSIST SYSTEM — IF
EQUIPPED
The ParkSense system provides visual and
audible indications of the distance between
the rear, and if equipped, the front fascia/
bumper and a detected obstacle when
backing up or moving forward (e.g. during a
parking maneuver). The vehicle brakes may be automatically applied and released when
performing a reverse parking maneuver if the
system detects a possible collision with an
obstacle.
When the REVERSE gear is engaged and the
system is on, the front and rear sensors are
activated. If the vehicle moves from REVERSE
to a forward gear, the rear sensors are deacti
-
vated, while the front sensors remain active
until the speed of 9 mph (15 km/h) is exceeded.
NOTE:
In certain operating conditions, the system
could start detecting an obstacle only after the
vehicle has moved slightly (a few inches).
ParkSense Sensors
The ParkSense sensors located in the rear
fascia/bumper and (if equipped) in the front
fascia/bumper, monitor the area in front and
behind the vehicle that is within the sensors’
field of view. These sensors detect the pres -
ence of any obstacles and warn the driver
through an acoustic signal and visual indica -
tions, which will be displayed on the instru -
ment cluster display.
WARNING!
Drivers must be careful when backing up
even when using the ParkSense system.
Always check carefully behind your vehicle,
and be sure to check for pedestrians,
animals, other vehicles, obstructions, or
blind spots before backing up. You are
responsible for the safety of your
surroundings and must continue to pay
attention while backing up. Failure to do so
can result in serious injury or death.
CAUTION!
The ParkSense system is only a parking
aid and it is unable to recognize every
obstacle, including small obstacles.
Parking curbs might be temporarily
detected or not detected at all. Obstacles
located above or below the sensors will
not be detected when they are in close
proximity.
The vehicle must be driven slowly when
using the ParkSense system in order to be
able to stop in time when an obstacle is
detected. It is recommended that the
driver looks over his/her shoulder when
using the ParkSense system.
21_GU_OM_EN_USC_t.book Page 123
Page 128 of 280
STARTING AND OPERATING
126
(Continued)
ParkSense System Usage Precautions
NOTE:
Some conditions may influence the perfor-
mance of the ParkSense system:
Reduced sensor sensitivity could be due to
the presence of ice, snow, mud, or thick
paint on the surface of the sensor.
The sensors may detect a false obstacle
(echo interference) due to mechanical inter -
ference, for example when washing the
vehicle or in extreme weather.
The signals sent by the sensors can be
altered by the presence of ultrasonic
systems (e.g. pneumatic brake systems of
trucks or pneumatic drills) near the vehicle.
System performance can be influenced by
the position of the sensors. For example,
due to a change in the ride setting (caused
by wear to the shock absorbers or suspen -
sion), by changing tires, overloading the
vehicle or operations that require the
vehicle to be lowered.
Be sure not to place bumper stickers or
other adhesives over the sensors as this will
affect system performance.
The presence of a trailer hitch without a
trailer. This may interfere with the operation
of the parking sensors. Before using the
ParkSense system, it is recommended to remove or close the trailer hitch assembly
when the vehicle is not being used for
towing.
LANE DEPARTURE WARNING
(LDW) SYSTEM
Lane Departure Warning Operation
The Lane Departure Warning system uses a
forward looking camera located on the wind
-
shield to detect lane markings and measure
vehicle position within the lane boundaries.
When one or both lane limits are detected and
the vehicle passes over one without an acti -
vated turn signal, the system emits a visual as
well as an acoustic signal.
If the vehicle continues to go beyond the line
of the lane without any intervention from the
driver, the surpassed line will light up on the
display (left or right) to urge the driver to bring
the vehicle back into the limits of the lane.
CAUTION!
Projecting loads on the roof of the vehicle
may interfere with the correct operation of
the camera. Before starting, make sure
the load is correctly positioned in order
not to cover the camera operating range.
Do not cover the operating range of the
camera with stickers or other objects.
Do not tamper with nor operate on the
camera. Do not close the openings in the
aesthetic cover located under the interior
rearview mirror. In the event of a failure of
the camera, contact your authorized
dealer.
The camera may have limited or absent
operation due to weather conditions such
as: heavy rain, hail, thick fog, heavy snow,
formation of ice layers on the windshield.
Camera operation may also be compro -
mised by the presence of dust, condensa -
tion, dirt or ice on the windshield, by traffic
conditions (e.g. vehicles that are driving
not aligned with yours, vehicle driving in a
transverse or opposite way on the same
lane, bend with a small radius of curva -
ture), by road surface conditions and by
driving conditions (e.g. off-road driving).
Make sure the windshield is always clean.
Use specific detergents and clean cloths
to avoid scratching the windshield. The
camera operation may also be limited or
absent in some driving, traffic and road
surface conditions.
If the windshield must be replaced due to
scratches, chipping or breakage, contact
exclusively an authorized dealer. Do not
replace the windshield on your own. It is
advisable to replace the windshield if it is
damaged in the area of the camera.
CAUTION! (Continued)
21_GU_OM_EN_USC_t.book Page 126
Page 138 of 280
STARTING AND OPERATING
136
Gross Vehicle Weight Rating (GVWR)
The GVWR is the total permissible weight of
your vehicle including driver, passengers,
vehicle, options and cargo. The label also
specifies maximum capacities of front and
rear axle systems (GAWR). Total load must be
limited so GVWR and front and rear GAWR are
not exceeded.
Payload
The payload of a vehicle is defined as the
allowable load weight a truck can carry,
including the weight of the driver, all passen-
gers, options and cargo.
Gross Axle Weight Rating (GAWR)
The GAWR is the maximum permissible load
on the front and rear axles. The load must be
distributed in the cargo area so that the GAWR
of each axle is not exceeded.
Each axle GAWR is determined by the compo -
nents in the system with the lowest load
carrying capacity (axle, springs, tires or
wheels). Heavier axles or suspension compo -
nents sometimes specified by purchasers for
increased durability do not necessarily
increase the vehicle's GVWR.
Tire Size
The tire size on the Vehicle Certification Label
represents the actual tire size on your vehicle.
Replacement tires must be equal to the load
capacity of this tire size.
Rim Size
This is the rim size that is appropriate for the
tire size listed.
Inflation Pressure
This is the cold tire inflation pressure for your
vehicle for all loading conditions up to full
GAWR.
Curb Weight
The curb weight of a vehicle is defined as the
total weight of the vehicle with all fluids,
including vehicle fuel, at full capacity condi -
tions, and with no occupants or cargo loaded
into the vehicle. The front and rear curb weight
values are determined by weighing your
vehicle on a commercial scale before any
occupants or cargo are added.
Loading
The actual total weight and the weight of the
front and rear of your vehicle at the ground can
best be determined by weighing it when it is
loaded and ready for operation.
The entire vehicle should first be weighed on a
commercial scale to ensure that the GVWR
has not been exceeded. The weight on the
front and rear of the vehicle should then be
determined separately to be sure that the load
is properly distributed over the front and rear
axle. Weighing the vehicle may show that the
GAWR of either the front or rear axles has
been exceeded but the total load is within the specified GVWR. If so, weight must be shifted
from front to rear or rear to front as appro
-
priate until the specified weight limitations are
met. Store the heavier items down low and be
sure that the weight is distributed equally.
Stow all loose items securely before driving.
Improper weight distributions can have an
adverse effect on the way your vehicle steers
and handles and the way the brakes operate.
TRAILER TOWING
In this section you will find safety tips and
information on limits to the type of towing you
can reasonably do with your vehicle. Before
towing a trailer, carefully review this informa -
tion to tow your load as efficiently and safely
as possible.
To maintain the New Vehicle Limited Warranty
coverage, follow the requirements and recom -
mendations in this manual concerning vehi -
cles used for trailer towing.
CAUTION!
Do not load your vehicle any heavier than
the GVWR or the maximum front and rear
GAWR. If you do, parts on your vehicle can
break, or it can change the way your vehicle
handles. This could cause you to lose
control. Also overloading can shorten the
life of your vehicle.
21_GU_OM_EN_USC_t.book Page 136
Page 139 of 280
137
Common Towing Definitions
The following trailer towing related definitions
will assist you in understanding the following
information:
Gross Vehicle Weight Rating (GVWR)
The GVWR is the total allowable weight of your
vehicle. This includes driver, passengers,
cargo and tongue weight. The total load must
be limited so that you do not exceed the GVWR
Ú
page 135.
Gross Trailer Weight (GTW)
The GTW is the weight of the trailer plus the
weight of all cargo, consumables, and equip -
ment (permanent or temporary) loaded in or
on the trailer in its "loaded and ready for oper -
ation" condition.
The recommended way to measure GTW is to
put your fully loaded trailer on a vehicle scale.
The entire weight of the trailer must be
supported by the scale.
Gross Combination Weight Rating (GCWR)
The GCWR is the total allowable weight of your
vehicle and trailer when weighed in combination.
Gross Axle Weight Rating (GAWR)
The GAWR is the maximum capacity of the
front and rear axles. Distribute the load over
the front and rear axles evenly. Make sure that
you do not exceed either front or rear GAWR
Ú
page 135.
Tongue Weight (TW)
The tongue weight is the downward force
exerted on the hitch ball by the trailer. You
must consider this as part of the load on your
vehicle.
Trailer Frontal Area
The frontal area is the maximum height multi -
plied by the maximum width of the front of a
trailer.
Weight-Carrying Hitch
A weight-carrying hitch supports the trailer
tongue weight, just as if it were luggage
located at a hitch ball or some other
connecting point of the vehicle. These kinds of
hitches are the most popular on the market
today and they are commonly used to tow
small and medium sized trailers.
Weight-Distributing Hitch
A weight-distributing system works by applying
leverage through spring (load) bars. They are
typically used for heavier loads to distribute
trailer tongue weight to the tow vehicle's front axle and the trailer axle(s). When used in
accordance with the manufacturer's direc
-
tions, it provides for a more level ride, offering
more consistent steering and brake control
thereby enhancing towing safety. The addition
of a friction/hydraulic sway control also
dampens sway caused by traffic and cross -
winds and contributes positively to tow vehicle
and trailer stability. Trailer Sway Control and a
weight distributing (load equalizing) hitch are
recommended for heavier Tongue Weights
(TW) and may be required depending on
vehicle and trailer configuration/loading to
comply with Gross Axle Weight Rating (GAWR)
requirements.
Trailer Hitch Classification
The following chart provides the industry stan -
dard for the maximum trailer weight a given
trailer hitch class can tow and should be used
to assist you in selecting the correct trailer
hitch for your intended towing condition.
WARNING!
It is important that you do not exceed the
maximum front or rear GAWR. A dangerous
driving condition can result if either rating is
exceeded. You could lose control of the
vehicle and have a collision.
WARNING!
An improperly adjusted Weight Distrib -
uting Hitch system may reduce handling,
stability, braking performance, and could
result in a collision.
Weight Distributing Systems may not be
compatible with Surge Brake Couplers.
Consult with the hitch and trailer manu -
facturer or a reputable Recreational
Vehicle dealer for additional information.
21_GU_OM_EN_USC_t.book Page 137