2020 VOLKSWAGEN TRANSPORTER door lock
[x] Cancel search: door lockPage 235 of 486
Connecting the gas bottle
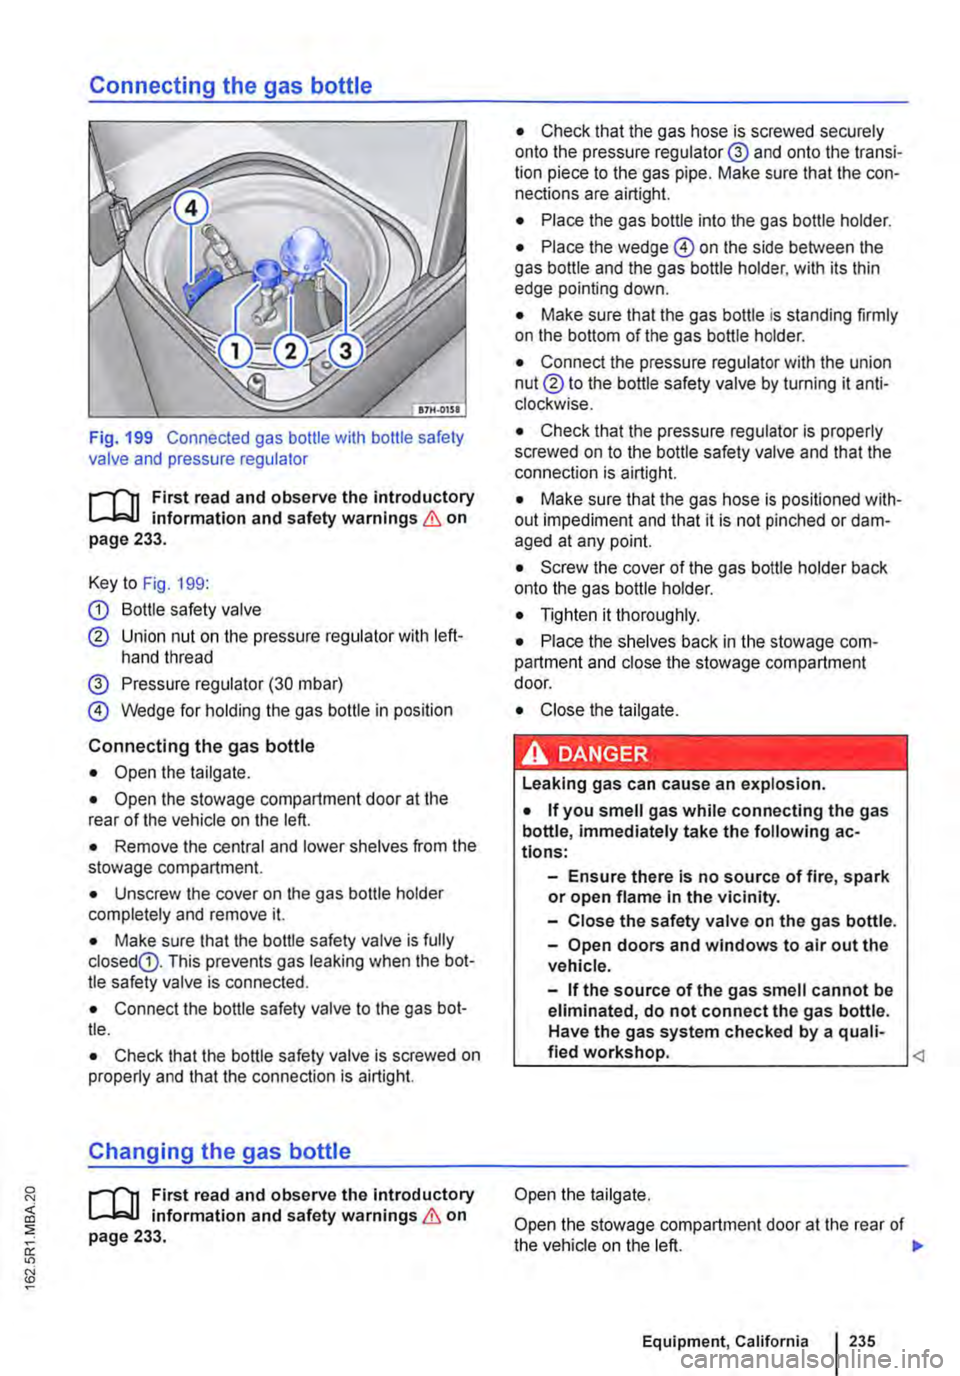
Fig. 199 Connected gas bottle with bottle safety valve and pressure regulator
r-l'n First read and observe the introductory L-J.:.IJ information and safety warnings & on page 233.
Key to Fig. 199:
G) Bottle safety valve
® Union nut on the pressure regulator with left-hand thread
@ Pressure regulator (30 mbar)
@ Wedge for holding the gas bottle in position
Connecting the gas bottle
• Open the tailgate.
• Open the stowage compartment door at the rear of the vehicle on the left.
• Remove the central and lower shelves from the stowage compartment.
• Unscrew the cover on the gas bottle holder completely and remove it.
• Make sure that the bottle safety valve is fully closedG). This prevents gas leaking when the bot-tle safety valve is connected.
• Connect the bottle safety valve to the gas bot-tle.
• Check that the bottle safety valve is screwed on properly and that the connection is airtight.
Changing the gas bottle
r-l'n First read and observe the Introductory L-J.:.IJ information and safety warnings & on page 233.
• Check that the gas hose is screwed securely onto the pressure regulator@ and onto the transi-tion piece to the gas pipe. Make sure that the con-nections are airtight.
• Place the gas bottle into the gas bottle holder.
• Place the wedge @ on the side between the gas bottle and the gas bottle holder. with its thin edge pointing down.
• Make sure that the gas bottle is standing firmly on the bottom of the gas bottle holder.
• Connect the pressure regulator with the union nut® to the bottle safety valve by turning it anti-clockwise.
• Check that the pressure regulator is properly screwed on to the bottle safety valve and that the connection is airtight.
• Make sure that the gas hose is positioned with-out impediment and that it is not pinched or dam-aged at any point.
• Screw the cover of the gas bottle holder back onto the gas bottle holder.
• Tighten it thoroughly.
• Place the shelves back in the stowage com-partment and close the stowage compartment door.
• Close the tailgate.
· &' DANGER .. --' • ,.,_.._.. '·-• I Leaking gas can cause an explosion.
• If you smell gas while connecting the gas bottle, immediately take the following ac-tions:
-Ensure there is no source of fire, spark or open flame in the vicinity.
-Close the safety valve on the gas bottle.
-Open doors and windows to air out the vehicle.
-If the source of the gas smell cannot be eliminated, do not connect the gas bottle. Have the gas system checked by a quali-fied workshop.
Open the stowage compartment door at the rear of the vehicle on the left. 11>
Equipment, California I 235
Page 236 of 486
Remove the central and lower shelves from the stowage compartment.
Unscrew the cover on the gas bottle holder com-pletely and remove it.
Make sure that the bottle safety valve 199 G) is completely closed. This prevents gas from leaking when the union nut® is slack-ened.
Completely unscrew the union nut of the pressure regulator from the bottle safety valve by turning it clockwise.
Lift out the gas bottle together with the wedge.
Connecting a new gas bottle 235
Turning the gas cooker on and off
B7H·0274
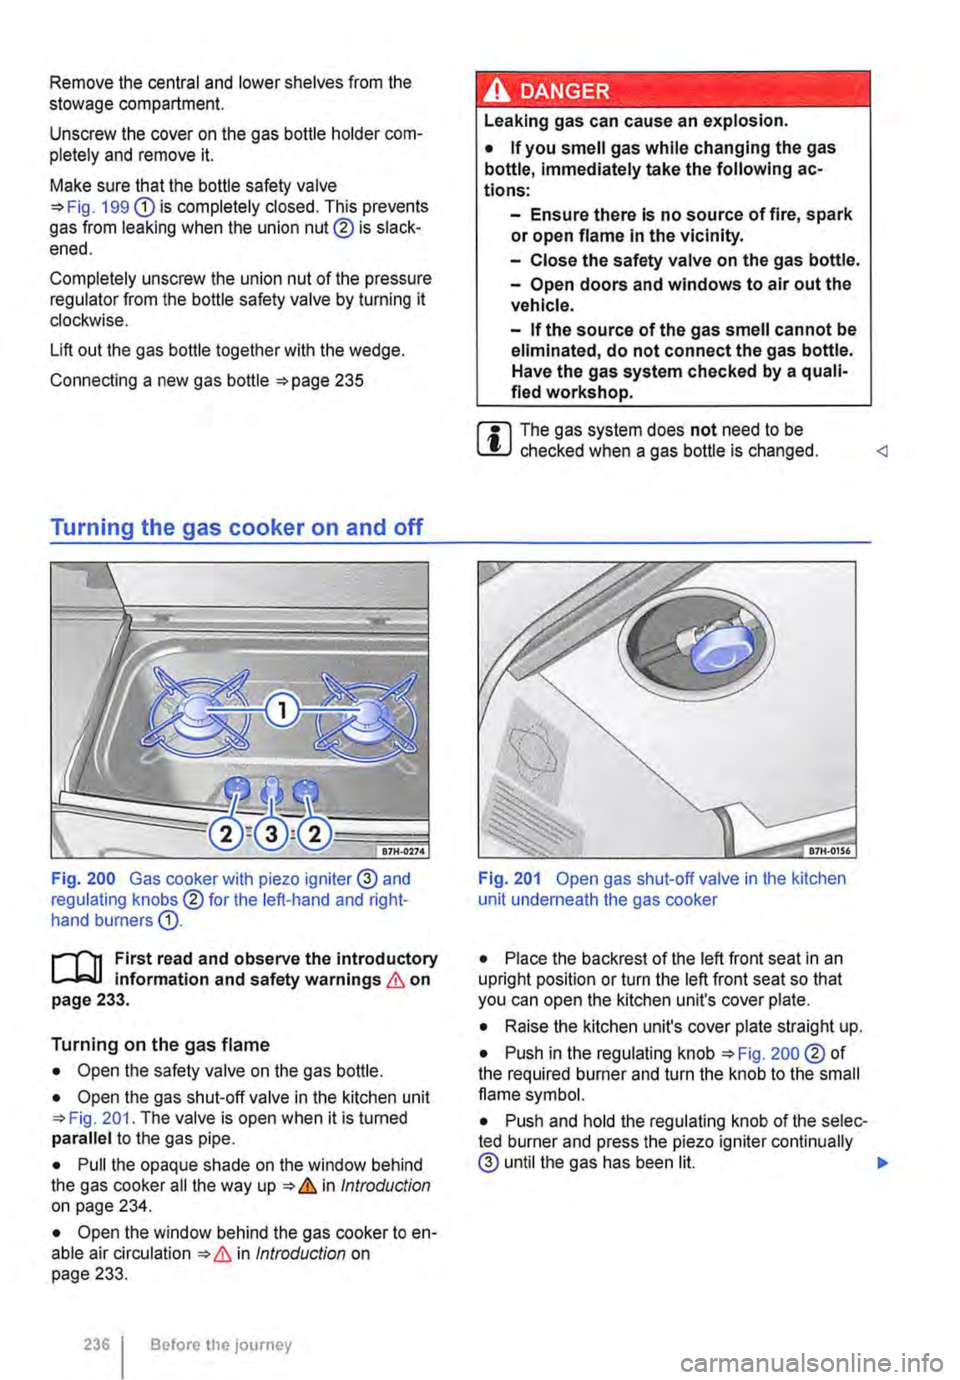
Fig. 200 Gas cooker with piezo igniter 0 and regulating knobs® for the left-hand and right-hand burners G).
i""""('n First read and observe the introductory information and safety warnings & on page 233.
Turning on the gas flame
• Open the safety valve on the gas bottle.
• Open the gas shut-off valve in the kitchen unit 201. The valve is open when it is turned parallel to the gas pipe.
• Pull the opaque shade on the window behind the gas cooker all the way up & in Introduction on page 234.
• Open the window behind the gas cooker to en-able air circulation & in Introduction on page 233.
236 Before the journey
Leaking gas can cause an explosion.
• If you smell gas while changing the gas bottle, immediately take the following ac-tions:
-Ensure there is no source of fire, spark or open flame In the vicinity.
-Close the safety valve on the gas bottle.
-Open doors and windows to air out the vehicle.
-If the source of the gas smell cannot be eliminated, do not connect the gas bottle. Have the gas system checked by a quali-fied workshop.
m The gas system does not need to be L!J checked when a gas bottle is changed.
• Place the backrest of the left front seat in an upright position or turn the left front seat so that you can open the kitchen unit's cover plate.
• Raise the kitchen unit's cover plate straight up.
• Push in the regulating knob 200 ®of the required burner and turn the knob to the small flame symbol.
• Push and hold the regulating knob of the selec-ted burner and press the piezo igniter continually 0 until the gas has been lit. .,.
Page 238 of 486
Fresh water system
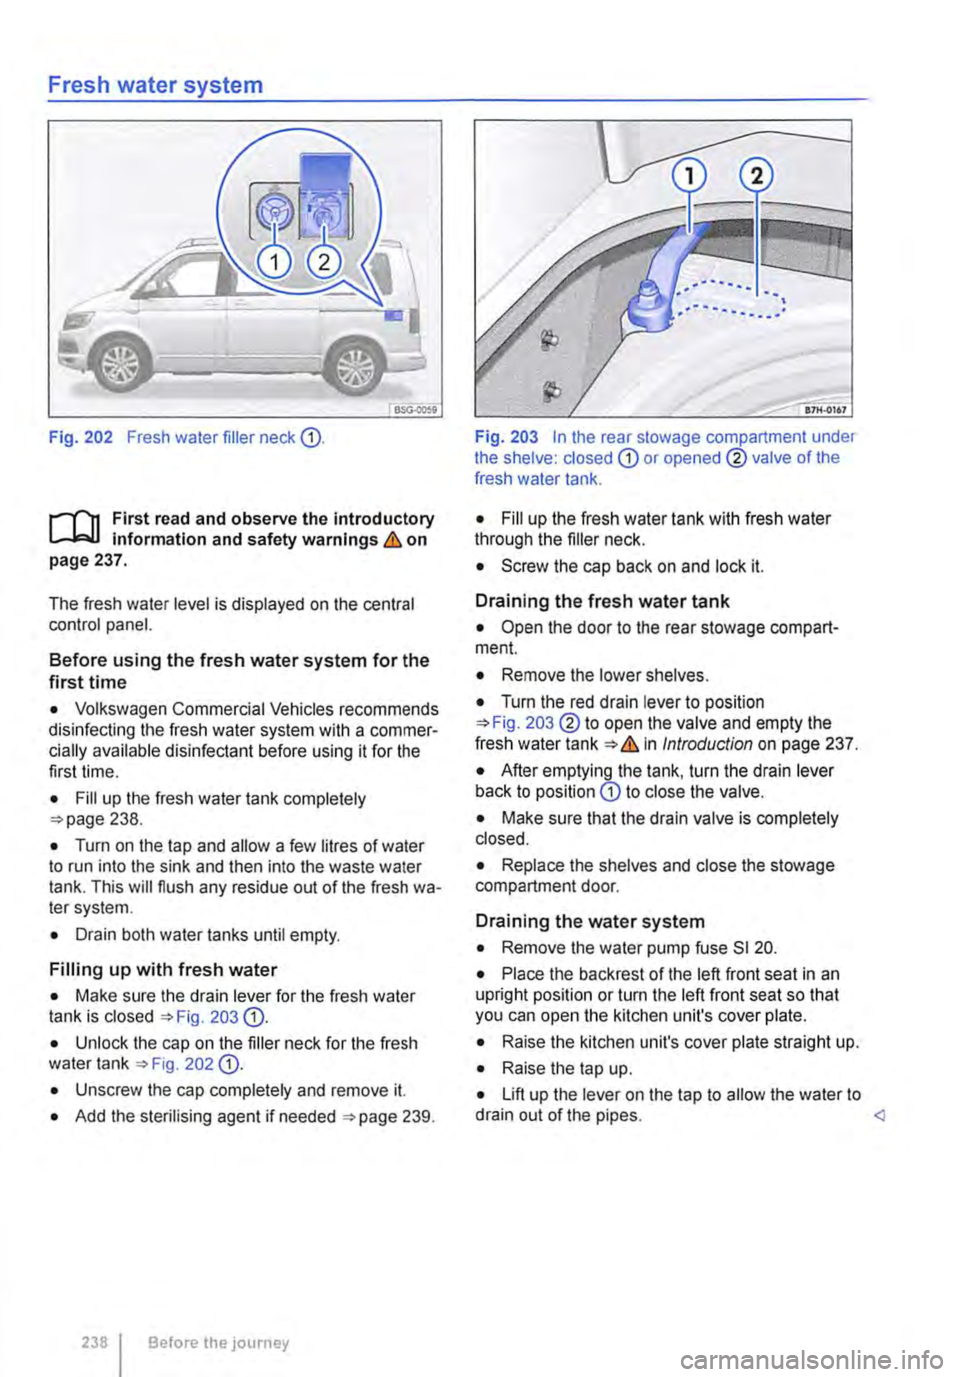
Fig. 202 Fresh water filler neck CD.
l"'""'('n First read and observe the introductory L-J.:.I.I Information and safety warnings & on page 237.
The fresh water level is displayed on the central control panel.
Before using the fresh water system for the first time
• Volkswagen Commercial Vehicles recommends disinfecting the fresh water system with a commer-cially available disinfectant before using it for the first time.
• Fill up the fresh water tank completely =>page 238.
• Turn on the tap and allow a few litres of water to run into the sink and then into the waste water tank. This will flush any residue out of the fresh wa-ter system.
• Drain both water tanks until empty.
Filling up with fresh water
• Make sure the drain lever for the fresh water tank is closed =>Fig. 203 CD.
• Unlock the cap on the filler neck for the fresh water tank =>Fig 202 CD.
• Unscrew the cap completely and remove it.
• Add the sterilising agent if needed =>page 239.
238 I Before the journey
Fig. 203 In the rear stowage compartment under the shelve: closed CD or opened ® valve of the fresh water tank.
• Fill up the fresh water tank with fresh water through the filler neck.
• Screw the cap back on and lock it.
Draining the fresh water tank
• Open the door to the rear stowage compart-ment.
• Remove the lower shelves.
• Turn the red drain lever to position =>Fig. 203 ®to open the valve and empty the fresh water tank=>& In Introduction on page 237.
• After emptying the tank, turn the drain lever back to position CD to close the valve.
• Make sure that the drain valve is completely closed.
• Replace the shelves and close the stowage compartment door.
Draining the water system
• Remove the water pump fuse SI 20.
• Place the back rest of the left front seat in an upright position or turn the left front seat so that you can open the kitchen unit's cover plate.
• Raise the kitchen unit's cover plate straight up.
• Raise the tap up.
• Lift up the lever on the tap to allow the water to drain out of the pipes. <
Page 239 of 486

Sterilising agent
f"""('n First read and observe the Introductory L-J,:,U information and safety warnings & on page 237.
Volkswagen Commercial Vehicles recommends adding a sterilising agent to the fresh water through the fresh water filler neck =>&.After add-ing sterilising agent, turn on the tap and allow ap-proximately one litre of water to run out and down the drain. This will distribute the sterilising agent through the fresh water system.
You may also pour sterilising agent down the sink, followed by a little water, to sterilize the waste wa-ter tank.
Cleaning the fresh water tank
Fig. 204 In the rear stowage compartment under the shelve: opening for cleaning the fresh water tank.
f"""('n First read and observe the introductory l-J,:,,J information and safety warnings & on page 237.
A WARNING
Improper use of the sterilising agent can cause poisoning or Injury.
• Follow the manufacturer's instructions for diluting and using the sterilising agent.
m Sterilising agent is available at specialist L!J camping shops and in pharmacies.
• Open the door to the wardrobe on the right of the luggage compartment.
• Remove the round plastic cover plate from the bottom of the wardrobe.
• Carefully disconnect the electrical connection =>Fig. 204@ for the water level sensor@.
• Turn the tank cap Q) together with the water level sensor anticlockwise.
• Reassemble by following the preceding steps in reverse order.
m Vehicles used for commercial purposes in L!J Germany are required by law to have their fresh water systems checked to ensure compliance with drinking water regulations.
Page 241 of 486
Cleaning the drain
r-f'n First read and observe the introductory l.-.lo=-U information and safety warnings & on page 237.
• Make sure that there is no food debris or water in the sink.
• You will need a suitable container to catch any water that is drained out.
• Open the cupboard door under the sink.
• Pull out the drawer.
• Loosen the clamp on the drain hose on top of the waste water tank and carefully pull the drain hose from its waste water tank connection.
• Drain the water out of the drain hose into the container.
Refrigerator box, California
CClJ Introduction
This chapter contains information on the following subjects:
Using the refrigerator box . . . . . . . . . . . . . . . . . 242
Cleaning the refrigerator box . . . . . . . . . . 242
Additional information:
• Central control panel 204.
• Rectifying faults on the camping equipment 254
• Fuses for the camping equipment 249.
A WARNING
Objects that are not secured, or are secured Incorrectly, can cause serious injuries in the event of a sudden driving or braking manoeu-vre or accident.
• The refrigerator box lid must always be kept closed and locked when the vehicle is in motion.
• Never use the refrigerator box as a table or stowage compartment when the vehicle is in motion.
• Clean the drain hose and the drain in the sink using a soft flexible object such as a pipe cleaner.
• Insert the drain hose back into the waste water tank connection.
• Tighten the drain hose clamp on the waste wa-ter tank connection.
• Make sure that the drain hose is connected properly and check that the connection is water-tight
CD
Water leaking from a poor connection on the waste water drain hose can cause damage.
• Always check to make sure the waste water drain hose connection Is not leaking.
If the ambient temperature in the vehicle is too low, the temperature in the refrigerator box could fall below +2 oc (+35 °F) degrees. This could cause the contents of the refriger-ator box to freeze and bottles and other con-tainers to burst, potentially causing injuries.
• Do not use the refrigerator box when the ambient temperature is too low.
CD
Handling the refrigerator box incorrectly could damage it.
• Do not place containers, food or other ob-jects which are warmer than +50 oc (+122 °F) in the refrigerator box.
• Do not place corrosive substances or sol-vents In the refrigerator box.
• Never expose the refrigerator box to rain or humidity.
• To prevent mould and mildew from forming In the refrigerator box when it is not being used for long periods, place a folded dry towel be-tween the box and Its lid.
r.:l The refrigerator box is not intended to cool or W heat the vehicle interior. The refrigerator box should only be used to keep food cool and for transporting heat-sensitive items on short journeys.
Page 342 of 486
A WARNING_tContlnued)
• The power steering, all driver assist sys-tems and brake assist systems will not func-tion if the engine "sputters" or stops com-pletely due to a lack of fuel or Irregular fuel supply.
• Always fill the tank when it is stlll1/4 full. This reduces the risk of running out of fuel and breaking down.
Filling the tank with petrol or diesel
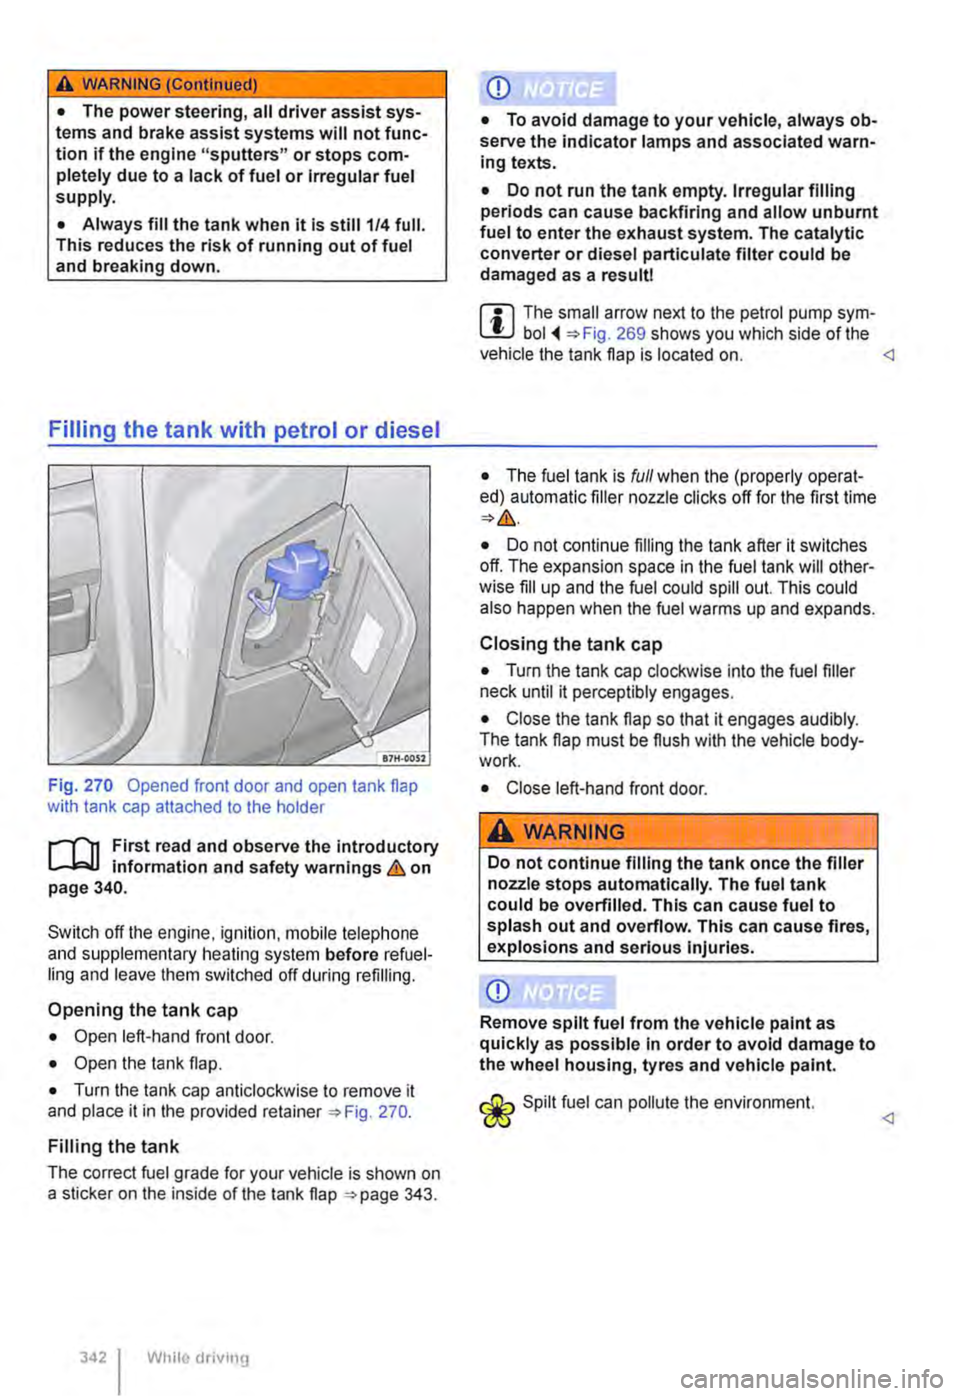
Fig. 270 Opened front door and open tank flap with tank cap attached to the holder
r--f"'n First read and observe the introductory L-.1=.1.1 information and safety warnings & on page 340.
Switch off the engine, ignilion. mobile lelephone and supplementary heating system before refuel-ling and leave them switched off during refilling.
Opening the tank cap
• Open left-hand front door.
• Open the lank flap.
• Turn the tank cap anticlockwise to remove it and place it in the provided retainer 270.
Filling the tank
The correct fuel grade for your vehicle is shown on a sticker on the inside of the tank flap 343.
While driv111g
Q)
• To avoid damage to your vehicle, always ob-serve the indicator lamps and associated warn-ing texts.
• Do not run the tank empty. Irregular filling periods can cause backfiring and allow unburnt fuel to enter the exhaust system. The catalytic converter or diesel partlculate filter could be damaged as a result!
m The small arrow next to the petrol pump sym-L!J bol 269 shows you which side of the vehicle the tank flap is located on.
• The fuel tank is full when the (properly operat-ed) automatic filler nozzle clicks off for the first time
• Do not continue filling the tank after it switches off. The expansion space in the fuel tank will other-wise fill up and the fuel could spill out. This could also happen when the fuel warms up and expands.
Closing the tank cap
• Turn the tank cap clockwise into the fuel filler neck until it perceptibly engages.
• Close the tank flap so that it engages audibly. The tank flap must be flush with the vehicle body-work.
• Close left-hand front door.
A WARNING
Do not continue filling the tank once the filler nozzle stops automatically. The fuel tank could be overfilled. This can cause fuel to splash out and overflow. This can cause fires, explosions and serious Injuries.
Q)
Remove spilt fuel from the vehicle paint as quickly as possible in order to avoid damage to the wheel housing, tyres and vehicle paint.
Spilt fuel can pollute lhe environment.
Page 371 of 486
A wARNING
New tyres will have to be run in as they will Initially have reduced grip and braking effect.
• Drive particularly carefully for the first 600 km in order to prevent accidents and se-rious injury.
A WARNING
Wheels must have the necessary freedom of operation. If the wheels do not have the nec-essary freedom of operation, the tyre could rub on parts of the running gear, the vehicle body and the brake lines. This can lead to a fault in the brake system and to tread separa-tion and thus to a tyre bursting.
Tyre pressure
r-T'n First read and observe the introductory L-k.U Information and safety warnings & on page 367.
The correct tyre pressure for factory-fitted tyres is shown on the tyre pressure label and applies to all-season, summer and winter tyres. The tyre pres-sure label is located on the lock column on the left front door.
If the tyre pressure is too low or too high, the tyres will wear prematurely and the vehicle will not han-dle well => &. The correct tyre pressure is particu-larly important at high speeds. Incorrect tyre pres-sure causes premature wear and can cause a tyre burst.
The pressure should therefore be checked at least once a month and before starting a journey.
The given tyre pressure applies to cold tyres. Tyre pressure is always higher in warm tyres than it is in cold tyres.
For this reason, never reduce the pressure in warm tyres to adjust the tyre pressure. This would result in low tyre pressures that could potentially cause the tyre to burst suddenly.
Checking tyre pressure
Always check the tyre inflation pressure on "cold" tyres. A "cold" tyre can be defined as one on a ve-hicle that has only been driven a few kilometres (miles) within 3 hours prior to the test and at low speeds.
A WARNING (Continued)
• The actual tyre size must not exceed the tyre dimensions of manufacturers approved by Volkswagen Commercial Vehicles and must not rub on any vehicle body parts.
m Despite identical size details, the actual size L!..J of the various tyre makes may vary from these specified dimensions, or the tyre contours may vary considerably.
m Volkswagen Commercial Vehicles-approved L!..J tyres are guaranteed to have the dimensions that are suitable for the vehicle. The salesperson will have to provide a certificate from the tyre man-ufacturer for other tyre makes to prove that the tyre is also suitable for the vehicle. This certificate must be stored in a safe place in the vehicle.
• The tyre pressures must be adjusted to suit a heavy vehicle load.
• After altering the tyre pressures, please ensure that the valve caps are screwed on and observe any information and instructions on setting the tyre monitoring system =>page 318.
The temporary spare wheel is filled to the highest tyre pressure permissible for the vehicle.
A WARNING
Too high or too low a pressure may cause the tyre to suddenly lose pressure or burst while the vehicle is in motion. This can cause seri-ous accidents and fatal Injuries.
• If the tyre pressure Is too low, it is possi-ble that the tyre temperature will increase to such an extent when driving that the tread peels off and the tyre bursts.
• Fast speeds or overloading of the vehicle can cause overheating, sudden tyre damage including tyre bursts and ripping of the tread surface and thus to a loss of control of the vehicle.
• If the tyre pressure is too low or too high, the tyres will wear prematurely and the vehi-cle will not handle well. .,.
Wheels and tyres 371
Page 380 of 486
Vehicle care and maintenance
Caring for and cleaning the vehicle exterior
o:n Introduction
This chapter contains information on the following subjects:
Washing the vehicle . . . . . . . . . . . . . . . 381
Washing the vehicle with a high-pressure cleaner . . . . . . . . . . . . . . . . . . . . . . . . . . . 382 Cleaning windows and exterior mirrors . . . . . . 382
Cleaning and changing wiper blades 383
Waxing and polishing the vehicle 384
Cleaning and caring for chrome and aluminium trim parts . . . . . . . . . . . . . . 385
Cleaning and caring for the decorative film . . 385
Cleaning wheels . . . . . . . . . . . . . . . . . . . . . 386
Care of rubber seals . . . . . . . . . . . . . . . . . . . . . 386
De-icing door lock cylinders . . . . . . • . . . . . . . . 387
Undersea! . . . . . . . . . . . . . . . . . . . . . . . . . . . . . . 387
Cleaning the engine compartment . 387
Regular and expert care helps to maintain the val-ue of the vehicle. Proper maintenance may also be one of the requirements for the approval of warran-ty claims in the event of corrosion or paint defects.
Suitable care products are available from Volkswa-gen Commercial Vehicles dealers.
Additional information and warnings:
• Preparation for working in the engine compart-ment ::-page 350
• Cleaning and caring for the interior ::-page 388
• Accessories, modifications, repairs and renewal of parts ::-page 394
A WARNING
Car care products can be toxic and hazard-ous. Unsuitable care products and Incorrect application of care products can cause acci-dents, serious Injuries, burns or poisoning.
• The care product must be kept In Its origi-nal sealed container.
380 Cleaning and maintenance
A WARNING (Continued)
• Read the manufacturer's Instructions .
• Never store car care products in empty food containers, bottles or any other non-original containers as people finding these containers may not know that they contain care products.
• Keep children away from care products .
• The products can give off harmful fumes during use. They should therefore only be used outside or In well-ventilated spaces.
• Never use fuel, turpentine, engine oil, nail varnish remover or other volatile fluids to wash, clean or care for your vehicle. These substances are toxic and highly Inflammable.
A WARNING
Incorrect care and cleaning of vehicle parts can Impair the safety features of the vehicle and thus cause serious Injury.
• Vehicle parts must be cleaned according to the manufacturer's Instructions.
• Only use approved or recommended cleaning products.
CD
Cleaning agents that contain solvents attack the material and can cause damage.
r:Q:... In the interests of environmental protection, "C!S the vehicle should only be washed in special-ly provided wash bays. This prevents waste water contaminated with oil, grease or fuel from entering the sewerage system. In some countries, washing vehicles anywhere else may be prohibited.
r:Q:... Environmentally-friendly care products "C!S should be used.
r:Q:... Leftover car care products should not be dis-"C!S posed of with ordinary household waste. Read the manufacturer's instructions.