Page 114 of 220
Obstacle-Aware AccelerationObstacle-Aware Acceleration is designed toreduce the impact of a collision by reducing
motor torque if Model 3 detects an object in
its driving path. For example, Model 3, while
parked in front of a closed garage door with
the Drive gear engaged, detects that you have
pressed hard on the accelerator pedal.
Although Model 3 still accelerates and hits the
garage door, the reduced torque may result in
less damage.
Obstacle-Aware Acceleration is designed to operate only when all of these conditions are
simultaneously met:
Page 115 of 220

Speed Assist
How Speed Assist Works
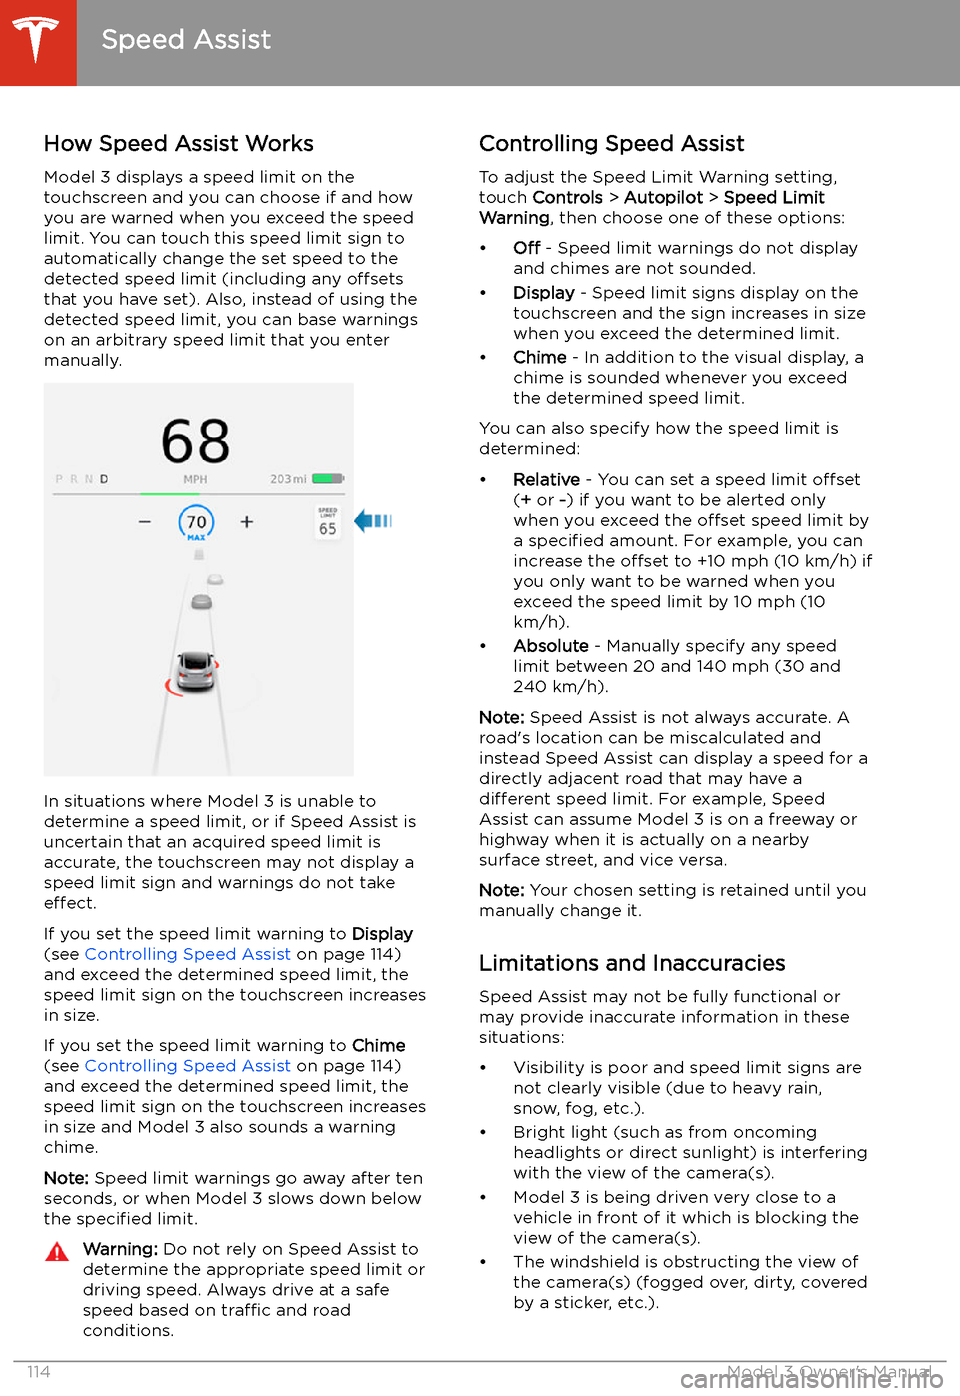
Model 3 displays a speed limit on the
touchscreen and you can choose if and how
you are warned when you exceed the speed
limit. You can touch this speed limit sign to automatically change the set speed to thedetected speed limit (including any offsets
that you have set). Also, instead of using the detected speed limit, you can base warnings
on an arbitrary speed limit that you enter manually.
In situations where Model 3 is unable to
determine a speed limit, or if Speed Assist is
uncertain that an acquired speed limit is
accurate, the touchscreen may not display a
speed limit sign and warnings do not take effect.
If you set the speed limit warning to Display
(see Controlling Speed Assist on page 114)
and exceed the determined speed limit, the
speed limit sign on the touchscreen increases
in size.
If you set the speed limit warning to Chime
(see Controlling Speed Assist on page 114)
and exceed the determined speed limit, the
speed limit sign on the touchscreen increases
in size and Model 3 also sounds a warning
chime.
Note: Speed limit warnings go away after ten
seconds, or when Model 3 slows down below
the specified limit.
Warning:
Do not rely on Speed Assist to
determine the appropriate speed limit or driving speed. Always drive at a safe
speed based on traffic and road
conditions.Controlling Speed Assist
To adjust the Speed Limit Warning setting,
touch Controls > Autopilot > Speed Limit
Warning , then choose one of these options:
Page 117 of 220

Using the Touchscreen
Controls
Overview
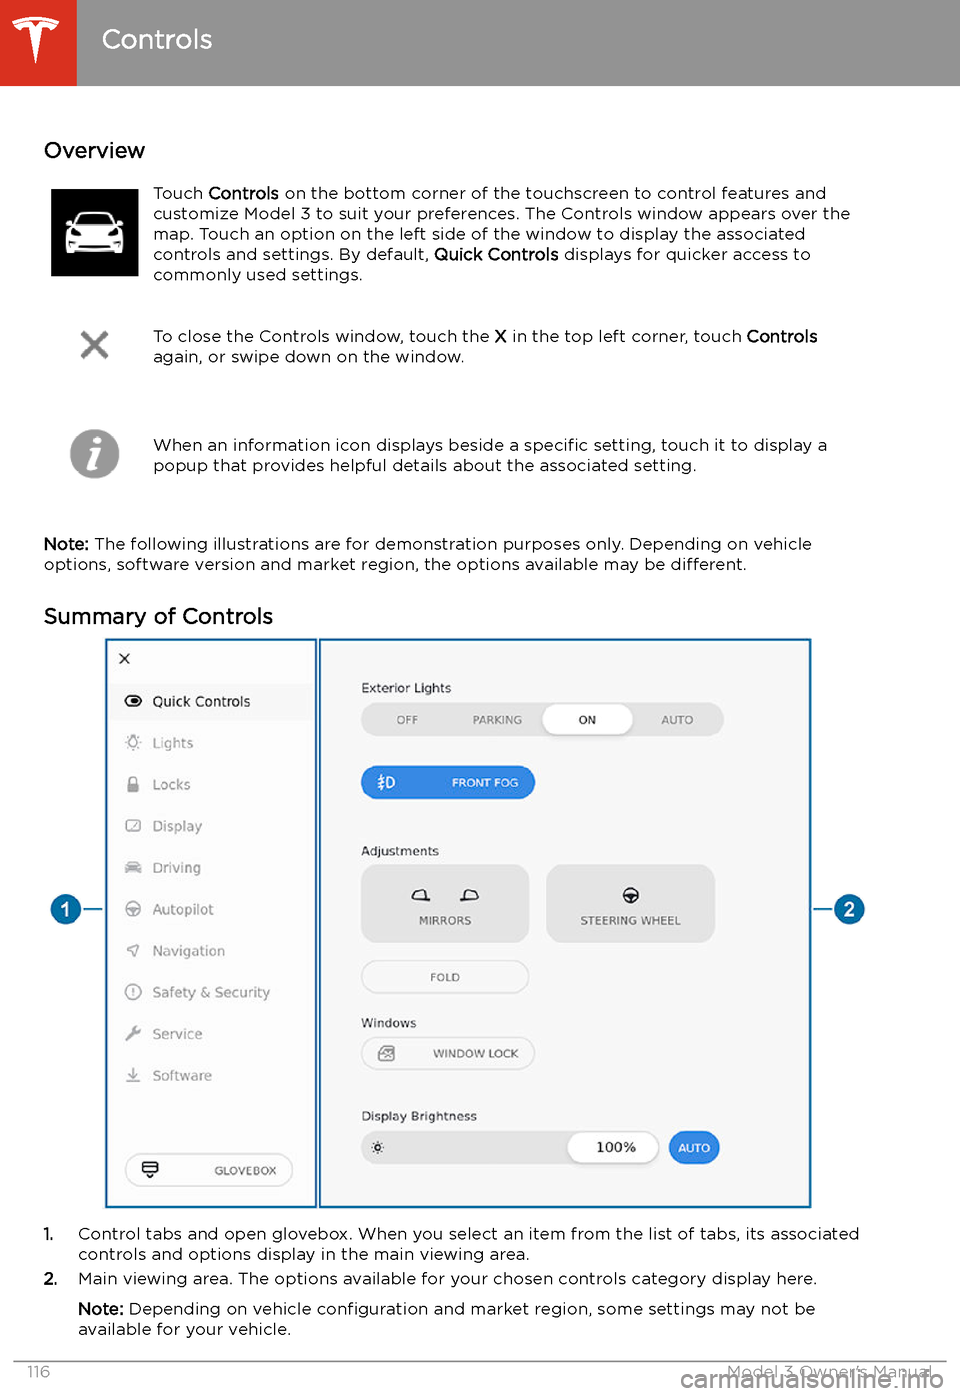
Touch Controls on the bottom corner of the touchscreen to control features and
customize Model 3 to suit your preferences. The Controls window appears over the map. Touch an option on the left side of the window to display the associated
controls and settings. By default, Quick Controls displays for quicker access to
commonly used settings.
To close the Controls window, touch the X in the top left corner, touch Controls
again, or swipe down on the window.When an information icon displays beside a specific setting, touch it to display a
popup that provides helpful details about the associated setting.
Note: The following illustrations are for demonstration purposes only. Depending on vehicle
options, software version and market region, the options available may be different.
Summary of Controls
1. Control tabs and open glovebox. When you select an item from the list of tabs, its associated
controls and options display in the main viewing area.
2. Main viewing area. The options available for your chosen controls category display here.
Note: Depending on vehicle configuration and market region, some settings may not be
available for your vehicle.
Controls
116Model 3 Owner
Page 127 of 220
Adjusting Climate Control Settings
To override the Auto setting, touch the fan icon, turn off the Auto setting, then use the buttons
that appear to manually adjust settings.
In addition to the settings shown, if Model 3 is in Park, the Keep Climate On, Dog Mode, and Camp
Mode setting displays when you touch the fan icon when the vehicle is in Park (see Keep Climate
On, Dog Mode, and Camp Mode on page 128).
1. Touch AUTO to turn the Auto setting on or off.
2. Touch to turn the climate control system off.
3. If equipped with the premium package, the climate control settings window has two tabs. The
general settings tab displays by default and is represented by the fan icon. Touch the seat
heater icon to access controls for both the front and rear seat heaters (see Operating Seat
Heaters on page 127).
4. Choose where air
Page 128 of 220
Operating Seat Heaters
To control the front seat heaters for the driver
and passenger, touch the corresponding
control on the main climate control area at the
bottom of the touchscreen. To control the rear
seat heaters (if equipped) or access duplicate
controls for the front seat heaters, touch the
fan icon, then touch the seat heater icon
followed by the seat for which you want to
adjust heating. Seat heaters operate at three
setting levels from 3 (highest) to 1 (lowest).
When operating, the associated seat icon displays twisting lines that turn red to indicatethe setting level. You can touch All Off to turn
off all seat heaters simultaneously.
Adjusting the Front Vents Model 3 has a unique horizontal face-level
vent that spans the width of the dashboard.
Using the touchscreen, you can pinpoint
exactly where you want to direct the air
Page 133 of 220

If Navigate on Autopilot (if available in your
market region) is enabled, you can turn it on
for the navigation route by touching Navigate
on Autopilot in the turn-by-turn direction list.
Navigate on Autopilot is an extension of Autosteer that automatically changes lanesand steers Model 3 onto the appropriate
exit(s) when navigating on controlled access
roads (such as freeways). For details, see
Navigate on Autopilot on page 96.The route overview icon displays
when a navigation route is active.
Touch this icon at any time to view
an overview of your navigation
route, or to change the orientation
of the map (see Overview on page
130), which also zooms the map to
show the current leg of your trip.
The black pin at the end of the
route line represents your
destination.Mute/unmute navigation volume.
Note: You can also mute the
volume of the navigation system by
pressing the scroll button on the
left side of the steering wheel while
navigation instructions are being
spoken. A volume control specific
to navigation instructions is also
available by touching the settings
icon on the map (see Overview on
page 130).
To stop navigating, touch CANCEL, located
below the turn-by-turn direction list.
Note: If a data connection is not available,
onboard maps allow you to navigate to any location, but you must enter the location
Page 136 of 220
For security reasons, if you sell Model 3, it is
recommended that you delete your Home and
Work Locations. You can delete these
individually or you can perform a factory reset to erase all personal data (see Erasing
Personal Data on page 124).
Map Updates
As updated maps become available, they are
automatically sent to Model 3 over Wi-Fi. To
ensure you receive them, periodically connect Model 3 to a Wi-Fi network (see Connecting
to Wi-Fi on page 150). The touchscreen
displays a message informing you when new
maps are installed.
Maps and Navigation
Using the Touchscreen135
Page 141 of 220
Note: Unpairing the phone has no effect on
using the phone as a key. To forget an
authenticated phone, see Keys on page 9.
Connecting to a Paired Phone
Model 3 automatically connects with the last
phone to which it was connected, provided it
is within operating range and has Bluetooth turned on. If the last phone is not within range,
it attempts to connect with the next phone
that it has been paired with.
To connect to a different phone, touch the
Bluetooth icon on the top of the touchscreen.
The Bluetooth window displays a list of paired
phones. Choose the phone you want to connect to, then touch Connect. If the phone
you want to connect to is not listed, you must
pair the phone. See Pairing a Bluetooth Phone
on page 139.
When connected, the Model 3 touchscreen displays the Bluetooth symbol next to thephone name to show that the connection is
active.
Using the Phone App
When your phone is connected to Model 3
using Bluetooth, and you have allowed access to your phone