2020 Ram ProMaster City transmission
[x] Cancel search: transmissionPage 178 of 350

STARTING AND OPERATING 175
To Resume Speed
To resume a previously set speed, push the RES (+) button and
release. Resume can be used at any speed above 20 mph
(32 km/h) up to the maximum speed of 100 mph (160 km/h).
To Deactivate
A soft tap on the brake pedal, pushing the CAN button, or
normal brake pressure while slowing the vehicle will deacti-
vate the Speed Control without erasing the set speed from
memory.
Pushing the on/off button or turning the ignition switch off
erases the set speed from memory.
PARKSENSE REAR PARK ASSIST — IF EQUIPPED
The ParkSense system provides an audible indication of the
distance between the rear fascia/bumper and a detected
obstacle when backing up (e.g. during a parking maneuver).
Refer to “ParkSense Rear Park Assist System Usage Precau-
tions” in this section for limitations of this system and recom -
mendations.
The ParkSense system is automatically activated when the
transmission is placed into REVERSE. As the distance from
an obstacle behind the vehicle decreases, the audible alert
becomes more frequent.
Interaction With Trailer Towing
The ParkSense system is automatically deactivated when a
trailer equipped by Mopar is hitched to the vehicle. The
system will be automatically activated as soon as the trailer
is removed. If it does not happen, turning the key ignition
switch to OFF and then to ON again would be needed. If a
non-Mopar trailer hitch is mounted, the sensor deactivation
cannot be guaranteed.
5
2020_RAM_PROMASTER_CITY_OM_USA=GUID-7B6A7FCA-79B0-423F-95C5-ED2A949C3D13=1=en=.book Page 175
Page 183 of 350

180 STARTING AND OPERATING
The Camera Delay setting can be set to on/off in the rear
camera settings menu. When the vehicle is shifted out of
REVERSE and the Camera Delay is turned off, the rear
camera mode is exited and the navigation or audio screen
appears on display again.
When the transmission is shifted out of REVERSE, and
Camera Delay is activated in the menu screen, the camera
image will continue to be displayed for up to 10 seconds,
unless the speed of the vehicle is greater than 8 mph (13 km/h), the transmission is in PARK, or the ignition is placed in
the OFF position.
When displayed, static grid lines will illustrate the width of
the vehicle and will show separate zones that will help
indicate the distance to the rear of the vehicle. The following
table shows the approximate distances for each zone:
NOTE:
If snow, ice, mud, or any foreign substance builds up on the
camera lens, clean the lens, rinse with water, and dry with a
soft cloth. Do not cover the lens.
Zone
Distance To The Rear Of The
Vehicle
Red 0 - 1 ft (0 - 30 cm)
Yellow 1 ft - 3 ft (30 cm - 1 m)
Green 3 ft or greater (1 m or greater)WARNING!
Drivers must be careful when backing up even when
using the ParkView Rear Back Up Camera. Always check
carefully behind your vehicle, and be sure to check for
pedestrians, animals, other vehicles, obstructions, or
blind spots before backing up. You are responsible for
the safety of your surroundings and must continue to
pay attention while backing up. Failure to do so can
result in serious injury or death.
CAUTION!
• To avoid vehicle damage, ParkView should only be used as a parking aid. The ParkView camera is unable
to view every obstacle or object in your drive path.
• To avoid vehicle damage, the vehicle must be driven slowly when using ParkView to be able to stop in time
when an obstacle is seen. It is recommended that the
driver look frequently over his/her shoulder when
using ParkView.
2020_RAM_PROMASTER_CITY_OM_USA=GUID-7B6A7FCA-79B0-423F-95C5-ED2A949C3D13=1=en=.book Page 180
Page 193 of 350

190 STARTING AND OPERATING
(Continued)
WARNING!
• Make certain that the load is secured in the trailer and will not shift during travel. When trailering cargo that
is not fully secured, dynamic load shifts can occur that
may be difficult for the driver to control. You could lose
control of your vehicle and have a collision.
• When hauling cargo or towing a trailer, do not overload your vehicle or trailer. Overloading can cause a loss of
control, poor performance or damage to brakes, axle,
engine, transmission, steering, suspension, chassis
structure or tires.
• Safety chains must always be used between your vehicle and trailer. Always connect the chains to the
hook retainers of the vehicle hitch. Cross the chains
under the trailer tongue and allow enough slack for
turning corners.
• Vehicles with trailers should not be parked on a grade.When parking, apply the parking brake on the tow
vehicle. Put the tow vehicle transmission in PARK. For
four-wheel drive vehicles, make sure the transfer case
is not in NEUTRAL. Always, block or "chock" the
trailer wheels.
• GCWR must not be exceeded.
• Total weight must be distributed between the tow vehicle and the trailer such that the following four
ratings are not exceeded:
• GVWR
• GTW
• GAWR
• Tongue weight rating for the trailer hitch utilized.
WARNING! (Continued)
2020_RAM_PROMASTER_CITY_OM_USA=GUID-7B6A7FCA-79B0-423F-95C5-ED2A949C3D13=1=en=.book Page 190
Page 196 of 350

STARTING AND OPERATING 193
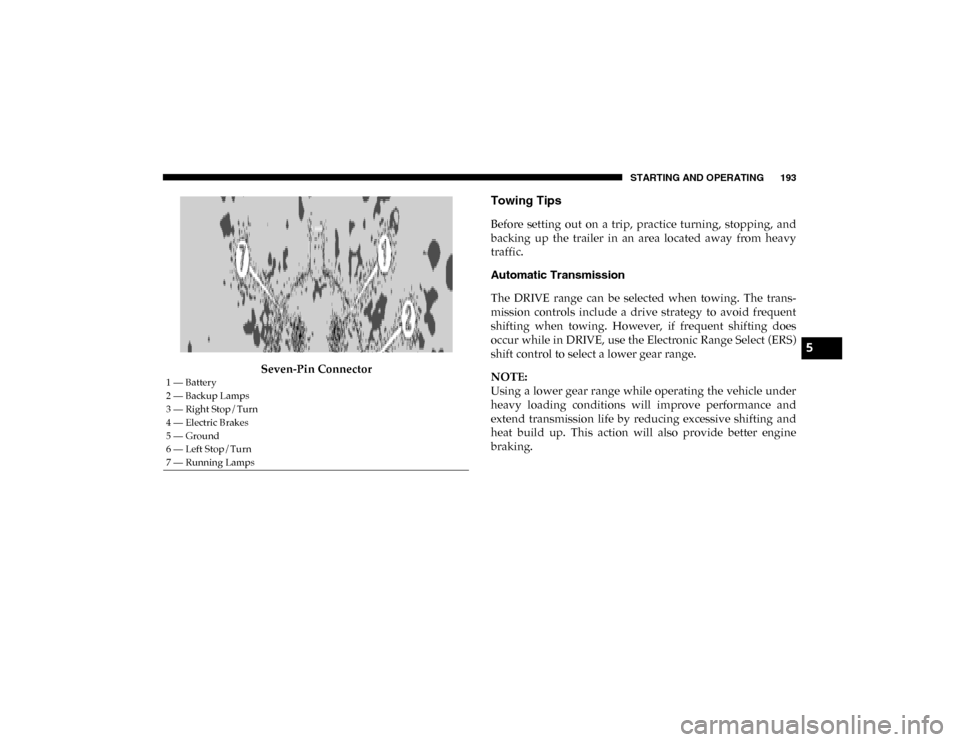
Seven-Pin Connector
Towing Tips
Before setting out on a trip, practice turning, stopping, and
backing up the trailer in an area located away from heavy
traffic.
Automatic Transmission
The DRIVE range can be selected when towing. The trans-
mission controls include a drive strategy to avoid frequent
shifting when towing. However, if frequent shifting does
occur while in DRIVE, use the Electronic Range Select (ERS)
shift control to select a lower gear range.
NOTE:
Using a lower gear range while operating the vehicle under
heavy loading conditions will improve performance and
extend transmission life by reducing excessive shifting and
heat build up. This action will also provide better engine
braking.
1 — Battery
2 — Backup Lamps
3 — Right Stop/Turn
4 — Electric Brakes
5 — Ground
6 — Left Stop/Turn
7 — Running Lamps
5
2020_RAM_PROMASTER_CITY_OM_USA=GUID-7B6A7FCA-79B0-423F-95C5-ED2A949C3D13=1=en=.book Page 193
Page 197 of 350

194 STARTING AND OPERATING
Electronic Range Select (ERS)
• When using the ERS shift control, select the highest gearthat allows for adequate performance and avoids frequent
downshifts. For example, choose “5” if the desired speed
can be maintained. Choose “4” or “3” if needed to main -
tain the desired speed.
• To prevent excess heat generation, avoid continuous driving at high RPM. Reduce vehicle speed as necessary to
avoid extended driving at high RPM. Return to a higher
gear range or vehicle speed when grade and road condi -
tions allow.
Speed Control — If Equipped
• Do not use on hilly terrain or with heavy loads.
• When using the Speed Control, if you experience speed drops greater than 10 mph (16 km/h), disengage until you
can get back to cruising speed.
• Use Speed Control in flat terrain and with light loads to maximize fuel efficiency. Cooling System
To reduce potential for engine and transmission over
-
heating, take the following actions:
City Driving
• In city traffic — while stopped, place the transmission in NEUTRAL, but do not increase engine idle speed.
Highway Driving
• Reduce speed.
• Temporarily turn off air conditioning.
2020_RAM_PROMASTER_CITY_OM_USA=GUID-7B6A7FCA-79B0-423F-95C5-ED2A949C3D13=1=en=.book Page 194
Page 198 of 350

STARTING AND OPERATING 195
RECREATIONAL TOWING (BEHIND MOTORHOME, ETC.)
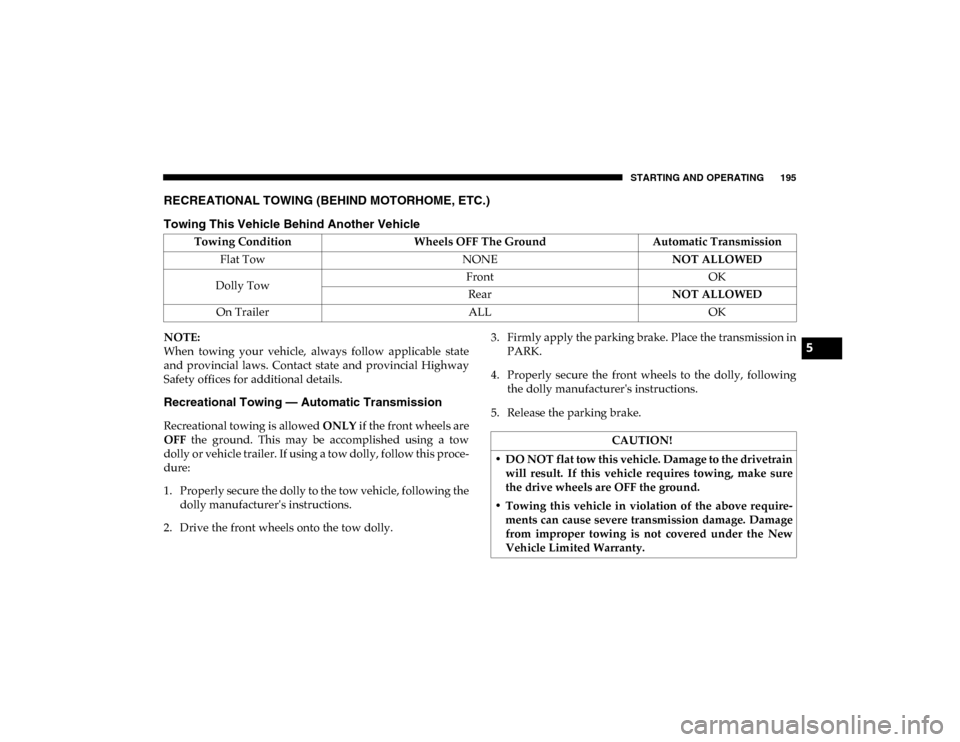
Towing This Vehicle Behind Another Vehicle
NOTE:
When towing your vehicle, always follow applicable state
and provincial laws. Contact state and provincial Highway
Safety offices for additional details.
Recreational Towing — Automatic Transmission
Recreational towing is allowed ONLY if the front wheels are
OFF the ground. This may be accomplished using a tow
dolly or vehicle trailer. If using a tow dolly, follow this proce -
dure:
1. Properly secure the dolly to the tow vehicle, following the dolly manufacturer's instructions.
2. Drive the front wheels onto the tow dolly. 3. Firmly apply the parking brake. Place the transmission in
PARK.
4. Properly secure the front wheels to the dolly, following the dolly manufacturer's instructions.
5. Release the parking brake.
Towing Condition
Wheels OFF The Ground Automatic Transmission
Flat Tow NONENOT ALLOWED
Dolly Tow Front
OK
Rear NOT ALLOWED
On Trailer ALLOK
CAUTION!
• DO NOT flat tow this vehicle. Damage to the drivetrain will result. If this vehicle requires towing, make sure
the drive wheels are OFF the ground.
• Towing this vehicle in violation of the above require -
ments can cause severe transmission damage. Damage
from improper towing is not covered under the New
Vehicle Limited Warranty.
5
2020_RAM_PROMASTER_CITY_OM_USA=GUID-7B6A7FCA-79B0-423F-95C5-ED2A949C3D13=1=en=.book Page 195
Page 201 of 350

198 STARTING AND OPERATING
(Continued)
CAUTION!
• Always check the depth of the standing water before driving through it. Never drive through standing water
that is deeper than the bottom of the tire rims mounted
on the vehicle.
• Determine the condition of the road or the path that is under water and if there are any obstacles in the way
before driving through the standing water.
• Do not exceed 5 mph (8 km/h) when driving through standing water. This will minimize wave effects.
• Driving through standing water may cause damage toyour vehicle’s drivetrain components. Always inspect
your vehicle’s fluids (i.e., engine oil, transmission, axle,
etc.) for signs of contamination (i.e., fluid that is milky
or foamy in appearance) after driving through standing
water. Do not continue to operate the vehicle if any
fluid appears contaminated, as this may result in
further damage. Such damage is not covered by the
New Vehicle Limited Warranty.
• Getting water inside your vehicle’s engine can cause it to lock up and stall out, and cause serious internal
damage to the engine. Such damage is not covered by
the New Vehicle Limited Warranty. CAUTION!
(Continued)
2020_RAM_PROMASTER_CITY_OM_USA=GUID-7B6A7FCA-79B0-423F-95C5-ED2A949C3D13=1=en=.book Page 198
Page 209 of 350

206 IN CASE OF EMERGENCY
FUSESUnderhood Fuses
The Front Distribution Unit is located on the right side of the
engine compartment, next to the battery. To access the fuses,
remove fasteners and remove the cover.
Front Distribution Unit
The ID number of the electrical component corresponding to
each fuse can be found on the back of the cover.WARNING!
• When replacing a blown fuse, always use an appro -
priate replacement fuse with the same amp rating as the
original fuse. Never replace a fuse with another fuse of
higher amp rating. Never replace a blown fuse with
metal wires or any other material. Do not place a fuse
inside a circuit breaker cavity or vice versa. Failure to
use proper fuses may result in serious personal injury,
fire and/or property damage.
• Before replacing a fuse, make sure that the ignition is off and that all the other services are switched off and/
or disengaged.
• If the replaced fuse blows again, contact an authorized dealer.
• If a general protection fuse for safety systems (air bag system, braking system), power unit systems (engine
system, transmission system) or steering system blows,
contact an authorized dealer.
2020_RAM_PROMASTER_CITY_OM_USA=GUID-7B6A7FCA-79B0-423F-95C5-ED2A949C3D13=1=en=.book Page 206