2020 Ram ProMaster City lock
[x] Cancel search: lockPage 68 of 350

GETTING TO KNOW YOUR VEHICLE 65
3. Raise the hood and place the hood prop rod in hood slotto secure the hood in the open position.
Hood Prop RodClosing
CAUTION!
Be sure to disengage the rod and secure it in close
position before closing the hood. Damage may occur.
WARNING!
Be sure the hood is fully latched before driving your
vehicle. If the hood is not fully latched, it could open
when the vehicle is in motion and block your vision.
Failure to follow this warning could result in serious
injury or death.
CAUTION!
To prevent possible damage, do not slam the hood to
close it. Lower hood to approximately 12 inches (30 cm)
and drop the hood to close. Make sure hood is fully
closed for both latches. Never drive vehicle unless hood
is fully closed, with both latches engaged.
2
2020_RAM_PROMASTER_CITY_OM_USA=GUID-7B6A7FCA-79B0-423F-95C5-ED2A949C3D13=1=en=.book Page 65
Page 71 of 350

68 GETTING TO KNOW YOUR VEHICLE
INTERNAL EQUIPMENT
Storage
Glove Compartment
The glove compartment is located on the passenger side of
the instrument panel.
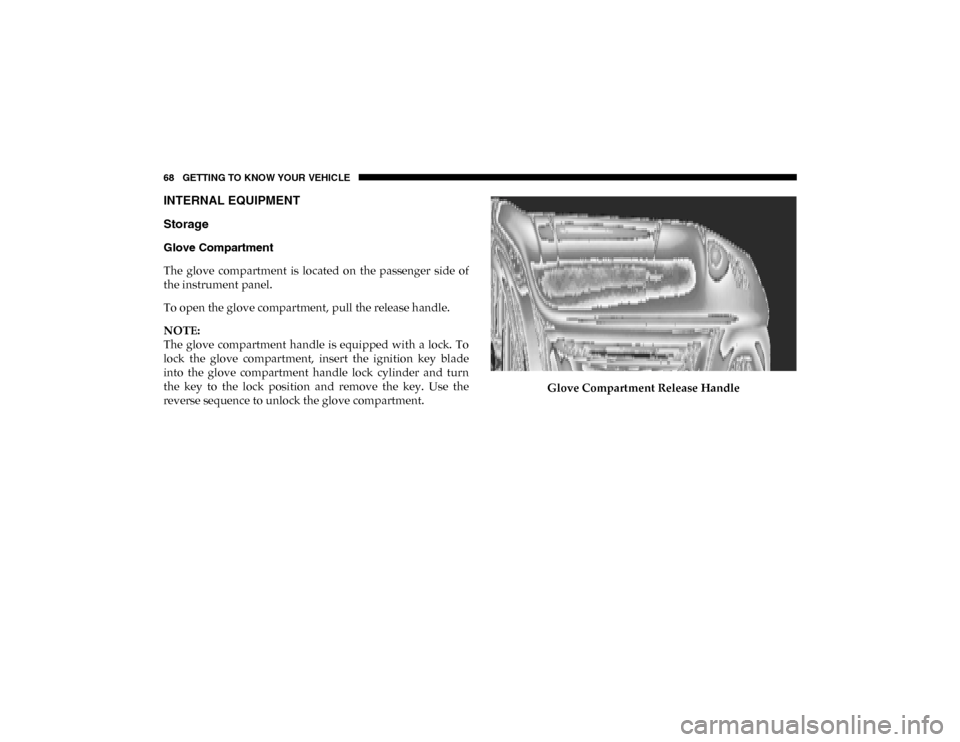
To open the glove compartment, pull the release handle.
NOTE:
The glove compartment handle is equipped with a lock. To
lock the glove compartment, insert the ignition key blade
into the glove compartment handle lock cylinder and turn
the key to the lock position and remove the key. Use the
reverse sequence to unlock the glove compartment.Glove Compartment Release Handle
2020_RAM_PROMASTER_CITY_OM_USA=GUID-7B6A7FCA-79B0-423F-95C5-ED2A949C3D13=1=en=.book Page 68
Page 76 of 350

GETTING TO KNOW YOUR VEHICLE 73
(Continued)
Distribute cargo weight evenly on the roof rack crossbars.
The roof rack does not increase the total load carrying
capacity of the vehicle. Be sure the total load of cargo inside
the vehicle plus that on the external rack does not exceed the
maximum vehicle load capacity.
To move the crossbars, loosen the attachments, located at the
upper edge of each crossbar, approximately eight turns
using the anti-theft wrench provided with the Mopar cross-
bars. Then, move the crossbar to the desired position,
keeping the crossbars parallel to the rack frame. Once the
crossbar is in the desired position, re-tighten the with the
wrench to lock the crossbar into position.
NOTE:
• To help control wind noise when the crossbars are not in use, place the front and rear crossbars approximately
24 inches (61 cm) apart. Optimal noise reduction can then
be achieved by adjusting the front crossbar forward or aft
using increments of 1 inch (2.5 cm). • If (or any metallic object) is placed over the satellite radio
antenna (if equipped), you may experience interruption of
satellite radio reception. For improved satellite radio
reception, avoid placing the rear crossbar over the satellite
radio antenna.
WARNING!
Cargo must be securely tied down before driving your
vehicle. Improperly secured loads can fly off the vehicle,
particularly at high speeds, resulting in personal injury
or property damage. Follow the roof rack cautions when
carrying cargo on your roof rack.
CAUTION!
• To prevent damage to the roof of your vehicle, DO NOT carry any loads on the roof rack without the crossbars
deployed. The load should be secured and placed on
top of the crossbars, not directly on the roof. If it is
necessary to place the load on the roof, place a blanket
or other protective layer between the load and the roof
surface.
2
2020_RAM_PROMASTER_CITY_OM_USA=GUID-7B6A7FCA-79B0-423F-95C5-ED2A949C3D13=1=en=.book Page 73
Page 83 of 350

80 GETTING TO KNOW YOUR INSTRUMENT PANEL
Change Engine Oil — If Equipped
Your vehicle may be equipped with an engine oil change
indicator system. The “Change Engine Oil” message will
display in the instrument cluster display. The engine oil
change indicator system is duty cycle based, which means
the engine oil change interval may fluctuate, dependent
upon your personal driving style.
Unless reset, this message will continue to display each time
you turn the ignition switch to the ON/RUN position. To
turn off the message temporarily, push and release the
MENU button. To reset the oil change indicator system (after
performing the scheduled maintenance), refer to the
following procedure.
1. Turn the ignition switch to the ON position (do not start the engine).
2. Fully push the accelerator pedal slowly, three times, within 10 seconds.
3. Turn the ignition switch to the OFF/LOCK position.
NOTE:
If the indicator message illuminates when you start the
vehicle, the oil change indicator system did not reset. If
necessary, repeat this procedure.
Instrument Cluster Display Menu Items
Speed Beep
This function is used to set a speed limit (MPH or km/h); the
driver is alerted when this limit is exceeded.
To set the desired speed limit:
1. Push the MENU button briefly. The display will show the
wording (SPEED BEEP) and the unit (MPH) or (km/h)
previously set.
2. If the function is on, push and release the up or down
arrow button to select the required speed limit and then
push MENU to confirm.
NOTE:
The speed may be set in the range from 20 to 125 MPH (30 to
200 km/h) according to the previously chosen unit.
The setting will increase/decrease by five units each time the
up or down arrow button is pushed. Hold down the up or
down arrow button to automatically increase/decrease the
setting rapidly. Complete the adjustment when you
approach the desired value.
2020_RAM_PROMASTER_CITY_OM_USA=GUID-7B6A7FCA-79B0-423F-95C5-ED2A949C3D13=1=en=.book Page 80
Page 88 of 350

GETTING TO KNOW YOUR INSTRUMENT PANEL 85
Brake Warning Light This warning light monitors various brake func -
tions, including brake fluid level and parking brake
application. If the brake light turns on it may indi -
cate that the parking brake is applied, that the brake fluid
level is low, or that there is a problem with the anti-lock
brake system reservoir.
If the light remains on when the parking brake has been
disengaged, and the fluid level is at the full mark on the
master cylinder reservoir, it indicates a possible brake
hydraulic system malfunction or that a problem with the
Brake Booster has been detected by the Anti-Lock Brake
System (ABS) / Electronic Stability Control (ESC) system. In
this case, the light will remain on until the condition has been
corrected. If the problem is related to the brake booster, the
ABS pump will run when applying the brake, and a brake
pedal pulsation may be felt during each stop.
The dual brake system provides a reserve braking capacity in
the event of a failure to a portion of the hydraulic system. A
leak in either half of the dual brake system is indicated by the
Brake Warning Light, which will turn on when the brake
fluid level in the master cylinder has dropped below a spec -
ified level.
The light will remain on until the cause is corrected. NOTE:
The light may flash momentarily during sharp cornering
maneuvers, which change fluid level conditions. The vehicle
should have service performed, and the brake fluid level
checked.
If brake failure is indicated, immediate repair is necessary.
Vehicles equipped with the Anti-Lock Brake System (ABS)
are also equipped with Electronic Brake Force Distribution
(EBD). In the event of an EBD failure, the Brake Warning
Light will turn on along with the ABS Light. Immediate
repair to the ABS system is required.
WARNING!
Driving a vehicle with the red brake light on is
dangerous. Part of the brake system may have failed. It
will take longer to stop the vehicle. You could have a
collision. Have the vehicle checked immediately.
3
2020_RAM_PROMASTER_CITY_OM_USA=GUID-7B6A7FCA-79B0-423F-95C5-ED2A949C3D13=1=en=.book Page 85
Page 91 of 350

88 GETTING TO KNOW YOUR INSTRUMENT PANEL
Seat Belt Reminder Warning Light When the ignition is first placed in the ON/RUN or
MAR/ON/RUN position, if the driver’s seat belt is
unbuckled, a chime will sound and the light will
turn on. When driving, if the driver or front passenger seat
belt remains unbuckled, the Seat Belt Reminder Light will
flash or remain on continuously and a chime will sound.
Refer to “Occupant Restraint Systems” in “Safety” for
further information.
Transmission Fault Warning Light
This light will illuminate (together with a message in
the instrument cluster display and a buzzer) to indi -
cate a transmission fault. Contact your authorized
dealer if the message remains after restarting the engine. Engine Oil Level Warning Light
This warning light appears on the panel when the
engine oil level falls below the minimum recom -
mended value. Restore the correct engine oil level or
contact your authorized dealer for service.
Yellow Warning Lights
Anti-Lock Brake System (ABS) Warning Light
This light monitors the Anti-Lock Brake System (ABS).
The light will turn on when the ignition is placed in the
ON/RUN or MAR/ON/RUN position and may stay
on for as long as four seconds.
If the ABS light remains on or turns on while driving, then
the Anti-Lock portion of the brake system is not functioning
and service is required. However, the conventional brake
system will continue to operate normally if the brake
warning light is not on.
If the ABS light is on, the brake system should be serviced as
soon as possible to restore the benefits of Anti-Lock Brakes.
If the ABS light does not turn on when the ignition is placed
in the ON/RUN or MAR/ON/RUN position, have the light
inspected by an authorized dealer.
CAUTION!
Continuous driving with the Transmission Temperature
Warning Light illuminated will eventually cause severe
transmission damage or transmission failure.
2020_RAM_PROMASTER_CITY_OM_USA=GUID-7B6A7FCA-79B0-423F-95C5-ED2A949C3D13=1=en=.book Page 88
Page 100 of 350

97
(Continued)
SAFETY
SAFETY FEATURES
Four-Wheel Anti-Lock Brake System (ABS)
The Four-Wheel Anti-Lock Brake System (ABS) is designed
to aid the driver in maintaining vehicle control under
adverse braking conditions. The system operates with a
separate computer to modulate hydraulic pressure, to
prevent wheel lock-up and to help avoid skidding on
slippery surfaces.
The system's pump motor runs during an ABS stop to
provide regulated hydraulic pressure. The pump motor
makes a low humming noise during operation, which is
normal.
The ABS includes an amber ABS Warning Light. When the
light is illuminated, the ABS is not functioning. The system
reverts to standard non-anti-lock brakes. Turning the igni-
tion OFF and ON again may reset the ABS if the fault
detected was only momentary.
WARNING!
• The ABS contains sophisticated electronic equipment that may be susceptible to interference caused by
improperly installed or high output radio transmitting
equipment. This interference can cause possible loss of
anti-lock braking capability. Installation of such equip -
ment should be performed by qualified professionals.
• Pumping of the Anti-Lock Brakes will diminish their effectiveness and may lead to a collision. Pumping
makes the stopping distance longer. Just press firmly
on your brake pedal when you need to slow down or
stop.
• The ABS cannot prevent the natural laws of physics from acting on the vehicle, nor can it increase braking
or steering efficiency beyond that afforded by the
condition of the vehicle brakes and tires or the traction
afforded.
4
2020_RAM_PROMASTER_CITY_OM_USA=GUID-7B6A7FCA-79B0-423F-95C5-ED2A949C3D13=1=en=.book Page 97
Page 101 of 350

98 SAFETY
When you are in a severe braking condition involving the
use of the ABS, you will experience some pedal drop as the
vehicle comes to a stop. This is the result of the system
reverting to the base brake system.
Engagement of the ABS may be accompanied by a pulsing
sensation. You may also hear a clicking noise. These occur-
rences are normal and indicate that the system is functioning
properly.
Electronic Brake Control (EBC) System
Your vehicle is equipped with an advanced Electronic Brake
Control (EBC) system that includes the Brake Assist System
(BAS), Traction Control System (TCS), Hill Start Assist
(HSA), Electronic Stability Control (ESC), Electronic Roll
Mitigation (ERM) and Trailer Sway Control (TSC). All
systems work together to enhance vehicle stability and
control in various driving conditions and are commonly
referred to as ESC.
Brake Assist System (BAS)
The Brake Assist System (BAS) is designed to optimize the
vehicle’s braking capability during emergency braking
maneuvers. The system detects an emergency braking situa -
tion by sensing the rate and amount of brake application and
then applies optimum pressure to the brakes. This can help
reduce braking distances. The BAS complements the
Anti-Lock Brake System (ABS). Applying the brakes very
quickly results in the best BAS assistance. To receive the
benefit of the system, you must apply continuous braking
pressure during the stopping sequence, (do not “pump” the
brakes). Do not reduce brake pedal pressure unless braking
is no longer desired. Once the brake pedal is released, the
BAS is deactivated.
• The ABS cannot prevent collisions, including those
resulting from excessive speed in turns, following
another vehicle too closely, or hydroplaning.
• The capabilities of an ABS equipped vehicle must never be exploited in a reckless or dangerous manner
that could jeopardize the user’s safety or the safety of
others.
WARNING! (Continued)
2020_RAM_PROMASTER_CITY_OM_USA=GUID-7B6A7FCA-79B0-423F-95C5-ED2A949C3D13=1=en=.book Page 98