2020 MERCEDES-BENZ GLS SUV service
[x] Cancel search: servicePage 358 of 549
Symbol
DesignationFunction
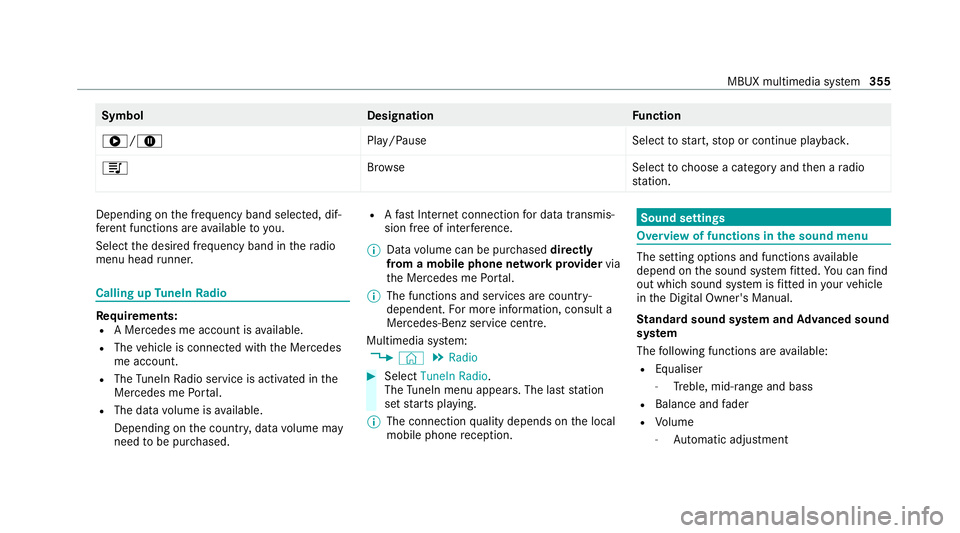
6/8 Play/PauseSelecttostart, stop or continue playbac k.
5 Brows eS electtochoose a category and then a radio
st ation. Depending on
the frequency band selected, dif‐
fe re nt functions are available to you.
Select the desired frequency band in thera dio
menu head runner. Calling up
TuneIn Radio Re
quirements:
R A Mercedes me account is available.
R The vehicle is connected with the Mercedes
me account.
R The TuneIn Radio service is activated in the
Mercedes me Portal.
R The data volume is available.
Depending on the count ry, data volume may
need tobe pur chased. R
Afast Internet connection for data transmis‐
sion free of inter fere nce.
% Data volume can be pur chased directly
from a mobile phone network pr ovider via
th e Mercedes me Portal.
% The functions and services are countr y-
dependent. For more information, consult a
Mercedes-Benz service centre.
Multimedia sy stem:
4 © 5
Radio #
Select TuneIn Radio.
The TuneIn menu appears. The la st station
set starts playing.
% The connection quality depends on the local
mobile phone reception. Sound settings
Overview of functions in the sound menu
The setting options and functions
available
depend on the sound sy stem fitted. You can find
out which sound sy stem is fitted in your vehicle
in the Digital Owner's Manual.
St andard sound sy stem and Advanced sound
sy stem
The following functions are available:
R Equaliser
- Treble, mid-range and bass
R Balance and fader
R Volume
- Automatic adju stment MBUX multimedia sy
stem 355
Page 360 of 549
ASS
YST PLUS se rvice inter val display Fu
nction of the ASS YST PLUS se rvice inter val
displ ay The ASS
YST PLUS service inter val display on the
instrument display pr ovides information on the
re maining time or dis tance be fore the next
service due date.
Yo u can hide this service display using the back
button on the left-hand side of thesteering
wheel.
Depending on how theve hicle is used, the
ASS YST PLUS service inter val display may
shor tenth e service inter val, e.g. in thefo llowing
cases:
R mainly short-dis tance driving
R when the engine is of ten le ftidling for long
periods
R intheeve nt of frequent cold start phases
R vehicles with a diesel particulate filter: in
th eev ent of frequently inter rupted rege nera‐
tion of the diesel particulate filter Mercedes-Benz
recommends avoiding such
operating conditions.
Yo u can obtain information concerning the serv‐
icing of your vehicle from a qualified specialist
wo rkshop, e.g. a Mercedes-Benz Service Centre. Displaying
the service due da te On-board computer:
4 Service 5
ASSYST PLUS
The next service due date is displa yed. #
Toexitth e displa y:press the back button
on the left-hand side of thesteering wheel.
Bear in mind thefo llowing related topic:
R Operating the on-board computer
(/ page 306). Information on
regular maintenance work *
NO
TEPremature wearthro ugh failure to
obser veservice due dates Maintenance
workwhich is not car ried out at
th eright time or incomple tely can le adto
inc reased wear and damage totheve hicle. #
Adhere tothe prescribed service inter‐
va ls. #
Alw ays ha vethe prescribed mainte‐
nance workcar ried out at a qualified
specialist workshop. Special service
requ irements The prescribed service inter
val is based on nor‐
mal operation of theve hicle. Maintenance work
will need tobe per form ed more of ten if theve hi‐
cle is operated under arduous conditions or
increased loads.
The ASS YST PLUS service inter val display is only
an aid. The driver of theve hicle bears responsi‐
bility as rega rdsto whe ther maintenance work
needs tobe per form ed more of tenth an speci‐ Main
tenance and care 357
Page 361 of 549
fi
ed based on the actual operating conditions
and/or loads.
Examples of arduous operating conditions:
R regular city driving with frequent intermedi‐
ate stops
R mainly short-dis tance driving
R frequent operation in mountainous terrain or
on poor road sur faces
R when the engine is of ten le ftidling for long
periods
R operation in particula rly dusty conditions
and/or if air-recirculation mode is frequently
used
In these or similar operating conditions, ha vethe
interior air filter, engine air cleaner, engine oil
and oil filter etc. changed more frequent ly. The
ty re s must be checked more frequently if the
ve hicle is operated under increased loads. Fur‐
th er information can be obtained at a qualified
specialist workshop. Battery disconnection periods
The ASS
YST PLUS se rvice inter val display
can only calculate the service due da tewhen
th e bat tery is connected. #
Notedown the service due date displa yed on
th e instrument display before disconnecting
th e battery (/ page 357). Engine compartment
Opening and closing
the bonnet &
WARNING Risk of accident due todriv‐
ing with the bonn etunlo cked
The bonn etmay open and block your vie w. #
Neverre lease the bonn etwhen driving. #
Before every trip, ensure that the
engine bonn etis loc ked. &
WARNING Risk of accident and inju ry
when opening and closing the bonn et
The bonnet may suddenly drop into the end
position.
There is a risk of injury for an yone in the bon‐
net's range of mo vement. #
Open or close the bonn etonly when
th ere is nobody in the bonn et's range of
mo vement. &
WARNING Danger of bu rns when open‐
ing the bonn et
If yo u open the engine bonn etwhen the
engine has overheated or during a fire inthe
engine compartment, you could come into
contact with hot gases or other escaping
operating fluids. #
Before opening the bonn et, allow the
engine tocool down. #
Intheeve nt of a fire inthe engine com‐
partment, keep the engine bonn et
closed and call thefire service. 358
Maintenance and care
Page 363 of 549
#
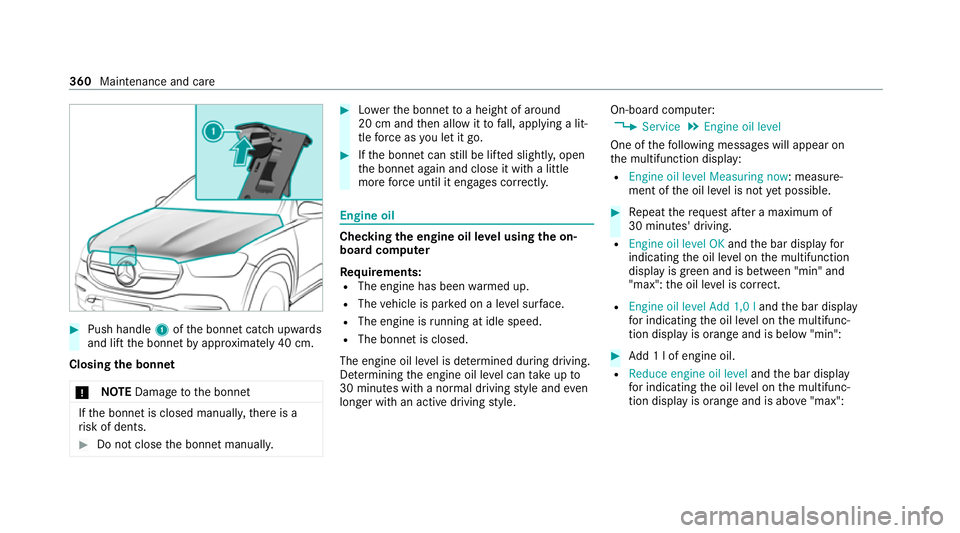
Push handle 1ofthe bonn etcatch up wards
and lift the bonn etby appr oximately 40 cm.
Closing the bonnet
* NO
TEDama getothe bonn et If
th e bonn etis closed manuall y,there is a
ri sk of dents. #
Do not close the bonn etmanually. #
Lowe rth e bonn etto a height of around
20 cm and then allow it tofall, applying a lit‐
tle forc e as you let it go. #
Ifth e bonn etcan still be lif ted slightl y,open
th e bonn etagain and close it with a little
more forc e until it engages cor rectly. Engine oil
Che
cking the engine oil le vel using the on-
board compu ter
Re quirements:
R The engine has been warmed up.
R The vehicle is par ked on a le vel sur face.
R The engine is running at idle speed.
R The bonnet is closed.
The engine oil le vel is de term ined during driving.
De term ining the engine oil le vel can take up to
30 minutes with a normal driving style and even
longer with an active driving style. On-board computer:
4 Service 5
Engine oil level
One of thefo llowing messages will appear on
th e multifunction display:
R Engine oil level Measuring now : measure‐
ment of the oil le vel is not yet possible. #
Repeat there qu est af ter a maximum of
30 minutes' driving.
R Engine oil level OK andthe bar display for
indicating the oil le vel on the multifunction
display is green and is between "min" and
"max": the oil le vel is cor rect.
R Engine oil level Add 1,0 l andthe bar display
fo r indicating the oil le vel on the multifunc‐
tion display is orange and is below "min": #
Add 1 l of engine oil.
R Reduce engine oil level andthe bar display
fo r indicating the oil le vel on the multifunc‐
tion display is orange and is abo ve"max": 360
Maintenance and care
Page 364 of 549
#
Drain off any excess engine oil that has been
added. Todo so, consult a qualified specialist
wo rkshop.
R For engine oil level turn on ignition #
Switch on the ignition tocheck the engine oil
le ve l.
R Engine oil level System inoperative : The oil
le ve l sensor is defective or not connec ted. #
Consult a qualified specialist workshop.
R Engine oil level System currently unavail. #
Close the bonn et.
To pping up engine oil &
WARNING Risk of bu rns from hot com‐
ponent parts in the engine compartment
Cer tain component parts in the engine com‐
partment can be very hot, e.g. the engine,
th e cooler and parts of theex haust sy stem. #
Allow the engine tocool down and only
to uch co mponent parts described in
th efo llowing. &
WARNING Risk offire and injury from
engine oil
If engine oil comes into con tact wi thhot
component parts in the engine compart‐
ment, it may ignite. #
Make sure that no engine oil is spilled
next tothefiller opening. #
Allow the engine tocool off and thor‐
oughly clean the engine oil from compo‐
nent parts before starting theve hicle. *
NO
TEEngine dama gecaused byan
incor rect oil filter, incor rect oil or addi‐
tives #
Do not use engine oils or oil filters
which do not cor respond tothe specifi‐
cations explicitly prescribed forthe
service inter vals. #
Follow the instructions on the service
inter val display forch anging the engine
oil and obser vethe prescribed change
inter vals. #
Do not use additives. *
NO
TEDama gecaused bytopping up too
much engine oil To
o much engine oil can damage the engine
or the catalytic con verter. #
Have excess engine oil remo ved at a
qu alified specialist workshop. %
Depending on driving style, theve hicle con‐
sumes up to0.8 lof oil per 1000 km. The oil
consum ption may be higher than this when
th eve hicle is new or if you frequently drive
at high engine speeds.
% Depending on the engine, the cap may be
ins talled in the engine compartment in dif‐
fe re nt locations. Maintenance and care
361
Page 371 of 549
R
Do not use car wash programmes with a final
hot wax treatment.
R Do not use paint cleane rs, buf fing or polish‐
ing products, gloss preser vers, e.g. wax.
In theev ent of paintwork damage:
R Alw ays ha vepaintwork repairs car ried out at
a qu alified specialist workshop.
R Make sure thera dar sensors function
(/ page 224). Note
s on cleaning decorative foils Obser
vethe no tes on matt finish care in the
ch ap ter "No tes on paintwork/matt finish paint‐
wo rkcare" (/ page 367). They also app lyto
matt decorative foils.
Obser vethe no tes on cleaning decorative foils to
avo idvehicle damage.
Cleaning R For cleaning, use plenty of water and a mild
cleaning agent without additives or abrasive
subs tances, e.g. a car sha mpoo appr ovedfor
Mercedes-Benz. R
Remo vedirt immediatel y,where possible,
whilst avoiding rubbing too hard. There is
ot herwise a risk of damaging the decorative
fo il ir reparabl y.
R Ifth ere is dirt on thefinish or if the decora‐
tive foil is dull: use thePa int Cleaner recom‐
mended and appr oved for Mercedes-Benz.
R Insect remains: soak with insect remo ver and
ri nse off the treated areas af terw ards.
R Bird droppings: soak with water and rinse off
af te rw ards.
R Toprev ent waterst ains, dry a foil-wrapped
ve hicle with a soft, absorbent clo thafter
ev ery car wash.
Av oiding dama getothe decorative foil
R The service life and colouring of decorative
fo ils are impaired by:
- sunlight
- temp erature, e.g. hot air blo wer
- weather conditions
- stone chippings and dirt
- chemical cleaning agents -
oily products
R Do not use polish on matt decorative foil.
Po lishing will ha vethe ef fect of shining the
fo il-wrapped sur face.
R Do not treat matt or stru ctured deco rative
fo ils with wax.Pe rm anent stains may occur.
Sc ratches, cor rosive deposits, areas af fected by
cor rosion and damage caused byincor rect care
cannot al ways be comple tely repaired. In such
cases, visit a qualified specialist workshop.
Yo u can obtain more information on care and
cleaning products from the manufacturer.
In the case of foil-wrapped sur faces, optical dif‐
fe re nces may occur between the sur faces that
we renot pr otected bya decorative foil af ter
re moving a decorative foil.
% Have wo rkor repairs todecorative foils car‐
ri ed out at a qualified specialist workshop,
e.g. in a Mercedes-Benz Service Centre. 368
Maintenance and care
Page 376 of 549
#
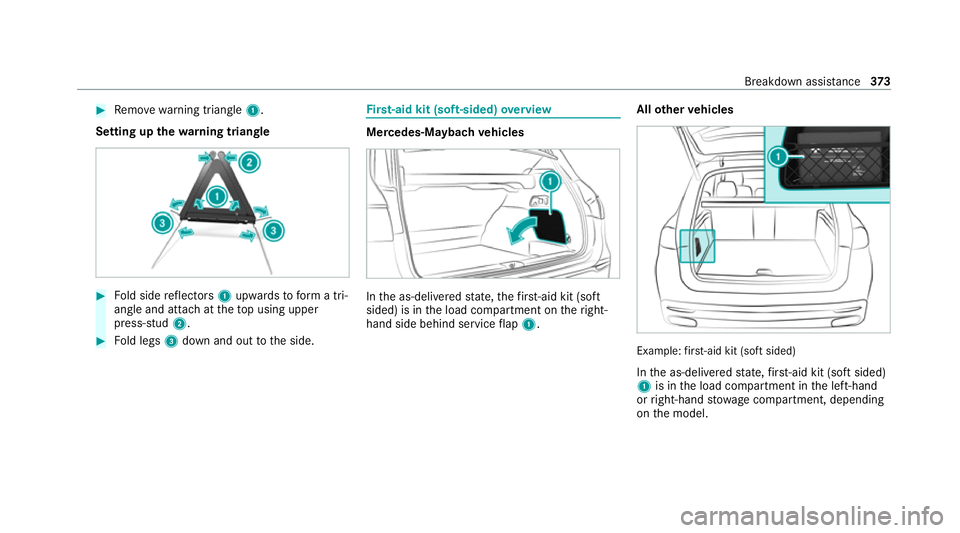
Remo ve wa rning triangle 1.
Setting up thewa rning triangle #
Fold side reflectors 1upwards toform a tri‐
angle and attach at theto p using upper
press-stud 2. #
Fold legs 3down and out tothe side. Fi
rs t-aid kit (soft-sided) overview Mercedes‑M
aybach vehicles In
the as-delivered state, thefirs t-aid kit (soft
sided) is in the load compartment on theright-
hand side behind service flap 1. All
other vehicles Example:
firs t-aid kit (soft sided)
In the as-delivered state, firs t-aid kit (soft sided)
1 is in the load compartment in the left-hand
or right-hand stowage compartment, depending
on the model. Breakdown assis
tance 373
Page 382 of 549
&
WARNING Risk of accident from driving
wi th sealed tyres
A tyre temp orarily sealed with tyre sealant
impairs the handling characteristics and is
not suitable for higher speeds. #
Adapt your driving style according lyand
drive carefull y. #
Do not exceed the maximum speed
limit with a tyre that has been repaired
using tyre sealant. #
Obser vethe maximum permissible speed for
a tyre sealed with tyre sealant 80 km/h.
* NO
TEStaining from leaking tyre sealant Af
ter use, excess tyre sealant may leak out
from thefilling hose. #
Therefore, place thefilling hose in the
plastic bag that con tained the TIREFIT
kit. +
ENVIRONMEN
TALNO TEEnvironmental
pollution caused byenvironmen tally ir re‐
sponsible disposal Ty
re sealant contains polluta nts. #
Have the tyre sealant bottle disposed of
professionall y,e.g. at a Mercedes-Benz
Service Centre. #
Stow th e tyre sealant bottle and the tyre
inflation compressor. #
Pull away immediatel y. #
Stop driving af ter appro ximately ten minu tes
and check the tyre pressure using the tyre
inflation compressor.
The tyre pressure must now be at least
13 0 kPa (1.3 bar/19 psi). &
WARNING Risk of accident due tothe
specified tyre pressure not being
attained
If th e specified tyre pressure is not reached,
th e tyre is too badly damaged. The tyre seal‐
ant cannot repair the tyre in this ins tance. The braking and driving
characteristics may
be great lyimpaired. #
Do not continue driving. #
Consult a qualified specialist workshop. Countries
that ha veMercedes-Benz
Service24h: you will find a sticke r with thete le‐
phone number, e.g. on the B‑pillar on the driver's
side. #
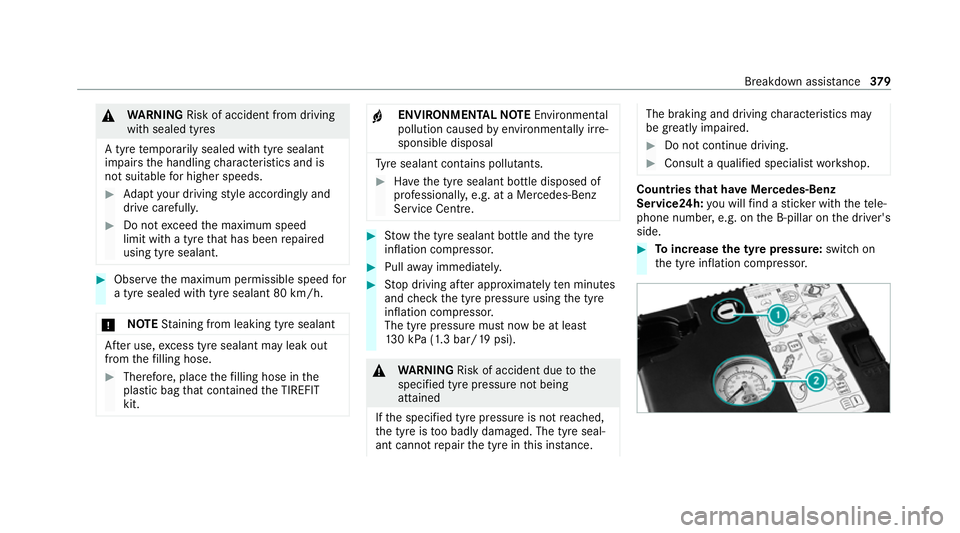
Toincrease the ty repressure: switch on
th e tyre inflation compressor. Breakdown assis
tance 37 9