2020 MERCEDES-BENZ GLE COUPE change time
[x] Cancel search: change timePage 421 of 757
#
Tosend a haza rdwa rning yourself: tap on
th e media display when the map is shown.
The navigation menu is shown. #
Select ¡. #
Select Report traffic incident.
A prom ptis shown. #
Select Yes.
The Thank you for supporting accident pre-
vention. message appears. Ro
ute guidance with augmented reality Overview of
route guidance with augmented
re ality &
WARNING Risk of accident and inju ryas
a re sult of distraction, incor rect depic‐
tion or wrong interpr etation of the dis‐
play
The camera image of the augmented reality
display is not suitable as a guide for driving. #
Alw ayske ep an eye on the actual traf fic
situation. #
Avoid extended obser vation of the cam‐
era image. During
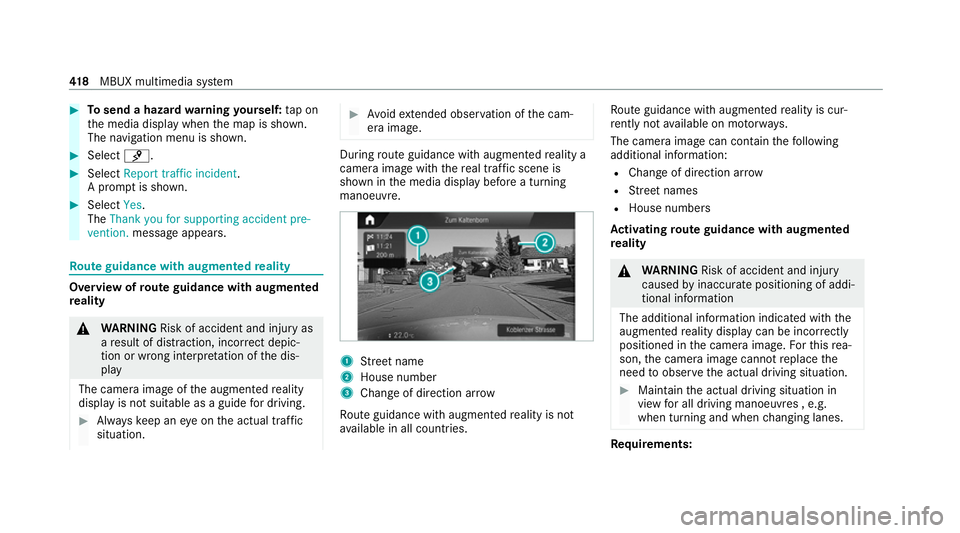
route guidance with augmented reality a
camera image with there al traf fic scene is
shown in the media display before a turning
manoeuvre. 1
Street name
2 House number
3 Change of di rection ar row
Ro ute guidance with augmented reality is not
av ailable in all countries. Ro
ute guidance with augmented reality is cur‐
re ntly not available on mo torw ays.
The camera image can contain thefo llowing
additional information:
R Change of direction ar row
R Street names
R House numbe rs
Ac tivating route guidance with augmented
re ality &
WARNING Risk of accident and inju ry
caused byinaccura tepositioning of addi‐
tional information
The additional information indicated with the
augmen tedre ality display can be incor rectly
positioned in the camera image. Forth is rea‐
son, the camera image cann otreplace the
need toobser vethe actual driving situation. #
Maintain the actual driving situation in
view for all driving manoeuvres , e.g.
when turning and when changing lanes. Re
quirements: 41 8
MBUX multimedia sy stem
Page 424 of 757
Ro
tating the map #
With two fingers, rotate anti-clockwise or
clo ckwise on the media display or theto uch‐
pad.
Selecting the map orientation
Multimedia sy stem:
4 © 5
Navigation 5
Z
5 Advanced #
Select View. #
Select Map orientation. #
Select an option.
The 003Bdot indicates the cur rent setting.
The following options are available:
R 2D heading up option:the 2D map view is
aligned tothe direction of tra vel.
R 2D north up option:the 2D map view is
displa yed so that no rth is alw ays at the
to p.
R 3Doption: the 3D map view is aligned to
th e direction of tra vel.
or #
Using quick- access: repeatedly tap or press
on theÄ compass symbol on the map.
The view changes in the sequence 3D,2D
heading up to2D north up .
If th e map is mo ved, it can switch between
3D and 2D north up .
Selecting POI symbols for the map display
Multimedia sy stem:
4 © 5
Navigation 5
Z
POIs include restaurants and ho tels, forex am‐
ple. These can be displa yed as symbols on the
map. Not all POIs are available everywhere.
Pe rsonal POIs are destinations which you ha ve
sa ve d on a USB device, forex ample.
% The display of POI symbols on the map can
be activated or deactivated as a favo urite. #
Toswitch on/off using quick- access: if
av ailable, swit chPOI symbols on or off.
The POI symbols forth e selected categories
are shown on the map.
or #
Toswitch on/off in the menu: select
Advanced. #
Select View. #
Select Map elements. #
Select POI symbols 0048.
The POI SYMBOLS menu is shown. #
Swit chDisplay POIs on or off.
Selecting ca tegories #
Select 0048inthePOI SYMBOLS All catego-
ries menu. #
Switch Show all on or off.
When the option is switched on, the POI sym‐
bols for all categories are shown on the map.
or #
Select the categories and sub-categories (if
av ailable) 0048. #
Activate or deacti vate the categories.
The POI symbols forth e selected categories
are shown on the map. MBUX multimedia sy
stem 421
Page 426 of 757
Multimedia sy
stem:
4 © 5
Navigation 5
Z
5 Advanced #
Select View. #
Select Text information. #
Activate Next intersecting street .
The display button is acti vated. If the option
is switched on and the journey continues
without route guidance, the name of the next
intersecting stre et will be displa yed at the
upper edge of the displa y.
Displaying the map version
Multimedia sy stem:
4 © 5
Navigation 5
Z
5 Advanced #
Select View. #
Select Map version .
The de tail information is displa yed.
% The online map update service from
Mercedes me connect can be used to
update the map data (/ page 424). A message is shown in
the media display
when a new map version is available.
% Info rm ation about new versions of the digital
map can be obtained from a Mercedes-Benz
service cent re.
Overview of avoiding an area for the route
Yo u can define areas along a route that you
wo uld like toavoid.
Mo torw ays or multi-lane expressw ays, which are
ro uted thro ugh an area tobe avo ided are taken
into account forth ero ute.
Av oiding a new area for the route
Multimedia sy stem:
4 © 5
Navigation 5
Z
5 Advanced 5
Route 5
Avoid options
5 Avoid areas #
Select Avoid new area. #
Tostart in the map: selectUsing map. #
Movethe map (/ page 420). #
Tostart via destination sear ch:select Via
address entry. #
Enter the address (/ page 389). #
Select the destination in the list or accept
with 0076.
The map appears. #
Toshow an area: tap or press on the control
element.
A redre ctangle appea rs. This designates the
area that should be avoided. #
Tochange the map scale: movetwo fingers
apart or toget her on the media display or on
th eto uchpad.
The map is zoomed in or out. #
Toset an area: select0076.
The Avoid area has been set. message
appears. The area is entered into the list.
Changing an area tobe avo ided
Multimedia sy stem:
4 © 5
Navigation 5
Z
5 Advanced 5
Route 5
Avoid options
5 Avoid areas #
Select an area in the list. #
Select Edit. MBUX multimedia sy
stem 423
Page 427 of 757
#
Tomo vean area on the map: swipe in any
direction on the control element. #
Tochange the size of the area: tap or press
on the control element. #
Swipe up or down on the control element. #
Select 0076.
The Avoid area has been set. message
appears. The area is entered into the list. #
Totake account of an area for the route:
select an area from the list. #
Activate Avoid area.
The display button is acti vated.
If ro ute guidance is active, a new route is cal‐
culated.
If th ere is no route yet,th e setting is car ried
ove rto the next route guidance.
The route can include an area that is tobe
av oided in thefo llowing cases:
R the destination is located in an area that
is to be avo ided.
R thero ute includes mo torw ays or multi-
lane expressw ays which pass thro ugh an
area tobe avo ided. R
there is no sensible alternative route.
Deleting an area
Multimedia sy stem:
4 © 5
Navigation 5
Z
5 Advanced 5
Route 5
Avoid options
5 Avoid areas #
Todel ete an area: select an area in the list. #
Select Delete. #
Confirm the prom ptwith Yes. #
Todel ete all areas: if at least two areas to
av oid are set, select Delete all. #
Confirm the prom ptwith Yes.
Map data upda teoverview
Up dating at the Mercedes-Benz se rvice
centre
The digital maps generated bythe map software
become outdated in the same way as co nven‐
tional road maps. Optimal route guidance can
on ly be pr ovided bythe navigation sy stem in
conjunction with the most up-to-date map data.
Information about new versions of the digital map can be obtained from a Mercedes-Benz
service cent
re.
Yo u can ha veupdates tothe digital map imple‐
mented there.
% Additional costs can be incur red in this con‐
nection.
Online map update
The online map update service from Mercedes
me connect can be used toupdate the map
data.
Re quirements:
R Mercedes me connect is available.
R You ha vea user account forth e Mercedes
me por tal.
R The service is available.
R The service has been activated.
% The online map update service is not availa‐
ble in all countries.
The following options are available forthe
update:
R For one region (automatic map update) 424
MBUX multimedia sy stem
Page 435 of 757
#
Activate Automatic video recording.
The display button is acti vated. When the
ve hicle is star ted, video recording starts
automaticall y.
% This function is not available in all countries. Te
lephone Te
lephony Note
s ontelephony &
WARNING Risk of di stra ction from oper‐
ating integrated communication equip‐
ment while theve hicle is in motion
If yo u operate communication equipment
integrated in theve hicle when driving, you
will be distracted from the tra ffic situation.
This could also cause youto lose control of
th eve hicle. #
Only operate this equipment when the
traf fic situation permits. #
Ifyo u cannot be sure of this, stop the
ve hicle whilst paying attention toroad and traf
fic conditions and ope rate the
equipment with theve hicle stationar y. &
WARNING Risk of an accident from
ope rating mobile communication equip‐
ment while theve hicle is in motion
Mobile communications devices distract the
driver from the traf fic situation. This could
also cause the driver tolose control of the
ve hicle. #
Asthe driver, only operate mobile com‐
munications devices when theve hicle is
st ationar y. #
As a vehicle occupant, only use mobile
communications devices in the areas
intended forth is purpose, e.g. in the
re ar passenger compartment. Yo
u must obse rveth e legal requirements forthe
country in whi chyou are cur rently driving when
operating mobile communication equipment in
th eve hicle. &
WARNING Risk of inju rydue toobjects
being stowed inco rrectly
If objects in theve hicle interior are stowed
incor rectly, they can slide or be thrown
around and hit vehicle occupants. In addi‐
tion, cup holders, open stowage spaces and
mobile phone recep tacles cannot al ways
re tain all objects they contain.
The reis a risk of injur y,particularly in the
ev ent of sudden braking or a sudden change
in direction. #
Alw aysstow objects so that they can‐
not be throw n around in su chsitua‐
tions. #
Alw ays make sure that objects do not
pr otru de from stowage spaces, luggage
nets or stowage nets. #
Close the loc kable stow age spaces
before starting a journe y. #
Alw aysstow and secure heavy, hard,
poin ted, sharp-edged, fragile or bulky
objects in the boot/load compartment. 432
MBUX multimedia sy stem
Page 437 of 757
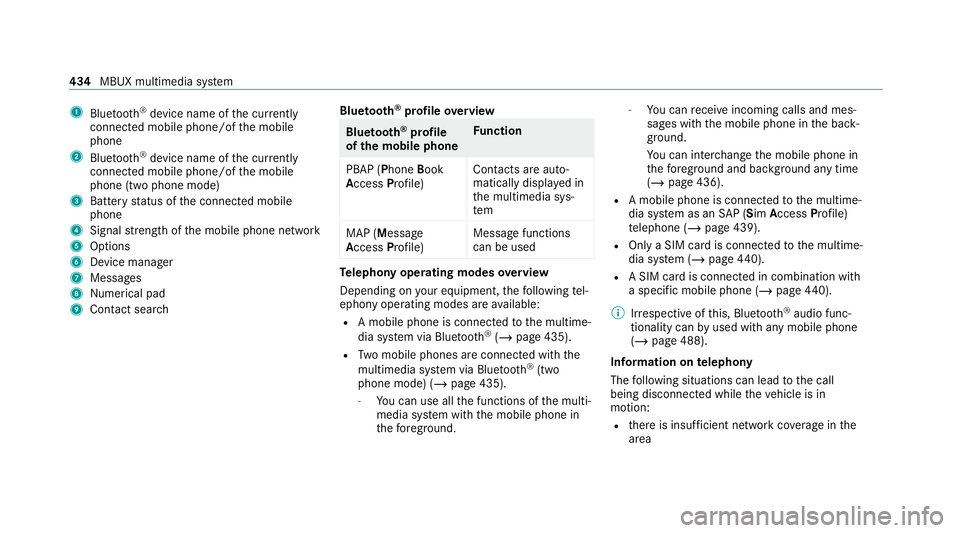
1
Bluetoo th®
device name of the cur rently
connected mobile phone/of the mobile
phone
2 Blue tooth ®
device name of the cur rently
connected mobile phone/of the mobile
phone (two phone mode)
3 Battery status of the connected mobile
phone
4 Signal stre ngth of the mobile phone network
5 Options
6 Device manager
7 Messages
8 Nume rical pad
9 Contact sea rch Blue
tooth ®
profile overview Blue
tooth ®
profile
of the mobile phone Fu
nction
PBAP (Phone Book
Access Profile) Contacts are auto‐
matically displa
yed in
th e multimedia sys‐
tem
MAP (Message
Access Profile) Message functions
can be used Te
lephony operating modes overview
Depending on your equipment, thefo llowing tel‐
ephony operating modes are available:
R A mobile phone is connec tedto the multime‐
dia sy stem via Blue tooth®
(/ page 435).
R Two mobile phones are connected with the
multimedia sy stem via Blue tooth®
(two
phone mode) (/ page 435).
- You can use all the functions of the multi‐
media sy stem with the mobile phone in
th efo re ground. -
You can recei veincoming calls and mes‐
sages with the mobile phone in the back‐
ground.
Yo u can inter change the mobile phone in
th efo re ground and bac kground any time
(/ page 436).
R A mobile phone is connected tothe multime‐
dia sy stem as an SAP (Sim Access Profile)
te lephone (/ page 439).
R Only a SIM card is connec tedto the multime‐
dia sy stem (/ page440).
R A SIM card is connected in combination wi th
a specific mobile phone (/ page440).
% Irre spective of this, Blue tooth®
audio func‐
tionality can byused with any mobile phone
(/ page 488).
Information on telephony
The following situations can lead tothe call
being disconnected while theve hicle is in
motion:
R there is insuf ficient network co verage inthe
area 434
MBUX multimedia sy stem
Page 443 of 757
%
Ifth e mobile phone is connected as a car
phone, calls cann otbe made on the mobile
phone, since its SIM card is being used by
th eve hicle.
Switching between Blue tooth ®
te lephony
and car telephony via Blue tooth ®
profile SAP #
Toswitch toBlue tooth ®
te lephon y:select
th e0062 symbol in the line of the mobile
phone in theí device manager. #
Select Use as Bluetooth phone.
The mobile phone is no longer connected via
Blue tooth ®
profile SAP but via the Blue tooth®
HFP profile (Hands FreePro file). #
Tochange tocar telephony via Blue‐
to oth ®
profile SAP:select the0062 symbol
in the line of the mobile phone in theí
device manager. #
Select Use as car phone.
The mobile phone is connected using the
SA P Blue tooth®
profile.
% This option is only shown if the mobile phone
supports the Blue tooth®
SA P profile. Setting up car
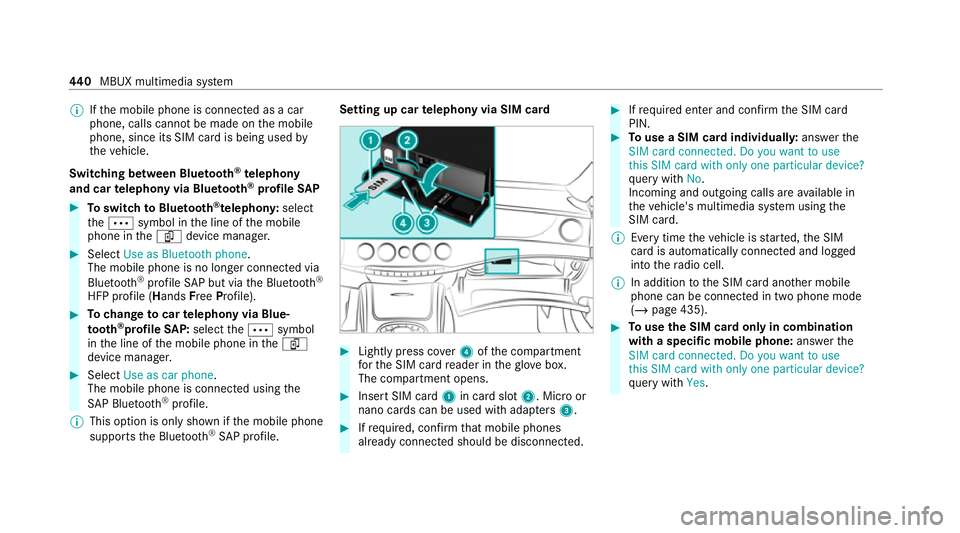
telephony via SIM card #
Light lypress co ver4 ofthe compartment
fo rth e SIM card reader in theglove box.
The compartment opens. #
Insert SIM card 1in card slot 2. Micro or
nano cards can be used with adap ters 3 . #
Ifre qu ired, con firm that mobile phones
already connec ted should be disconnec ted. #
Ifre qu ired enter and con firm the SIM card
PIN. #
Touse a SIM card individuall y:ans werthe
SIM card connected. Do you want to use
this SIM card with only one particular device?
qu ery with No.
Incoming and outgoing calls are available in
th eve hicle's multimedia sy stem using the
SIM card.
% Every time theve hicle is star ted, the SIM
card is automatically connected and logged
into thera dio cell.
% In addition tothe SIM card ano ther mobile
phone can be connected in two phone mode
(/ page 435). #
Touse the SIM card only in combination
with a specific mobile phone: answerthe
SIM card connected. Do you want to use
this SIM card with only one particular device?
qu ery with Yes. 440
MBUX multimedia sy stem
Page 444 of 757
#
Select a mobile phone that has been author‐
ised or connect a new mobile phone.
Incoming and outgoing calls are available in
th eve hicle's multimedia sy stem using the
SIM card.
% The SIM card only logs into thera dio cell
when the associated mobile phone is con‐
nected. The associated mobile phone can be
fi xe d in the settings forth e SIM card
(/ page 441).
Checking thest atus of the SIM card PIN
Multimedia sy stem:
4 © 5
Phone
The symbol for car telephony appears with an
ex clamation mark if re-entering the PIN is
requ ired. #
Select theí device manager. #
Select the name of the mobile phone or the
SIM card. #
Enter the SIM card PIN and confi rm.Calling up
the car telephony settings
Multimedia sy stem:
4 © 5
Phone 5
Car phone 5
Z #
Select the desired settings.
The following settings are available:
R SIM card (/page 441)
R Withhold phone number (/page 442)
R Call waiting (/page 442)
R Select network provider (/page 442)
R Call forwardi ng(/ page 442)
R Data usage, voice (/page 442)
Setting the SIM card
Multimedia sy stem:
4 © 5
Phone 5
Car phone 5
Z
5 SIM card
The following options are available: #
Tosave a PIN: pressthe button.
The LED symbol lights up. The SIM card PIN
is sa ved. #
Tore-enter a PIN: the PIN is entered auto‐
maticall y. #
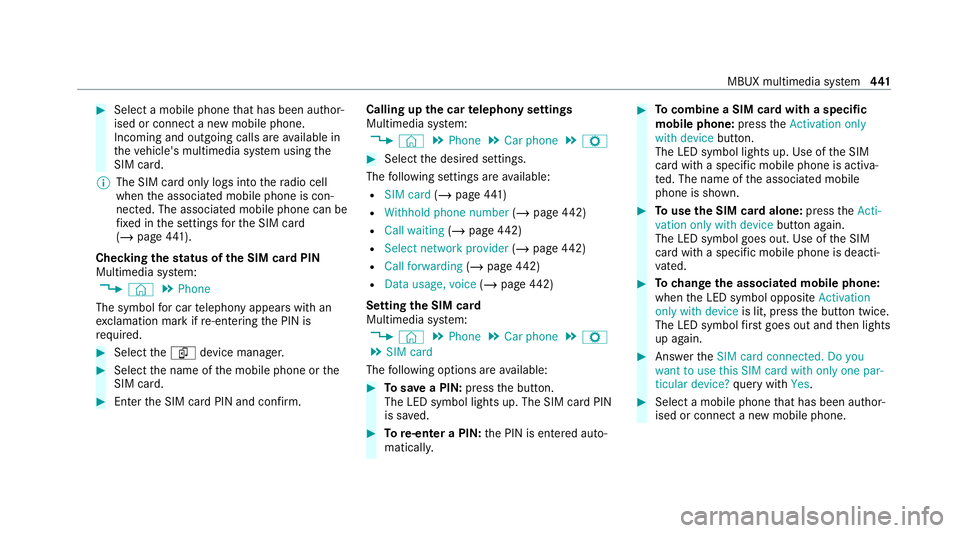
Tocombine a SIM card with a specific
mobile phone: presstheActivation only
with device button.
The LED symbol lights up. Use of the SIM
card with a specific mobile phone is activa‐
te d. The name of the associated mobile
phone is shown. #
Touse the SIM card alone: presstheActi-
vation only with device button again.
The LED symbol goes out. Use of the SIM
card with a specific mobile phone is deacti‐
va ted. #
Tochange the associa ted mobile phone:
when the LED symbol opposite Activation
only with device is lit, pressthe button twice.
The LED symbol firs t goes out and then lights
up again. #
Answer theSIM card connected. Do you
want to use this SIM card with only one par-
ticular device? query with Yes. #
Select a mobile phone that has been author‐
ised or connect a new mobile phone. MBUX multimedia sy
stem 441