Page 337 of 441

#
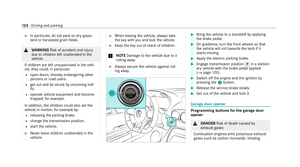
Fitthe new wheel (/ page 334).Fi
tting a new wheel Re
quirements:
R The wheel is remo ved (/ page 333). &
WARNING Risk of accident from losing a
wheel
Oiled, greased or damaged wheel bolt/wheel
nut thre ads or wheel hub/wheel mounting
bolt thre ads can cause the wheel bolts/
wheel nuts tocome loose.
As a result, you could lose a wheel while driv‐
ing. #
Never oil or grease theth re ads. #
Intheeve nt of damage totheth re ads,
con tact a qualified specialist workshop
immediatel y. #
Have the damaged wheel bolts or dam‐
aged hub thre ads replaced. #
Do not continue driving. #
Obser vethe information on thech oice of
tyres (/ page 325).
Fo r tyres with a specified direction of rotation,
an ar row on the side wall of the tyre indicates
th e cor rect dire ction of rotation. Obse rvethe
direction of rotation when fitting.
* NO
TEDama getothe ceramic-brake disc
when changing a wheel Mercedes
-AMG vehicles with cera mic-
brake discs: during remo val and reposition‐
ing of the wheel, the wheel rim can strike the
ceramic-brake disk and damage it. #
Take particular care. #
Ask ano ther person for assi stance or
use a second centring pin. #
Slide the wheel tobe mounted onto the cen‐
tring pin and push it on. #
Notes on fitting an eme rgency spare wheel
(/ page 335). &
WARNING Risk of injury from tightening
wheel bolts and nuts
If yo u tighten the wheel bolts or wheel nuts
when theve hicle is raised, the jack could tip. #
Only tighten wheel bolts or wheel nuts
when theve hicle is on the ground. #
Be sure toobser vethe instructions and
saf ety no tes on "Changing a wheel"
(/ page 325). #
For saf etyre asons, only use wheel bolts
which ha vebeen appr ovedby Mercedes-
Benz and forth e wheel in question. #
Tighten the wheel bolts evenly in a diagonal
pattern in the order indicated until they are
fi nger-tight. #
Unscr ew the cent ring pin. #
Tighten the last wheel bolt until it is finger-
tight. #
Lowe rth eve hicle (/ page 335). 334
Wheels and tyres
Page 338 of 441

Lo
weri ngtheve hicle af ter a wheel change Re
quirements:
R The new wheel has been fitted
(/ page 334). #
Tolowe r the vehicle: turnthe crank of the
jack anti-clo ckwise until theve hicle is once
again standing firm lyon the ground. #
Tighten the wheel bolts evenly in a diagonal
pattern in the order indicated 1to5 with
a maximum of 80 Nm. #
Tighten the wheel bolts evenly in a diagonal
pattern in the order indicated 1to5 the
specified tightening torque of 180 Nm. &
WARNING Risk of injury thro ugh incor‐
re ct tigh tening torque
The wheels could come loose if the wheel
bolts or wheel nuts are not tightened tothe
prescribed tightening torque. #
Ensu rethat the wheel bolts or nuts are
tightened tothe prescribed tightening
to rque. #
Ifyo u are not sure, do not mo vethe
ve hicle. Consult a qualified specialist
wo rkshop and ha vethe tightening tor‐
qu ech ecked immediately. #
Check the tyre pressure of the newly fitted
wheel and adjust it if necessa ry. #
Vehicles with a tyre pressure monitoring
sy stem: restart the tyre pressure monitoring
sy stem (/ page 325).
Exception: the new wheel is an emer gency
spa rewheel. Emer
gency spare wheel Note
s onthe emer gency spare wheel &
WARNING Risk of accident caused by
incor rect wheel and tyre dimensions
The wheel or tyre size and the tyre type of
th e emer gency spa rewheel or spare wheel
and the wheel tobe replaced may dif fer. The
emer gency spa rewheel or spare wheel can
significantly impair driving characteristics of
th eve hicle.
To preve nt hazardous situations: #
Drive carefully. #
Neverfit more than one emer gency
spa rewheel or spare wheel that dif fers
in size. #
Only use an emer gency spa rewheel or
spare wheel brief ly. #
Do not deacti vate ESP ®
. #
Have the emer gency spa rewheel or
spare wheel of a dif fere nt size replaced
at the nearest qualified specialist work‐ Wheels and tyres
335
Page 339 of 441

shop. The new wheel must ha
vethe
cor rect dimensions. Obser
vethefo llowing no tes on fitting an emer‐
ge ncy spa rewheel:
R Check the tyre pressure of the emer gency
spa rewheel fitted. Co rrect the pressure as
necessar y.
R The maximum permissible speed with an
emer gency spa rewheel fitted is 80 km/h.
R Do not fit th e emer gency spa rewheel with
sn ow ch ains.
R Replace the emer gency spa rewheel af ter six
ye ars at the latest, rega rdless of wear.
% Ve
hicles with a tyre pressure monitoring
sy stem: if an emer gency spa rewheel is fit‐
te dth e tyre pressure monitoring sy stem can‐
not function reliabl y.Fo r a few minutes af ter
an emer gency spa rewheel is fitted, the sys‐
te m may still display the tyre pressure of the
re mo ved wheel. Only restart the sy stem
again when the emer gency spa rewheel has
been replaced with a new wheel. Be sure
toalso obse rveth efo llowing fur ther
re lated subjects:
R Notes on tyre pressure (/ page 322)
R Tyre pressure table (/ page 323)
R Notes on fitting tyres (/ page 325) Inflating
the emer gency spare wheel *
NO
TEOverheating due tothe tyre infla‐
tion compressor running too long #
Do not runth e tyre inflation compres‐
sor for longer than ten minu tes without
inter ruption. Re
quirements:
Comply with the manufacturer's saf ety no tes on
th est icke r of the emer gency spa rewheel and on
th e tyre inflation compressor. #
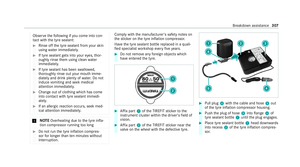
Remo vesticke r with the label 80 km/h from
th e tyre inflation compressor housing and
af fix it tothe instrument clus ter within the
driver's field of vision. #
Remo vethe tyre inflation compressor from
th estow agewell under the boot floor .
(/ page 306) #
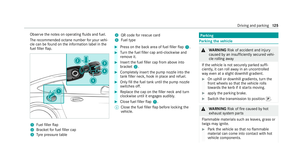
Pull filler hose 1and plug 3out of the tyre
inflation compressor housing. #
Insert plug 7offiller hose 1inthe soc ket
on the tyre inflation compressor and then
turn it until plug 7engages. #
Unscr ew the cap from theva lve on the emer‐
ge ncy spa rewheel. #
Screw union nut 2offiller hose 1onto
va lve. 336
Wheels and tyres
Page 340 of 441

#
Make sure on and off switch 4ofthe tyre
inflation compressor is set to0. #
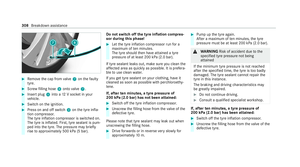
Insert plug 3in a soc ket in your vehicle.
R Cigar ette lighter soc ket
R 12V soc ket (/ page 89).
R Obse rveth e no tes on the cigar ette lighter in
th e Digital Owner's Manual
R Obser vethe no tes on soc kets (/ page 89). #
Press thest art/ stop button once toswitch
on the po wer supp ly. (/ page 104) #
Press On/Off switch 4onthe tyre inflation
compressor toI.
The tyre inflation compressor is switched on.
The tyre is inflated. The tyre pressure is
shown on manome ter5. #
Pump the tyre tothe specified tyre pressure.
% The specified tyre pressure is stated on the
label of the emer gency spa rewheel. #
When the specified tyre pressure has been
re ached, press on and off swit ch4 onthe
tyre inflation compressor to0.
The tyre inflation compressor is switched off. #
Press thest art/ stop button toswitch off the
po we r supp ly. #
Ifth e tyre pressure is higher than the speci‐
fi ed pressure, press pressure release valve
bu tton 6until the cor rect tyre pressure has
been reached. #
Unscr ew union nut 2offiller hose 1from
th eva lve. #
Screw theva lve cap of the emer gency spa re
wheel onto theva lve again. #
Stow filler hose 1and plug 3inthe lo wer
section of the tyre inflation compressor
housing. #
Stow th e tyre inflation compressor in the
ve hicle. Wheels and tyres
337
Page 341 of 441

Note
s ontech nical data
The tech nical da tawa s de term ined in accord‐
ance with EU Directives. The data stated only
applies tovehicles with standard equipment. Yo u
can obtain fur ther information from a Mercedes-
Benz Service Centre.
Only for ce rtain countries: you can find vehi‐
cle-specific vehicle data in the EC-Certificate of
Conformity (CERTIFIC ATE OF CONFORMITY).
These documents are deli vered with your vehi‐
cle. On-board electronics
Note
s on tampering with the engine elec‐
tronics *
NO
TEPremature wearthro ugh improper
main tenance Improper maintenance may cause
vehicle
components towe ar more quickly and the
ve hicle's operating permit may be in valida‐
te d. #
Alw ays ha vewo rkon the engine elec‐
tronics and related components car ried
out at a qualified specialist workshop. Ra
dio equipment appr ovals for the vehicle
comp onents
Manufacturer information about radio-based
ve hicle components can be found using thekey
wo rd"Radio operating permits", in the Digital
Owner's Manual in theve hicle, on the internet
and in the app. Ve
hicle identification plate, VIN and engine
number overview
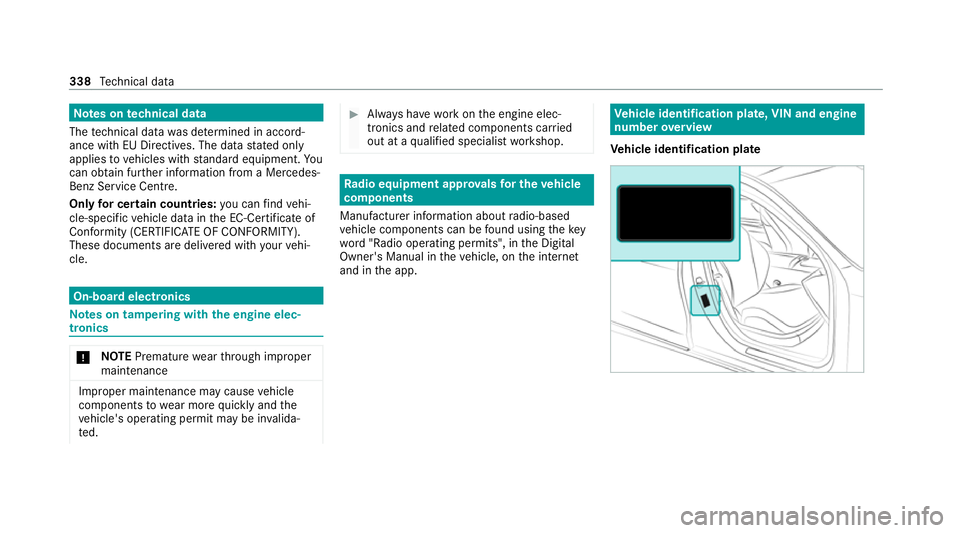
Ve hicle identification plate 338
Tech nical da ta
Page 342 of 441
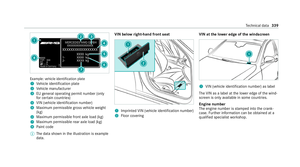
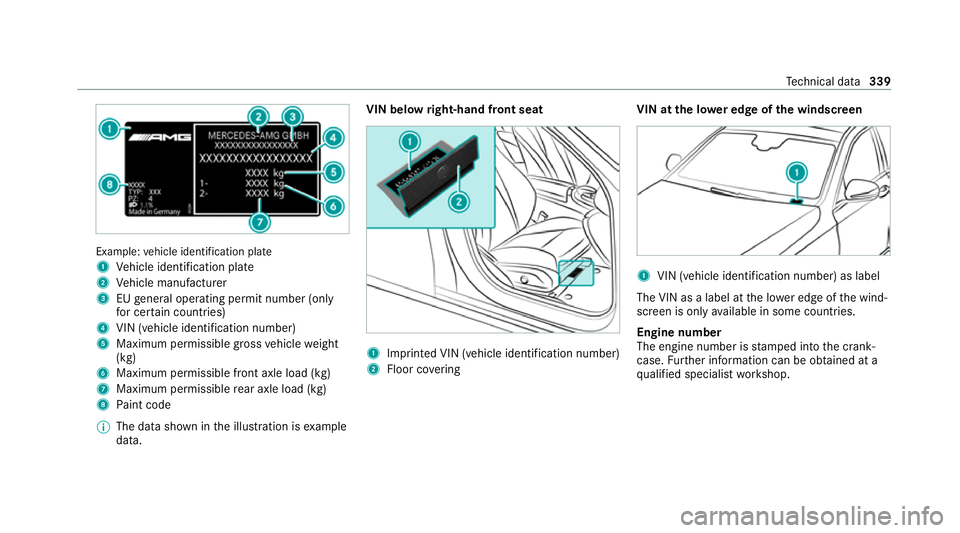
Example:
vehicle identification plate
1 Vehicle identification plate
2 Vehicle manufacturer
3 EUgeneral operating pe rmit number (only
fo r cer tain countries)
4 VIN (vehicle identification number)
5 Maximum permissible gross vehicle weight
(kg)
6 Maximum permissible front axle load (kg)
7 Maximum permissible rear axle load (kg)
8 Paint code
% The data shown in the illustration is example
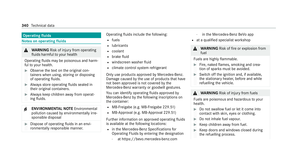
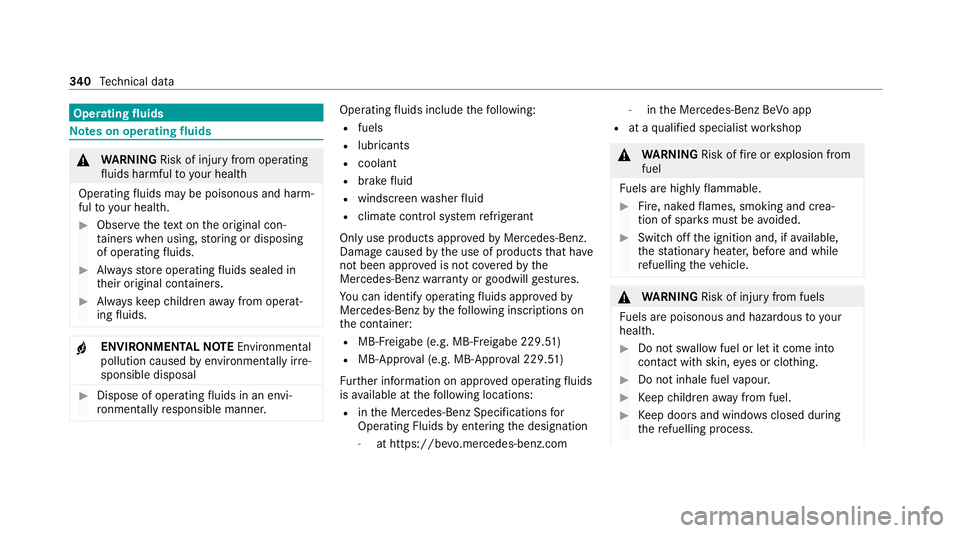
data. VIN below
right-hand front seat 1
Imprinted VIN (vehicle identification number)
2 Floor co vering VIN at the lo
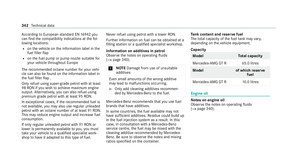
wer edge of the windscreen 1
VIN (vehicle identi fication number) as label
The VIN as a label at the lo wer edge of the wind‐
screen is only available in some countries.
Engine number
The engine number is stamped into the crank‐
case. Further information can be obtained at a
qu alified specialist workshop. Te
ch nical da ta339
Page 343 of 441

Operating
fluids Note
s on operating fluids &
WARNING Risk of injury from operating
fl uids harmful to your health
Operating fluids may be poisonous and harm‐
ful to yo ur health. #
Obser vethete xt on the original con‐
ta iners when using, storing or disposing
of operating fluids. #
Alw aysst ore operating fluids sealed in
th eir original conta iners.#
Alw ayske ep children away from operat‐
ing fluids. +
ENVIRONMEN
TALNO TEEnvironmental
pollution caused byenvironmen tally ir re‐
sponsible disposal #
Dispose of operating fluids in an envi‐
ro nmentally responsible manner. Operating
fluids include thefo llowing:
R fuels
R lubricants
R coolant
R brake fluid
R windsc reen washer fluid
R climate cont rol sy stem refrigerant
Only use products app rove dby Mercedes-Benz.
Damage caused bythe use of products that ha ve
not been appr oved is not co veredby the
Mercedes-Benz warranty or goodwill gestures.
Yo u can identify operating fluids appr ovedby
Mercedes-Benz bythefo llowing insc ript ions on
th e conta iner:
R MB- Freigabe (e.g. MB-Fr eigabe 229.51 )
R MB-Appr oval (e.g. MB-App rova l 229.51)
Fu rther information on appr oved operating fluids
is available at thefo llowing locations:
R inthe Mercedes-Benz Specifications for
Operating Fluids byentering the designation
- at https://be vo.mercedes-benz.com -
inthe Mercedes-Benz BeVo app
R at a qualified specialist workshop &
WARNING Risk offire or explosion from
fuel
Fu els are highly flammable. #
Fire, naked flames, smoking and crea‐
tion of spar ksmust be avoided. #
Swit choff the ignition and, if available,
th est ationary heater, before and while
re fuelling theve hicle. &
WARNING Risk of injury from fuels
Fu els are poisonous and hazardous to your
health. #
Do not swallow fuel or let it come into
contact with skin, eyes or clo thing. #
Do not inhale fuel vapour. #
Keep children away from fuel. #
Keep doors and windo wsclosed du ring
th ere fuelling process. 340
Tech nical da ta
Page 344 of 441

If
yo u or other people come into contact with
fuel, obser vethefo llowing: #
Immediately rinse fuel off your skin with
soap and water. #
If fuel comes into contact with your
ey es, immediately rinse them thor‐
oughly with clean water.Seek medical
attention immediately. #
Ifyo u swallow fuel, seek medical atten‐
tion immediatel y.Do not induce vomit‐
ing. #
Change immediately out of clo thing that
has come into con tact with fuel. Fu
el Note
s on fuel grade
Obse rveth e no tes on operating fluids
(/ page 340). *
NO
TEDama gecaused bythe wrong fuel Small amounts of
the wrong fuel may cause
damage tothe fuel sy stem, engine and emis‐
sion control sy stem.
Ne ver under any circums tances refuel with
any of thefo llowing fuels:
R diesel
R regular petrol with an octane number
lo we rth an 91 RON
R petrol with more than 10%ethanol byvol‐
ume, e.g. E15, E20, E85, E100
R petrol with more than 3% me thanol by
vo lume, e.g. M15, M30
R petrol with additives conta ining metal
If yo u ha verefuelled with the wrong fuel: #
Do not switch the ignition on. #
Consult a qualified specialist workshop. If
th eav ailable fuel is not suf ficiently low in sul‐
phu r,th is can produce unpleasant odours. Only
refuel using sulphur- free spark-ignition
engine fuel that con form sto European EN 228,
or an equivalent speci fication.
This fuel may contain up to10%ethanol byvol‐
ume. Your vehicle is suitable for use with E10
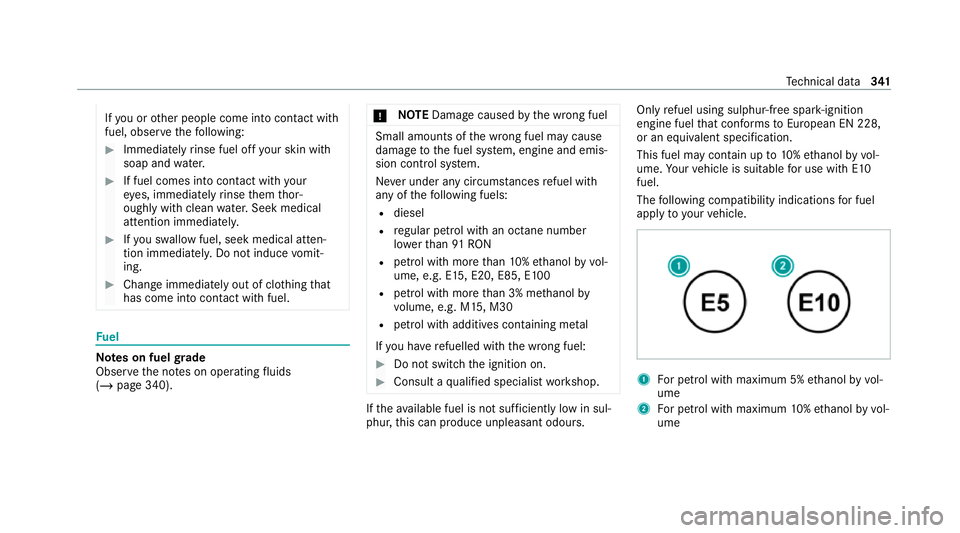
fuel.
The following compatibility indications for fuel
apply to yourvehicle. 1
For petrol with maximum 5% ethanol byvol‐
ume
2 For petrol with maximum 10%ethanol by vol‐
ume Te
ch nical da ta341