2020 MERCEDES-BENZ AMG GT COUPE light
[x] Cancel search: lightPage 208 of 433
R
English: that.lands.winning
R French: posteaux.bobineur.ombrant
3 wo rdaddresses are unique, easy to
re member and suf fice for most routine appli‐
cations.
Yo u can co nvertaddresses to3wo rd
addresses and back again:
R Atthewe bsite https://what3wo rds.com
R Inthe what3words apps
Selecting a destination on the map
Multimedia sy stem:
4 Navigation 5
Z Options #
Select Map menu.
or #
Ifth e map is displa yed in full screen mode,
press the cent ral control element.
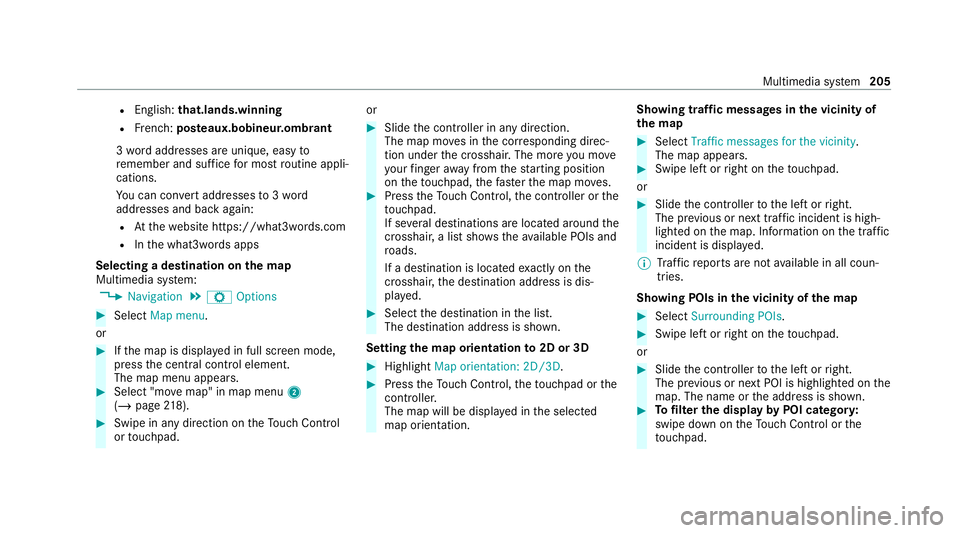
The map menu appears. #
Select "mo vemap" in map menu 2
(/ page 218). #
Swipe in any dire ction ontheTo uch Control
or touchpad. or #
Slide the controller in any direction.
The map mo ves in the cor responding direc‐
tion under the crosshair. The more you mo ve
yo ur finger away from thest arting position
on theto uchpad, thefast erthe map mo ves. #
Press theTo uch Control, the controller or the
to uchpad.
If se veral destinations are located around the
crosshair, a list showstheav ailable POIs and
ro ads.
If a destination is located exact ly on the
crosshair, the destination address is dis‐
pla yed. #
Select the destination in the list.
The destination address is shown.
Setting the map orientation to2D or 3D #
Highlight Map orientation: 2D/3D. #
Press theTo uch Control, theto uchpad or the
controller.
The map will be display ed inthe selected
map orientation. Showing traf
fic messages in the vicinity of
th e map #
Select Traffic messages for the vicinity.
The map appears. #
Swipe left or right on theto uchpad.
or #
Slide the controller tothe left or right.
The pr evious or next traf fic incident is high‐
lighted on the map. Information on the tra ffic
incident is displa yed.
% Traf fic re ports are not available in all coun‐
tries.
Showing POIs in the vicinity of the map #
Select Surrounding POIs . #
Swipe left or right on theto uchpad.
or #
Slide the controller tothe left or right.
The pr evious or next POI is highligh ted on the
map. The name or the address is shown. #
Tofilter the display byPOI categor y:
swipe down on theTo uch Control or the
to uchpad. Multimedia sy
stem 205
Page 213 of 433
R
Incomple tedigital map data
Note s on GPS reception
The cor rect function of the navigation sy stem
depends amongst other things on GPS recep‐
tion. In cer tain situations GPS reception can be
impaired, defective or even not possible, e.g. in
tunnels or in multi-s torey car par ks.
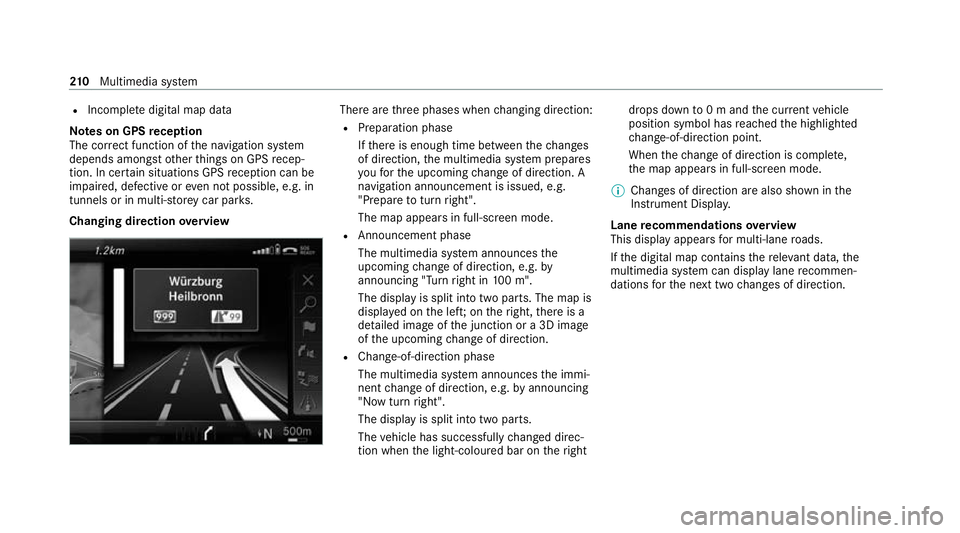
Changing direction overview There are
thre e phases when changing direction:
R Preparation phase
Ifth ere is enough time between thech anges
of direction, the multimedia sy stem prepares
yo ufo rth e upcoming change of direction. A
navigation announcement is issued, e.g.
"Prepare toturn right".
The map appears in full-screen mode.
R Announcement phase
The multimedia sy stem announces the
upcoming change of direction, e.g. by
announcing "Turn right in 100 m".
The display is split into two parts. The map is
displa yed on the lef t;on theright, there is a
de tailed image of the junction or a 3D image
of the upcoming change of direction.
R Chan ge-of-direction phase
The multimedia sy stem announces the immi‐
nent change of direction, e.g. byannouncing
"N ow turn right".
The display is split into two parts.
The vehicle has successfully changed direc‐
tion when the light-coloured bar on theright drops down
to0 m and the cur rent vehicle
position symbol has reached the highlighted
ch ange-of-direction point.
When thech ange of direction is comple te,
th e map appears in full-screen mode.
% Changes of direction are also shown in the
Instrument Displa y.
Lane recommendations overview
This display appears for multi-lane roads.
If th e digital map conta insthere leva nt da ta,the
multimedia sy stem can display lane recommen‐
dations forth e next two changes of direction. 210
Multimedia sy stem
Page 216 of 433
Overview of
route guidance toan off-road
destination
An off-road destination is within the digital map.
The map conta ins noroads that lead tothe des‐
tination.
Yo u can en terge o-coordinates or a thre ewo rd
address for off-road destinations on the map.
Ro ute guidance guides youfo r as long as possi‐
ble with navigation announcements and displa ys
on roads that are kn ownto the multimedia sys‐
te m.
Shortly before youre ach the last know n position
on the map, you will hear the "Please follow the
direction ar row" announcement. The displ ay
sho wsa direction ar rowand the linear dis tance
to the destination.
Overview of route guidance from an off-road
location toa destination
Off-road position: the cur rent vehicle position is
located within the digital map on roads that are
not available.
When route guidance begins thefo llowing dis‐
pla ysappear:
R The Road not mapped message is shown. R
A direction ar row showing the linear direc‐
tion tothe POI.
When theve hicle is back on a road kn ownto the
multimedia sy stem, route guidance continues as
no rm al.
Overview of off- road status during route
guidance
Due toroadwor ks,fo rex ample, there may be dif‐
fe re nces between the data on the digital map
and the actual course of thero ad. In such cases,
th e multimedia sy stem will temp orarily be
unable tolocate theve hicle's cur rent position on
th e digital map. The vehicle is off-road.
If th eve hicle is displa yed as being offroad, the
fo llowing displa ysappear:
R The Road not mapped message
R A direction ar row showing the linear direc‐
tion tothe POI
When theve hicle is back on a road kn ownto the
multimedia sy stem, route guidance continues as
no rm al. Destination
Saving
the cur rent vehicle position
Multimedia sy stem:
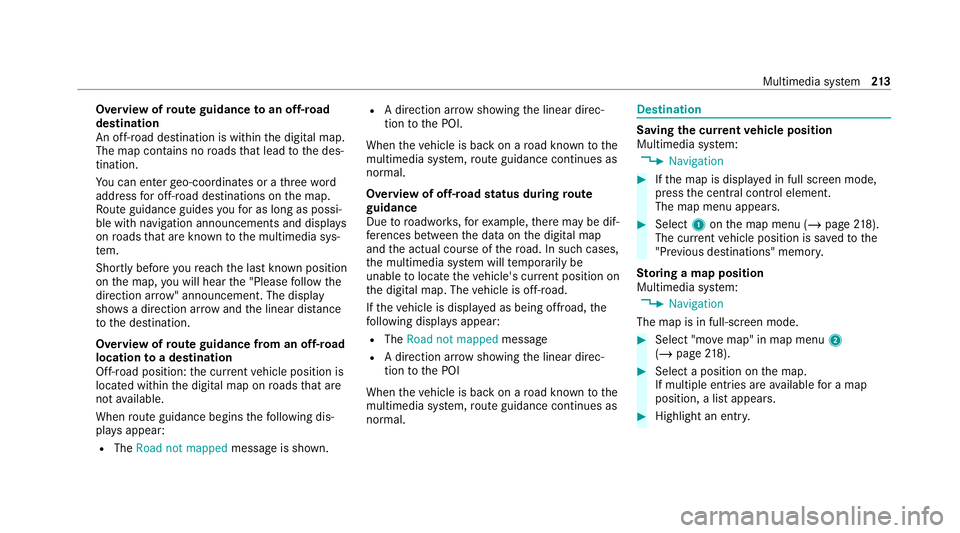
4 Navigation #
Ifth e map is displa yed in full screen mode,
press the cent ral control element.
The map menu appears. #
Select 1onthe map menu (/ page218).
The current vehicle position is sa vedto the
"Pr evious destinations" memo ry.
St oring a map position
Multimedia sy stem:
4 Navigation
The map is in full-screen mode. #
Select "mo vemap" in map menu 2
(/ page 218). #
Select a position on the map.
If multiple entri es areavailable for a map
position, a list appears. #
Highlight an entr y. Multimedia sy
stem 213
Page 217 of 433
#
Select ¥Store in "Previous destina-
tions" .
The map position is sa vedto the "Pr evious
destinations" memo ry.
Editing the pr evious destinations
Multimedia sy stem:
4 Navigation
5 ¬ Previous and other destinations
5 Previous destinations #
Highlight one of the pr evious destinations. #
Tosave as a favo urite: select ¥Save
as global favourite .
The favo urites are displ ayed. #
Movethefa vo urite tothe desired position.
If a favo urite has already been added at this
position, it will be overwritten. #
Tosave as "Home" address: select¥
Save as "Home" address .#
Tosave as "Work" address: select¥
Save as "Work" address . #
Todel ete a single or all destinations:
select ¥Delete orDelete all.
A prom ptappears. #
Select Yes. #
Todispl aydestination information: select
¥ Details.
Using extern al destinations
External destinations can be recei ved from the
fo llowing sources:
R Mercedes-Benz Apps
R door-to-door navigation
% Recei ved destinations are sa ved in the pr evi‐
ous destinations.
A prom ptappears on the media displa y. #
A destination has been received without
picture information: selectYes. #
Ifro ute guidance is not active, select Start
route guidance .
The route tothe destination is calculated.
The map sho ws thero ute. Route guidance
th en begins.
or #
Ifro ute guidance is active, select Start new
route guidance orSet as next intermediate
destination .
Start new route guidance: there cei ved desti‐
nation address is set as a new destination.
The pr evious destinations and intermediate
destinations are dele ted. Ro ute guidance to
th e new destination begins.
Set as next intermediate destination: the
re cei ved destination address is set as the
next intermedia tedestination. Route guid‐
ance begins. #
A destination has been received with pic‐
tu re information: selectStart route guid-
ance .
Ro ute guidance starts. Ro
ute guidance with cur rent traf fic re ports Tr
af fic information overview
The services are not available in everycountr y.
Tr af fic re ports can be recei ved with thefo llowing
services:
R Live Traf fic Information 214
Multimedia sy stem
Page 224 of 433
#
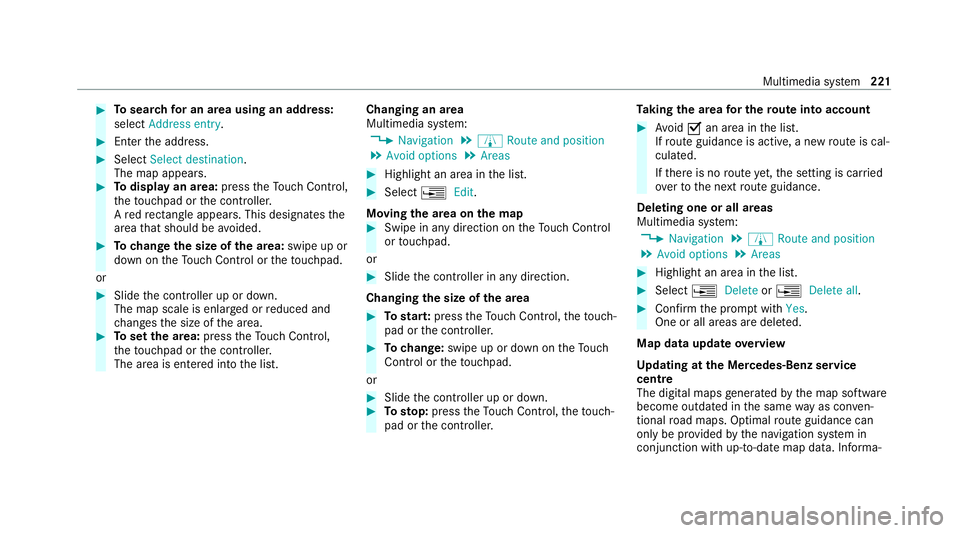
Tosear chfor an area using an address:
select Address entry . #
Enter the address. #
Select Select destination.
The map appears. #
Todispl ayan area: presstheTo uch Control,
th eto uchpad or the controller.
A redre ctangle appears . This designates the
area that should be avoided. #
Tochange the size of the area: swipe up or
down on theTo uch Control or theto uchpad.
or #
Slide the controller up or down.
The map scale is enlar ged or reduced and
ch anges the size of the area. #
Toset the area: presstheTo uch Control,
th eto uchpad or the controller.
The area is entered into the list. Changing an area
Multimedia sy
stem:
4 Navigation 5
À Route and position
5 Avoid options 5
Areas #
Highlight an area in the list. #
Select ¥Edit.
Moving the area on the map #
Swipe in any direction on theTo uch Control
or touchpad.
or #
Slide the controller in any direction.
Changing the size of the area #
Tostar t:press theTo uch Control, theto uch‐
pad or the controller. #
Tochange: swipe up or down on theTo uch
Control or theto uchpad.
or #
Slide the controller up or down. #
Tosto p:press theTo uch Control, theto uch‐
pad or the controller. Ta
king the area for the route into account #
Avoid Oan area in the list.
If ro ute guidance is active, a new route is cal‐
culated.
If th ere is no route yet,th e setting is car ried
ove rto the next route guidance.
Deleting one or all areas
Multimedia sy stem:
4 Navigation 5
À Route and position
5 Avoid options 5
Areas #
Highlight an area in the list. #
Select ¥Delete or¥ Delete all. #
Confirm the prom ptwith Yes.
One or all areas are dele ted.
Map data update overview
Up dating at the Mercedes-Benz se rvice
centre
The digital maps generated bythe map software
become outdated in the same way as conv en‐
tional road maps. Optimal route guidance can
on ly be pr ovided bythe navigation sy stem in
conjunction with up-to-date map data. Informa‐ Multimedia sy
stem 221
Page 233 of 433
Using a SIM card
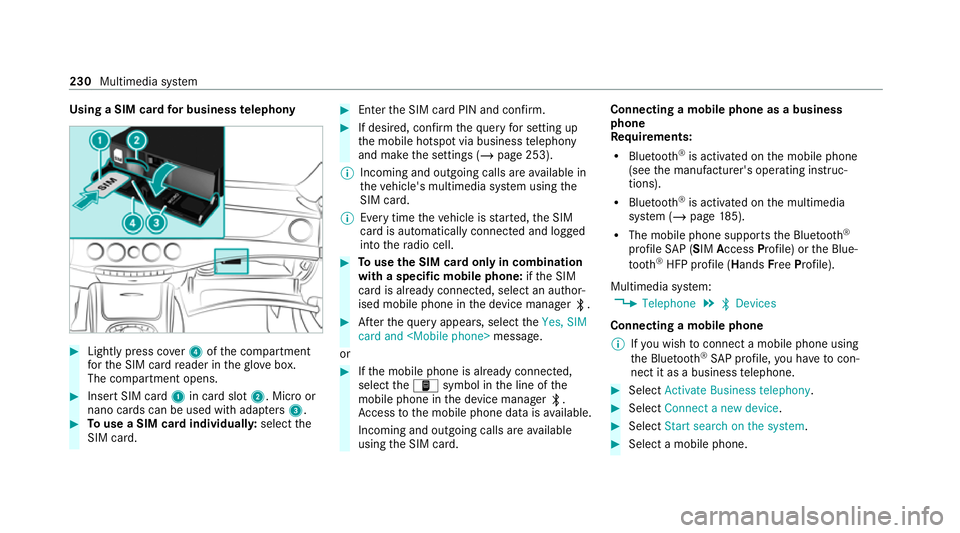
for business telephony #
Light lypress co ver4 ofthe compartment
fo rth e SIM card reader in theglove box.
The compartment opens. #
Insert SIM card 1in card slot 2. Micro or
nano cards can be used with adap ters 3 . #
Touse a SIM card individuall y:select the
SIM card. #
Enter the SIM card PIN and confi rm. #
If desired, confirm thequ ery for setting up
th e mobile hotspot via business telephony
and make the settings (/ page 253).
% Incoming and outgoing calls are available in
th eve hicle's multimedia sy stem using the
SIM card.
% Every time theve hicle is star ted, the SIM
card is automatically connected and logged
into thera dio cell. #
Touse the SIM card only in combination
with a specific mobile phone: ifth e SIM
card is already connected, select an author‐
ised mobile phone in the device manager ª. #
Afterth equ ery appears, select theYes, SIM
card and
or #
Ifth e mobile phone is already connected,
select theò symbol in the line of the
mobile phone in the device manager ª.
Ac cess tothe mobile phone data is available.
Incoming and outgoing calls are available
using the SIM card. Connecting a mobile phone as a business
phone
Re
quirements:
R Blue tooth ®
is activated on the mobile phone
(see the manufacturer's operating instruc‐
tions).
R Blue tooth ®
is activated on the multimedia
sy stem (/ page185).
R The mobile phone suppor tsthe Blue tooth ®
profile SAP (SIM Access Profile) or the Blue‐
tooth ®
HFP profile (Hands FreePro file).
Multimedia sy stem:
4 Telephone 5
ª Devices
Connecting a mobile phone % Ifyo u wish toconnect a mobile phone using
th e Blue tooth®
SA P profile, you ha vetocon‐
nect it as a business telephone. #
Select Activate Business telephony. #
Select Connect a new device. #
Select Start search on the system . #
Select a mobile phone. 230
Multimedia sy stem
Page 235 of 433
6
SIM card inse rted and available
7 Hands-free profile activated
8 SAP function available and activated
9 SAP function not available
% Ifth e mobile phone is actively connected
with the sy stem, the cor responding symbol
is highlighte d inyello w.
Calling up the business telephony settings
Multimedia sy stem:
4 Telephone 5
Z Options
5 Business telephony #
Select the desired option.
The following settings are available:
R Call waiting
R Select network provider
R Call forwarding
R Phone number blocking
R Data usage, voice Calls
Te
lephone operation
Multimedia sy stem:
4 Telephone 5
ª Contacts
Making a call #
Select Numerical keypad. #
Ente rth e number. #
Select w.
The call is made.
Ac cepting a call #
Select Accept .
Re jecting a call #
Select Reject.
No ting an incoming call in "In-Car Of fice" #
If "In-Car Of fice" is available: select
Reminder (/page 238).
Ending a call #
Select =. Ac
tivating functions during a call #
Toshow all functions, navigate down.
The following functions are available during a
call:
R End call
R Make additional call
R Keyboard (showtosend DTMF tones)
R Switch Mute mic onO or off ª.
R Private mode (an activecall in hands-free
mode is transfer redove rto thete lephone)
% Private mode is not available for business
te lephon y.
Conducting calls with se veral participants
Re quirements:
R There is an active call (/ page 232).
R Another call is being made.
Switching between calls #
Select call #.
The selected call is active. The other call is
on hold. 232
Multimedia sy stem
Page 247 of 433
Using
thevo ice dialogue sy stem you access the
desired service:
R Accident and breakdown manage ment
(/ page 247)
R Mercedes-Benz Cus tomer Centre forge neral
information about theve hicle
Yo u can find information on thefo llowing topics:
R Activation of Me rcedes me connect
R Operating theve hicle
R Nearest Mercedes-Benz service centre
R Other products and services from Mercedes-
Benz
Data is transfer red during the connection tothe
Mercedes-Benz Cus tomer Centre (/ page245).
Calling the Mercedes-Benz Cus tomer Centre
using the multimedia sy stem
Requ irements:
R You ha veaccess toa GSM networ k.
R The contra ct partner's GSM network co ver‐
age is available in there spective region. R
The ignition is switched on so that vehicle
data can be transfer red automaticall y.
Multimedia sy stem:
4 Telephone 5
ª Contacts #
Call Mercedes me connect.
The call is made.
Af ter confirmation, the multimedia sy stem
sends there qu ired vehicle data. The data
transfer is shown in the media displa y.
Then, you can select a service and be con‐
nected toa specialist at the Mercedes-Benz
Cus tomer Centre.
Fu rther information about Mercedes me con‐
nect, the pr ovided service scope and operation:
https://moba.i.daimler.com/mar kets/ece-r ow/
baix/cars/connectme/en_GB/#emotions/
St artseite.html
Calling the Mercedes-Benz Cus tomer Centre
af te r automatic accident or breakdown
de tection
Re quirements: R
The vehicle has de tected an accident or
breakdown situation.
R The vehicle is stationar y.
R The hazard warning lights are switched on.
% This function is not available in all countries.
In limited situations theve hicle can de tect acci‐
dent or breakdown situations.
In theeve nt an accident or breakdown is de tec‐
te d, the emer gency guide sho wssafety no tes in
th e multimedia sy stem displa y.
Af terqu itting the emer gency guide displ ayon
th e multimedia sy stem, a prom ptappears asking
whe ther you wish toget support from the
Mercedes-Benz Cus tomer Centre. #
Select Call.
R Afteryo ur agreement, or if the Mercedes
me connect service "Accident and Break‐
down Management" is active, theve hicle
data is transfer red automatically
(/ page 247).
R A Mercedes-Benz Cust omer Centre
emplo yeeta ke syo ur call and or ganises
th e breakdown and accident assis tance. 244
Multimedia sy stem