2020 MASERATI GRANTURISMO lights
[x] Cancel search: lightsPage 137 of 286
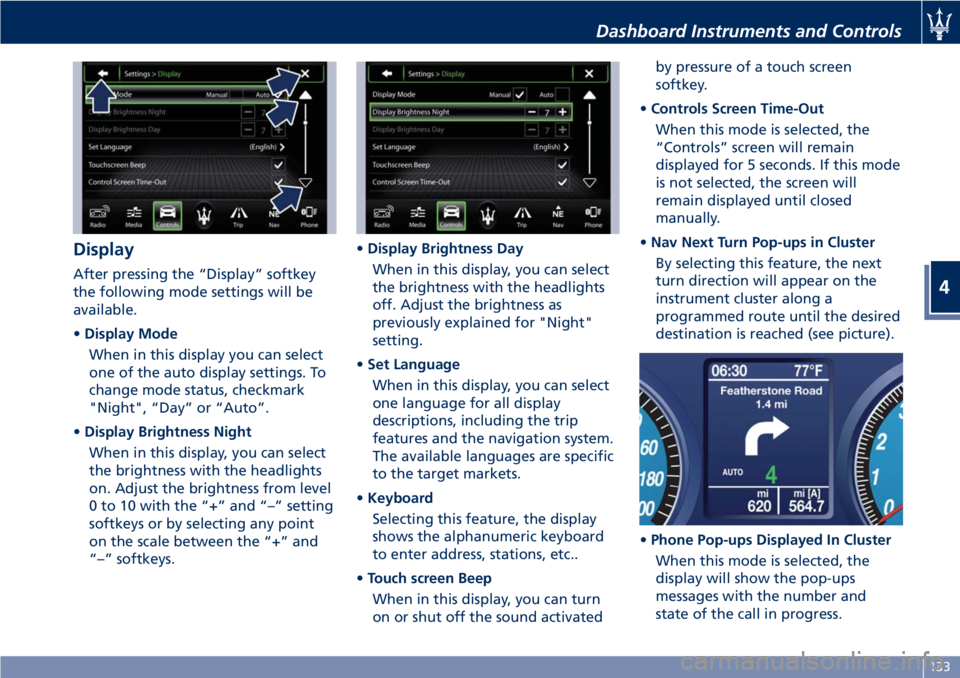
Display
After pressing the “Display” softkey
the following mode settings will be
available.
•Display Mode
When in this display you can select
one of the auto display settings. To
change mode status, checkmark
"Night", “Day” or “Auto”.
•Display Brightness Night
When in this display, you can select
the brightness with the headlights
on. Adjust the brightness from level
0 to 10 with the “+” and “–” setting
softkeys or by selecting any point
on the scale between the “+” and
“–” softkeys.•Display Brightness Day
When in this display, you can select
the brightness with the headlights
off. Adjust the brightness as
previously explained for "Night"
setting.
•Set Language
When in this display, you can select
one language for all display
descriptions, including the trip
features and the navigation system.
The available languages are specific
to the target markets.
•Keyboard
Selecting this feature, the display
shows the alphanumeric keyboard
to enter address, stations, etc..
•Touch screen Beep
When in this display, you can turn
on or shut off the sound activatedby pressure of a touch screen
softkey.
•Controls Screen Time-Out
When this mode is selected, the
“Controls” screen will remain
displayed for 5 seconds. If this mode
is not selected, the screen will
remain displayed until closed
manually.
•Nav Next Turn Pop-ups in Cluster
By selecting this feature, the next
turn direction will appear on the
instrument cluster along a
programmed route until the desired
destination is reached (see picture).
•Phone Pop-ups Displayed In Cluster
When this mode is selected, the
display will show the pop-ups
messages with the number and
state of the call in progress.
Dashboard Instruments and Controls
4
133
Page 139 of 286

•Set Time Hours
With “Sync with GPS Time” feature
unchecked and this mode selected,
you can set the hours manually
from 1 to 24. To select, touch the
“+” or “–” softkeys to adjust the
hours.
•Set Time Minutes
With “Sync with GPS Time” feature
unchecked and this mode selected,
you can set the minutes manually
from 0 to 59. To select, touch the
“+” or “–” softkeys as done for the
hours.
•Time Format
When in this mode, you can select
the time format display. To change
the current setting, touch and
release the “12 Hrs” or “24 Hrs”
softkey.•Show Time In Status Bar
This feature will allow you to turn
on or shut off the digital clock in
the status bar.
•Set Date in Cluster (DD/MM/YY)
When in this mode, you can set the
date manually in the status bar of
the MTC+ and on the instrument
cluster display. Touch the “+” or “-”
softkeys to adjust “Day”, “Month”
and “Year”.
Safety & Driving Assistant
Touch this softkey to set the following
modes.
•Stop & Go Parking Sensors
This feature allows you to disable
the parking sensors signal under
special traffic conditions.
See “Park Assist” in section “Before
Starting” for further information.
•ParkView Camera with Dynamic
Guidelines
When this feature is selected, by
moving the transmission lever in R
(Reverse) position, the rearview
image with dynamic guidelines will
appear on MTC+ display.
The feature can be set to “On” or
“Off”.•ParkView Camera Off Delay
By selecting this feature, when the
transmission lever is moved out of R
(Reverse), the rear view image with
dynamic guidelines will be displayed
for up to 10 seconds after shifting
unless the forward vehicle speed
exceeds 8 mph (12 km/h), or the
transmission is shifted into P (Park)
or the key in the ignition switch is
turned inSTOP (OFF)position.
The feature can be set to “On” or
“Off”.
•Instrument Panel Buzzer Volume
This feature allows adjusting the
volume of the acoustic signal that
accompanies some instrument panel
warnings (EPB overheating, seat
and rearview mirror position
storage).
The volume can be set to 7 levels
identified by numbers from "1" to
"7" by pressing the "+" or "–"
softkey.
•Light Sensor
This feature allows to adjust the
sensitivity of the twilight sensor for
turning on the lights.
The feature can be set to 3 levels:
"Low", "Medium" (default setting)
and "High".
Dashboard Instruments and Controls
4
135
Page 140 of 286
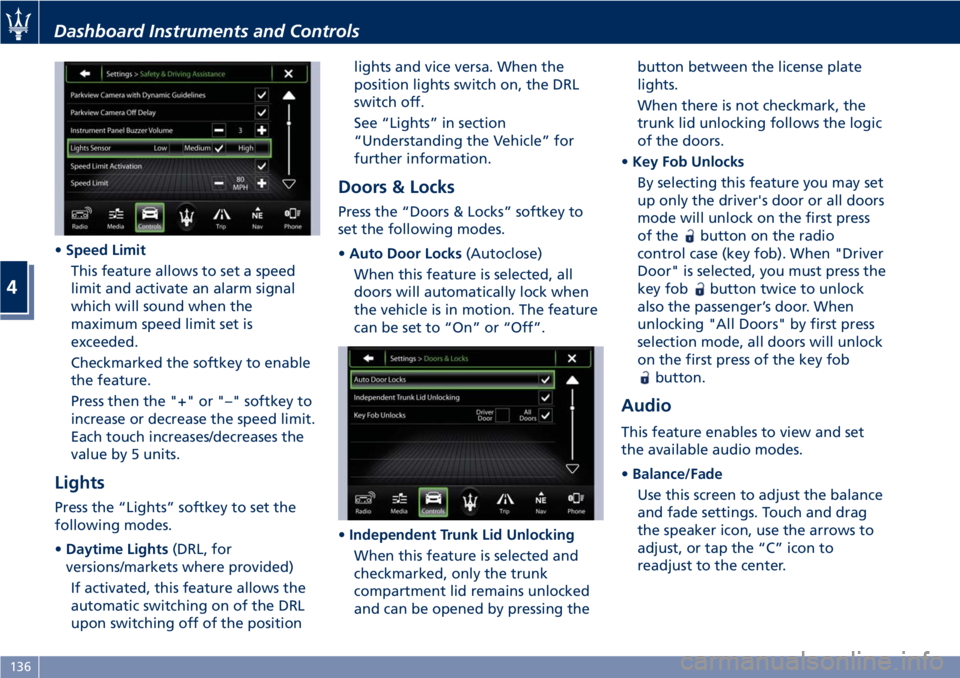
•Speed Limit
This feature allows to set a speed
limit and activate an alarm signal
which will sound when the
maximum speed limit set is
exceeded.
Checkmarked the softkey to enable
the feature.
Press then the "+" or "–" softkey to
increase or decrease the speed limit.
Each touch increases/decreases the
value by 5 units.
Lights
Press the “Lights” softkey to set the
following modes.
•Daytime Lights(DRL, for
versions/markets where provided)
If activated, this feature allows the
automatic switching on of the DRL
upon switching off of the positionlights and vice versa. When the
position lights switch on, the DRL
switch off.
See “Lights” in section
“Understanding the Vehicle” for
further information.
Doors & Locks
Press the “Doors & Locks” softkey to
set the following modes.
•Auto Door Locks(Autoclose)
When this feature is selected, all
doors will automatically lock when
the vehicle is in motion. The feature
can be set to “On” or “Off”.
•Independent Trunk Lid Unlocking
When this feature is selected and
checkmarked, only the trunk
compartment lid remains unlocked
and can be opened by pressing thebutton between the license plate
lights.
When there is not checkmark, the
trunk lid unlocking follows the logic
of the doors.
•Key Fob Unlocks
By selecting this feature you may set
up only the driver's door or all doors
mode will unlock on the first press
of the
button on the radio
control case (key fob). When "Driver
Door" is selected, you must press the
key fob
button twice to unlock
also the passenger’s door. When
unlocking "All Doors" by first press
selection mode, all doors will unlock
on the first press of the key fob
button.
Audio
This feature enables to view and set
the available audio modes.
•Balance/Fade
Use this screen to adjust the balance
and fade settings. Touch and drag
the speaker icon, use the arrows to
adjust, or tap the “C” icon to
readjust to the center.
Dashboard Instruments and Controls
4
136
Page 152 of 286
Normal Starting of the
Engine
WARNING!
It is dangerous to run the engine in an
enclosed area. The engine consumes
oxygen and discharges carbon
dioxide, carbon monoxide and other
toxic gases in the atmosphere.
WARNING!
California Proposition 65
Operating, servicing and maintaining
a passenger vehicle or off-road vehicle
can expose you to chemicals including
such as, engine exhaust, carbon
monoxide, phthalates and lead, that
which are know to the State of
California to cause cancer and birth
defects or other reproductive harm. To
minimize exposure, avoid breathing
exhaust, do not idle the engine except
as necessary, service your vehicle in a
well-ventilated area and wear gloves
or wash your hands frequently when
servicing your vehicle. For more
information go to:www.P65Warnings.ca.gov/passenger-
vehicle
When you open a door to get into the
car, the instrument cluster turns on.
The TFT displays the complete
odometer, time, outside temperature
and the
open doors indicator.
Before starting the engine, close the
doors, adjust your seat, the inside and
outside mirrors, fasten your seat belt
and instruct all other occupants to
buckle their seat belts.
Make sure that the Electric Parking
Brake (EPB) is applied.
The shift lever must be in P (Park) or N
(Neutral) position before you can start
the engine. Apply the brakes before
shifting into any driving gear (see
“Automatic Transmission” in this
section).
CAUTION!
• Before starting the engine, switch off
the electrical devices with a high
power consumption (air-conditioning
and heating system, heated rear
window, headlights, etc.).
• Do not start the engine if the fuel
level in the tank is low.
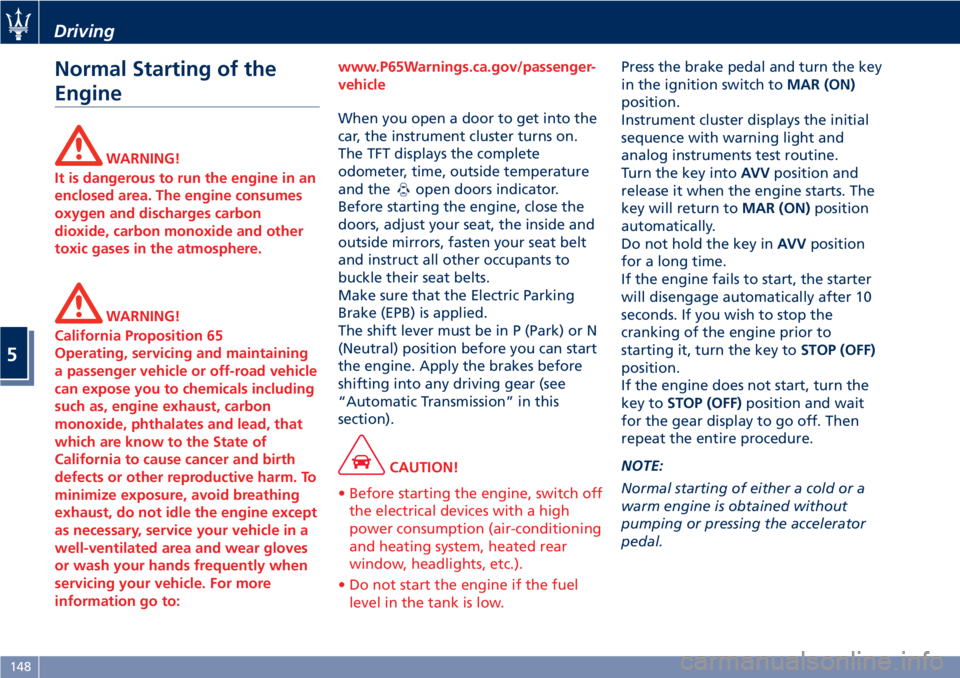
Press the brake pedal and turn the key
in the ignition switch toMAR (ON)
position.
Instrument cluster displays the initial
sequence with warning light and
analog instruments test routine.
Turn the key intoAVVposition and
release it when the engine starts. The
key will return toMAR (ON)position
automatically.
Do not hold the key inAVVposition
for a long time.
If the engine fails to start, the starter
will disengage automatically after 10
seconds. If you wish to stop the
cranking of the engine prior to
starting it, turn the key toSTOP (OFF)
position.
If the engine does not start, turn the
key toSTOP (OFF)position and wait
for the gear display to go off. Then
repeat the entire procedure.
NOTE:
Normal starting of either a cold or a
warm engine is obtained without
pumping or pressing the accelerator
pedal.
Driving
5
148
Page 165 of 286

can be activated at any time and the
system limits the engine speed rate to
3000 rpm in all gears except for the
6th, unrequested gearshifts could take
place.
In any case, it is advisable to
deactivate SPORT mode before
selecting ICE (low-grip) mode.
When sequential manual gearshifting
is active, regardless of the mode set
(NORMAL / SPORT / ICE), the
transmission will automatically upshift
or downshift when reaching the
minimum and maximum rpm. This is
to prevent engine overrevving or
underrevving.
(ESC Off) Mode
The ESC system is designed to
automatically activate every time the
engine is started and can be
deactivated by pressing
(ESC Off)
button on the central console for
about 2 seconds. The
(ESC Off)
amber warning light illuminates on
the instrument cluster as well as on
the display, where it is accompanied
by a specific message.
The ESC (Electronic Stability Control)
antiyawing system incorporates all of
the vehicle control systems: ABS, EBD,
ASR and MSR (see "Brake and StabilityControl System" in this section for
further information).
The system is fitted with a unit that
predicts the vehicle behavior with
extreme accuracy. The system can
detect when the driver is about to lose
control of the vehicle. In this case, it
can activate the brake calipers
individually and engine control, in
order to create a torque sufficient to
resist the vehicle’s yawing moment.
Press
(ESC Off) button again to
reactivate the system.
The
(ESC On) amber warning light
on the instrument cluster flashes
during all the operating phases.
, the system is automatically disabled
and cannot be re-activated. While
driving, this condition is signaled by
the
(ESC On) amber warning light,
that illuminates both on the
instrument cluster as well as on the
multi-function display, where it is
accompanied by the message “ESC
unavailable go to dealer”.
When the engine is started, the system
malfunction is indicated by the
illumination of the
(ESC On) amber
warning light.
CAUTION!
• In the event of a fault, and with the
ESC system disabled (
(ESC Off)
button pressed), the vehicle behaves
as if it were not equipped with this
system: however, we recommend
you contact theAuthorized Maserati
Dealeras soon as possible to have
the system checked.
• If you have to tow the vehicle with 2
wheels raised, make sure the key in
the ignition switch is in theSTOP
(OFF)position. Otherwise, with the
ESC system active (
(ESC Off)
button not pressed), the control unit
will store a malfunction with
consequent illumination of the
(ESC On) amber warning lights on
the instrument cluster and on the
display. Should this occur, contact
theAuthorized Maserati Dealerto
have the system repaired.
• In low- and medium-grip conditions
(e.g., rain, snow, ice, sand, etc.) it is
advisable not to activate SPORT
mode, even with the ESC system
active (
(ESC Off) button not
pressed).
Driving
5
161
Page 167 of 286
Sequential manual operation can only
be selected from the D (Drive) position
whatever the function (SPORT,
NORMAL) active at the time of the
request. The gear selected by the
automatic transmission will remain
engaged when the transmission shift
lever is moved.
Shifting the lever back to D (Drive),
automatic operation will instantly be
resumed, and a gear will be engaged
based on the driving style and mode
selected.
In the event of a failure of the
sequential manual gearshift system,
the transmission ECU will select
automatic operation.
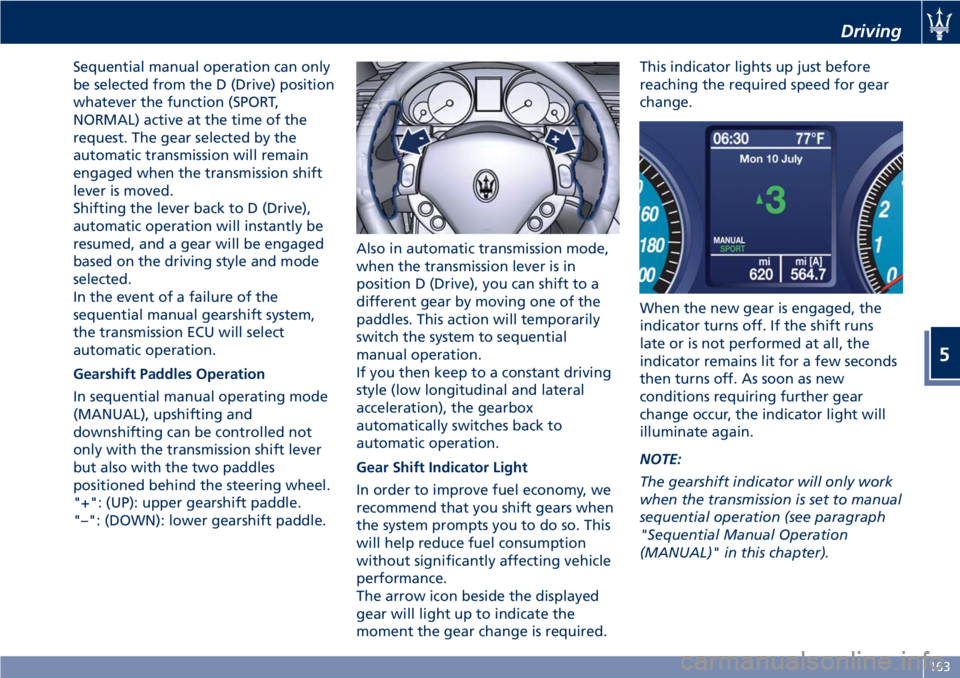
Gearshift Paddles Operation
In sequential manual operating mode
(MANUAL), upshifting and
downshifting can be controlled not
only with the transmission shift lever
but also with the two paddles
positioned behind the steering wheel.
"+": (UP): upper gearshift paddle.
"–": (DOWN): lower gearshift paddle.Also in automatic transmission mode,
when the transmission lever is in
position D (Drive), you can shift to a
different gear by moving one of the
paddles. This action will temporarily
switch the system to sequential
manual operation.
If you then keep to a constant driving
style (low longitudinal and lateral
acceleration), the gearbox
automatically switches back to
automatic operation.
Gear Shift Indicator Light
In order to improve fuel economy, we
recommend that you shift gears when
the system prompts you to do so. This
will help reduce fuel consumption
without significantly affecting vehicle
performance.
The arrow icon beside the displayed
gear will light up to indicate the
moment the gear change is required.This indicator lights up just before
reaching the required speed for gear
change.
When the new gear is engaged, the
indicator turns off. If the shift runs
late or is not performed at all, the
indicator remains lit for a few seconds
then turns off. As soon as new
conditions requiring further gear
change occur, the indicator light will
illuminate again.
NOTE:
The gearshift indicator will only work
when the transmission is set to manual
sequential operation (see paragraph
"Sequential Manual Operation
(MANUAL)" in this chapter).
Driving
5
163
Page 168 of 286
Parking Brake
The vehicle is equipped with an
electric automatic parking brake, also
called EPB (Electric Parking Brake).
It can be automatically engaged when
the engine is turned off and it is
disengaged when, with the engine
running, the accelerator pedal is
depressed.
When the parking brake is applied
(with the key in the ignition switch in
STOP (OFF)position), the
indicator lights up on the rev.
counter display and the related
message is displayed on the instrument
cluster for 5 seconds (see “Instrument
Cluster” in section “Dashboard
Instruments and Controls”).
During engagement and
disengagement procedures, the
indicator flashes until theparking brake has reached its
maximum activation force and is
respectively fully released.
The parking brake is automatically
applied when the engine is turned off
and the vehicle is stationary.
It can only be disengaged when the
engine is restarted.
If the key has been removed from the
ignition switch or is turned inSTOP
(OFF)position, it cannot be
disengaged.
Manual Engagement/
Disengagement
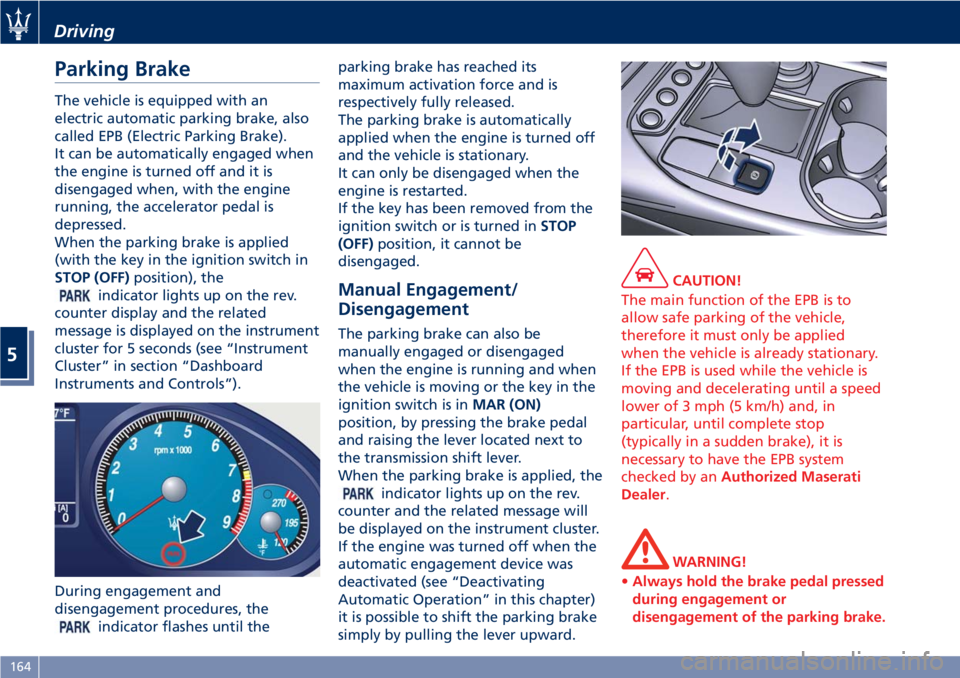
The parking brake can also be
manually engaged or disengaged
when the engine is running and when
the vehicle is moving or the key in the
ignition switch is inMAR (ON)
position, by pressing the brake pedal
and raising the lever located next to
the transmission shift lever.
When the parking brake is applied, the
indicator lights up on the rev.
counter and the related message will
be displayed on the instrument cluster.
If the engine was turned off when the
automatic engagement device was
deactivated (see “Deactivating
Automatic Operation” in this chapter)
it is possible to shift the parking brake
simply by pulling the lever upward.
CAUTION!
The main function of the EPB is to
allow safe parking of the vehicle,
therefore it must only be applied
when the vehicle is already stationary.
If the EPB is used while the vehicle is
moving and decelerating until a speed
lower of 3 mph (5 km/h) and, in
particular, until complete stop
(typically in a sudden brake), it is
necessary to have the EPB system
checked by anAuthorized Maserati
Dealer.
WARNING!
•Always hold the brake pedal pressed
during engagement or
disengagement of the parking brake.
Driving
5
164
Page 177 of 286
Use of the Engine
Breaking-In
Today's most modern production
methods are designed to provide
extremely precise construction and
assembly of components. However,
moving parts do undergo a settling
process, basically in the first hours of
vehicle operation.
Do not drive keeping at a constant
high speed rate for a prolonged time.
While cruising, brief full-throttle
acceleration within the limits of local
traffic laws contributes to a good
break-in. Wide-open throttle
acceleration in low gear can be
detrimental and should be avoided.
The engine oil installed in the engine
at the factory is a high-quality energy
conserving type lubricant. Oil changes
should be consistent with anticipated
climate conditions under which vehicle
operations will occur. For the
recommended viscosity and quality
grades, see “Refillings” in section
“Features and Specifications”.
A new engine may consume some oil
during its first few thousand
kilometers of operation. This should
be considered as a normal part of thebreak-in and not interpreted as an
indication of malfunction.
Avoid exceeding 5000 rpm for the first
620 trip mi (1000 km).
After starting the vehicle, do not
exceed 4000 rpm until the engine has
warmed up sufficiently (coolant
temperature: 149-158°F/65-70°C).
While Driving
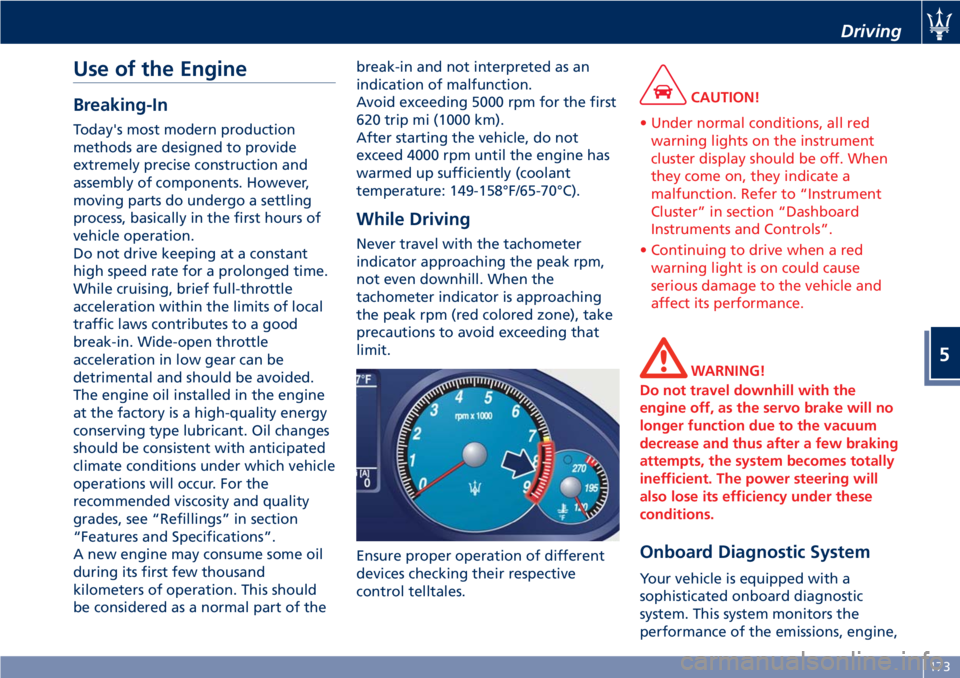
Never travel with the tachometer
indicator approaching the peak rpm,
not even downhill. When the
tachometer indicator is approaching
the peak rpm (red colored zone), take
precautions to avoid exceeding that
limit.
Ensure proper operation of different
devices checking their respective
control telltales.
CAUTION!
• Under normal conditions, all red
warning lights on the instrument
cluster display should be off. When
they come on, they indicate a
malfunction. Refer to “Instrument
Cluster” in section “Dashboard
Instruments and Controls”.
• Continuing to drive when a red
warning light is on could cause
serious damage to the vehicle and
affect its performance.
WARNING!
Do not travel downhill with the
engine off, as the servo brake will no
longer function due to the vacuum
decrease and thus after a few braking
attempts, the system becomes totally
inefficient. The power steering will
also lose its efficiency under these
conditions.
Onboard Diagnostic System
Your vehicle is equipped with a
sophisticated onboard diagnostic
system. This system monitors the
performance of the emissions, engine,
Driving
5
173