2020 MASERATI GRANTURISMO lights
[x] Cancel search: lightsPage 11 of 286

Abbreviations
Some descriptions and terms with
particular meanings are found in this
manual in abbreviated form.
A/CAir-Conditioning System.
ABSAnti-Lock Braking System.
ALCAdaptive Light Control.
ALRAutomatic Locking Retractor.
ASRAnti-Slip Regulation.
BOSBrake Override System.
CANController Area Network.
CCCruise Control.
CRSChild Restraint System.
DRLDaytime Running Lights.
EBDElectronic Brake-force
Distribution.
ECUElectronic Control Unit.
EDREvent Data Recorder.
EPBElectric Parking Brake.
ESCElectronic Stability Control.
ETDEmergency Tensioning
Device.
FTPFlash To Pass.
HBAHydraulic Brake Assistance.
ICEIncrease Control and
Efficiency.LATCHLower Anchors and Tether
for CHildren.
MILMalfunction Indicator Light.
MTC+Maserati Touch Control Plus.
OBDOn Board Diagnostics.
ORCOccupant Restraint
Controller.
RHDRight-Hand Drive.
SBRSeat Belt Reminder.
TFTThin Film Transistor.
TPMSTire Pressure Monitoring
System.
VINVehicle Identification
Number.
Updating
Constant improvements are being
performed to maintain this vehicle's
high level of quality. Therefore, there
may be differences between this
manual and your vehicle.
Maserati reserves the right to carry
out design and functional changes
and to provide updates or
improvements.
This Owner's Manual illustrates and
describes all versions of the current
vehicle model. Therefore, some of the
equipment and accessories in this
publication may not appear on your
vehicle; please only consider the
information related to your vehicle.
All specifications and illustrations
contained in this manual are as of the
Manual publishing date.
NOTE:
The updated version of the on-board
documentation can be consulted by
accessing the section “SERVICES” on
the websitewww.maserati.comor by
using the specific apps developed for
the more common Tablet and
Smartphone.
Introduction
1
7
Page 16 of 286

Towing the Vehicle
The vehicle has not been designed,
developed and homologated to be
used as a towing vehicle for other
means (e.g. trailers, campers, etc.) and
nothing can be loaded on the roof;
fitting structures such as bars or
roof-racks may damage the vehicle.
Symbols
There are specific colored plates on or
near some of the components on your
Maserati designed to attract user’s
attention. The related symbols are
important warnings that the user must
follow when using the component
involved.
All symbols reported on the plate and
inside the vehicle, as well as the
component for which the symbols
stand, are summarized in the
following list. These symbols are
divided into categories according to
their meaning.
Danger Symbols
Battery
Corrosive liquid.
Battery
Explosion.
Blower
May start automatically
even with engine off.
Coolant expansion
reservoir
Do not open cap with
engine warm.
Coil - headlights
High voltage.
Belts and pulleys
Moving parts, keep body
and clothing clear.
Air-conditioning lines
High pressure gas, do not
open.
Symbols of Prohibitions and
Compulsory Measures
Battery
Keep away from flames.
Battery
Keep out of children’s
reach.
Heat guards - belts -
pulleys - fans
Do not touch.
Battery
Wear eye protection.
Battery - jack
Refer to the owner manual.
Introduction
1
12
Page 36 of 286

Control Plus (MTC+) settings (see
"MTC+ Settings" in section
"Dashboard Instrument and
Controls").
If one or more doors are not properly
closed when locking the doors from
the outside, they will not be locked,
while if the trunk compartment is not
properly closed, the doors will in any
case be locked.
In both cases, the malfunction will be
indicated by the turn signals flashing
for a few seconds.
NOTE:
•The interior door locking/unlocking,
trunk compartment lid opening and
fuel tank door opening buttons are
disabled when the doors are locked
from the outside.
•In the event that the inertia switch
activates, the doors are electrically
unlocked and the vehicle can be
accessed by pressing the rear button
inside each handle.
Opening from the Inside
To open the door, even if the lock is
engaged, pull the internal handle.There are two buttons in front of the
transmission lever which operate the
door locking and unlocking functions:
: door locking;
: door unlocking.NOTE:
By pulling the internal handle on the
driver’s door, all the locks can be
released at the same time or just the
driver’s door, depending on the MTC+
settings (see "MTC+ Settings" in
section "Dashboard Instrument and
Controls").
Door Open Warning Lights
If the doors and the engine/luggage
compartment lids are not closed
properly, this is signaled by the
illumination of relative symbols on the
instrument panel display, accompanied
by the messages “Door open” or
“Doors open” shown in the picture.
Door Lock ECU Initialization
Every time the battery is connected or
a fuse replaced, you must perform the
system initialization procedure to
Before Starting
2
32
Page 37 of 286

ensure proper system operation. To
perform this procedure, lock and then
unlock the doors using the buttons
andon the radio control device.
For more details, see "Maintenance-
Free Battery" in section "Maintenance
and Care".
Door Open Indicator Light
Each door is provided with a reflector
fitted on the rear side of the door
panel that makes it visible when
illuminated by the headlights of a
vehicle.
Signal
Upon exceeding a speed of 3 mph
(5 km/h), if one or more doors/lid are
open or not properly closed, a
warning signal will be activated.
Door Courtesy Light
Each door panel is fitted with a
courtesy light, on the lower part of
the door framework, to illuminate the
area where passengers enter/exit the
vehicle.
WARNING!
Gearshifting is always active and may
be performed even when one or more
doors, the engine compartment lid or
the trunk lid are open. Therefore, in
these conditions, take great care to
avoid moving the transmission shift
lever and so accidentally engage
gears.
Power Windows
The power windows can only be
activated when the key in the ignition
switch is in theMAR (ON)position.
The controls for all power windows
are located in the armrest of the door
on the driver’s side. The external
switch commands the power window
driver’s side; the inner switch
commands the power window
passenger’s side.
The door on the passenger side only
has control for the window on the
passenger side.
Before Starting
2
33
Page 71 of 286

•Never place or install floor mats or
other floor coverings in the vehicle
that cannot be properly secured to
prevent them from moving and
interfering with the pedals.
•Never put floor mats or other floor
coverings on top of already installed
floor mats. Additional floor mats
and other coverings will reduce the
size of the pedal area and interfere
with the pedals.
•Check mounting of mats on a
regular basis. Always properly
reinstall and secure floor mats that
have been removed for cleaning.
•Always make sure that objects
cannot fall into the driver footwell
while the vehicle is moving. Objects
can become trapped under the
brake pedal and accelerator pedal
causing a loss of vehicle control.
•Mounting posts must be properly
installed, if not equipped from the
factory. Failure to properly follow
floor mat installation or mounting
can cause interference with the
brake pedal and accelerator pedal
operation causing loss of control of
the vehicle.Tires
• Examine tires for excessive tread
wear and uneven wear patterns.
• Check for stones, nails, glass, or
other objects lodged in the tread or
sidewall.
• Inspect the tread for cuts and cracks.
• Inspect sidewalls for cuts, cracks and
bulges.
• Check the wheel nuts for tightness.
• Check the tires (see “Tire Inflation
Pressure” chapter in section
“Features and Specifications”) for
proper cold inflation pressure.
Lights and Indicator Lights
• Have someone observe the
operation of exterior lights while
you operate the controls (see
“Lights” chapter in section
“Understanding the Vehicle”).
• Check turn signal and high beam
indicator lights on the instrument
cluster (see “Instrument Cluster”
chapter in section “Dashboard
Instruments and Controls”).
Door Latches
• Check for positive closing, latching,
and locking of doors and trunk lid
(see chapter “Doors” and “Open and
Close the Trunk Lid” in this section).Fluid Leaks
• Check area under vehicle after
overnight parking for recent fluid
leaks (oil, fuel, etc.).
• If gasoline fumes are detected or
fluid leaks are suspected, contact an
Authorized Maserati Dealer.
WARNING!
California Proposition 65
Operating, servicing and maintaining
a passenger vehicle or off-road vehicle
can expose you to chemicals including
such as, engine exhaust, carbon
monoxide, phthalates and lead, that
which are know to the State of
California to cause cancer and birth
defects or other reproductive harm. To
minimize exposure, avoid breathing
exhaust, do not idle the engine except
as necessary, service your vehicle in a
well-ventilated area and wear gloves
or wash your hands frequently when
servicing your vehicle. For more
information go to:
www.P65Warnings.ca.gov/passenger-
vehicle
Before Starting
2
67
Page 73 of 286

3 – Understanding the Vehicle
Interior Components..................................... 70
Front Seats............................................ 74
Comfort Pack Front Seats.................................. 76
Rear Seats............................................. 78
Steering Wheel Adjustment................................ 79
Rearview Mirrors........................................ 80
Lights................................................ 83
Windshield Wipers and Washers............................ 90
Interior Features........................................ 93
Cargo Area............................................ 97
HomeLink (for versions/markets, where provided)............... 98
Air Conditioning Distribution............................. 101
Sport Skyhook Suspension
(for versions/markets, where provided)..................... 103
69
Page 75 of 286

1Adjustable side air vents.
2Hood lid opening lever.
3Headlight and fog light switch.
4"Mode" and adjust "+" and
"–" buttons.
5Front parking sensors
disabling/enabling.
6Trunk lid opening button.
7Fuel tank door opening button
(see "Refueling" in section
"Driving" for operation).
8Multifunction lever (Cruise
Control, turn signals, headlight
washer and headlight
selection).
9Lower gearshift paddle
"DOWN".
10Instrument cluster.
11Steering wheel height and
depth adjustment lever.
12Upper air vent.
13Sun radiation sensor.
14Horn control.
15Multimedia controls repeated
on the steering wheel.
16Windshield/headlight
wiper/washer control lever.17Upper gearshift paddle "UP".
18Ignition switch.
19Clock.
20Central adjustable air vents.
21MTC+ display.
22Glove compartment.
23Side window vents.
Front Dome Console
Components
1Reading lights control button.
2Central light control button.
3Reading lights.
4Central light.
5Anti-lift alarm system
deactivation button.6Volumetric alarm system
deactivation button.
7Paired phone hands-free
microphone.
Understanding the Vehicle
3
71
Page 87 of 286

Lights
The external lights and turn signals
turn on only with the key in the
ignition switch inMAR (ON)position.
Only the parking lights can be turned
on at any time.
The external lights can be turned on
and off manually or automatically,
according to the brightness of the
light outside.
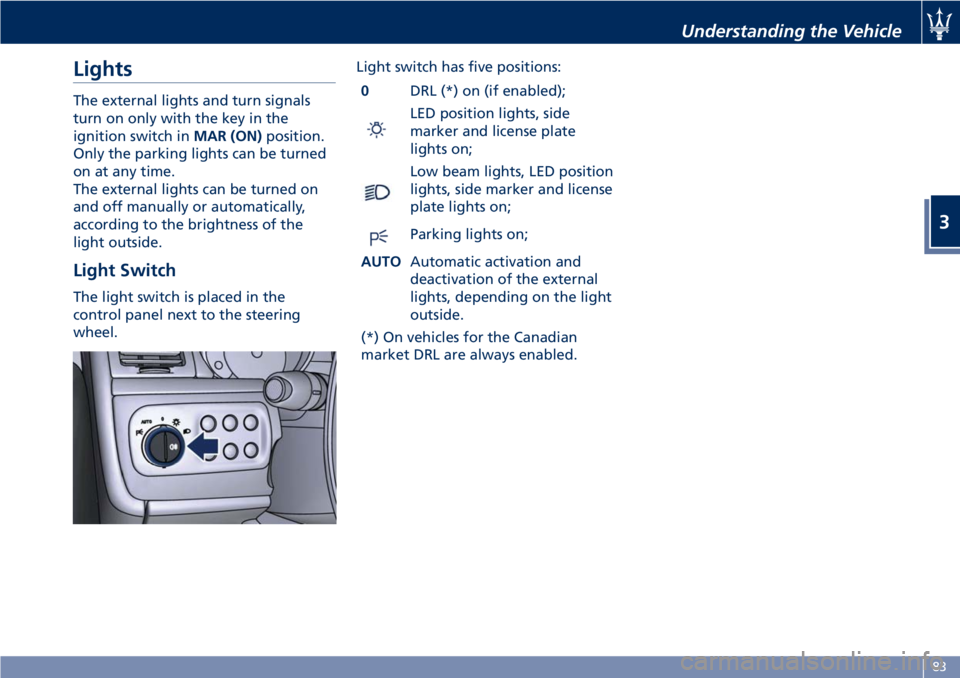
Light Switch
The light switch is placed in the
control panel next to the steering
wheel.Light switch has five positions:
0DRL (*) on (if enabled);
LED position lights, side
marker and license plate
lights on;
Low beam lights, LED position
lights, side marker and license
plate lights on;
Parking lights on;
AUTOAutomatic activation and
deactivation of the external
lights, depending on the light
outside.
(*) On vehicles for the Canadian
market DRL are always enabled.
Understanding the Vehicle
3
83