2020 MASERATI GRANTURISMO light
[x] Cancel search: lightPage 76 of 286

Doors Components
1Inside door handle.
2Rearview mirrors switch.
3Drive power window switch.
4Passenger power window
switch.
5Door panel grip.
6Reflex reflector.7Dual-color LED to indicate door
status (locked/unlocked).
8Door courtesy light.
9Door outboard opening lock.
10Outside door handle.
11External door unlock buttons.
Understanding the Vehicle
3
72
Page 79 of 286
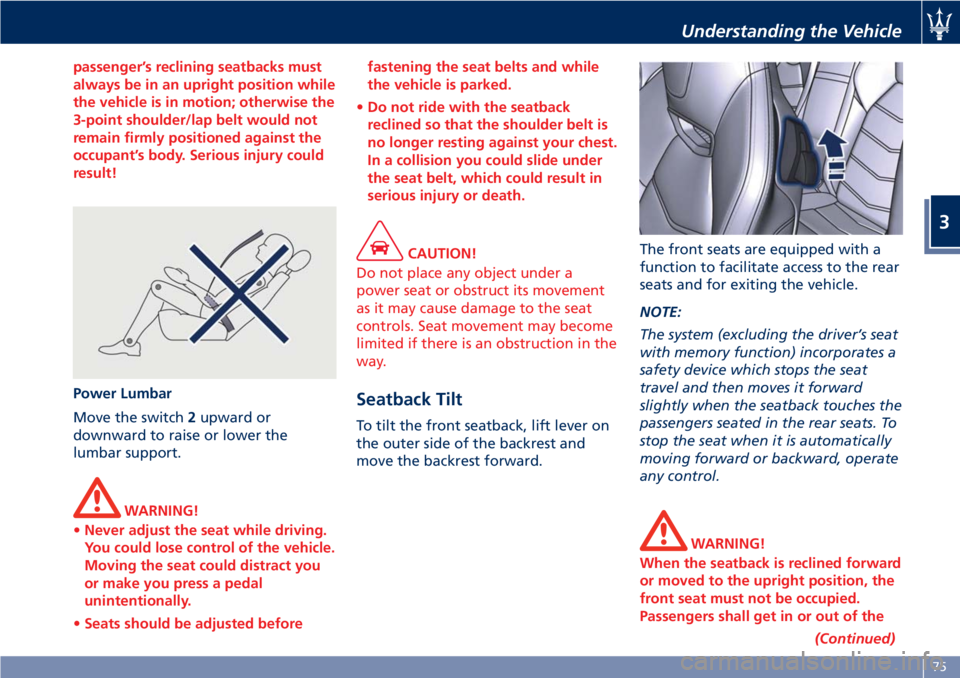
passenger’s reclining seatbacks must
always be in an upright position while
the vehicle is in motion; otherwise the
3-point shoulder/lap belt would not
remain firmly positioned against the
occupant’s body. Serious injury could
result!
Power Lumbar
Move the switch2upward or
downward to raise or lower the
lumbar support.
WARNING!
•Never adjust the seat while driving.
You could lose control of the vehicle.
Moving the seat could distract you
or make you press a pedal
unintentionally.
•Seats should be adjusted beforefastening the seat belts and while
the vehicle is parked.
•Do not ride with the seatback
reclined so that the shoulder belt is
no longer resting against your chest.
In a collision you could slide under
the seat belt, which could result in
serious injury or death.
CAUTION!
Do not place any object under a
power seat or obstruct its movement
as it may cause damage to the seat
controls. Seat movement may become
limited if there is an obstruction in the
way.
Seatback Tilt
To tilt the front seatback, lift lever on
the outer side of the backrest and
move the backrest forward.The front seats are equipped with a
function to facilitate access to the rear
seats and for exiting the vehicle.
NOTE:
The system (excluding the driver’s seat
with memory function) incorporates a
safety device which stops the seat
travel and then moves it forward
slightly when the seatback touches the
passengers seated in the rear seats. To
stop the seat when it is automatically
moving forward or backward, operate
any control.
WARNING!
When the seatback is reclined forward
or moved to the upright position, the
front seat must not be occupied.
Passengers shall get in or out of the
(Continued)
Understanding the Vehicle
3
75
Page 80 of 286
(Continued)
rear seats only when the front seat is
stopped. Make sure that passengers in
the rear seats (especially children) do
not touch the seat or any of it's
components when it's moving.Comfort Pack Front Seats
This includes:
• heating of the front seats;
• driver seat, steering wheel and
outside rearview mirrors memory
position (see paragraph "Driver
Memory Seat" in this chapter).
Front Heated Seats
The front seats are equipped with
heaters in both seat cushions and
seatbacks.
WARNING!
•Persons with low skin sensitivity
because of advanced age, chronic
illness, diabetes, spinal cord injury,
medication, alcohol use, exhaustion
or other physical conditions must be
careful when using the seat heater. It
may cause irritation even at low
temperatures, especially if used for
long periods of time.
•Do not place anything on the seat
that insulates against heat, such as a
blanket or cushion. This may cause
the seat heater to overheat.
NOTE:
Seat heating also works with engine
off and key in ignition switch inACC
orMAR (ON)position. To avoid
discharging the battery, it is
recommended to activate the feature
with engine running.
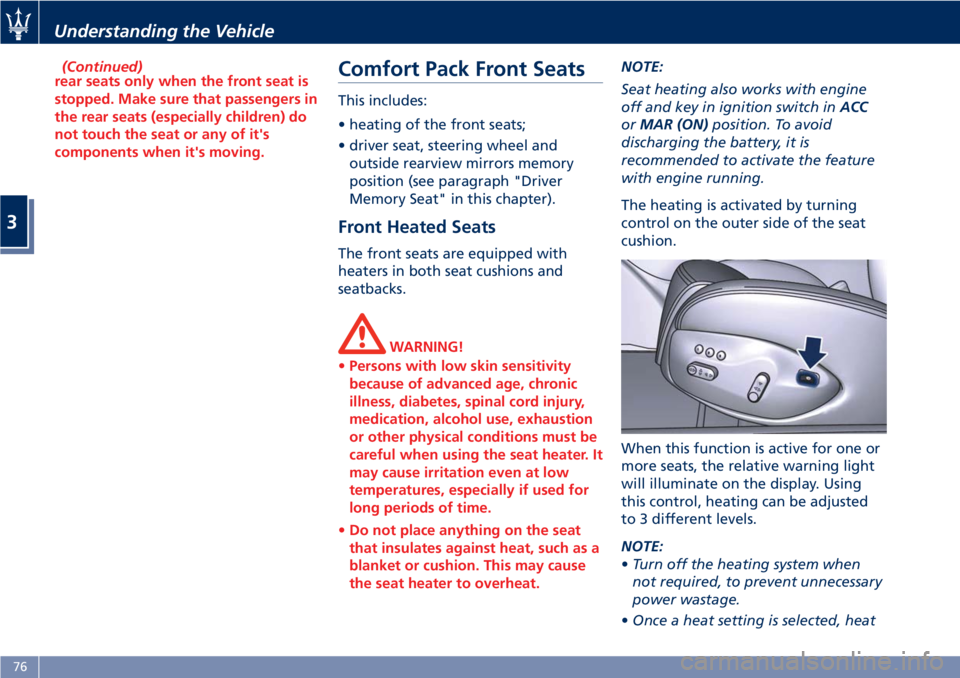
The heating is activated by turning
control on the outer side of the seat
cushion.
When this function is active for one or
more seats, the relative warning light
will illuminate on the display. Using
this control, heating can be adjusted
to 3 different levels.
NOTE:
•Turn off the heating system when
not required, to prevent unnecessary
power wastage.
•Once a heat setting is selected, heat
Understanding the Vehicle
3
76
Page 84 of 286
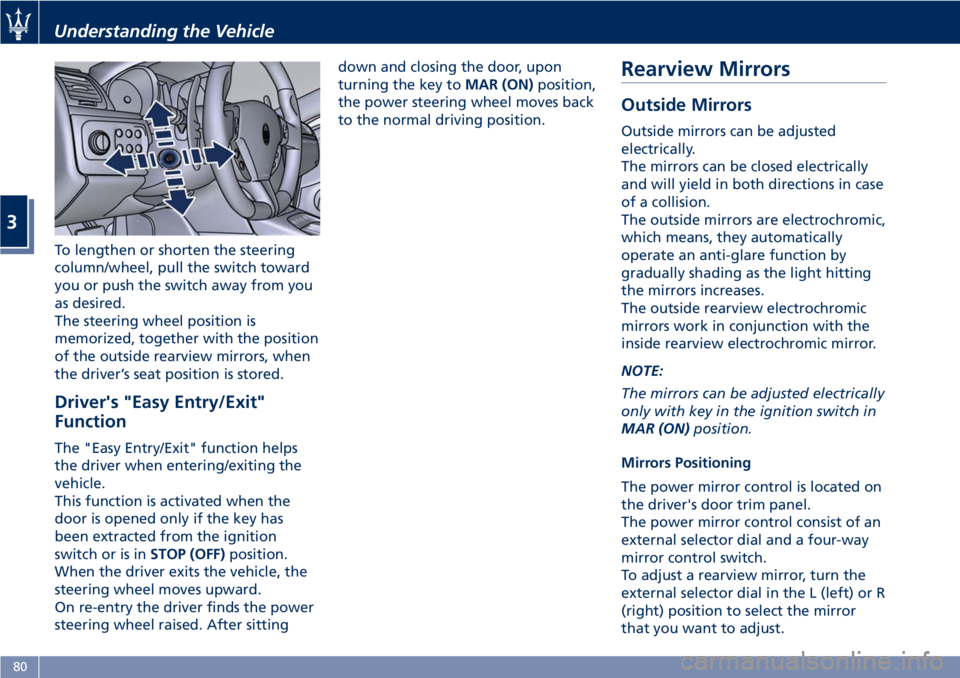
To lengthen or shorten the steering
column/wheel, pull the switch toward
you or push the switch away from you
as desired.
The steering wheel position is
memorized, together with the position
of the outside rearview mirrors, when
the driver’s seat position is stored.
Driver's "Easy Entry/Exit"
Function
The "Easy Entry/Exit" function helps
the driver when entering/exiting the
vehicle.
This function is activated when the
door is opened only if the key has
been extracted from the ignition
switch or is inSTOP (OFF)position.
When the driver exits the vehicle, the
steering wheel moves upward.
On re-entry the driver finds the power
steering wheel raised. After sittingdown and closing the door, upon
turning the key toMAR (ON)position,
the power steering wheel moves back
to the normal driving position.
Rearview Mirrors
Outside Mirrors
Outside mirrors can be adjusted
electrically.
The mirrors can be closed electrically
and will yield in both directions in case
of a collision.
The outside mirrors are electrochromic,
which means, they automatically
operate an anti-glare function by
gradually shading as the light hitting
the mirrors increases.
The outside rearview electrochromic
mirrors work in conjunction with the
inside rearview electrochromic mirror.
NOTE:
The mirrors can be adjusted electrically
only with key in the ignition switch in
MAR (ON)position.
Mirrors Positioning
The power mirror control is located on
the driver's door trim panel.
The power mirror control consist of an
external selector dial and a four-way
mirror control switch.
To adjust a rearview mirror, turn the
external selector dial in the L (left) or R
(right) position to select the mirror
that you want to adjust.
Understanding the Vehicle
3
80
Page 86 of 286
Inside Rearview Mirror
The position of inside rearview mirror
can be manually adjusted, and is
endowed with an accident-prevention
release system operating in the event
of a collision.
The electrochromic rearview mirror
automatically operates an anti-glare
function by gradually darkening as the
light reflected on its surface increases.
This function is automatically
deactivated when reversing, to ensure
optimal visibility of obstacles.
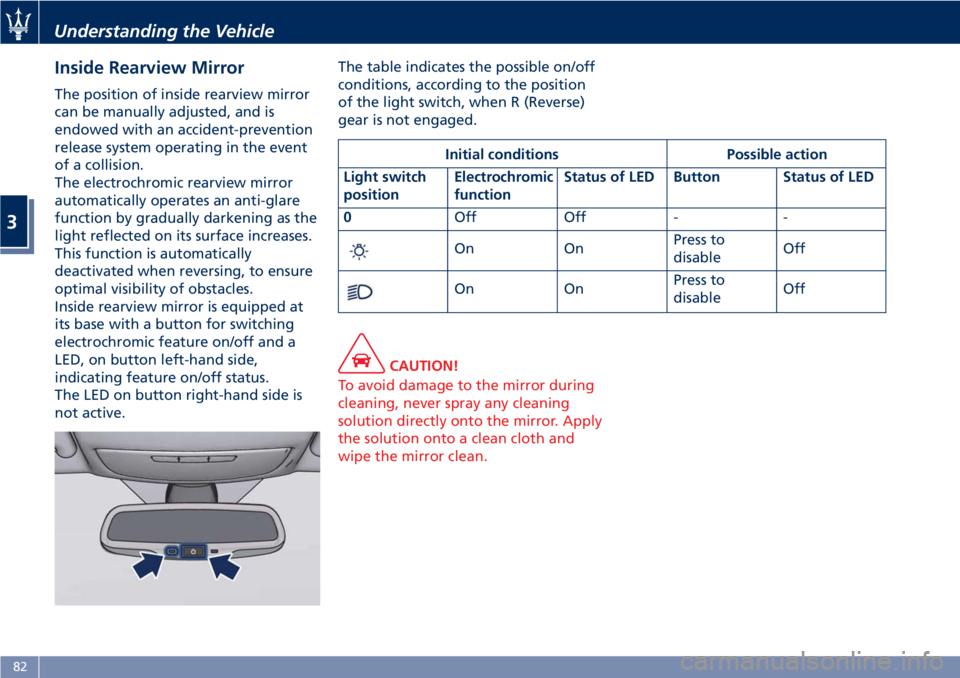
Inside rearview mirror is equipped at
its base with a button for switching
electrochromic feature on/off and a
LED, on button left-hand side,
indicating feature on/off status.
The LED on button right-hand side is
not active.The table indicates the possible on/off
conditions, according to the position
of the light switch, when R (Reverse)
gear is not engaged.
CAUTION!
To avoid damage to the mirror during
cleaning, never spray any cleaning
solution directly onto the mirror. Apply
the solution onto a clean cloth and
wipe the mirror clean.
Initial conditions Possible action
Light switch
positionElectrochromic
functionStatus of LED Button Status of LED
0Off Off - -
On OnPress to
disableOff
On OnPress to
disableOff
Understanding the Vehicle
3
82
Page 87 of 286
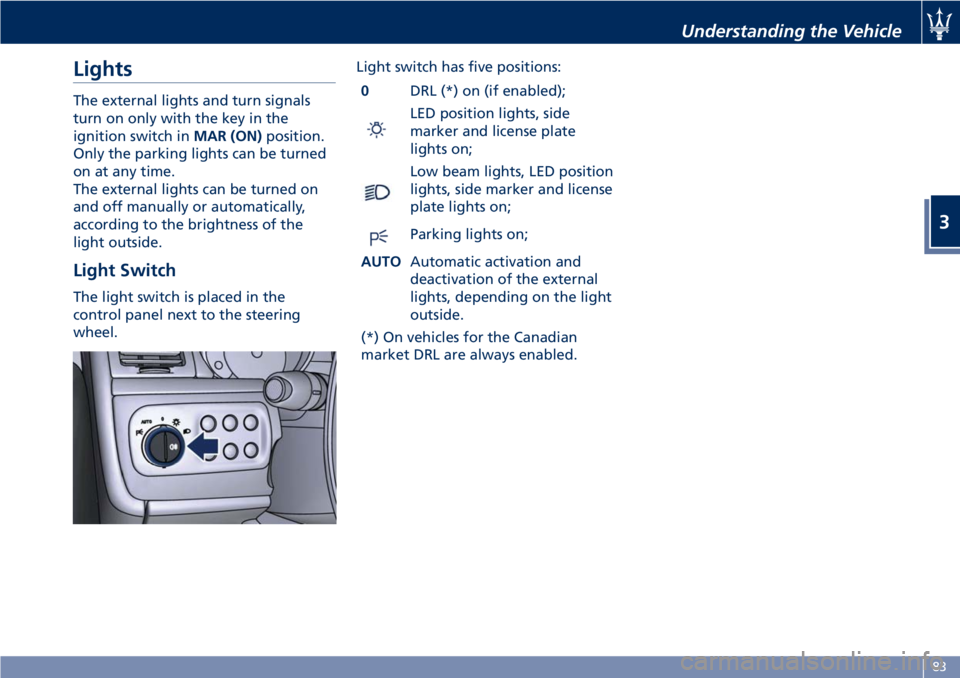
Lights
The external lights and turn signals
turn on only with the key in the
ignition switch inMAR (ON)position.
Only the parking lights can be turned
on at any time.
The external lights can be turned on
and off manually or automatically,
according to the brightness of the
light outside.
Light Switch
The light switch is placed in the
control panel next to the steering
wheel.Light switch has five positions:
0DRL (*) on (if enabled);
LED position lights, side
marker and license plate
lights on;
Low beam lights, LED position
lights, side marker and license
plate lights on;
Parking lights on;
AUTOAutomatic activation and
deactivation of the external
lights, depending on the light
outside.
(*) On vehicles for the Canadian
market DRL are always enabled.
Understanding the Vehicle
3
83
Page 88 of 286

Daytime Running Lights (DRL)
DRL are normally enabled. Under
special conditions, with light switch in
andposition, LED headlight
can be turned on to full power (DRL),
low power (position lights) or off.
Status change of these lights is
explained below.
Adaptive Bi-Xenon Headlights
The gas-discharge (xenon) headlights
operate with an electric arc saturated
with Xenon gas under pressure,
instead of the incandescent filament.
The light produced is assuredly higher
compared to traditional light bulbs, in
terms of quality (brighter light) as well
as of the span and positioning of the
illuminated area.
In addition, the headlights are
equipped with an ALC system
(Adaptive Light Control).
This system combines the light beam
with the steering angle to assure
better visibility of the road surface
when driving in a curve, steering or in
the event of road deviations.
The advantages offered by improved
lighting system are perceived
especially in case of bad weather, fog
and/or insufficient road indications
providing broader illumination of the
side zones, which are normally left in
the dark, and for highway driving (see
comparison rendered below).
This surely increases driving safety as it
offers less eye strain and increased
orientation for the driver and better
detection of other persons on the road
sides (pedestrians, bicycle riders and
motorcycle drivers).
Light
switch
positionKey
positionEngine DRL Front
position
lightsRear
position,
side marker
and license
plate lights
MAR (ON)OFF OFF ON
ON ON ON OFF
OFF OFF ON
Understanding the Vehicle
3
84
Page 89 of 286

The electric arc requires very high
voltage for activation, but afterward
power is supplied at a lower voltage.
The headlights reach maximum
brightness about 0,5 seconds after
being turned on.
The strong light produced by this type
of headlight requires the use of an
automatic system to keep the position
of the headlights constant and to
prevent dazzling approaching cars, in
the case of braking, acceleration or
load transport.
WARNING!
If xenon headlamp replacement is
necessary, contact the Authorized
Maserati Dealer only: DANGER - RISK
OF ELECTRICAL SHOCK.
Parking Lights
The parking lights only work with the
key in the ignition switch turned to
STOP (OFF)orACCposition, or with
the key removed.
They are activated by turning the light
switch to
position.
It is harder to turn the switch to
position than to the other
positions. This is to avoid activatingthe parking lights unintentionally and
wasting power.
When the parking lights are on, the
warning light on the instrument
cluster illuminates.
With parking lights on, move down
left-hand multifunction lever to switch
on position lights on left-hand side,
and move it up to switch on only the
ones on right-hand side.
Automatic Headlights
When the light switch is turned to
"AUTO" position and the key in the
ignition switch is inMAR (ON)
position, the position lights, low beam
lights and license plate lights turn on
and off automatically, depending on
the light outside.
NOTE:
The high beams can only be turned on
manually by pushing the left-hand
multifunction lever forward.
WARNING!
•If the low beams are activated, they
will come on automatically every
time the lights are turned on. You
are therefore advised to turn off the
high beams every time the twilightsensor deactivates the external
lights.
•In case of fog during the day,
position lights and low beam lights
are not turned on automatically. The
driver must always be ready to turn
the lights on manually, including
rear fog lights, if necessary.
•The driver is always responsible for
turning on the external lights,
depending on the light outside and
in compliance with the applicable
legislation in the country of use. The
automatic system for activating/
deactivating the external lights must
be considered an aid for the driver.
If necessary, turn the lights on and
off manually.
NOTE:
After external lights turn on
automatically, driver can always
manually turn on rear fog lights.
When external lights turn off
automatically, rear fog lights will turn
off automatically too, if on. Upon the
following automatic switch-on driver
must manually turn on rear fog lights,
if necessary.
Understanding the Vehicle
3
85