2020 HYUNDAI VELOSTER display
[x] Cancel search: displayPage 313 of 480
5-95
Driving your vehicle
5
There is a boundary structure in
the roadway such as a concrete
barrier, guardrail and reflector post
that is inadvertently being detected
by the camera.
When light coming from a street
light or an oncoming vehicle is
reflected on a wet road surface
such as a puddle in the road.
Road surface is not evenness.
The field of view in front is
obstructed by sun glare.
There is not enough distance
between you and the vehicle in
front to be able to detect the lane
line or the vehicle ahead is driving
on the lane line.
Driving on a steep grade, over a
hill, or when driving on a curved
road.
The adverse road conditions cause
excessive vehicle vibrations while
driving.
The surrounding of the inside rear
view mirror temperature is high
due to direct sunlight and etc.When front visibility is poor
The windshield or the LKA system
camera lens is blocked with dirt or
debris.
The windshield glass is fogged up;
a clear view of the road is obstruct-
ed.
Placing objects on the dashboard,
etc.
LKA system Function Change
The driver can change LKA to Lane
Departure Warning (LDW) system or
change the LKA system mode
between Standard LKA and Active
LKA from the LCD display. Go to the
'User Settings →Driver Assistance →
Lane Keeping Assist →Lane
Departure Warning/Standard
LKA/Active LKA'.
Lane Departure Warning
LDW system alerts the driver with a
visual warning and a warning alarm
when the system detects the vehicle
departing the lane. The steering
wheel will not be controlled.
Standard LKA
The Standard LKA mode guides the
driver to help keep the vehicle within
the lanes. It rarely controls the steer-
ing wheel, when the vehicle drives
well inside the lanes. However, it
starts to control the steering wheel,
when the vehicle is about to deviate
out of the lanes.
Active LKA
The Active LKA mode provides more
frequent steering wheel control in
comparison with the Standard LKA
mode. Active LKA can help reduce
the driver's fatigue to assist the
steering for maintaining the vehicle
in the middle of the lane.
Page 314 of 480
5-96
Driving your vehicle
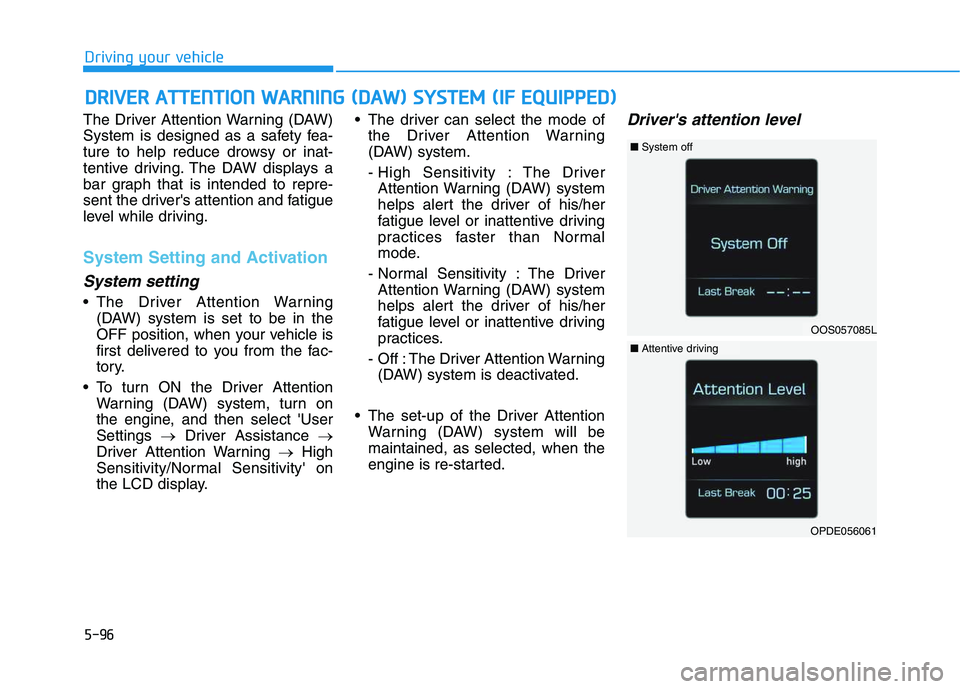
The Driver Attention Warning (DAW)
System is designed as a safety fea-
ture to help reduce drowsy or inat-
tentive driving. The DAW displays a
bar graph that is intended to repre-
sent the driver's attention and fatigue
level while driving.
System Setting and Activation
System setting
The Driver Attention Warning
(DAW) system is set to be in the
OFF position, when your vehicle is
first delivered to you from the fac-
tory.
To turn ON the Driver Attention
Warning (DAW) system, turn on
the engine, and then select 'User
Settings →Driver Assistance →
Driver Attention Warning →High
Sensitivity/Normal Sensitivity' on
the LCD display. The driver can select the mode of
the Driver Attention Warning
(DAW) system.
- High Sensitivity : The Driver
Attention Warning (DAW) system
helps alert the driver of his/her
fatigue level or inattentive driving
practices faster than Normal
mode.
- Normal Sensitivity : The Driver
Attention Warning (DAW) system
helps alert the driver of his/her
fatigue level or inattentive driving
practices.
- Off : The Driver Attention Warning
(DAW) system is deactivated.
The set-up of the Driver Attention
Warning (DAW) system will be
maintained, as selected, when the
engine is re-started.
Driver's attention level
D DR
RI
IV
VE
ER
R
A
AT
TT
TE
EN
NT
TI
IO
ON
N
W
WA
AR
RN
NI
IN
NG
G
(
(D
DA
AW
W)
)
S
SY
YS
ST
TE
EM
M
(
(I
IF
F
E
EQ
QU
UI
IP
PP
PE
ED
D)
)
OOS057085L
■System off
OPDE056061
■Attentive driving
Page 315 of 480
5-97
Driving your vehicle
5
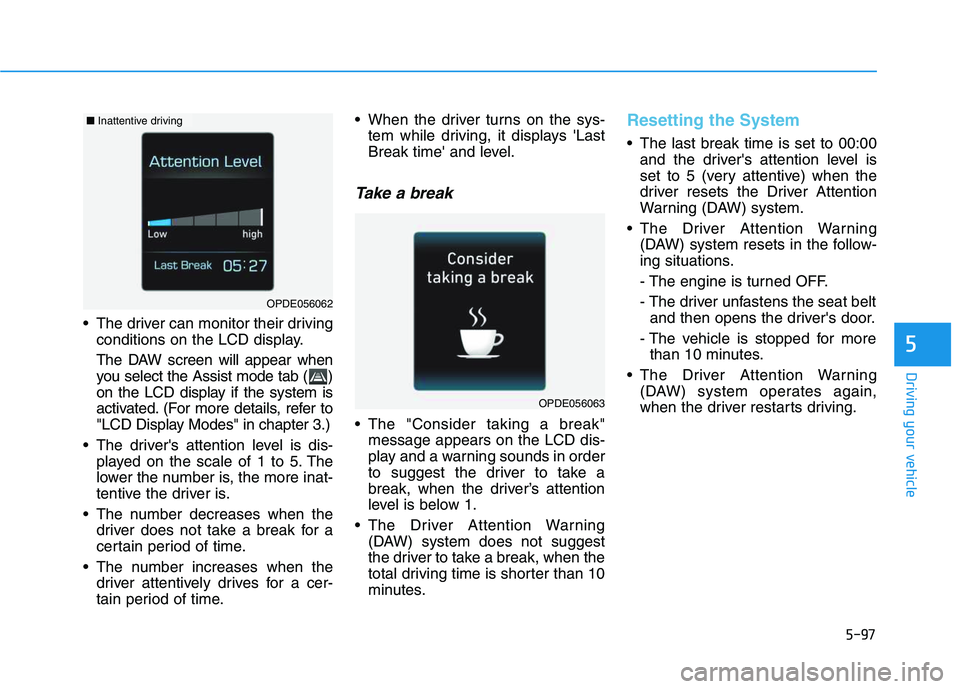
The driver can monitor their driving
conditions on the LCD display.
The DAW screen will appear when
you select the Assist mode tab ( )
on the LCD display if the system is
activated. (For more details, refer to
"LCD Display Modes" in chapter 3.)
The driver's attention level is dis-
played on the scale of 1 to 5. The
lower the number is, the more inat-
tentive the driver is.
The number decreases when the
driver does not take a break for a
certain period of time.
The number increases when the
driver attentively drives for a cer-
tain period of time. When the driver turns on the sys-
tem while driving, it displays 'Last
Break time' and level.
Take a break
The "Consider taking a break"
message appears on the LCD dis-
play and a warning sounds in order
to suggest the driver to take a
break, when the driver’s attention
level is below 1.
The Driver Attention Warning
(DAW) system does not suggest
the driver to take a break, when the
total driving time is shorter than 10
minutes.
Resetting the System
The last break time is set to 00:00
and the driver's attention level is
set to 5 (very attentive) when the
driver resets the Driver Attention
Warning (DAW) system.
The Driver Attention Warning
(DAW) system resets in the follow-
ing situations.
- The engine is turned OFF.
- The driver unfastens the seat belt
and then opens the driver's door.
- The vehicle is stopped for more
than 10 minutes.
The Driver Attention Warning
(DAW) system operates again,
when the driver restarts driving.
OPDE056063
OPDE056062
■Inattentive driving
Page 316 of 480
5-98
Driving your vehicle
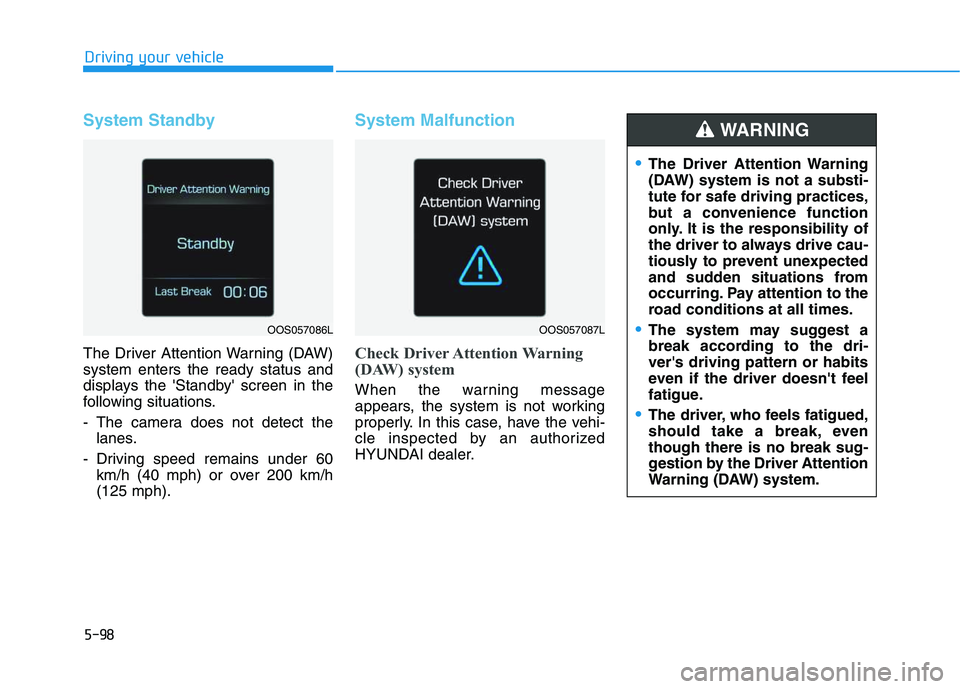
System Standby
The Driver Attention Warning (DAW)
system enters the ready status and
displays the 'Standby' screen in the
following situations.
- The camera does not detect the
lanes.
- Driving speed remains under 60
km/h (40 mph) or over 200 km/h
(125 mph).
System Malfunction
Check Driver Attention Warning
(DAW) system
When the warning message
appears, the system is not working
properly. In this case, have the vehi-
cle inspected by an authorized
HYUNDAI dealer.
The Driver Attention Warning
(DAW) system is not a substi-
tute for safe driving practices,
but a convenience function
only. It is the responsibility of
the driver to always drive cau-
tiously to prevent unexpected
and sudden situations from
occurring. Pay attention to the
road conditions at all times.
The system may suggest a
break according to the dri-
ver's driving pattern or habits
even if the driver doesn't feel
fatigue.
The driver, who feels fatigued,
should take a break, even
though there is no break sug-
gestion by the Driver Attention
Warning (DAW) system.
WARNING
OOS057086LOOS057087L
Page 319 of 480
5-101
Driving your vehicle
5
Information
• During normal cruise control opera-
tion, when the SET switch is activat-
ed or reactivated after applying the
brakes, the cruise control will ener-
gize after approximately 3 seconds.
This delay is normal.
• Before activating the cruise control
function, the system will check to
verify that the brake switch is oper-
ating normally. Depress the brake
pedal at least once after turning ON
the ignition or starting the engine.
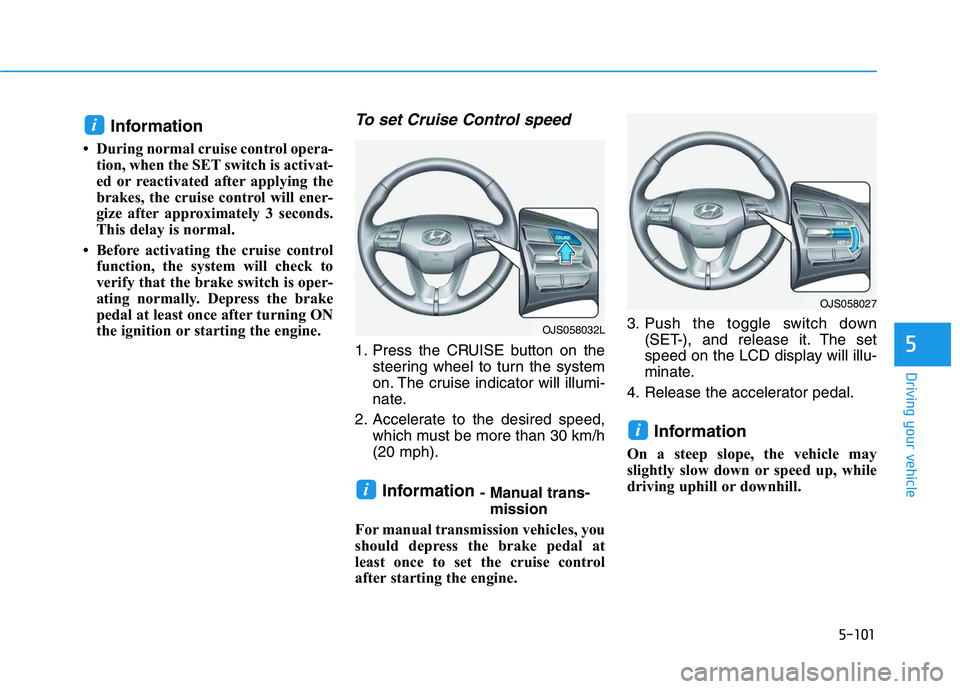
To set Cruise Control speed
1. Press the CRUISE button on the
steering wheel to turn the system
on. The cruise indicator will illumi-
nate.
2. Accelerate to the desired speed,
which must be more than 30 km/h
(20 mph).
Information - Manual trans-
mission
For manual transmission vehicles, you
should depress the brake pedal at
least once to set the cruise control
after starting the engine.3. Push the toggle switch down
(SET-), and release it. The set
speed on the LCD display will illu-
minate.
4. Release the accelerator pedal.
Information
On a steep slope, the vehicle may
slightly slow down or speed up, while
driving uphill or downhill.
i
i
i
OJS058027
OJS058032L
Page 321 of 480
5-103
Driving your vehicle
5
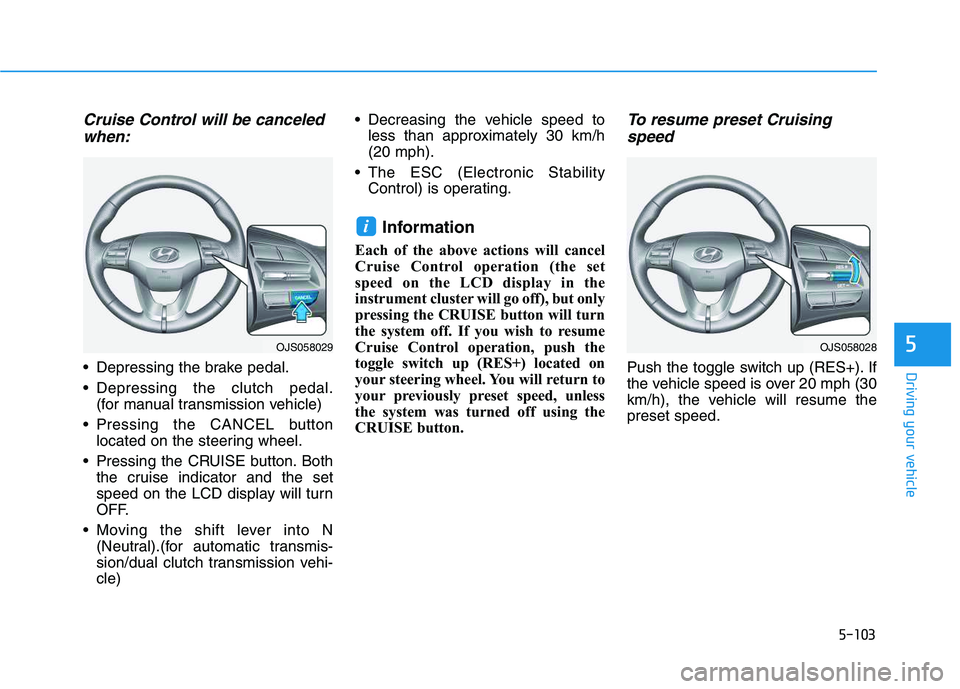
Cruise Control will be canceled
when:
Depressing the brake pedal.
Depressing the clutch pedal.
(for manual transmission vehicle)
Pressing the CANCEL button
located on the steering wheel.
Pressing the CRUISE button. Both
the cruise indicator and the set
speed on the LCD display will turn
OFF.
Moving the shift lever into N
(Neutral).(for automatic transmis-
sion/dual clutch transmission vehi-
cle) Decreasing the vehicle speed to
less than approximately 30 km/h
(20 mph).
The ESC (Electronic Stability
Control) is operating.
Information
Each of the above actions will cancel
Cruise Control operation (the set
speed on the LCD display in the
instrument cluster will go off), but only
pressing the CRUISE button will turn
the system off. If you wish to resume
Cruise Control operation, push the
toggle switch up (RES+) located on
your steering wheel. You will return to
your previously preset speed, unless
the system was turned off using the
CRUISE button.
To resume preset Cruising
speed
Push the toggle switch up (RES+). If
the vehicle speed is over 20 mph (30
km/h), the vehicle will resume the
preset speed.
i
OJS058029OJS058028
Page 323 of 480

5-105
Driving your vehicle
5
1. Cruise indicator
2. Set speed
3. Vehicle-to-vehicle distance
To see the SCC screen on the LCD
display in the cluster, select Assist
mode ( ). For more details, refer to
"LCD Display Modes" in chapter 3.The Smart Cruise Control system
allows you to program the vehicle to
maintain constant speed and mini-
mum distance between the vehicle
ahead.
The Smart Cruise Control system
will automatically adjust your vehicle
speed to maintain your programmed
speed and following distance without
requiring you to depress the acceler-
ator or brake pedals.
S SM
MA
AR
RT
T
C
CR
RU
UI
IS
SE
E
C
CO
ON
NT
TR
RO
OL
L
S
SY
YS
ST
TE
EM
M
(
(I
IF
F
E
EQ
QU
UI
IP
PP
PE
ED
D)
)
OJS058112
For your safety, please read the
owner's manual before using the
Smart Cruise Control system.
WARNING
The Smart Cruise Control sys-
tem is not a substitute for safe
driving practices, but a conven-
ience function only. It is the
responsibility of the driver to
always check the speed and
distance to the vehicle ahead.
WARNING
Take the following precautions :
Always set the vehicle speed
under the speed limit.
If the Smart Cruise Control is
left on, (cruise indicator light
in the instrument cluster is
illuminated) the Smart Cruise
Control can be activated unin-
tentionally. Keep the Smart
Cruise Control system off
(cruise indicator light OFF)
when the Smart Cruise
Control is not in use, to avoid
inadvertently setting a speed.
Use the Smart Cruise Control
system only when traveling
on open highways in good
weather.
Do not use the Smart Cruise
Control when it may not be
safe to keep the vehicle at a
constant speed.
Do not use when:
- Driving in heavy traffic or
when traffic conditions make
it difficult to drive at a con-
stant speed
WARNING
Page 325 of 480
5-107
Driving your vehicle
5
Smart Cruise Control Speed
To set Smart Cruise Control
speed
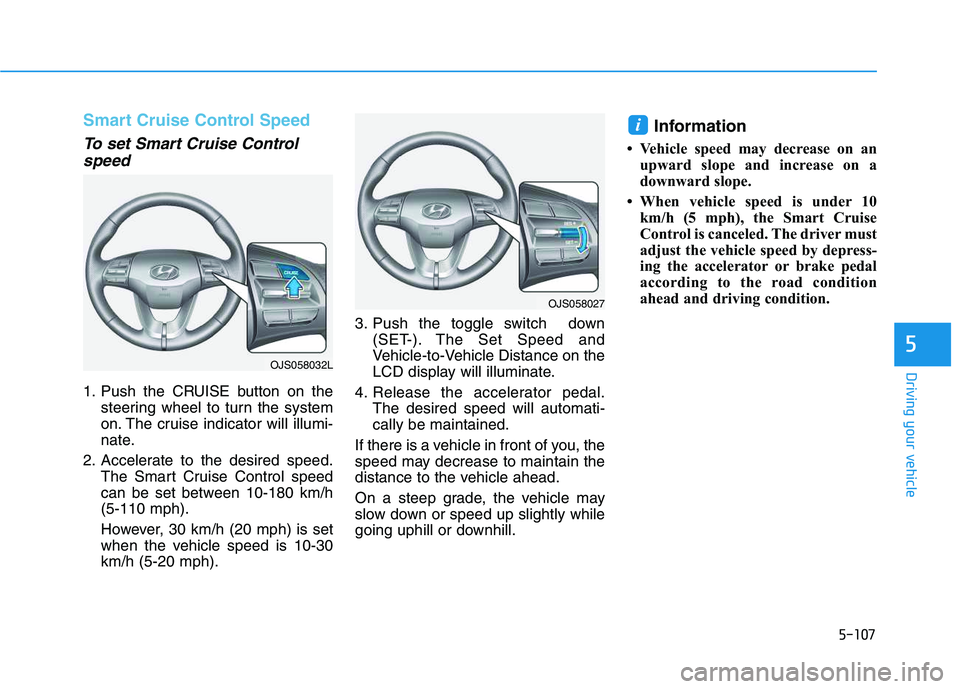
1. Push the CRUISE button on the
steering wheel to turn the system
on. The cruise indicator will illumi-
nate.
2. Accelerate to the desired speed.
The Smart Cruise Control speed
can be set between 10-180 km/h
(5-110 mph).
However, 30 km/h (20 mph) is set
when the vehicle speed is 10-30
km/h (5-20 mph).3. Push the toggle switch down
(SET-). The Set Speed and
Vehicle-to-Vehicle Distance on the
LCD display will illuminate.
4. Release the accelerator pedal.
The desired speed will automati-
cally be maintained.
If there is a vehicle in front of you, the
speed may decrease to maintain the
distance to the vehicle ahead.
On a steep grade, the vehicle may
slow down or speed up slightly while
going uphill or downhill.
Information
• Vehicle speed may decrease on an
upward slope and increase on a
downward slope.
• When vehicle speed is under 10
km/h (5 mph), the Smart Cruise
Control is canceled. The driver must
adjust the vehicle speed by depress-
ing the accelerator or brake pedal
according to the road condition
ahead and driving condition.
i
OJS058027
OJS058032L