Page 190 of 637
3-104
Convenient features of your vehicle
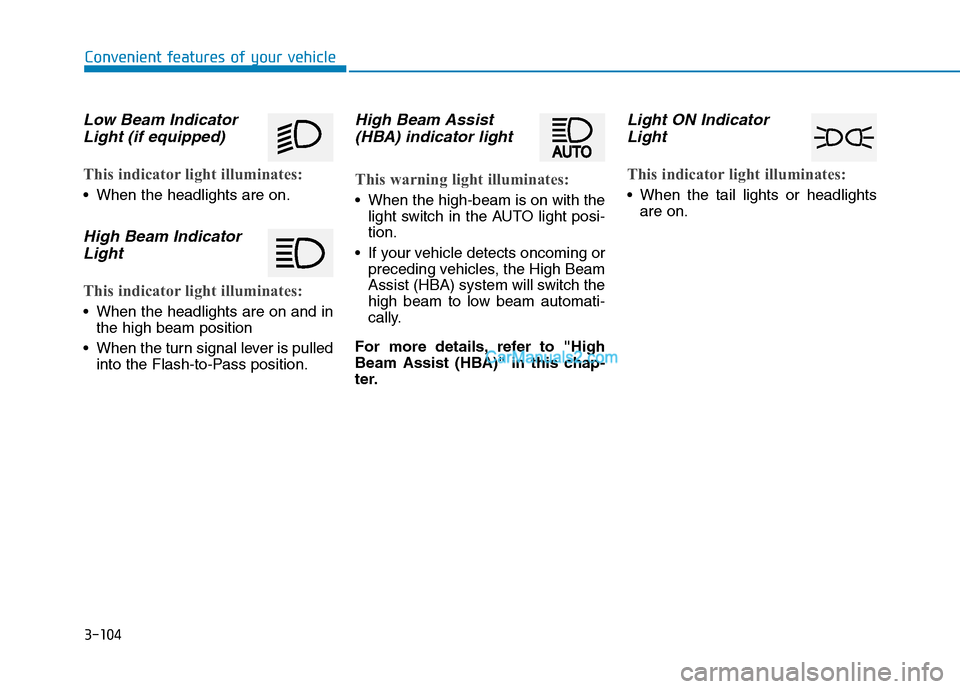
Low Beam Indicator
Light (if equipped)
This indicator light illuminates:
When the headlights are on.
High Beam Indicator
Light
This indicator light illuminates:
When the headlights are on and in
the high beam position
When the turn signal lever is pulled
into the Flash-to-Pass position.
High Beam Assist
(HBA) indicator light
This warning light illuminates:
When the high-beam is on with the
light switch in the AUTO light posi-
tion.
If your vehicle detects oncoming or
preceding vehicles, the High Beam
Assist (HBA) system will switch the
high beam to low beam automati-
cally.
For more details, refer to "High
Beam Assist (HBA)" in this chap-
ter.
Light ON Indicator
Light
This indicator light illuminates:
When the tail lights or headlights
are on.
Page 197 of 637
3-111
Convenient features of your vehicle
3
4. The High Beam Assist (HBA) will
turn on when vehicle speed is
above 40km/h.
1) If the light switch is pushed away
when the High Beam Assist
(HBA) is operating, the High
Beam Assist (HBA) will turn off
and the high beam will be on
continuously.
2) If the light switch is pulled
towards you when the high
beam is off, the high beam will
turn on without the High Beam
Assist (HBA) cancelled. When
you let go of the light switch, the
lever will move to the middle and
the high beam will turn off.
3) If the light switch is pulled
towards you when the high
beam is on by the High Beam
Assist (HBA), the low beam will
be on and the High Beam Assist
(HBA) will turn off.
4) If the light switch is placed to the
headlamp position, the High
Beam Assist (HBA) will turn off
and the low beam will be on
continuously.When the High Beam Assist (HBA) is
operating, the high beam switches to
low beam in the following conditions.
- When the headlamps of an on-
coming vehicle are detected.
- When the tail lamps of a vehicle in
front is detected.
- When the headlamp/tail lamp of a
bicycle/motorcycle is detected.
- When the surroundings are bright
enough high beams are not need-
ed.
- When streetlights or other lights
are detected.
- When the light switch is not in the
AUTO position.
- When the High Beam Assist (HBA)
is off.
- When vehicle speed is below 30
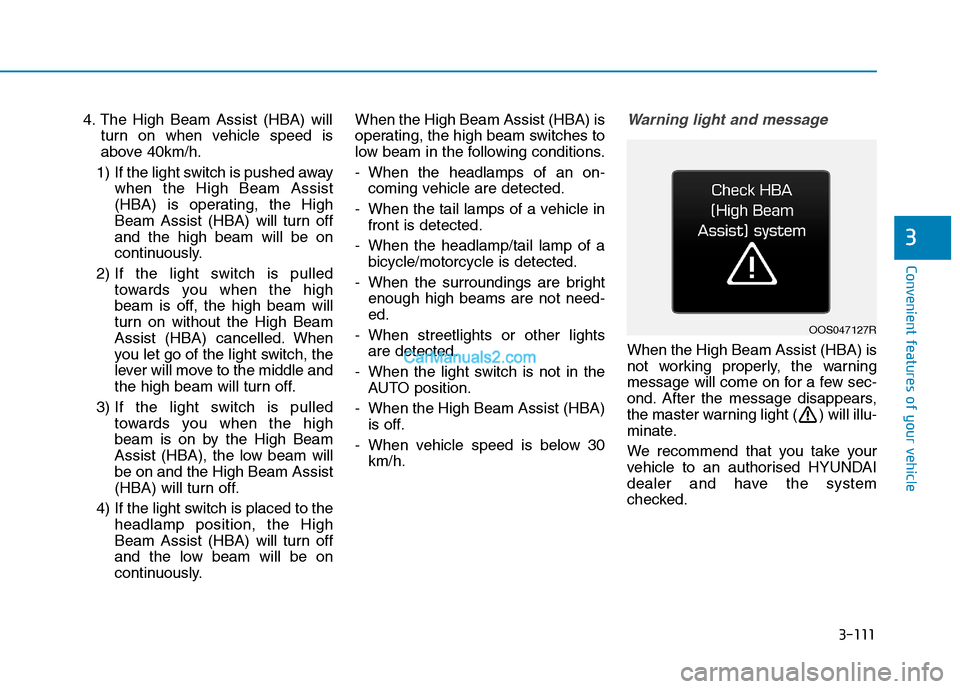
km/h.Warning light and message
When the High Beam Assist (HBA) is
not working properly, the warning
message will come on for a few sec-
ond. After the message disappears,
the master warning light ( ) will illu-
minate.
We recommend that you take your
vehicle to an authorised HYUNDAI
dealer and have the system
checked.
OOS047127R
Page 198 of 637
3-112
Convenient features of your vehicle
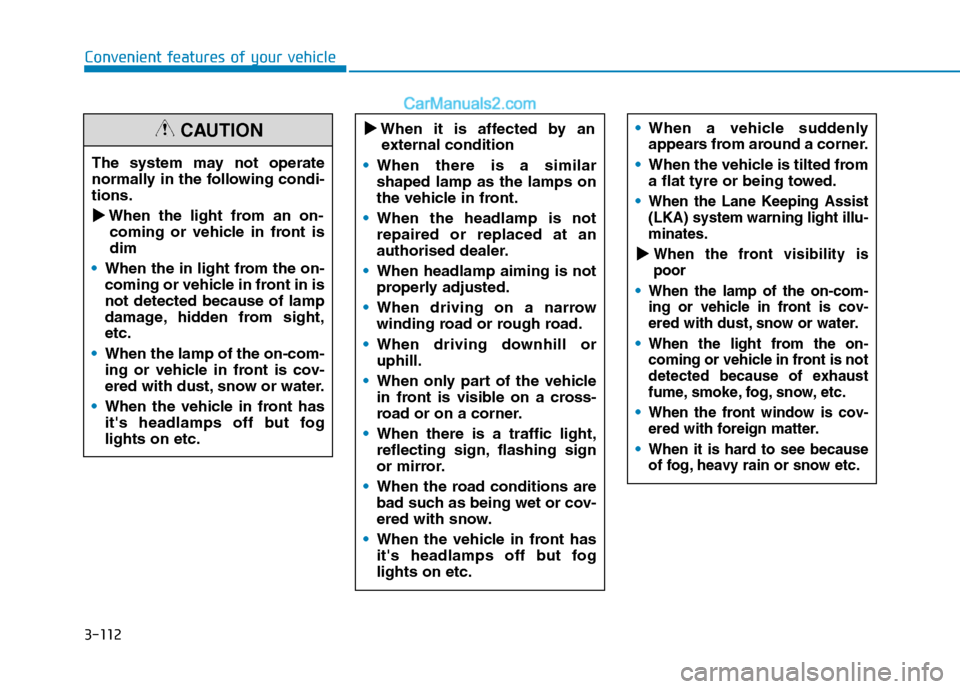
When a vehicle suddenly
appears from around a corner.
When the vehicle is tilted from
a flat tyre or being towed.
When the Lane Keeping Assist
(LKA) system warning light illu-
minates.
� �When the front visibility is
poor
When the lamp of the on-com-
ing or vehicle in front is cov-
ered with dust, snow or water.
When the light from the on-
coming or vehicle in front is not
detected because of exhaust
fume, smoke, fog, snow, etc.
When the front window is cov-
ered with foreign matter.
When it is hard to see because
of fog, heavy rain or snow etc.
The system may not operate
normally in the following condi-
tions.
� �
When the light from an on-
coming or vehicle in front is
dim
When the in light from the on-
coming or vehicle in front in is
not detected because of lamp
damage, hidden from sight,
etc.
When the lamp of the on-com-
ing or vehicle in front is cov-
ered with dust, snow or water.
When the vehicle in front has
it's headlamps off but fog
lights on etc.
� �
When it is affected by an
external condition
When there is a similar
shaped lamp as the lamps on
the vehicle in front.
When the headlamp is not
repaired or replaced at an
authorised dealer.
When headlamp aiming is not
properly adjusted.
When driving on a narrow
winding road or rough road.
When driving downhill or
uphill.
When only part of the vehicle
in front is visible on a cross-
road or on a corner.
When there is a traffic light,
reflecting sign, flashing sign
or mirror.
When the road conditions are
bad such as being wet or cov-
ered with snow.
When the vehicle in front has
it's headlamps off but fog
lights on etc.CAUTION
Page 206 of 637
3-120
Convenient features of your vehicle
Interior lights
Do not use the interior lights for
extended periods when the engine
is turned off or the battery will dis-
charge.
Interior lamp AUTO cut
The interior lamps will automatically
go off approximately 20 minutes after
the engine is turned off and the
doors closed. If a door is opened, the
lamp will go off 40 minutes after the
engine is turned off. If the doors are
locked by the smart key and the vehi-
cle enters the armed stage of the
theft alarm system, the lamps will go
off five seconds later.
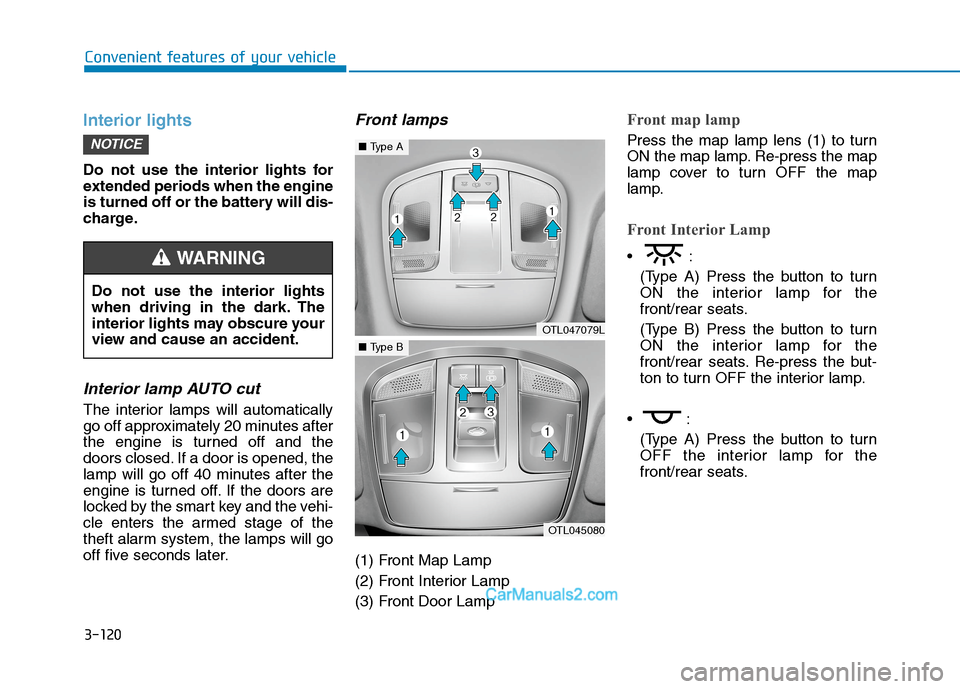
Front lamps
(1) Front Map Lamp
(2) Front Interior Lamp
(3) Front Door Lamp
Front map lamp
Press the map lamp lens (1) to turn
ON the map lamp. Re-press the map
lamp cover to turn OFF the map
lamp.
Front Interior Lamp
(Type A) Press the button to turn
ON the interior lamp for the
front/rear seats.
(Type B) Press the button to turn
ON the interior lamp for the
front/rear seats. Re-press the but-
ton to turn OFF the interior lamp.
(Type A) Press the button to turn
OFF the interior lamp for the
front/rear seats.
NOTICE
OTL047079L
■Type A
OTL045080
■Type B
Do not use the interior lights
when driving in the dark. The
interior lights may obscure your
view and cause an accident.
WARNING
Page 321 of 637
5-4
Driving your vehicle
Before entering the vehicle
• Be sure all windows, outside mir-
ror(s), and outside lights are clean
and unobstructed.
Remove frost, snow, or ice.
Visually check the tyres for uneven
wear and damage.
Check under the vehicle for any
sign of leaks.
Be sure there are no obstacles
behind you if you intend to reverse.
Before starting
Make sure the bonnet, the tailgate,
and doors are securely closed and
locked.
Adjust the position of the seat and
steering wheel.
Adjust the inside and outside
rearview mirrors.
Verify all the lights work.
Fasten your seat belt. Check that
all passengers have fastened their
seat belts.
Check the gauges and indicators
on the instrument panel and the
messages on the instrument dis-
play when the ignition switch is in
the ON position.
Check that any items you are car-
rying are stored properly or fas-
tened down securely.
B BE
EF
FO
OR
RE
E
D
DR
RI
IV
VI
IN
NG
G
To reduce the risk of SERIOUS
INJURY or DEATH, take the fol-
lowing precautions:
•ALWAYS wear your seat belt.
All passengers must be prop-
erly restrained whenever the
vehicle is moving. For more
details, refer to "Seat Belts" in
chapter 2.
Always drive defensively.
Assume other drivers or
pedestrians may be careless
and make mistakes.
Stay focused on the task of
driving. Driver distraction can
cause accidents.
Leave plenty of space
between you and the vehicle
in front of you.
WARNING
Page 324 of 637
5-7
Driving your vehicle
5
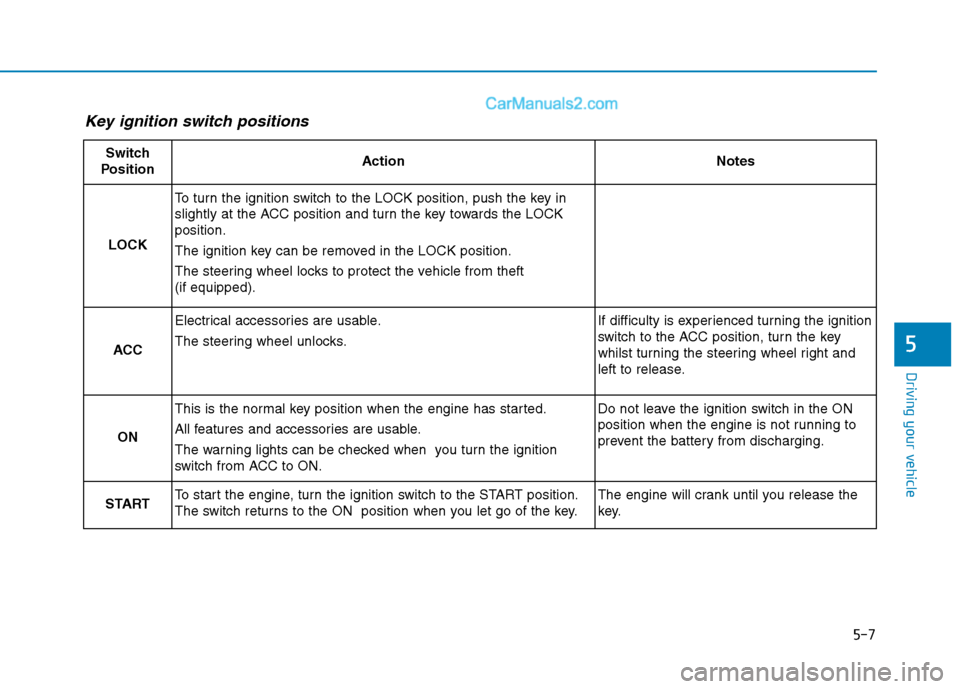
Key ignition switch positions
Switch
PositionActionNotes
LOCK
To turn the ignition switch to the LOCK position, push the key in
slightly at the ACC position and turn the key towards the LOCK
position.
The ignition key can be removed in the LOCK position.
The steering wheel locks to protect the vehicle from theft
(if equipped).
ACC
Electrical accessories are usable.
The steering wheel unlocks.If difficulty is experienced turning the ignition
switch to the ACC position, turn the key
whilst turning the steering wheel right and
left to release.
ON
This is the normal key position when the engine has started.
All features and accessories are usable.
The warning lights can be checked when you turn the ignition
switch from ACC to ON.Do not leave the ignition switch in the ON
position when the engine is not running to
prevent the battery from discharging.
STARTTo start the engine, turn the ignition switch to the START position.
The switch returns to the ON position when you let go of the key.The engine will crank until you release the
key.
Page 330 of 637
5-13
Driving your vehicle
5
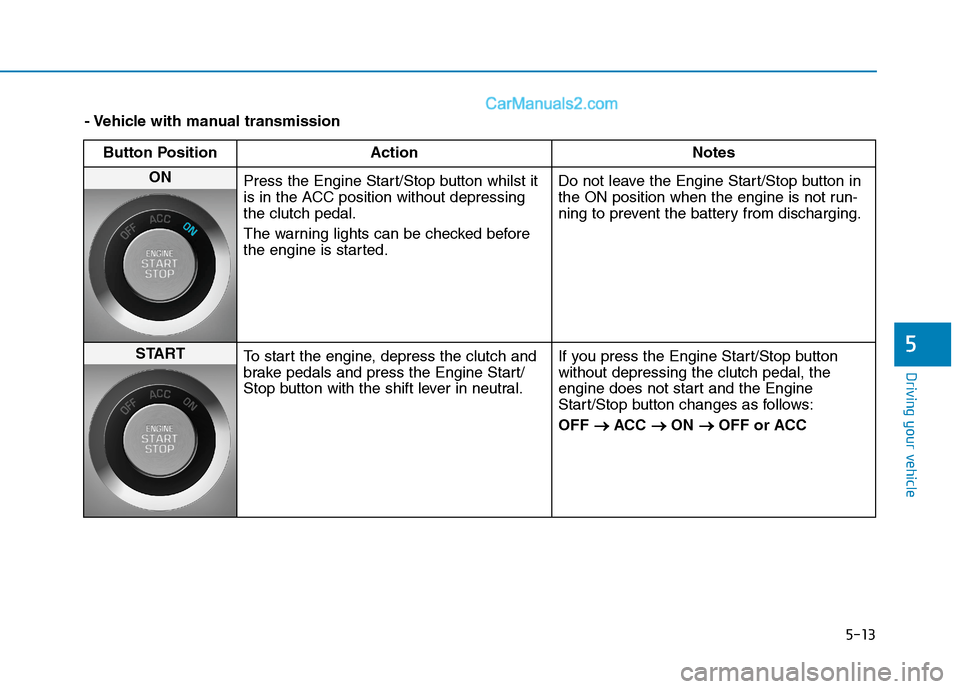
- Vehicle with manual transmission
Button Position Action Notes
ON
Press the Engine Start/Stop button whilst it
is in the ACC position without depressing
the clutch pedal.
The warning lights can be checked before
the engine is started.Do not leave the Engine Start/Stop button in
the ON position when the engine is not run-
ning to prevent the battery from discharging.
START
To start the engine, depress the clutch and
brake pedals and press the Engine Start/
Stop button with the shift lever in neutral.If you press the Engine Start/Stop button
without depressing the clutch pedal, the
engine does not start and the Engine
Start/Stop button changes as follows:
OFF → →
ACC → →
ON → →
OFF or ACC
Page 332 of 637
5-15
Driving your vehicle
5
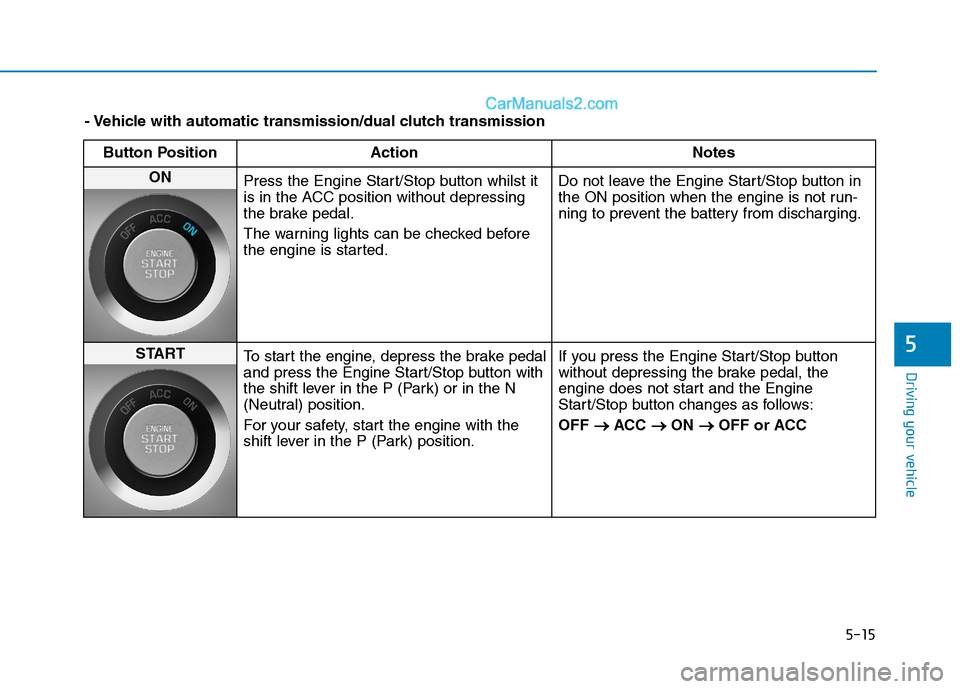
- Vehicle with automatic transmission/dual clutch transmission
Button Position Action Notes
ON
Press the Engine Start/Stop button whilst it
is in the ACC position without depressing
the brake pedal.
The warning lights can be checked before
the engine is started.Do not leave the Engine Start/Stop button in
the ON position when the engine is not run-
ning to prevent the battery from discharging.
START
To start the engine, depress the brake pedal
and press the Engine Start/Stop button with
the shift lever in the P (Park) or in the N
(Neutral) position.
For your safety, start the engine with the
shift lever in the P (Park) position.If you press the Engine Start/Stop button
without depressing the brake pedal, the
engine does not start and the Engine
Start/Stop button changes as follows:
OFF → →
ACC → →
ON → →
OFF or ACC