Page 369 of 509

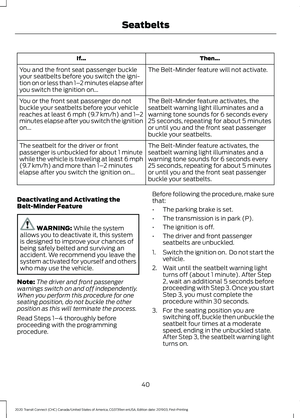
CREATING A WI-FI HOTSPOT -
VEHICLES WITHOUT: SYNC 3
You can create a Wi-Fi hotspot in your
vehicle and allow devices to connect to it
for access to the Internet.
Press the button to enter the
settings menu.
1. Select Connectivity Features.
2. Select
Vehicle Hotspot.
Note: The vehicle hotspot default setting
is on.
3. Select
Settings.
4. Select
Wi-Fi visibility.
Note: The Wi-Fi Visibility default setting is
on.
Finding the Wi-Fi Hotspot Name
and Password Press the button to enter the
settings menu.
1. Select
Connectivity Features.
2. Select
Vehicle Hotspot.
3. Select
Settings.
Note: The SSID is the hotspot name.
4. Scroll to
Hide password.
5. Uncheck the box.
Connecting a Device to the Wi-Fi
Hotspot
1. On your device, turn on Wi-Fi and select
the hotspot from the list of available
Wi-Fi networks.
2. When prompted, enter the password.
Purchasing a Data Plan
1. Connect a device to the hotspot. Note:
The vehicle network carrier ’s portal
opens on your device.
2. If the portal does not open on your device, open a website and it redirects
to the vehicle network carrier ’s portal.
Note: Secure websites do not redirect.
Note: If you have an active plan, the system
does not redirect to the vehicle network
carrier ’s portal when you connect a device.
Visit the vehicle network carrier ’s website
to purchase more data.
Note: If data usage information is available
in the vehicle hotspot menu, it is
approximate.
Note: If you carry out a master reset, the
system does not remove your vehicle from
your vehicle network carrier ’s account. To
remove your vehicle from the account,
contact your vehicle network carrier.
Note: The vehicle network carrier provides
Vehicle Hotspot services, subject to your
vehicle network carrier agreement, coverage
and availability.
CREATING A WI-FI HOTSPOT -
VEHICLES WITH: SYNC 3
You can create a Wi-Fi hotspot in your
vehicle and allow devices to connect to it
for access to the Internet. Select the settings option on the
feature bar.
1. Select
FordPass Connect.
2. Select
Vehicle Hotspot.
Note: The vehicle hotspot default setting
is on.
3. Select
Settings.
4. Select
Edit.
5. Select
Wi-Fi Visibility.
365
2020 Transit Connect (CHC) Canada/United States of America, CG3739en enUSA, Edition date: 201903, First-Printing Wi-Fi Hotspot
Page 370 of 509

Note:
The Wi-Fi Visibility default setting is
on.
Finding the Wi-Fi Hotspot Name
and Password Select the settings option on the
feature bar.
1. Select FordPass Connect.
2. Select
Vehicle Hotspot.
3. Select
Settings.
Note: The SSID is the hotspot name.
4. Select
View Password.
Connecting a Device to the Wi-Fi
Hotspot
1. On your device, turn on Wi-Fi and select
the hotspot from the list of available
Wi-Fi networks.
2. When prompted, enter the password.
Purchasing a Data Plan
1. Connect a device to the hotspot.
Note: The vehicle network carrier ’s portal
opens on your device.
2. If the portal does not open on your device, open a website and it redirects
to the vehicle network carrier ’s portal.
Note: Secure websites do not redirect.
Note: If you have an active plan, the system
does not redirect to the vehicle network
carrier ’s portal when you connect a device.
Visit the vehicle network carrier ’s website
to purchase more data.
Note: If data usage information is available
in the vehicle hotspot menu, it is
approximate.
Note: If you carry out a master reset, the
system does not remove your vehicle from
your vehicle network carrier ’s account. To
remove your vehicle from the account,
contact your vehicle network carrier. Note:
The vehicle network carrier provides
Vehicle Hotspot services, subject to your
vehicle network carrier agreement, coverage
and availability.
CHANGING THE WI-FI
HOTSPOT NAME OR
PASSWORD - VEHICLES
WITHOUT: SYNC 3 Press the button to enter the
settings menu.
1. Select Connectivity Features.
2. Select
Vehicle Hotspot.
3. Select
Settings.
4. Select
SSID: ___.
5. Enter your required SSID.
6. Select
Done.
7. Select
Password: ___.
8. Enter your required password.
9. Select
Done.
CHANGING THE WI-FI
HOTSPOT NAME OR
PASSWORD - VEHICLES WITH:
SYNC 3 Select the settings option on the
feature bar.
1. Select
FordPass Connect.
2. Select
Vehicle Hotspot.
3. Select
Settings.
4. Select
Edit.
366
2020 Transit Connect (CHC) Canada/United States of America, CG3739en enUSA, Edition date: 201903, First-Printing Wi-Fi Hotspot
Page 371 of 509

GENERAL INFORMATION
WARNING: Driving while
distracted can result in loss of vehicle
control, crash and injury. We strongly
recommend that you use extreme
caution when using any device that may
take your focus off the road. Your
primary responsibility is the safe
operation of your vehicle. We
recommend against the use of any
hand-held device while driving and
encourage the use of voice-operated
systems when possible. Make sure you
are aware of all applicable local laws
that may affect the use of electronic
devices while driving. Radio Frequencies and Reception
Factors
AM and FM frequencies are established by
the Federal Communications Commission
(FCC) and the Canadian Radio and
Telecommunications Commission (CRTC).
Those frequencies are:
•
AM: 530-1710 kHz
• FM: 87.9-107.9 MHz
Note: Listening to loud audio for long
periods of time could damage your hearing. Radio Reception Factors
The further you travel from an AM or FM station, the
weaker the signal and the weaker the reception.
Distance and strength
Hills, mountains, tall buildings, bridges, tunnels, freeway
overpasses, parking garages, dense tree foliage and
thunderstorms can interfere with the reception.
Terrain
When you pass a ground-based broadcast repeating
tower, a stronger signal may overtake a weaker one and
result in the audio system muting.
Station overload
CD and CD Player Information
Note: CD units play commercially pressed
4.7 in (12 cm) audio compact discs only. Due
to technical incompatibility, certain
recordable and re-recordable compact discs
may not function correctly when used in the
vehicle ’s CD player. Note:
Do not insert CDs with homemade
paper (adhesive) labels into the CD player
as the label may peel and cause the CD to
become jammed. You should use a
permanent felt tip marker rather than
adhesive labels on your homemade CDs.
Ballpoint pens may damage CDs. Ask an
authorized dealer for more information.
Note: Do not use any irregularly shaped
discs or discs with a scratch protection film
attached.
367
2020 Transit Connect (CHC) Canada/United States of America, CG3739en enUSA, Edition date: 201903, First-Printing Audio System
Page 372 of 509

Always handle discs by their edges only.
Clean the disc with an approved CD
cleaner only. Wipe it from the center of
the disc toward the edge. Do not clean in
a circular motion.
Do not expose discs to direct sunlight or
heat sources for extended periods.
MP3 and WMA Track and Folder
Structure
Audio systems capable of recognizing and
playing MP3 and WMA individual tracks
and folder structures work as follows:
•
There are two different modes for MP3
and WMA disc playback: MP3 and
WMA track mode (system default) and
MP3 and WMA folder mode.
• MP3 and WMA track mode ignores any
folder structure on the MP3 and WMA
disc. The player numbers each MP3
and WMA track on the disc (noted by
the MP3 or WMA file extension) from
T001 to a maximum of T255. The
maximum number of playable MP3 and
WMA files may be less depending on
the structure of the CD and exact
model of radio present.
• MP3 and WMA folder mode represents
a folder structure consisting of one
level of folders. The CD player numbers
all MP3 and WMA tracks on the disc
(noted by the MP3 or WMA file
extension) and all folders containing
MP3 and WMA files, from F001 (folder)
T001 (track) to F253 T255.
• Creating discs with only one level of
folders helps with navigation through
the disc files.
If you are burning your own MP3 and WMA
discs, it is important to understand how
the system reads the structures you create.
While various files may be present (files
with extensions other than MP3 and
WMA), only files with the MP3 and WMA extension are played; other files are
ignored by the system. This enables you to
use the same MP3 and WMA disc for a
variety of tasks on your work computer,
home computer and your in-vehicle
system.
In track mode, the system displays and
plays the structure as if it were only one
level deep (all MP3 and WMA files play,
regardless of being in a specific folder). In
folder mode, the system only plays the
MP3 and WMA files in the current folder.
AUDIO UNIT - VEHICLES
WITHOUT: SYNC 3
Switching the Audio Unit On and
Off
368
2020 Transit Connect (CHC) Canada/United States of America, CG3739en enUSA, Edition date: 201903, First-Printing Audio System E260686
Page 373 of 509
Adjusting the Volume
Selecting the Radio
Press the button to select radio
mode.
Press the button again to display
the available radio sources. Repeatedly
press the button to scroll through the
available radio sources. Changing Radio Stations
Manual Tuning
Tune by station list or tune by
frequency.
A
Station list tuning.
B Note:
You can change radio stations using
the seek buttons.
Note: You can recall radio stations using
the numeric preset buttons.
Selecting Media Press the button to select media
mode.
369
2020 Transit Connect (CHC) Canada/United States of America, CG3739en enUSA, Edition date: 201903, First-Printing Audio SystemE248939 E260697 E260687
A
B E248947 E100027
Page 374 of 509
Press the button again to display the
available media sources. Repeatedly press
the button to scroll through the available
media sources.
Scrolling Through the Menu
Options
Selecting a Menu Option
Returning to the Previous Screen
Seek Up and Next Track Button
Seek Down and Previous Track
Button
370
2020 Transit Connect (CHC) Canada/United States of America, CG3739en enUSA, Edition date: 201903, First-Printing Audio SystemE248947 E260782 E248946 E260781
Page 375 of 509

Pausing or Playing Media
In media mode, press the button
to pause playback. Press the
button again to resume
playback.
In radio mode, press the button to mute
the radio. Press the button again to
unmute.
Switching the Screen On and Off System Settings
Sound Settings
Press the button to adjust the
sound settings. You can optimize
the sound for different seating
positions.
You can also activate and set the
sensitivity of the speed compensated
volume.
Using a Cell Phone You can make a call from a
recent call list, contact list or dial
a number.
AUDIO UNIT - VEHICLES WITH:
SYNC 3
Switching the Audio Unit On and
Off Adjusting the Volume
Changing Radio Stations
Manual Tuning
Note:
You can change radio stations using
the seek buttons.
Note: You can recall radio stations using
the preset buttons on the touchscreen.
Seek Up and Next Track Button Select to skip to the next track.
371
2020 Transit Connect (CHC) Canada/United States of America, CG3739en enUSA, Edition date: 201903, First-Printing Audio System E142607 E248939 E270235
Page 376 of 509

Press and hold the button to fast forward
through the track.
Seek Down and Previous Track
Button
Select to return to the beginning
of a track.
Repeatedly press the button to
return to previous tracks.
Press and hold the button to fast rewind.
Pausing or Playing Media Select to play a track. Press the
button again to pause the track.
In radio mode, press the button to mute
the radio. Press the button again to
unmute.
Switching the Screen On and Off Sound Settings
Press the button to adjust the
sound settings. You can optimize
the sound for different seating
positions.
You can also activate and set the
sensitivity of the speed compensated
volume.
AM/FM RADIO - VEHICLES
WITHOUT: SYNC 3
Selecting a Radio Source Press the button to display the
available radio sources. Repeatedly press the button to scroll to
the desired radio source.
Press the OK button.
Station Presets
To store a radio station, press and hold one
of the numeric preset buttons.
Note: Six presets can be stored for each
radio source.
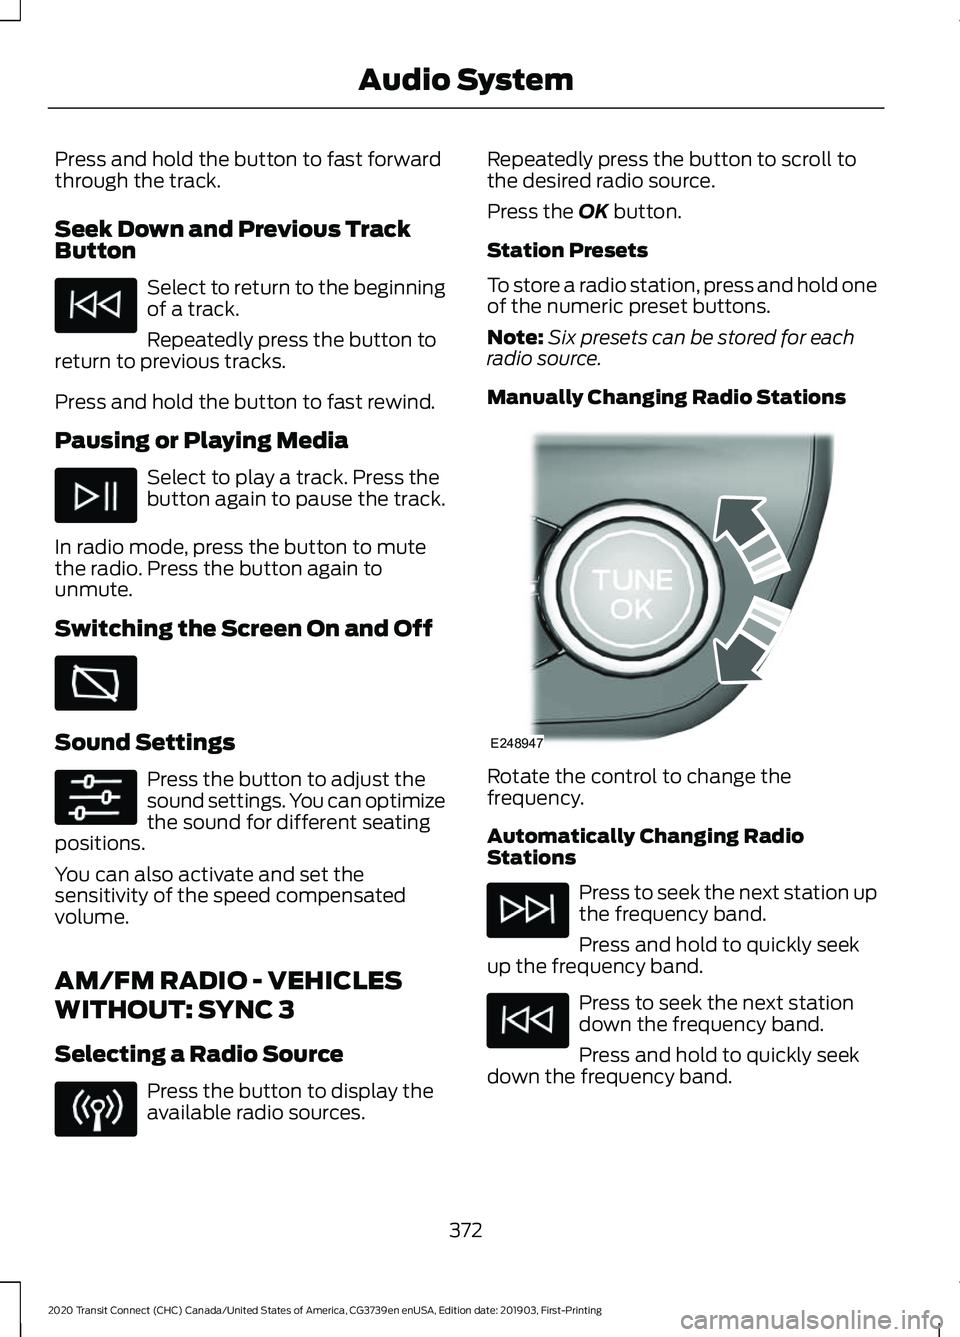
Manually Changing Radio Stations Rotate the control to change the
frequency.
Automatically Changing Radio
Stations
Press to seek the next station up
the frequency band.
Press and hold to quickly seek
up the frequency band. Press to seek the next station
down the frequency band.
Press and hold to quickly seek
down the frequency band.
372
2020 Transit Connect (CHC) Canada/United States of America, CG3739en enUSA, Edition date: 201903, First-Printing Audio System E248947