2020 CHRYSLER 300 wheel
[x] Cancel search: wheelPage 204 of 328
202IN CASE OF EMERGENCY
ASSIST Call
The ASSIST Button is used to automatically
connect you to any one of the following support
centers:
Roadside Assistance – If you get a flat tire, or
need a tow, just push the ASSIST button and
you will be connected to a representative for
assistance. Roadside Assistance will know
what vehicle you’re driving and its location.
Additional fees may apply for roadside Assis -
tance.
SiriusXM Guardian™ Customer Care –
In-vehicle support for SiriusXM Guardian™.
Vehicle Customer Care – Total support for all
other vehicle issues.
SOS Call
1. Push the SOS Call button on the Rearview Mirror.
NOTE:
In case the SOS Call button is pushed in error,
there will be a 10 second delay before the SOS
Call system initiates a call to a SOS operator. To
cancel the SOS Call connection, push the SOS call button on the Rearview Mirror or press the
cancellation button on the Device Screen.
Termination of the SOS Call will turn off the
green LED light on the Rearview Mirror.
2. The LED light located between the ASSIST
and SOS buttons on the Rearview Mirror will
turn green once a connection to a SOS
operator has been made.
3. Once a connection between the vehicle and a SOS operator is made, the SOS Call
system may transmit the following
important vehicle information to a SOS
operator: Indication that the occupant placed a
SOS Call.
The vehicle brand.
The last known GPS coordinates of the
vehicle.
4. You should be able to speak with the SOS operator through the vehicle audio system
to determine if additional help is needed. NOTE:
Your vehicle may be transmitting data as
authorized by the subscriber.
Once a connection is made between the
vehicle’s SOS Call system and the SOS oper
-
ator, the SOS operator may be able to open a
voice connection with the vehicle to deter -
mine if additional help is needed. Once the
SOS operator opens a voice connection with
the vehicle’s SOS Call system, the operator
should be able to speak with you or other
WARNING!
ALWAYS obey traffic laws and pay attention to
the road. ALWAYS drive safely with your hands
on the steering wheel. You have full
responsibility and assume all risks related to
the use of the Uconnect and SiriusXM
Guardian™ features and applications in this
vehicle. Only use Uconnect features and
SiriusXM Guardian™ services when it is safe
to do so. Failure to do so may result in an
accident involving serious injury or death.
20_LX_OM_EN_USC_t.book Page 202
Page 206 of 328
204IN CASE OF EMERGENCY
Even if the SOS Call system is fully functional,
factors beyond FCA US LLC’s control may
prevent or stop the SOS Call system operation.
These include, but are not limited to, the
following factors:
The ignition is in the OFF position.
The vehicle’s electrical systems are not intact.
The SOS Call system software and/or hard -
ware are damaged during a crash.
The vehicle battery loses power or becomes
disconnected during a vehicle crash.
LTE (voice/data) or 4G (data) network and/or
Global Positioning Satellite signals are
unavailable or obstructed.
Equipment malfunction at the SOS operator
facility.
Operator error by the SOS operator.
LTE (voice/data) or 4G (data) network
congestion.
Weather.
Buildings, structures, geographic terrain, or
tunnels. NOTE:
Your vehicle may be transmitting data as
authorized by the subscriber.
Never place anything on or near the vehicle’s
LTE (voice/data) or 4G (data) and GPS
antennas. You could prevent LTE (voice/
data) or 4G (data) and GPS signal reception,
which can prevent your vehicle from placing
an emergency call. An operable LTE (voice/
data) or 4G (data) network connection and a
GPS signal is required for the SOS Call
system to function properly.
Changes or modifications not expressly
approved by the party responsible for compli
-
ance could void the user's authority to
operate the equipment.
WARNING!
Ignoring the Rearview Mirror light could
mean you will not have SOS Call services. If
the Rearview Mirror light is illuminated,
have an authorized dealer service the SOS
Call system immediately.
The Occupant Restraint Control module
turns on the air bag Warning Light on the
instrument panel if a malfunction in any
part of the system is detected. If the Air Bag
Warning Light is illuminated, have an
authorized dealer service the Occupant
Restraint Control system immediately.
WARNING!
ALWAYS obey traffic laws and pay attention to
the road. ALWAYS drive safely with your hands
on the steering wheel. You have full
responsibility and assume all risks related to
the use of the Uconnect and SiriusXM
Guardian™ features and applications in this
vehicle. Only use Uconnect features and
SiriusXM Guardian™ services when it is safe
to do so. Failure to do so may result in an
accident involving serious injury or death.
CAUTION!
To avoid damage to the mirror during
cleaning, never spray any cleaning solution
directly onto the mirror. Apply the solution
onto a clean cloth and wipe the mirror clean.
20_LX_OM_EN_USC_t.book Page 204
Page 213 of 328

IN CASE OF EMERGENCY211
Cavity Cartridge Fuse Mini-FuseDescription
1– –Fuse – Spare
2 40 Amp Green –Radiator Fan #1 – (Non 6.2L Supercharged)
3 50 Amp Red –Electric Power Steering #1 – If Equipped
4 30 Amp Pink –Starter
5 40 Amp Green –Anti-Lock Brake
6 30 Amp Pink –Anti-Lock Brake
7 20 Amp Blue –Police Ignition Run / ACC #1
8 50 Amp Red /
20 Amp Blue –
Radiator Fan (6.2L Supercharged) / Police Ignition Run / ACC # 2
9 –20 Amp Yellow All-Wheel Drive Module – If Equipped
10 –10 Amp Red Intrusion MOD (300) – If Equipped / Under Hood Lamp – Police
11 –20 Amp Yellow Horns
12 –10 Amp Red Air Conditioning Clutch
13 – –Fuse – Spare
14 – –Fuse – Spare
15 –20 Amp Yellow Left HID Headlamp – If Equipped
16 –20 Amp Yellow Right HID Headlamp – If Equipped
18 50 Amp Red –Radiator Fan – (Non 6.2L Supercharged)
19 50 Amp Red –Electric Power Steering #2 – If Equipped
20 30 Amp Pink –Wiper Motor
6
20_LX_OM_EN_USC_t.book Page 211
Page 218 of 328

216IN CASE OF EMERGENCY
43–20 Amp Yellow Rear Heated Seats – If Equipped / Heated Steering Wheel –
If Equipped
44 –10 Amp Red Park Assist / Blind Spot / Rear View Camera
45 –15 Amp Blue Cluster / Rearview Mirror / Lane Departure
46 – –Fuse – Spare
47 –10 Amp Red Adaptive Front Lighting / Day Time Running Lamps – If Equipped
48 –20 Amp Yellow Active Suspension – (6.4L)
49 – –Fuse – Spare
50 – –Fuse – Spare
51 –20 Amp Yellow Front Heated / Vented Seats – If Equipped
52 –10 Amp RedHeated/Cooled Cup Holders/Rear Heated Seat Switches –
If Equipped
53 –10 Amp Red HVAC Module/In Vehicle Temperature Sensor
54 – –Fuse – Spare
55 – –Fuse – Spare
56 – –Fuse – Spare
57 – –Fuse – Spare
58 –10 Amp Red Airbag Module
59 –20 Amp Yellow Adjustable Pedals – Police
Cavity Cartridge Fuse Mini-FuseDescription
20_LX_OM_EN_USC_t.book Page 216
Page 219 of 328

IN CASE OF EMERGENCY217
(Continued)
(Continued)
JACKING AND TIRE CHANGING
60
– –Fuse – Spare
61 – –Fuse – Spare
62 – –Fuse – Spare
63 – –Fuse – Spare
64 –25 Amp Breaker Rear Windows (Charger/300)
65 –10 Amp Red Airbag Module
66 – –Fuse – Spare
67 –10 Amp RedRain and Light Sensor / Sunroof / Inside RearView Mirror /
Police Run Acc Relay
68 –10 Amp Red Rear USB Timer / Rear Sunshade – If Equipped
69 – –Fuse – Spare
70 – –Fuse – Spare
Cavity Cartridge Fuse Mini-FuseDescription
WARNING!
Do not attempt to change a tire on the side
of the vehicle close to moving traffic. Pull
far enough off the road to avoid the danger
of being hit when operating the jack or
changing the wheel.
Being under a jacked-up vehicle is
dangerous. The vehicle could slip off the
jack and fall on you. You could be crushed.
Never put any part of your body under a
vehicle that is on a jack. If you need to get
under a raised vehicle, take it to a service
center where it can be raised on a lift.
WARNING! (Continued)
Never start or run the engine while the
vehicle is on a jack.
The jack is designed to be used as a tool for
changing tires only. The jack should not be
used to lift the vehicle for service purposes.
The vehicle should be jacked on a firm level
surface only. Avoid ice or slippery areas.
WARNING! (Continued)
6
20_LX_OM_EN_USC_t.book Page 217
Page 220 of 328
218IN CASE OF EMERGENCY
JACK LOCATION/SPARE TIRE STOWAGE
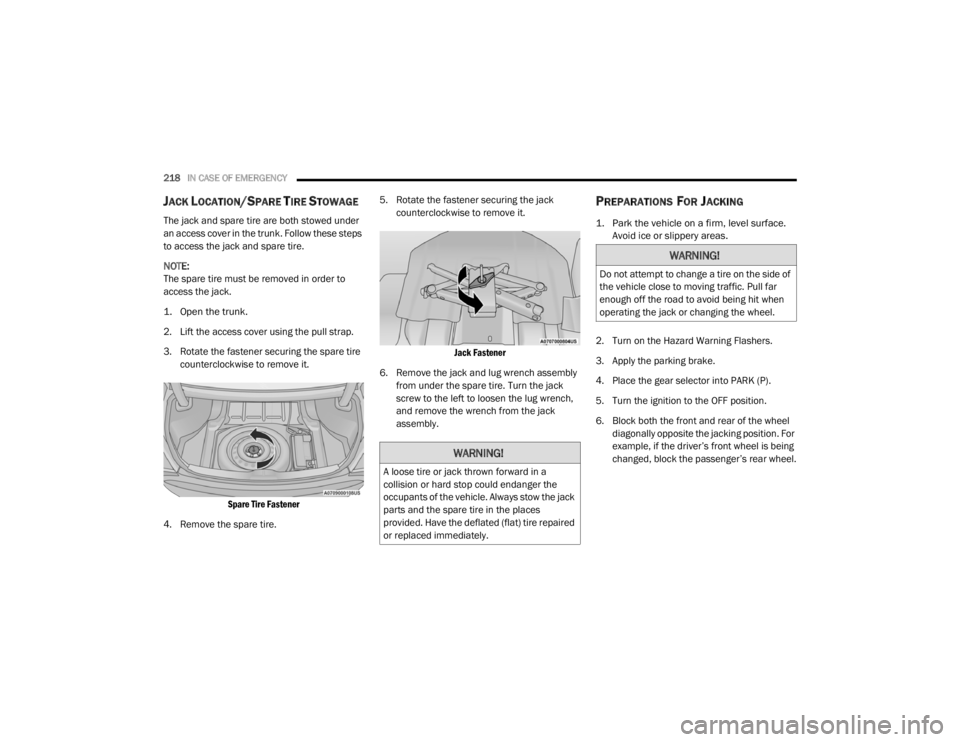
The jack and spare tire are both stowed under
an access cover in the trunk. Follow these steps
to access the jack and spare tire.
NOTE:
The spare tire must be removed in order to
access the jack.
1. Open the trunk.
2. Lift the access cover using the pull strap.
3. Rotate the fastener securing the spare tire
counterclockwise to remove it.
Spare Tire Fastener
4. Remove the spare tire. 5. Rotate the fastener securing the jack
counterclockwise to remove it.
Jack Fastener
6. Remove the jack and lug wrench assembly from under the spare tire. Turn the jack
screw to the left to loosen the lug wrench,
and remove the wrench from the jack
assembly.
PREPARATIONS FOR JACKING
1. Park the vehicle on a firm, level surface. Avoid ice or slippery areas.
2. Turn on the Hazard Warning Flashers.
3. Apply the parking brake.
4. Place the gear selector into PARK (P).
5. Turn the ignition to the OFF position.
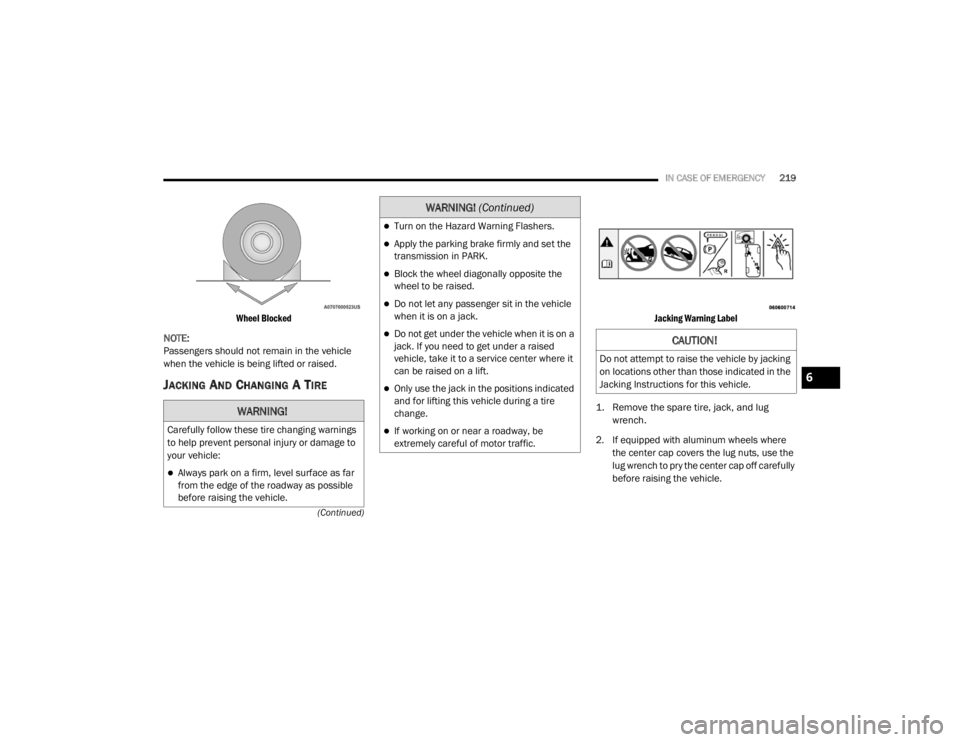
6. Block both the front and rear of the wheel diagonally opposite the jacking position. For
example, if the driver’s front wheel is being
changed, block the passenger’s rear wheel.
WARNING!
A loose tire or jack thrown forward in a
collision or hard stop could endanger the
occupants of the vehicle. Always stow the jack
parts and the spare tire in the places
provided. Have the deflated (flat) tire repaired
or replaced immediately.
WARNING!
Do not attempt to change a tire on the side of
the vehicle close to moving traffic. Pull far
enough off the road to avoid being hit when
operating the jack or changing the wheel.
20_LX_OM_EN_USC_t.book Page 218
Page 221 of 328
IN CASE OF EMERGENCY219
(Continued)
Wheel Blocked
NOTE:
Passengers should not remain in the vehicle
when the vehicle is being lifted or raised.
JACKING AND CHANGING A TIRE
Jacking Warning Label
1. Remove the spare tire, jack, and lug wrench.
2. If equipped with aluminum wheels where the center cap covers the lug nuts, use the
lug wrench to pry the center cap off carefully
before raising the vehicle.
WARNING!
Carefully follow these tire changing warnings
to help prevent personal injury or damage to
your vehicle:
Always park on a firm, level surface as far
from the edge of the roadway as possible
before raising the vehicle.
Turn on the Hazard Warning Flashers.
Apply the parking brake firmly and set the
transmission in PARK.
Block the wheel diagonally opposite the
wheel to be raised.
Do not let any passenger sit in the vehicle
when it is on a jack.
Do not get under the vehicle when it is on a
jack. If you need to get under a raised
vehicle, take it to a service center where it
can be raised on a lift.
Only use the jack in the positions indicated
and for lifting this vehicle during a tire
change.
If working on or near a roadway, be
extremely careful of motor traffic.
WARNING! (Continued)
CAUTION!
Do not attempt to raise the vehicle by jacking
on locations other than those indicated in the
Jacking Instructions for this vehicle.
6
20_LX_OM_EN_USC_t.book Page 219
Page 222 of 328
220IN CASE OF EMERGENCY
3. Before raising the vehicle, use the lug
wrench to loosen, but not remove, the lug
nuts on the wheel with the flat tire. Turn the
lug nuts counterclockwise one turn while
the wheel is still on the ground.
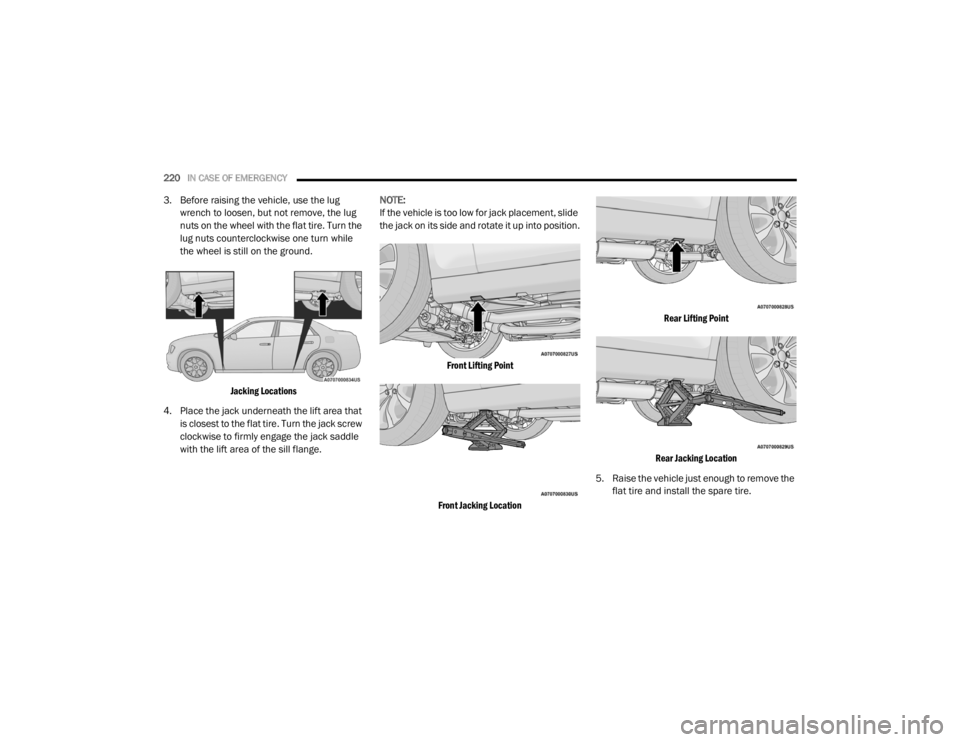
Jacking Locations
4. Place the jack underneath the lift area that is closest to the flat tire. Turn the jack screw
clockwise to firmly engage the jack saddle
with the lift area of the sill flange. NOTE:
If the vehicle is too low for jack placement, slide
the jack on its side and rotate it up into position.
Front Lifting Point
Front Jacking Location Rear Lifting Point
Rear Jacking Location
5. Raise the vehicle just enough to remove the flat tire and install the spare tire.
20_LX_OM_EN_USC_t.book Page 220