2020 CHRYSLER 300 climate settings
[x] Cancel search: climate settingsPage 35 of 328

GETTING TO KNOW YOUR VEHICLE33
seat position is greater than or equal to
2.7 inches (67.7 mm) forward of the rear
stop. The seat will return to its previously set
position when you place the vehicle’s ignition
in the ACC or RUN position.
The Easy Entry/Easy Exit feature is disabled
when the driver seat position is less than
0.9 of an inch (22.7 mm) forward of the rear
stop. At this position, there is no benefit to
the driver by moving the seat for Easy Exit or
Easy Entry.
Each stored memory setting will have an
associated Easy Entry and Easy Exit position.
NOTE:
The Easy Entry/Exit feature is not enabled when
the vehicle is delivered from the factory. The
Easy Entry/Exit feature is enabled (or later
disabled) through the programmable features
in the Uconnect system. Refer to “Uconnect
Settings” in “Multimedia”.
HEATED SEATS — IF EQUIPPED
On some models, the front and rear seats may
be equipped with heaters located in the seat
cushions and seat backs.
Front Heated Seats
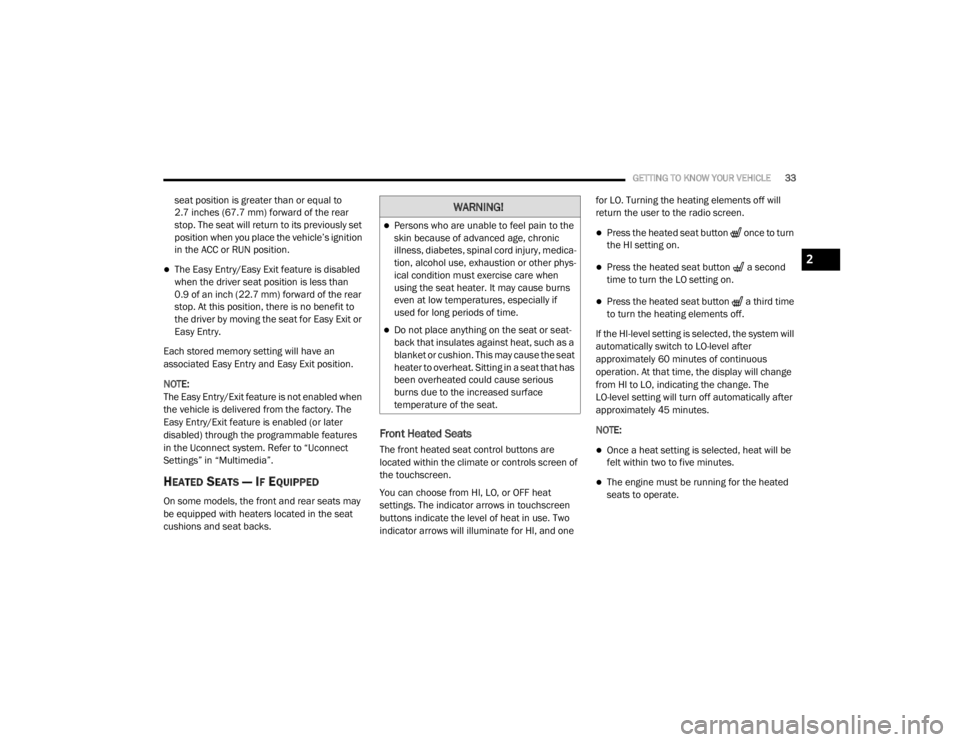
The front heated seat control buttons are
located within the climate or controls screen of
the touchscreen.
You can choose from HI, LO, or OFF heat
settings. The indicator arrows in touchscreen
buttons indicate the level of heat in use. Two
indicator arrows will illuminate for HI, and one for LO. Turning the heating elements off will
return the user to the radio screen.
Press the heated seat button once to turn
the HI setting on.
Press the heated seat button a second
time to turn the LO setting on.
Press the heated seat button a third time
to turn the heating elements off.
If the HI-level setting is selected, the system will
automatically switch to LO-level after
approximately 60 minutes of continuous
operation. At that time, the display will change
from HI to LO, indicating the change. The
LO-level setting will turn off automatically after
approximately 45 minutes.
NOTE:
Once a heat setting is selected, heat will be
felt within two to five minutes.
The engine must be running for the heated
seats to operate.
WARNING!
Persons who are unable to feel pain to the
skin because of advanced age, chronic
illness, diabetes, spinal cord injury, medica -
tion, alcohol use, exhaustion or other phys -
ical condition must exercise care when
using the seat heater. It may cause burns
even at low temperatures, especially if
used for long periods of time.
Do not place anything on the seat or seat -
back that insulates against heat, such as a
blanket or cushion. This may cause the seat
heater to overheat. Sitting in a seat that has
been overheated could cause serious
burns due to the increased surface
temperature of the seat.
2
20_LX_OM_EN_USC_t.book Page 33
Page 37 of 328

GETTING TO KNOW YOUR VEHICLE35
(Continued)
FRONT VENTILATED SEATS — IF
E
QUIPPED
Located in the seat cushion and seat back are
fans that draw the air from the passenger
compartment and move air through fine
perforations in the seat cover to help keep the
driver and front passenger cooler in higher
ambient temperatures. The fans operate at
two speeds, HI and LO.
The front ventilated seats control buttons are
located within the Uconnect system. You can
gain access to the control buttons through the
climate screen or the controls screen.
Press the ventilated seat button once to
choose HI.
Press the ventilated seat button a second
time to choose LO.
Press the ventilated seat button a third
time to turn the ventilated seat off.
NOTE:
The engine must be running for the ventilated
seats to operate. Vehicles Equipped With Remote Start
On models that are equipped with remote start,
the ventilated seats can be programmed to
come on during a remote start.
This feature can be programmed through the
Uconnect system. Refer to “Uconnect Settings”
in “Multimedia” for further information.
HEAD RESTRAINTS
Head restraints are designed to reduce the risk
of injury by restricting head movement in the
event of a rear impact. Head restraints should
be adjusted so that the top of the head restraint
is located above the top of your ear.
NOTE:
Do not reverse the head restraints (making the
rear of the head restraint face forward) in an
attempt to gain additional clearance to the back
of your head.
REACTIVE HEAD RESTRAINTS — FRONT
S
EATS
The front driver and passenger seats are
equipped with Reactive Head Restraints (RHR).
In the event of a rear impact, the RHR will
automatically extend forward minimizing the
gap between the back of the occupant’s head
and the RHR.
The RHR will automatically return to their
normal position following a rear impact. If the
RHR do not return to their normal position, see
an authorized dealer immediately.WARNING!
All occupants, including the driver, should
not operate a vehicle or sit in a vehicle’s
seat until the head restraints are placed in
their proper positions in order to minimize
the risk of neck injury in the event of a
crash.
Head restraints should never be adjusted
while the vehicle is in motion. Driving a
vehicle with the head restraints improperly
adjusted or removed could cause serious
injury or death in the event of a collision.
WARNING! (Continued)
2
20_LX_OM_EN_USC_t.book Page 35
Page 40 of 328

38GETTING TO KNOW YOUR VEHICLE
(Continued)
POWER TILT/TELESCOPING STEERING
C
OLUMN — IF EQUIPPED
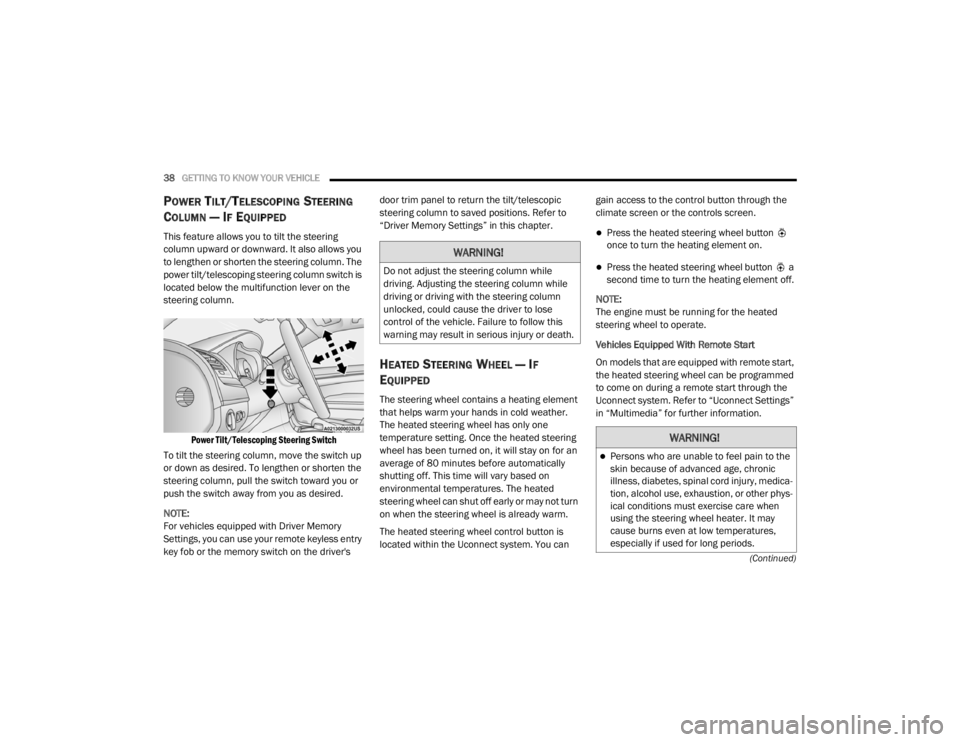
This feature allows you to tilt the steering
column upward or downward. It also allows you
to lengthen or shorten the steering column. The
power tilt/telescoping steering column switch is
located below the multifunction lever on the
steering column.
Power Tilt/Telescoping Steering Switch
To tilt the steering column, move the switch up
or down as desired. To lengthen or shorten the
steering column, pull the switch toward you or
push the switch away from you as desired.
NOTE:
For vehicles equipped with Driver Memory
Settings, you can use your remote keyless entry
key fob or the memory switch on the driver's door trim panel to return the tilt/telescopic
steering column to saved positions. Refer to
“Driver Memory Settings” in this chapter.
HEATED STEERING WHEEL — IF
E
QUIPPED
The steering wheel contains a heating element
that helps warm your hands in cold weather.
The heated steering wheel has only one
temperature setting. Once the heated steering
wheel has been turned on, it will stay on for an
average of 80 minutes before automatically
shutting off. This time will vary based on
environmental temperatures. The heated
steering wheel can shut off early or may not turn
on when the steering wheel is already warm.
The heated steering wheel control button is
located within the Uconnect system. You can gain access to the control button through the
climate screen or the controls screen.
Press the heated steering wheel button
once to turn the heating element on.
Press the heated steering wheel button a
second time to turn the heating element off.
NOTE:
The engine must be running for the heated
steering wheel to operate.
Vehicles Equipped With Remote Start
On models that are equipped with remote start,
the heated steering wheel can be programmed
to come on during a remote start through the
Uconnect system. Refer to “Uconnect Settings”
in “Multimedia” for further information.
WARNING!
Do not adjust the steering column while
driving. Adjusting the steering column while
driving or driving with the steering column
unlocked, could cause the driver to lose
control of the vehicle. Failure to follow this
warning may result in serious injury or death.
WARNING!
Persons who are unable to feel pain to the
skin because of advanced age, chronic
illness, diabetes, spinal cord injury, medica -
tion, alcohol use, exhaustion, or other phys -
ical conditions must exercise care when
using the steering wheel heater. It may
cause burns even at low temperatures,
especially if used for long periods.
20_LX_OM_EN_USC_t.book Page 38
Page 43 of 328

GETTING TO KNOW YOUR VEHICLE41
If the mirror does not electrically fold, check for
ice or dirt build up at the pivot area which can
cause excessive drag.
Power Folding Mirror Switch
Automatic Folding Mirrors
When the Automatic Folding Mirrors feature is
enabled, the exterior mirrors will fold in when
exiting the vehicle (with the ignition OFF, all
doors closed, and the doors are locked).
If the exterior mirrors were auto-folded, they
will unfold when the ignition is placed in the
ON position.
If the exterior mirrors were manually folded,
they will not automatically unfold. NOTE:
The Automatic Fold/Unfold Mirrors feature is
not turned on when delivered from the factory.
The Automatic Fold/Unfold Mirrors feature can
be turned on and off using the Uconnect
System. Refer to “Uconnect Settings” in "Multi
-
media" for further information.
Resetting The Power Folding Outside Mirrors
You may need to reset the power folding mirrors
if the following occurs:
The mirrors are accidentally blocked while
folding.
The mirrors are accidentally manually
folded/unfolded.
The mirrors come out of the unfolded posi -
tion.
The mirrors shake and vibrate at normal
driving speeds.
To reset the power folding mirrors, fold and
unfold them by pushing the button (this may
require multiple button pushes). This resets
them to their normal position.
HEATED MIRRORS — IF EQUIPPED
These mirrors are heated to melt frost
or ice. This feature will be activated
whenever you turn on the rear window
defroster (if equipped). Refer to “Climate
Controls” in this chapter for further information.
TILT SIDE MIRRORS IN REVERSE — IF
E
QUIPPED
Tilt Side Mirrors In Reverse provides automatic
outside mirror positioning which will aid the
driver’s view of the ground rearward of the front
doors. The outside mirrors will move slightly
downward from the present position when the
vehicle is shifted into REVERSE. The outside
mirrors will then return to the original position
when the vehicle is shifted out of the REVERSE
position. Each stored memory setting will have
an associated Tilt Side Mirrors In Reverse
position.
NOTE:
The Tilt Side Mirrors In Reverse feature is not
turned on when delivered from the factory. The
Tilt Side Mirrors In Reverse feature can be
turned on and off using the Uconnect system.
Refer to “Uconnect Settings” in “Multimedia”
for further information.
2
20_LX_OM_EN_USC_t.book Page 41
Page 52 of 328

50GETTING TO KNOW YOUR VEHICLE
desires less wiper sensitivity. Setting 4 can be
used if the driver desires more sensitivity. The
rain sensing wipers will automatically change
between an intermittent wipe, slow wipe and a
fast wipe depending on the amount of moisture
that is sensed on the windshield. Place the
wiper switch in the OFF position when not using
the system.
The Rain Sensing feature can be turned on and
off using the Uconnect system, refer to
“Uconnect Settings” in “Multimedia” for further
information.
NOTE:
The Rain Sensing feature will not operate
when the wiper speed is in the low or high
position.
The Rain Sensing feature may not function
properly when ice or dried salt water is
present on the windshield.
Use of Rain-X or products containing wax or
silicone may reduce rain sensor perfor -
mance. The Rain Sensing system has protective
features for the wiper blades and arms. It will
not operate under the following conditions:
Low Temperature Wipe Inhibit
— The Rain
Sensing feature will not operate when the
ignition is placed in the ON/RUN position, the
vehicle is stationary and the outside
temperature is below 32°F (0°C), unless the
wiper control on the multifunction lever is
moved, the vehicle speed becomes greater
than 0 mph (0 km/h) or the outside tempera -
ture rises above freezing.
Neutral Wipe Inhibit — The Rain Sensing
feature will not operate when the ignition is
placed in the ON/RUN position, the auto -
matic transmission gear selector is in the
NEUTRAL position and the vehicle speed is
less than 3 mph (5 km/h), unless the wiper
control on the multifunction lever is moved or
the gear selector is moved out of the
NEUTRAL position.
Remote Start Mode Inhibit — On vehicles
equipped with Remote Starting system, Rain
Sensing wipers are not operational when the
vehicle is in the remote start mode. Once the
operator is in the vehicle and has placed the ignition switch in the ON/RUN position, rain
sensing wiper operation can resume, if it has
been selected, and no other inhibit condi
-
tions (mentioned previously) exist.
CLIMATE CONTROLS
The Climate Control system allows you to
regulate the temperature, air flow, and direction
of air circulating throughout the vehicle. The
controls are located on the touchscreen (if
equipped) and on the instrument panel below
the radio.
AUTOMATIC CLIMATE CONTROL
O
VERVIEW
Uconnect 4C/4C NAV Automatic Climate Controls
20_LX_OM_EN_USC_t.book Page 50
Page 54 of 328

52GETTING TO KNOW YOUR VEHICLE
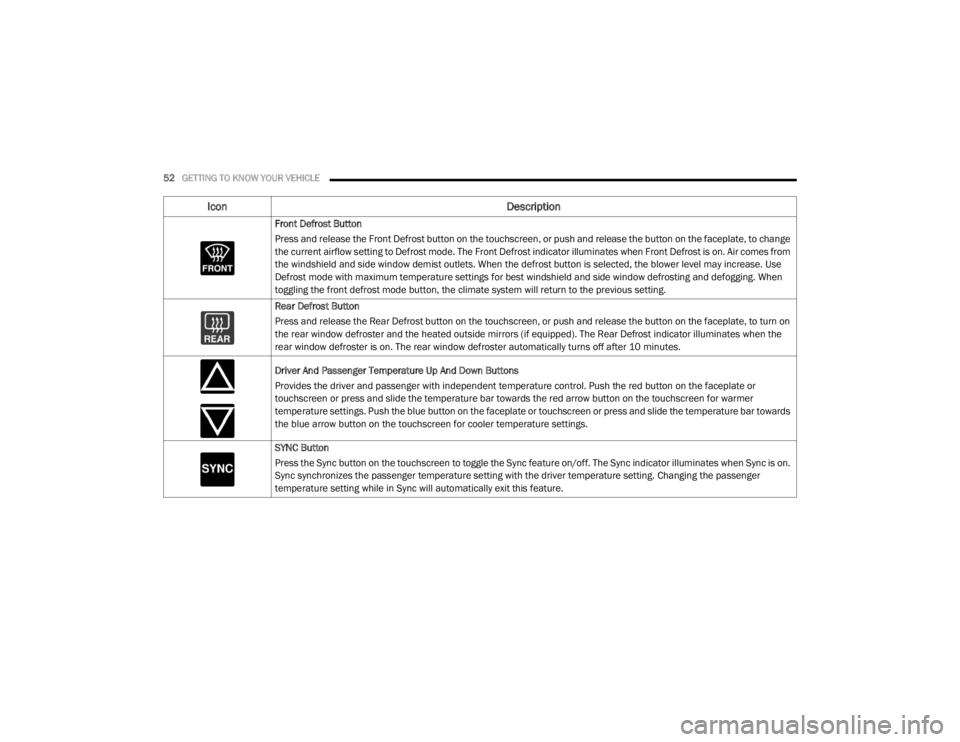
Front Defrost Button
Press and release the Front Defrost button on the touchscreen, or push and release the button on the faceplate, to change
the current airflow setting to Defrost mode. The Front Defrost indicator illuminates when Front Defrost is on. Air comes from
the windshield and side window demist outlets. When the defrost button is selected, the blower level may increase. Use
Defrost mode with maximum temperature settings for best windshield and side window defrosting and defogging. When
toggling the front defrost mode button, the climate system will return to the previous setting.
Rear Defrost Button
Press and release the Rear Defrost button on the touchscreen, or push and release the button on the faceplate, to turn on
the rear window defroster and the heated outside mirrors (if equipped). The Rear Defrost indicator illuminates when the
rear window defroster is on. The rear window defroster automatically turns off after 10 minutes.
Driver And Passenger Temperature Up And Down Buttons
Provides the driver and passenger with independent temperature control. Push the red button on the faceplate or
touchscreen or press and slide the temperature bar towards the red arrow button on the touchscreen for warmer
temperature settings. Push the blue button on the faceplate or touchscreen or press and slide the temperature bar towards
the blue arrow button on the touchscreen for cooler temperature settings.
SYNC Button
Press the Sync button on the touchscreen to toggle the Sync feature on/off. The Sync indicator illuminates when Sync is on.
Sync synchronizes the passenger temperature setting with the driver temperature setting. Changing the passenger
temperature setting while in Sync will automatically exit this feature.
Icon Description
20_LX_OM_EN_USC_t.book Page 52
Page 55 of 328

GETTING TO KNOW YOUR VEHICLE53
Faceplate Knob
Touchscreen Buttons Blower Control
Blower Control regulates the amount of air forced through the climate system. There are seven blower speeds available.
The speeds can be selected using either the blower control knob on the faceplate or the buttons on the touchscreen.
Faceplate: The blower speed increases as you turn the blower control knob clockwise from the lowest blower setting.
The blower speed decreases as you turn the blower control knob counterclockwise.
Touchscreen:
Use the small blower icon to reduce the blower setting and the large blower icon to increase the blower
setting. Blower can also be selected by pressing the blower bar area between the icons.
Mode Control
Select Mode by pressing one of the Mode buttons on the touchscreen to change the airflow distribution mode. The airflow
distribution mode can be adjusted so air comes from the instrument panel outlets, floor outlets, defrost outlets and demist
outlets.
The Mode settings are as follows:
Panel Mode Panel Mode
Air comes from the outlets in the instrument panel. Each of these outlets can be individually adjusted to direct the flow of
air. The air vanes of the center outlets and outboard outlets can be moved up and down or side to side to regulate airflow
direction. There is a shut off wheel located below the air vanes to shut off or adjust the amount of airflow from these
outlets.
Icon
Description
2
20_LX_OM_EN_USC_t.book Page 53
Page 57 of 328

GETTING TO KNOW YOUR VEHICLE55
CLIMATE CONTROL FUNCTIONS
A/C (Air Conditioning)
The Air Conditioning (A/C) button allows the
operator to manually activate or deactivate the
air conditioning system. When the air
conditioning system is turned on, cool
dehumidified air will flow through the outlets
into the cabin. For improved fuel economy, push
the A/C button to turn off the air conditioning
and manually adjust the blower and airflow
mode settings. Also, make sure to select only
Panel, Bi-Level, or Floor modes.
NOTE:
If fog or mist appears on the windshield or
side glass, select Defrost mode and adjust
blower speed if needed.
If your air conditioning performance seems
lower than expected, check the front of the
A/C condenser (located in front of the radi -
ator), for an accumulation of dirt or insects.
Clean with a gentle water spray from the front
of the radiator and through the condenser.
MAX A/C
MAX A/C sets the control for maximum cooling
performance. Press and release to toggle between MAX A/C
and the prior settings. The button illuminates
when MAX A/C is on.
In MAX A/C, the blower level and mode position
can be adjusted to desired user settings.
Pressing other settings will cause the MAX A/C
operation to switch to the selected setting and
MAX A/C to exit.
Recirculation
In cold weather, use of Recirculation mode may
lead to excessive window fogging. The
Recirculation feature may be unavailable
(button on the touchscreen greyed out) if
conditions exist that could create fogging on the
inside of the windshield.
AUTOMATIC TEMPERATURE CONTROL
(ATC)
Automatic Operation
1. Push the AUTO button on the faceplate, or
press and release the AUTO button on the
touchscreen on the Automatic
Temperature Control (ATC) Panel.
2. Next, adjust the temperature you would like the system to maintain by adjusting the driver and passenger temperature control
buttons. Once the desired temperature is
displayed, the system will achieve and
automatically maintain that comfort level.
3. When the system is set up for your comfort level, it is not necessary to change the
settings. You will experience the greatest
efficiency by simply allowing the system to
function automatically.
NOTE:
It is not necessary to change the temperature
settings for cold or hot vehicles. The system
automatically adjusts the temperature,
mode, and blower speed to provide comfort
as quickly as possible.
The temperature can be displayed in U.S. or
Metric units by selecting the U.S./Metric
customer-programmable feature. Refer to
the “Uconnect Settings” in “Multimedia” for
further information.
To provide you with maximum comfort in the
Automatic mode during cold start-ups, the
blower fan will remain on low until the engine
warms up. The blower will increase in speed
and transition into Auto mode.
2
20_LX_OM_EN_USC_t.book Page 55