2020 AUDI TT COUPE ESP
[x] Cancel search: ESPPage 191 of 280
![AUDI TT COUPE 2020 Owners Manual 8S1012721BB
System settings
System settings
Setting the date and
time
You can set the clock time manually or using the
GPS.
> Select: [MENU] button > Settings > left control
button > AUDI TT COUPE 2020 Owners Manual 8S1012721BB
System settings
System settings
Setting the date and
time
You can set the clock time manually or using the
GPS.
> Select: [MENU] button > Settings > left control
button >](/manual-img/6/57658/w960_57658-190.png)
8S1012721BB
System settings
System settings
Setting the date and
time
You can set the clock time manually or using the
GPS.
> Select: [MENU] button > Settings > left control
button > MMI settings > Date & time, or
> Select: [MENU] button > Vehicle > left control
button > Vehicle settings > Date & time.
Automatic setting
When this function is switched on M, the time
and date are automatically set.
Time
Requirement: the Automatic setting must be
switched off.
Press the control knob. You can set the Time
manually by turning and pressing the control
knob.
Date
Requirement: the Automatic setting must be
switched off.
Press the control knob. You can set the Date
manually by turning and pressing the control
knob.
Time zone
When selecting the appropriate time zone, a
sampling of countries in this zone will be listed.
Automatic time zone*
When this function is switched on M, the time
will automatically adjust to the corresponding
time zone.
Time format
If you select 24h, the clock will display, for exam-
ple, 13:00. If you select AM/PM, the clock will
display, for example, 1:00 PM.
D_ The Qi standard makes it possible to charge your mobile
device wirelessly.
Date format
If you select DD.MM.YYYY, the date display will
show, for example, 31.03.2019. If you select
MM/DD/YYVY, the date display will show, for ex-
ample, 03/31/2019. If you select YYYY-MM-DD,
the date display will show, for example,
2019-03-31.
MMI settings
> Select: [MENU] button > Settings > left control
button > MMI settings.
Language
You can change the display language as well as
the language for the voice guidance* and voice
recognition system*.
Measurement units
The following measurement units can be set de-
pending on availability: Speed, Distance, Tem-
perature, Fuel consumption, Volume, Pressure.
Mobile device reminder signal
Applies to: vehicles with Audi phone box
Requirement: your cell phone must be Qi-capa-
ble ) or connected to the Audi music interface @
with a USB adapter cable > page 131, fig. 131.
When the device reminder signal is switched on,
you will be notified that your mobile device is still
in the Audi phone box when you leave the vehicle.
You can select between Spoken cue, Signal tone
and Off.
Mobile device reminder signal volume: you can
adjust the reminder signal volume by turning the
control knob.
Switch off pop-up: when the function is switched
on [M, the messages in the Infotainment system
display regarding the charging status of your cell
phone in the Audi phone box are hidden. The re-
minder not to forget your cell phone when leav-
ing the vehicle is also switched off.
189
Page 192 of 280

System settings
Tool tips
When this function is switched on M, your MMI
shows you tips for input. The frequency of how
often it displays decreases with time. You can
switch off the operating tips at any time.
Speech dialog system
Applies to: vehicles with voice recognition system
Command display: when this function is switch-
ed on, the MMI will show you the possible
commands for voice input in the respective
menu. You can switch the function off at any
time.
Short dialog: when this function is switched on
, a shorter form of the prompts is used. You
can switch the function off at any time.
Speech dialog system volume: you can adjust
the volume of the prompts by turning the control
knob.
Individual speech training (only when the vehi-
cle is stationary): you can adapt the voice recog-
nition system to your voice or pronunciation in or-
der to improve the system's ability to recognize
your speech. Individual speech training is com-
prised of 20 speech entries that consist of com-
mands and sequences of numbers. You can de-
lete the programmed voice training with the Re-
set individual speech training function.
Factory settings
Depending on the vehicle equipment, the follow-
ing functions can be reset to factory settings:
— Sound settings
— Radio
— Media settings
— Jukebox
— Directory
— Telephone
— Bluetooth and Wi-Fi
— Navigation settings
— Navigation and online memory
— Voice recognition system
— Message settings
— Apps
— Tool tips
— Audi connect
190
You can select the desired functions individually
or all at once with the option Select all entries.
Select and confirm Restore factory settings.
G) Tips
Make sure that not only the settings were de-
leted but also the stored data, if necessary.
Connection manager
Introduction
The connection manager provides an overview of
your connected devices and their network status:
> Select: [MENU] button > Settings > left control
button > MMI settings > Connection manager.
> Select and confirm a menu item.
If a mobile device was already connected and you
select and confirm the corresponding menu item,
the device name and connection status are dis-
played under the menu item.
You can individually connect (M) or disconnect
(L) a paired device.
Requirement: The vehicle must be stationary and
the ignition must be switched on. The Bluetooth
settings will open on your mobile device during
the connection setup. The Bluetooth function and
visibility of the MMI > page 192 and mobile de-
vice must be switched on. The mobile device to
be connected must not be connected to any other
Bluetooth device.
daar lava dared)
Applies to: vehicles with telephone
> Connect new device: search for and connect a
mobile device.
> List of devices already paired: select your cell
phone from the list of all the devices that are
already paired.
Secondary phone
Applies to: vehicles with telephone and Audi phone box
> Connect new device: search for and connect a
mobile device.
Page 194 of 280

System settings
Bluetooth settings
— Bluetooth: select and confirm a setting for the
Bluetooth connection visibility. Select Visible
for the MMI to be visible to other devices. Se-
lect Invisible for the MMI to not be visible to
other devices. However, it is still possible to es-
tablish a Bluetooth connection with paired de-
vices when the visibility is switched off. Select
Off to turn visibility off. Then a Bluetooth con-
nection is not possible.
— Bluetooth audio player: when this function is
switched on M, the Bluetooth audio player is
available as a source in the Media menu.
— Bluetooth name: the MMI Bluetooth name (for
example "AUDI MMI") is displayed and can be
changed.
Online settings*
— Data connection settings: See > page 146, Cell
phone network.
— Data usage counter: the amount of data pack-
ets that are sent and received through the MMI
is displayed. You can reset the data usage infor-
mation to zero using the Reset data counter
option.
— Network status: the mobile network provider
for data service as well as the network status
are displayed.
Wi-Fi settings*
See > page 147.
SIM PIN settings*
— Automatic PIN entry: when this function is
switched on [M, the SIM PIN is automatically
saved in the MMI after it is entered for the first
time. The SIM PIN for four different SIM cards
can be saved in the MMI. With the function
switched off {_J, the SIM PIN that is currently
stored will be deleted from the MMI. When the
automatic PIN entry is switched on, there are
no SIM PIN prompts.
— Disable PIN query: when switched on, there are
no SIM PIN queries. The automatic PIN entry is
not used in this case.
— Change PIN: you can change the PIN on your
SIM card. First enter the current SIM PIN. The
SIM PIN may only contain digits 0-9. The new
192
SIM PIN must be entered twice for security and
then it will be saved to the SIM card.
Apple CarPlay sound settings/Android Auto
sound settings
Applies to: vehicles with Audi smartphone interface
See > page 193.
About Apple CarPlay/About Android Auto
Applies to: vehicles with Audi smartphone interface
Here you will find legal information regarding the
use of Apple CarPlay or Android Auto and infor-
mation about device-specific data exchange.
Delete Apple CarPlay device/Delete Android
Auto device
Applies to: vehicles with Audi smartphone interface
Requirement: your cell phone must not be con-
nected to the Audi music interface with a USB
adapter.
Select: Audi smartphone interface > a device
from the list > right control button.
To remove your mobile device from the list, select
and confirm Delete Apple CarPlay device or De-
lete Android Auto device.
(i) Tips
Some SIM cards do not allow the SIM PIN
queries to be switched off.
System update
> Select: [MENU] button > Settings > left control
button > System maintenance.
— System update: insert the storage device with
the update data into the appropriate drive
= page 171. Select and confirm: the respective
drive > Start update. The length of the process
depends on the size of the update.
— Reset driver installation: the selected media
driver package is reset to the settings at the
time of delivery.
— Version information: information on the MMI
software version and the navigation database*
software version is displayed. The Software in-
formation function also provides information >
Page 198 of 280

Checking and Filling
— Do not use any gasoline mixture whose
composition cannot be identified.
— Audi does not assume any responsibility for
damage to the fuel system or for perform-
ance problems caused by using gasoline
mixtures different from those specified.
This type of damage also does not fall under
the New Vehicle Limited Warranty or under
the emissions control system warranty.
— If you notice a higher fuel consumption or
poor handling or performance problems due
to such gasoline mixtures, we recommend
fueling with unblended gasoline.
Gasoline additives
An important issue for many automobile manu-
facturers is combustion residue in the engine
that results from the use of certain fuels.
Although types of gasoline differ depending on
the manufacturer, there are similarities. Certain
substances in the gasoline may cause deposits in
the engine. Additives in the gasoline that should
keep the engine and fuel system clean do not all
function equally.
Audi recommends using TOP TIER Detergent Gas-
oline. For additional information on TOP TIER De-
tergent Gasoline, visit www.toptiergas.com.
If you use incorrect fuels over a long period of
time, the maximum engine performance may be
impaired by combustion residue.
@) Note
— Damage or malfunctions caused by the use
of incorrect types of gasoline are not cov-
ered by the New Vehicle Limited Warranty.
— Only gasoline additives that have been ap-
proved by Audi may be used.
196
Refueling
Fueling procedure
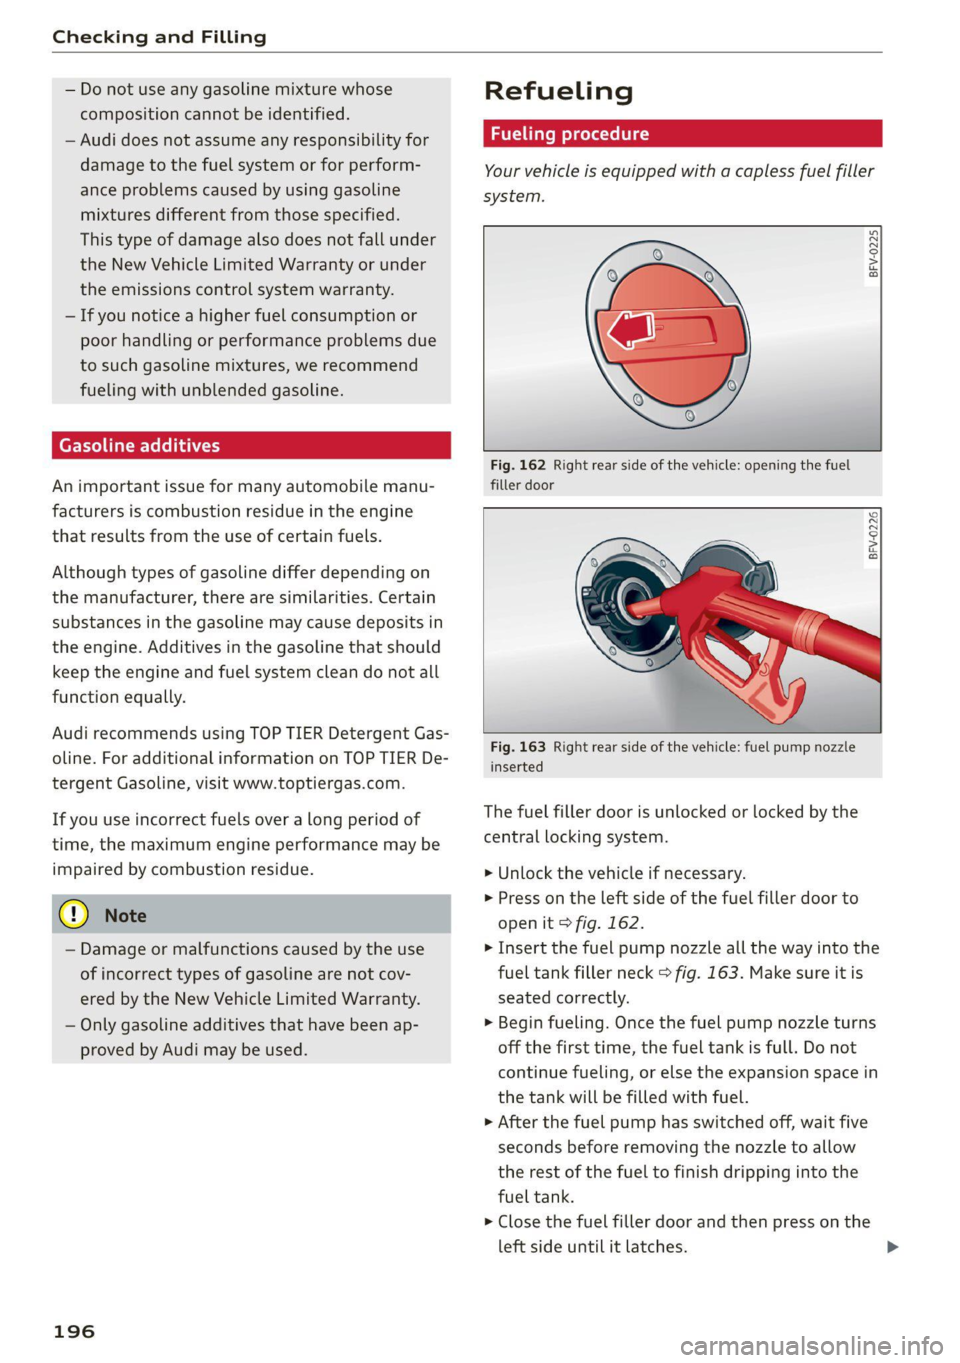
Your vehicle is equipped with a capless fuel filler
system.
BFV-0225
Fig. 162 Right rear side of the vehicle: opening the fuel
filler door
BFV-0226
Fig. 163 Right rear side of the vehicle: fuel pump nozzle
inserted
The fuel filler door is unlocked or locked by the
central locking system.
> Unlock the vehicle if necessary.
> Press on the left side of the fuel filler door to
open it > fig. 162.
> Insert the fuel pump nozzle all the way into the
fuel tank filler neck > fig. 163. Make sure it is
seated correctly.
> Begin fueling. Once the fuel pump nozzle turns
off the first time, the fuel tank is full. Do not
continue fueling, or else the expansion space in
the tank will be filled with fuel.
> After the fuel pump has switched off, wait five
seconds before removing the nozzle to allow
the rest of the fuel to finish dripping into the
fuel tank.
> Close the fuel filler door and then press on the
left side until it latches.
Page 199 of 280

8S1012721BB
Checking and Filling
The correct fuel type for your vehicle can be
found ona label located on the inside of the fuel
filler door. For additional information on fuel, see
=>page 195.
For the tank capacity in your vehicle, refer to the
Technical Data > page 263.
If the central locking system malfunctions, there
is a fuel filler door emergency release
=> page 199.
Messages
[i Tank system: malfunction! Please contact
Service
If the indicator light turns on and this message
appears, there is a malfunction in the tank sys-
tem. Drive to an authorized Audi dealer or au-
thorized Audi Service Facility immediately to have
the malfunction corrected.
ZA WARNING
Improper fueling procedures and improper
handling of fuel can lead to explosions, fires,
severe burns, and other injuries.
— Do not smoke. Keep away from open flames.
— The ignition must be switched off when re-
fueling.
— Mobile devices, radio devices, and other ra-
dio equipment should always be switched
off when refueling. Electromagnetic rays
could cause sparks and start a fire.
— If you do not insert the fuel pump nozzle all
the way into the filler tube, then fuel can
leak out. Spilled fuel can ignite and start a
fire.
— Never get into the vehicle when refueling. If
there is an exceptional situation where you
must enter the vehicle, close the door and
touch a metal surface before touching the
fuel pump nozzle again. This will reduce the
risk of electrostatic discharge that can cause
flying sparks. Sparks can start a fire when
refueling.
the container and ignite, especially during an
accident. This can cause explosions, fires, and
injuries.
— If you must transport fuel in a fuel contain-
er, note the following:
— Always place the fuel container on the
ground before filling. Never fill the fuel
container with fuel while it is inside or on
the vehicle. Electrostatic discharge can oc-
cur while refueling and the fuel vapors
could ignite.
— When using fuel containers made of met-
al, the fuel pump nozzle must always re-
main in contact with the container to re-
duce the risk of static charge.
— Insert the fuel pump nozzle as far as pos-
sible into the filler opening while refuel-
ing.
— Follow the applicable legal regulations in
the country where you are driving when
using, storing and transporting fuel con-
tainers.
— Make sure that the fuel container meets
the industry standards, for example ANSI
or ASTM F852-86.
ZA WARNING
Transporting fuel containers inside the vehicle
is not recommended. Fuel could leak out of
C) Note
— Remove fuel that has overflowed onto any
vehicle
components immediately to reduce
the risk of damage to the vehicle.
— Never drive until the fuel tank is completely
empty. The irregular supply of fuel that re-
sults from that can cause engine misfires.
Uncombusted fuel may enter the exhaust
system and increase the risk of damage to
the catalytic converter.
(@) For the sake of the environment
— Do not overfill the fuel tank, or fuel could
leak out when the vehicle is warming up.
— Fuel should never enter the sewer system or
come into contact with the ground.
197
>
Page 209 of 280

8S1012721BB
Checking and Filling
Coolant Freeze protec-
additive tion
Warm min. 40% min. -13 °F
regions max. 45% (-25 °C)
Cold min. 50% max. -40 °F
regions max. 55% (-40 °C)
@) Note
— Before the start of winter, have an author-
ized Audi dealer or authorized Audi Service
Facility check if the coolant additive in your
vehicle matches the percentage appropriate
for the climate. This is especially important
when driving in colder climates.
— If the appropriate coolant additive is not
available in an emergency, do not add any
other additive. You could damage the en-
gine. If this happens, only use water and re-
store the correct mixture ratio with the
specified coolant additive as soon as possi-
ble.
— Only refill with new coolant.
— Radiator sealant must not be mixed with
the coolant.
— Due to the risk of engine damage, the cool-
ing system should only be refilled by an au-
thorized Audi dealer or authorized Audi
Service Facility. An authorized Audi dealer or
authorized Audi Service Facility can also pro-
vide you with important information about
the recommended coolant additive.
Checking coolant
RAZ-0539
MIN
Fig. 173 Engine compartment - coolant expansion tank
(diagram): @) cover; @) markings
Observe the safety precautions > page 200, Gen-
eral information.
Checking the coolant level
> Park the vehicle on a level surface.
>» Switch the ignition off.
> Open the hood > page 201.
> Check the coolant level in the coolant expan-
sion tank > page 202, fig. 170 using the outer
markings @) > fig. 173. The coolant level must
be between the markings @) when the engine is
cold. When the engine is warm it can be slight-
ly above the upper marking.
Adding coolant
Requirement: there must be a residual amount of
coolant in the expansion tank >@.
If you must add coolant, use a mixture of water
and coolant additive. Mixing the coolant additive
with distilled water is recommended.
> Allow the engine to cool.
> Place a large, thick towel on the coolant expan-
sion tank cap.
>» Remove the cover () > fig. 173 carefully to the
left > A\.
» Add the correct mixture ratio of coolant
> page 206 up to the upper marking @)
> fig. 173.
> Make sure that the fluid level remains stable.
Add more coolant if necessary.
> Close the cap securely.
Coolant loss usually indicates that there is a leak.
Immediately drive your vehicle to an authorized
Audi dealer or authorized Audi Service Facility
and have the cooling system inspected. If the
cooling system is not leaking, coolant loss can re-
sult from the coolant boiling due overheating
and then being forced out of the cooling system.
Z\ WARNING
— The engine compartment in any vehicle can
be a dangerous area. Stop the engine and al-
low it to cool before working in the engine
compartment. Always follow the informa-
tion found in > page 200, General informa-
tion.
— Never open the hood if you can see or hear
steam or coolant escaping from the engine
compartment. This increases the risk of >
207
Page 214 of 280

Checking and Filling
Service interval display
The service interval display detects when your ve-
hicle is due for service.
The service interval display works in two stages:
— Inspection or oil change reminder: after a cer-
tain distance driven, a message appears in the
Infotainment system display each time the ig-
nition is switched on or off. The remaining dis-
tance or time is displayed briefly.
— Inspection or oil change due: if your vehicle
has reached an inspection or oil change interval
or both intervals at the same time, the mes-
sage Inspection due! or Oil change due! or Oil
change and inspection due! appears briefly af-
ter switching the ignition on or off.
Checking service intervals
You can check the remaining distance or time un-
til the next oil change or next inspection in the
Infotainment system. Select in the Infotainment
system: the [MENU] button > Vehicle > left con-
trol button > Service & checks > Service inter-
vals.
Resetting the indicator
An authorized Audi dealer or authorized Audi
Service Facility will reset the service interval dis-
play after performing service.
If you have changed the oil yourself, you must re-
set the oil change interval.
To reset the display, select in the Infotainment
system: the [MENU] button > Vehicle > left con-
trol button > Service & checks > Service intervals
> Reset oil change interval.
@ Note
— Only reset the oil change indicator if the oil
was changed.
— Following the service intervals is critical to
maintaining the service life and value of
your vehicle, especially the engine. Even if
the mileage on the vehicle is low, do not ex-
ceed the time for the next service.
212
Page 218 of 280

Wheels
Glossary of tire and loading
terminology
Accessory weight
means the combined weight (in
excess of those standard items
which may be replaced) of auto-
matic transmission, power steer-
ing, power brakes, power win-
dows, power seats, radio, and
heater, to the extent that these
items are available as factory-in-
stalled equipment (whether in-
stalled or not).
Aspect ratio
means the ratio of the height to
the width of the tire in percent.
Numbers of 55 or lower indicate a
low sidewall for improved steer-
ing response and better overall
handling on dry pavement.
Bead
means the part of the tire that is
made of steel wires, wrapped or
reinforced by ply cords and that is
shaped to fit the rim.
Bead separation
means a breakdown of the bond
between components in the bead.
216
Cord
means the strands forming the
plies in the tire.
Cold tire inflation pressure
means the tire pressure recom-
mended by the vehicle manufac-
turer for a tire of a designated
size that has not been driven for
more than a couple of miles (kilo-
meters) at low speeds in the three
hour period before the tire pres-
sure is measured or adjusted.
Curb weight
means the weight of a motor ve-
hicle with standard equipment in-
cluding the maximum capacity of
fuel, oil, and coolant, air condi-
tioning and additional weight of
optional equipment.
Extra load tire
means a tire designed to operate
at higher loads and at higher in-
flation pressures than the corre-
sponding standard tire. Extra load
tires may be identified as “XL”,
“xl”, “EXTRA LOAD”, or “RF” on
the sidewall.