2019 VOLKSWAGEN E-GOLF display
[x] Cancel search: displayPage 239 of 394

mance by applying more pressure to the brake pedal. But, during the break-in period, the stopping distance for hard braking and emergency braking will be longer until the brakes are fully broken in. Avoid hard braking and situations that might require hard braking (such as following other vehicles too closely) – especially during the break-in period.
Brake pad wear depends mostly on operating conditions and the way the vehicle is driven. If you do a lot of city and short-distance driving and/or have a sporty driving style, you should have the brake pads checked by an authorized Volkswagen dealer or authorized Volkswagen Service Facility more often than the regular service intervals.
Wet brakes (for example, after driving through water or washing the vehicle or after heavy rainfall) will not brake as well. Stopping distances will be longer when brake discs are wet or, in winter, even icy. Wet or icy brakes must be dried as soon as possible by carefully applying the brakes a couple of times while traveling at a relatively high speed. Make sure nobody is behind you and that you do not endan-
ger yourself or others ⇒ .
Brakes coated with road salt also react slower and need longer stopping distances. If there is salt on the roads and you are not braking regularly, brake carefully and gently from time to time to remove any
salt coating from the brake discs and pads ⇒ .
Brake disc corrosion (rust) and dirt buildup on the brake pads are more likely to occur if the vehicle is not driven much or is driven only for short distances with little braking. If the brakes have not been used and there is some rust on the discs, clean the brake discs and pads once in a while by carefully braking a couple of times while driving at relatively high speed to help clean the brake discs and pads.
Make sure nobody is behind you and that you do not endanger yourself or others ⇒ .
Brake system malfunction
If you brake and find that the vehicle doesn't brake nearly as well as it used to (sudden increase in stopping distance), a brake circuit may have failed. The brake warning light �H or �"�2�!�+�% will light up and a message may appear in the instrument cluster display. If you believe the vehicle is safe to drive, immediately take it to the nearest authorized Volkswagen dealer or authorized Volkswagen Service Facility for repair. Drive slowly and very carefully, allow for the longer stopping distance, and be ready to push longer and harder on the brake pedal to slow the vehicle down.
Electro-mechanical brake booster
The electro-mechanical brake booster works only when the electric motor is activated. It increases the force on the brakes above and beyond the pressure put on the brake pedal by the driver.
If the electro-mechanical brake booster is not working, you will have to push the brake pedal harder to
make up for the lack of booster assistance and the resulting longer stopping distance ⇒ .
WARNING
New brake pads do not provide maximum braking performance.
�x New brake pads do not have the best stopping power for the first 185 miles (300 km) and must be “broken in.” You can compensate for the slightly reduced braking force by putting more pressure on the brake pedal.
�x Drive with extra care while the new brake pads are being broken in. This reduces the risk of collisions and serious personal injuries due to a loss of control over the vehicle.
�x Never follow other vehicles too closely or put yourself into other situations that might require sudden, hard braking, especially when the brake pads have not been broken in.
Page 251 of 394

the battery fluid coming in contact with skin and eyes. If skin or eyes come into contact with bat-tery fluid, rinse the affected areas with clean flowing water for at least 15 minutes and see a doctor immediately.
(3) The high-voltage battery can burn. The high-voltage battery should never be exposed to fire, sparks or naked flames. Always handle the high-voltage battery with care to prevent damage and fluid leaks.
(4) Always keep children away from the high-voltage battery.
(5) You will find further information and warnings in the Owner's Manual and in the workshop manual.
(6) Never remove the cover from the high-voltage battery nor disassemble the high-voltage battery.
(7) Have maintenance work on the high-voltage battery performed only by properly qualified and
trained specialist staff ⇒ . Never make try to modify the high-voltage battery. The opened high-voltage battery should not come into contact with water or other liquids. Liquids can cause short-circuits, electric shocks and burns.
WARNING
Working on the high-voltage battery can cause severe chemical burns, explosions or life-endangering electric shocks.
�x Any necessary work should only be carried out by an authorized Volkswagen dealer or an authorized Volkswagen Service Facility .
WARNING
Damage to the high-voltage battery can cause liquids and gases to leak. Harmful substances can then leak and cause injuries. The emitted gases could also potentially cause a fire.
�x Do not touch any fluid that leaks out from the high-voltage battery as it can cause chemi-cal burns.
�x Call the fire department in the event of a fire. Inform the fire department that the vehicle has an electric drive and high-voltage components.
�x Leave the hazard area.
�x If you think that the high-voltage battery has been damaged, have the high-voltage battery checked by properly qualified and trained specialist staff.
Charge level display
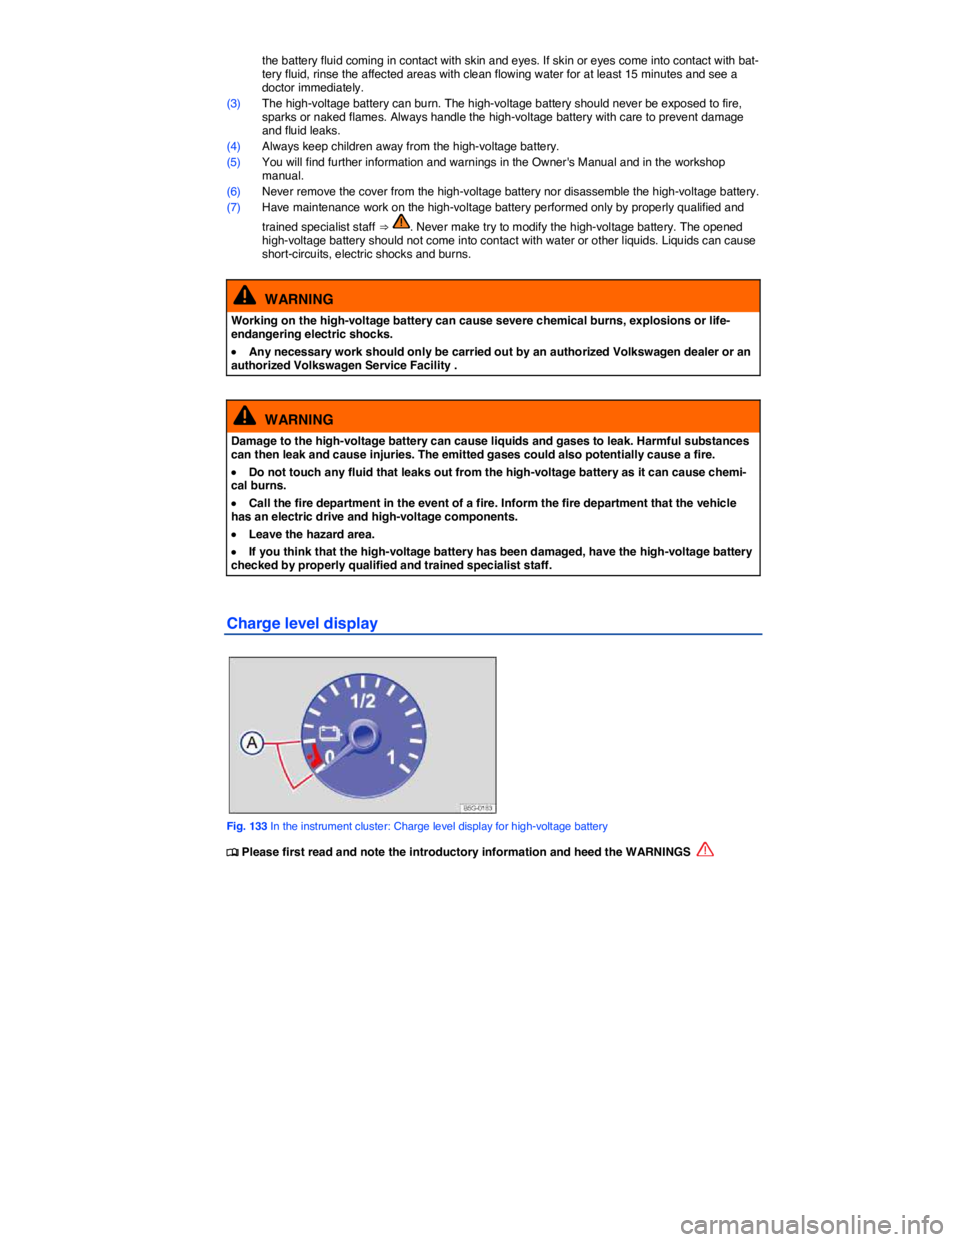
Fig. 133 In the instrument cluster: Charge level display for high-voltage battery
�
Page 252 of 394

The current charge level of the high-voltage battery is displayed in the instrument cluster ⇒ fig. 133.
The current range is also shown on the instrument cluster display ⇒ fig. 9.
When the high-voltage battery is fully charged, the needle in the charge level display points to 1.
the charge level of the high-voltage battery has reached the “reserve range” (A) or the vehicle is driving in the reserve range, various indicator lights will light up in the instrument cluster and text
messages will appear in the instrument cluster display ⇒ fig. 9. Charge the high-voltage battery as soon as possible.
WARNING
Driving when the high-voltage battery charge level is too low can lead to stalling in traffic, collisions and serious personal injury.
�x Always make sure that the high-voltage battery has enough charge to get where you are going and that the high-voltage battery can be charged when you get there.
Range of the high-voltage battery
�
Page 259 of 394

Control module display ⇒ fig. 136:
No. Display Meaning Proper re-
sponse
(5) Flashes
is connected to
the vehicle.
High-voltage
battery is being
charged.
(1) (4)
Flashes
The charging
cable is con-
nected to an
outlet without a
Ground Fault
Circuit (GFI).
The high-voltage
battery is not
being charged.
Connect charg-
ing cable to a
110 Volt outlet
with a Ground
Fault Circuit
(GFI).
Lights up
Charging cable
is connected to a
110 Volt outlet,
but an error was
detected by the
control module.
The high-voltage
battery is not
being charged.
Disconnect the
charging cable
from the 110 Volt
outlet and plug it
back in. If the
error comes
back again, get
expert assis-
tance from a
qualified electri-
cal installation
specialist.
Page 260 of 394

Control module display ⇒ fig. 136:
No. Display Meaning Proper re-
sponse
(1) (2) (4) Lights up
During the
charging pro-
cess: The con-
trol unit detected
a residual cur-
rent, the charg-
ing process is
interrupted.
Dangerous con-
tact voltage
damaged isola-
tion detected at
the voltage
source. High-
voltage battery is
not being
charged.
Or: Damaged
isolation detect-
ed in the vehi-
cle’s high-
voltage system.
Get expert assis-
tance from a
qualified electri-
cal installation
specialist.
During the test-
ing of the
Ground Fault
Circuit (GFI):
The test button
(3) was pressed
for longer than 3
seconds. The
high-voltage
battery is not
being charged.
Press the reset
button (6) for at
least 3 seconds.
(1) (2) Flashes Charging cable Have charging
Page 261 of 394

Control module display ⇒ fig. 136:
No. Display Meaning Proper re-
sponse
(4) Lights up
is connected to a
110 Volt outlet,
but an error was
detected by the
control module.
The high-voltage
battery is not
being charged.
cable checked
by a qualified
electrical special-
ist. Go to an
authorized
Volkswagen
dealer or
Volkswagen
service facility for
assistance.
(2) (4) Lights up
The vehicle’s
system detected
an error in the
connected
charging cable.
The high-voltage
battery is not
being charged.
Disconnect the
charging cable
from the 110 Volt
outlet and the
vehicle and plug
it back in. Should
the error occur
again, get expert
assistance from
a qualified elec-
trical installation
specialist.
(1) (2) Lights up An overheating - Let the charg-
Page 262 of 394

Control module display ⇒ fig. 136:
No. Display Meaning Proper re-
sponse
(4) Flashes
of the charging
cable was de-
tected. The high-
voltage battery is
not being
charged. An
overheating can
be caused by:
- A damaged 110
Volt outlet
- Ambient tem-
perature above
113 °F (45 °C)
- A damaged
charging cable
ing cable cool
down.
- Should the
error occur
again, have
charging cable
checked by a
qualified electri-
cal specialist. Go
to an authorized
Volkswagen
dealer or
Volkswagen
service facility for
assistance.
(1) Lights up
The system de-
tected fluctua-
tions in the volt-
age. The high-
voltage battery is
not being
charged
- The charging
process will con-
tinue automati-
cally once the
voltage is stable
again.
- If necessary try
connecting the
cable to another
110 Volt outlet.
- Should the
error occur
again, get expert
assistance from
a qualified elec-
trical installation
specialist.
(4) Flashes
(2) Flashes Excess voltage - Disconnect the
Page 263 of 394

Control module display ⇒ fig. 136:
No. Display Meaning Proper re-
sponse
(4) Lights up
was detected by
the control unit.
The high-voltage
battery is not
being charged.
charging cable
from the 110 Volt
outlet and the
vehicle and plug
it back in.
- If necessary try
connecting the
cable to another
110 Volt outlet.
- Should the
error occur
again, have
charging cable
checked by a
qualified electri-
cal specialist. Go
to an authorized
Volkswagen
dealer or
Volkswagen
service facility for
assistance.
Enabling the charging process
After a successful self-test, press the button (1) to set the protection unit to ready and enable the charging process. The LED in the protection unit symbol (2) lights up green.
Ending the charging process
If you want to interrupt the high-voltage battery charging process before charging is completed, the charging process must be interrupted or ended on the vehicle
Checking the Ground Fault Circuit (GFI) of the 110 Volt outlet
The GFI should be checked once a month. Carry out this procedure with the charging cable connected to the 110 Volt outlet and the vehicle. The charging process has to be deactivated:
�x Press the test button (3) on the control unit of the charging cable for at about 3 seconds.
�x If the test was successful, the warning lights (1) and (2) will light up. Should these warning lights not light up or other lights should light up or flash, an error occurred while testing.
�x After a successful test and if error occurred, you can start the charging process by pressing the rest button (6) for at least 3 seconds.