2019 MERCEDES-BENZ GLS SUV door lock
[x] Cancel search: door lockPage 160 of 398
Parking
Important safety notes
G
WARNING
Flammable material such as leaves, grass or
twigs may ignite if they come into contact with hot parts of the exhaust system or exhaust
gas flow. There is a risk of fire.
Park the vehicle so that no flammable mate-
rials come into contact with parts of the vehi- cle which are hot. Take particular care not to
park on dry grassland or harvested grain
fields. G
WARNING
If you leave children unsupervised in the vehi- cle, they could set it in motion by, for example:
R release the parking brake.
R shift the automatic transmission out of the
parking position P.
R start the engine.
In addition, they may operate vehicle equip-
ment and become trapped. There is a risk of
an accident and injury.
When leaving the vehicle, always take the
SmartKey with you and lock the vehicle. Never
leave children unsupervised in the vehicle.
! Always secure the vehicle correctly against
rolling away. Otherwise, the vehicle or its driv-
etrain could be damaged.
To ensure that the vehicle is secured against
rolling away unintentionally:
R the electric parking brake must be applied
R the transmission must be in position 005Dand
the SmartKey must be removed from the igni- tion lock
R the front wheels must be turned towards the
curb on steep uphill or downhill gradients
R the empty vehicle must be secured at the
front axle with a wheel chock or similar, for
example, on uphill or downhill gradients
R a laden vehicle must also be secured at the
rear axle with a wheel chock or similar, for
example, on uphill or downhill gradients Switching off the engine
G
WARNING
The automatic transmission switches to neu-
tral position Nwhen you switch off the engine.
The vehicle may roll away. There is a risk of an
accident.
After switching off the engine, always switch
to parking position P. Prevent the parked vehi-
cle from rolling away by applying the parking
brake.
X Apply the electric parking brake.
X Shift the transmission to position 005D.
X With the SmartKey: turn the SmartKey to
position 0092in the ignition lock and remove it.
The immobilizer is activated.
X With KEYLESS-GO:
Press the Start/Stop button (Y page 140)
The engine stops and all the indicator lamps in the instrument cluster go out.
If you switch the engine off with the transmis-
sion in position 005Eor005B, the automatic trans-
mission shifts to 005Cautomatically.
If you then open the driver's or front-passenger
door, the automatic transmission shifts to 005D
automatically.
If you want the automatic transmission to
remain in neutral 005C, e.g. when having the vehi-
cle cleaned in an automatic, tow-through car
wash:
X Vehicles with a SmartKey: switch on the
ignition.
X Vehicles with KEYLESS-GO: remove the
Start/Stop button from the ignition lock.
X Insert the SmartKey into the ignition lock.
X Switch on the ignition.
X All vehicles: depress the brake pedal and
keep it depressed.
X Engage neutral 005C.
X Release the brake pedal.
X Release the electric parking brake.
X Switch off the ignition and leave the SmartKey
in the ignition lock.
i The engine can be switched off in an emer-
gency while the vehicle is in motion by press-
ing and holding the Start/Stop button for
three seconds. 158
ParkingDriving and parking
Page 161 of 398
Electric parking brake
General notes G
WARNING
If you leave children unsupervised in the vehi- cle, they could set it in motion by, for example:
R release the parking brake.
R shift the automatic transmission out of the
parking position P.
R start the engine.
In addition, they may operate vehicle equip-
ment and become trapped. There is a risk of
an accident and injury.
When leaving the vehicle, always take the
SmartKey with you and lock the vehicle. Never
leave children unsupervised in the vehicle.
The function of the electric parking brake is
dependent on the on-board voltage. If the on-
board voltage is low or there is a malfunction in
the system, it may not be possible to apply the
released parking brake.
X If this is the case, only park the vehicle on
level ground and secure it to prevent it rolling
away.
X Shift the automatic transmission to position
005D.
It may not be possible to release an applied
parking brake if the on-board voltage is low or
there is a malfunction in the system. Contact a
qualified specialist workshop.
i The electric parking brake performs a func-
tion test at regular intervals while the engine
is switched off. The sounds that can be heard while this is occurring are normal. Applying or releasing manually X
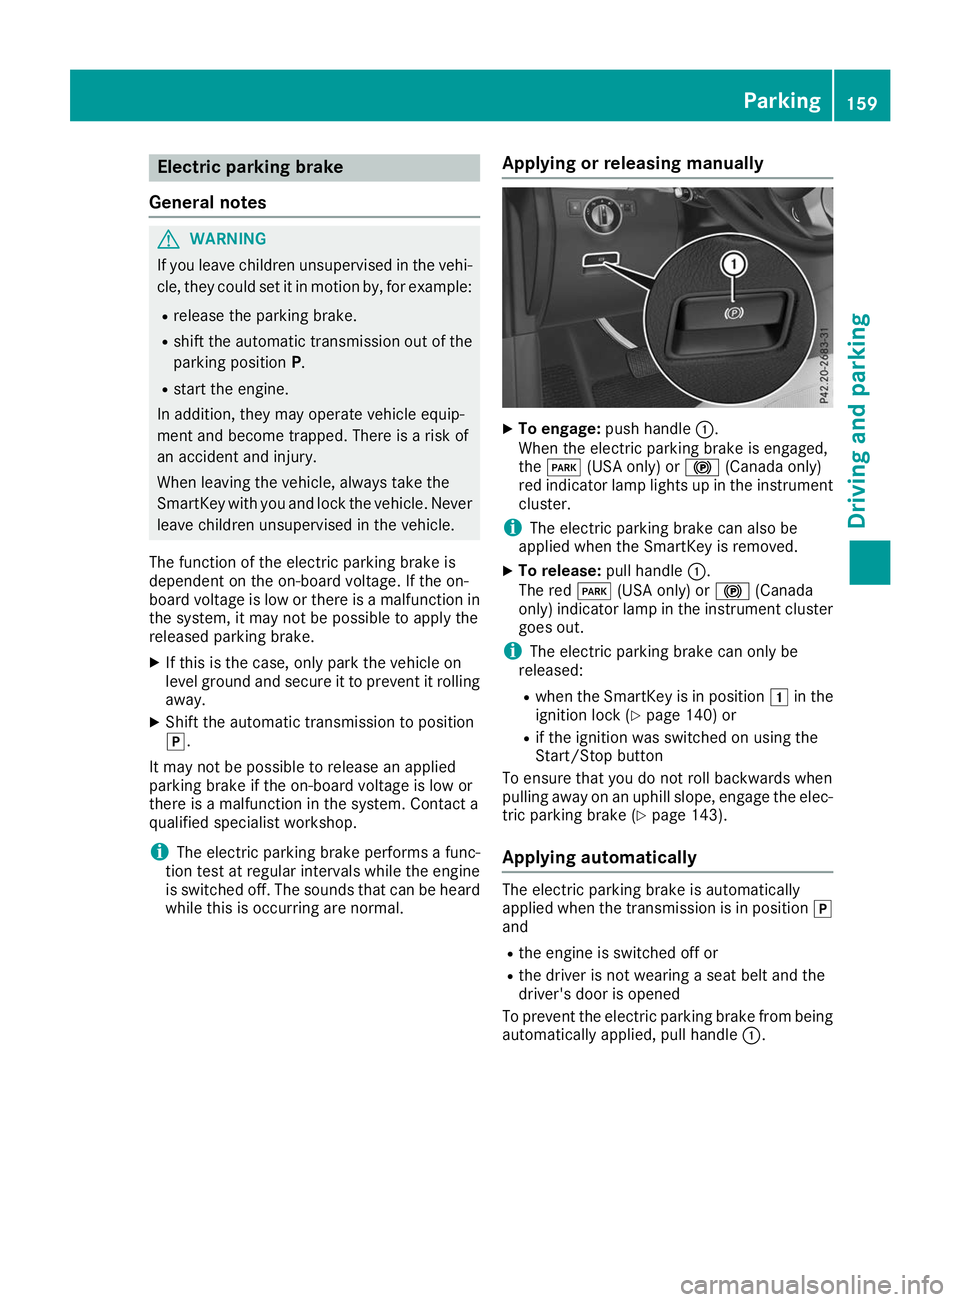
To engage: push handle 0043.
When the electric parking brake is engaged,
the 0049 (USA only) or 0024(Canada only)
red indicator lamp lights up in the instrument
cluster.
i The electric parking brake can also be
applied when the SmartKey is removed.
X To release: pull handle0043.
The red 0049(USA only) or 0024(Canada
only) indicator lamp in the instrument cluster goes out.
i The electric parking brake can only be
released:
R when the SmartKey is in position 0047in the
ignition lock (Y page 140) or
R if the ignition was switched on using the
Start/Stop button
To ensure that you do not roll backwards when
pulling away on an uphill slope, engage the elec-
tric parking brake (Y page 143).
Applying automatically The electric parking brake is automatically
applied when the transmission is in position 005D
and
R the engine is switched off or
R the driver is not wearing a seat belt and the
driver's door is opened
To prevent the electric parking brake from being automatically applied, pull handle 0043. Parking
159Driving and parking Z
Page 167 of 398
You can obtain further information about this
from your authorized Mercedes-Benz Center.
New and replaced brake pads and discs only
reach their optimum braking effect after several
hundred kilometers of driving. Compensate for
this by applying greater force to the brake pedal. Keep this in mind, and adapt your driving and
braking accordingly during this break-in period.
Excessive heavy braking results in correspond-
ingly high brake wear. Observe the 0026brake
wear warning lamp in the instrument cluster and
note any brake status messages in the multi-
function display. Especially for high perform-
ance driving, it is important to maintain and have the brake system checked regularly. Driving on wet roads
Hydroplaning If water has accumulated to a certain depth on
the road surface, there is a danger of hydro-
planing occurring, even if:
R you drive at low speeds
R the tires have adequate tread depth
For this reason, in the event of heavy rain or in
conditions in which hydroplaning may occur,
you must drive in the following manner:
R lower your speed
R avoid ruts
R avoid sudden steering movements
R brake carefully
Driving on flooded roads !
Do not drive through flooded areas. Check
the depth of any water before driving through
it. Drive slowly through standing water. Oth-
erwise, water could enter the vehicle interior
or engine compartment. It can then damage
the engine's or automatic transmission's
electronic components. It can also be sucked
in by the engine's air intake connection and
cause engine damage.
i Vehicles with the AIRMATIC Package:
select the raised vehicle level before driving
through a body of water. Off-road fording !
Under no circumstances should you accel-
erate before entering the water. The bow
wave could cause water to enter and damage
the engine and other assemblies.
! Do not open any of the vehicle's doors while
fording. Otherwise, water could get into the
vehicle interior and damage the vehicle's
electronics and interior equipment.
R Establish how deep the water is and the char-
acteristics of the body of water before ford-
ing.
R Select the highest possible vehicle level.
R Shift to a lower gear using the left-hand steer-
ing wheel paddle shifter.
R Avoid high engine speeds.
R Enter and exit the water at a flat place and at
a steady walking pace.
R Drive slowly and at an even speed through the
water.
R Ensure that a bow wave does not form as you
drive.
R Do not stop and do not switch off the engine.
Water offers a high degree of resistance, and the ground is slippery and in some cases
unstable. Therefore, it is difficult and danger-
ous to pull away in the water.
R Clean any mud from the tire tread after ford-
ing.
R Apply the brakes to dry them after fording.
Always observe the maximum fording depth val- ues (Y page 390). Winter driving
G
WARNING
If you shift down on a slippery road surface in an attempt to increase the engine's braking
effect, the drive wheels could lose their grip.
There is an increased danger of skidding and
accidents.
Do not shift down for additional engine brak-
ing on a slippery road surface. G
DANGER
If the exhaust pipe is blocked or adequate
ventilation is not possible, poisonous gases Driving tips
165Driving and parking
Z
Page 182 of 398
R
the distance to the vehicle in front is too short
and thus the lane markings cannot be detec-
ted
R the lane markings change quickly, e.g. lanes
branch off, cross one another or merge
R the road is narrow and winding
R there are highly variable shade conditions on
the roadway
The system is switched to passive and no longer assists you by performing steering interventions
if:
R you actively change lane
R you switch on the turn signal
R you take your hands off the steering wheel or
do not steer for a prolonged period of time
i Once you have finished changing lanes,
Active Steering Assist automatically reacti-
vates.
Active Steering Assist cannot provide assis-
tance:
R on very sharp corners
R when towing a trailer
R when a loss of tire pressure or a defective tire
has been detected and displayed
Observe the important safety notes on Active
Distance Assist DISTRONIC (Y page 173).
The steering interventions are carried out with a limited steering moment. The system requires
the driver to keep his hands on the steering
wheel and to steer himself.
If you do not steer yourself or if you take your
hands off the steering wheel for a prolonged
period of time, the system will first alert you with
a visual warning. A steering wheel symbol
appears in the multifunction display. If you have
still not started to steer and have not taken hold of the steering wheel after five seconds at the
latest, a warning tone also sounds to remind you
to take control of the vehicle. Active Steering
Assist is then switched to passive. Active Dis-
tance Assist DISTRONIC remains active.
Activating Active Steering Assist X Select the Active Distance Assist DISTRONIC
with Active Steering Assist function using the
on-board computer (Y page 238).
The Active
Active Steering Steering Assist
AssistOn
Onmessage
appears on the multifunction display. Active
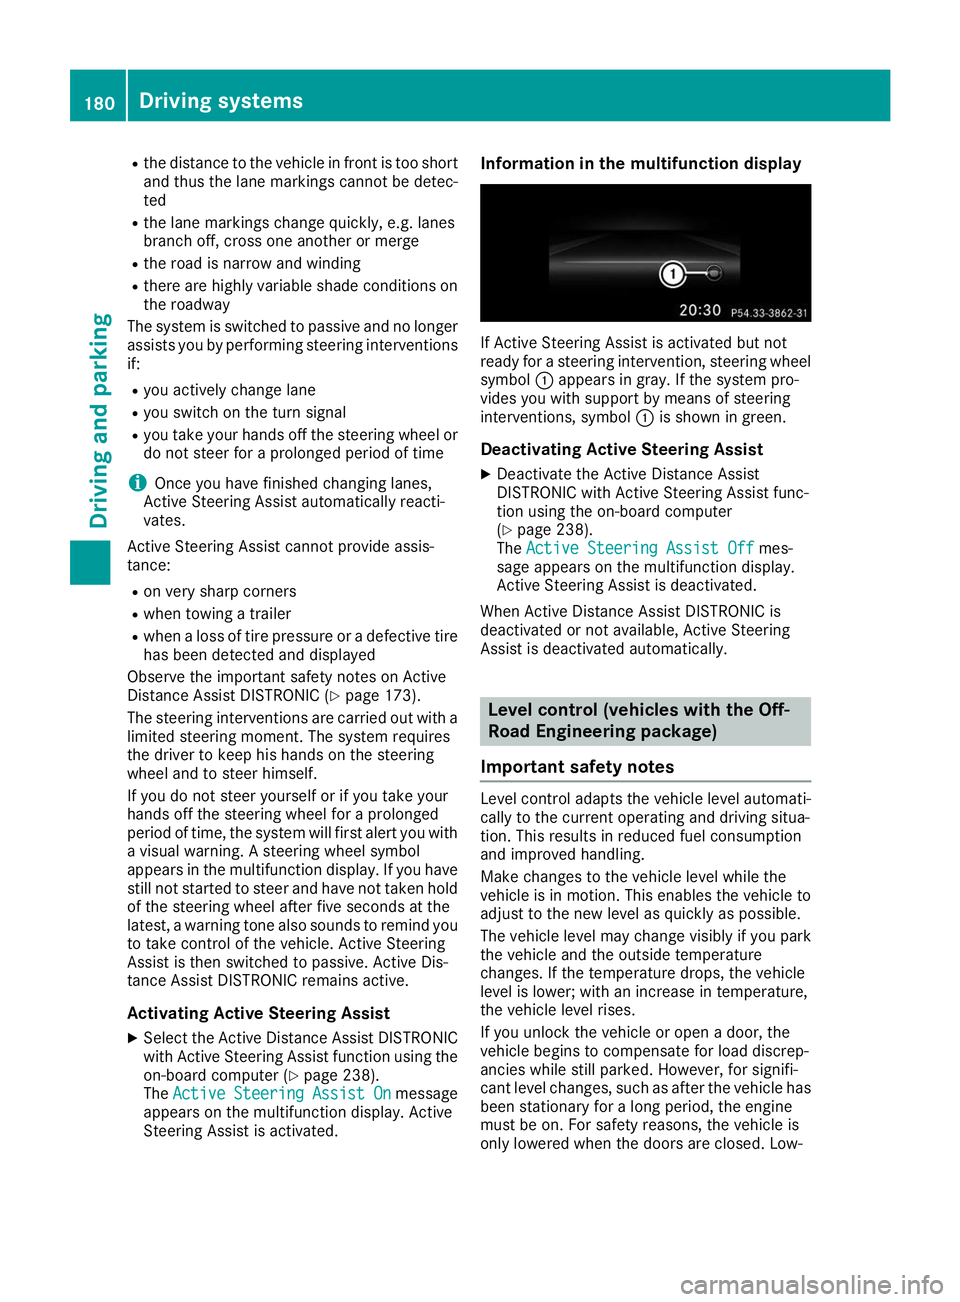
Steering Assist is activated. Information in the multifunction display
If Active Steering Assist is activated but not
ready for a steering intervention, steering wheel
symbol 0043appears in gray. If the system pro-
vides you with support by means of steering
interventions, symbol 0043is shown in green.
Deactivating Active Steering Assist
X Deactivate the Active Distance Assist
DISTRONIC with Active Steering Assist func-
tion using the on-board computer
(Y page 238).
The Active Steering Assist Off Active Steering Assist Off mes-
sage appears on the multifunction display.
Active Steering Assist is deactivated.
When Active Distance Assist DISTRONIC is
deactivated or not available, Active Steering
Assist is deactivated automatically. Level control (vehicles with the Off-
Road Engineering package)
Important safety notes Level control adapts the vehicle level automati-
cally to the current operating and driving situa-
tion. This results in reduced fuel consumption
and improved handling.
Make changes to the vehicle level while the
vehicle is in motion. This enables the vehicle to adjust to the new level as quickly as possible.
The vehicle level may change visibly if you park
the vehicle and the outside temperature
changes. If the temperature drops, the vehicle
level is lower; with an increase in temperature,
the vehicle level rises.
If you unlock the vehicle or open a door, the
vehicle begins to compensate for load discrep-
ancies while still parked. However, for signifi-
cant level changes, such as after the vehicle has
been stationary for a long period, the engine
must be on. For safety reasons, the vehicle is
only lowered when the doors are closed. Low- 180
Driving systemsDriving an
d parking
Page 187 of 398
The electric parking brake secures the vehicle
automatically if the HOLD function is activated
when the vehicle is stationary and:
R a system malfunction occurs
R the power supply is insufficient
On steep uphill or downhill gradients or if there
is a malfunction, the transmission may also be
automatically shifted to position 005D.AIRMATIC package
General notes AIRMATIC is an air suspension system with var-
iable damping for improved driving comfort.
Level control ensures the best possible suspen- sion and constant ground clearance, even with a laden vehicle. When you drive fast, the vehicle islowered automatically to improve driving safety
and to reduce fuel consumption. There is also
the option to manually adjust the vehicle level.
AIRMATIC consists of:
R level settings
R level control and
R ADS or ADS PLUS (Adaptive Damping Sys-
tem)
All vehicles (except Mercedes-AMG vehi-
cles): your vehicle may also be equipped with
the ACTIVE CURVE SYSTEM (Y page 186).
Mercedes-AMG vehicles: your vehicle is equip-
ped with the ACTIVE CURVE SYSTEM
(Y page 186).
Observe the notes on driving with a trailer
(Y page 222).
The vehicle level can be set using the DYNAMIC
SELECT controller (Y page 147) or the level but-
ton (Y page 187). The setting always corre-
sponds to the last selected function.
Important safety notes G
WARNING
When the vehicle is being lowered, people
could become trapped if their limbs are
between the vehicle body and the wheels or
underneath the vehicle. There is a risk of
injury. Make sure no one is underneath the vehicle or
in the immediate vicinity of the wheel arches
when the vehicle is being lowered.
If you unlock the vehicle or open a door, the
vehicle begins to compensate for load discrep-
ancies while still parked. However, for signifi-
cant level changes, such as after the vehicle has
been stationary for a long period, the engine
must be on. For safety reasons, the vehicle is
only lowered when the doors are closed. Low-
ering is interrupted if a door is opened, and it
continues once the door has been closed.
ADS and ADS PLUS (Adaptive Damping
System) General notes
The Adaptive Damping System automatically
controls the calibration of the dampers. The
damping characteristics adapt to the current
operating and driving situation.
The damping is tuned individually to each wheel
and depends on:
R your driving style, e.g. sporty
R the road surface conditions
R the drive program selected
R the vehicle level setting
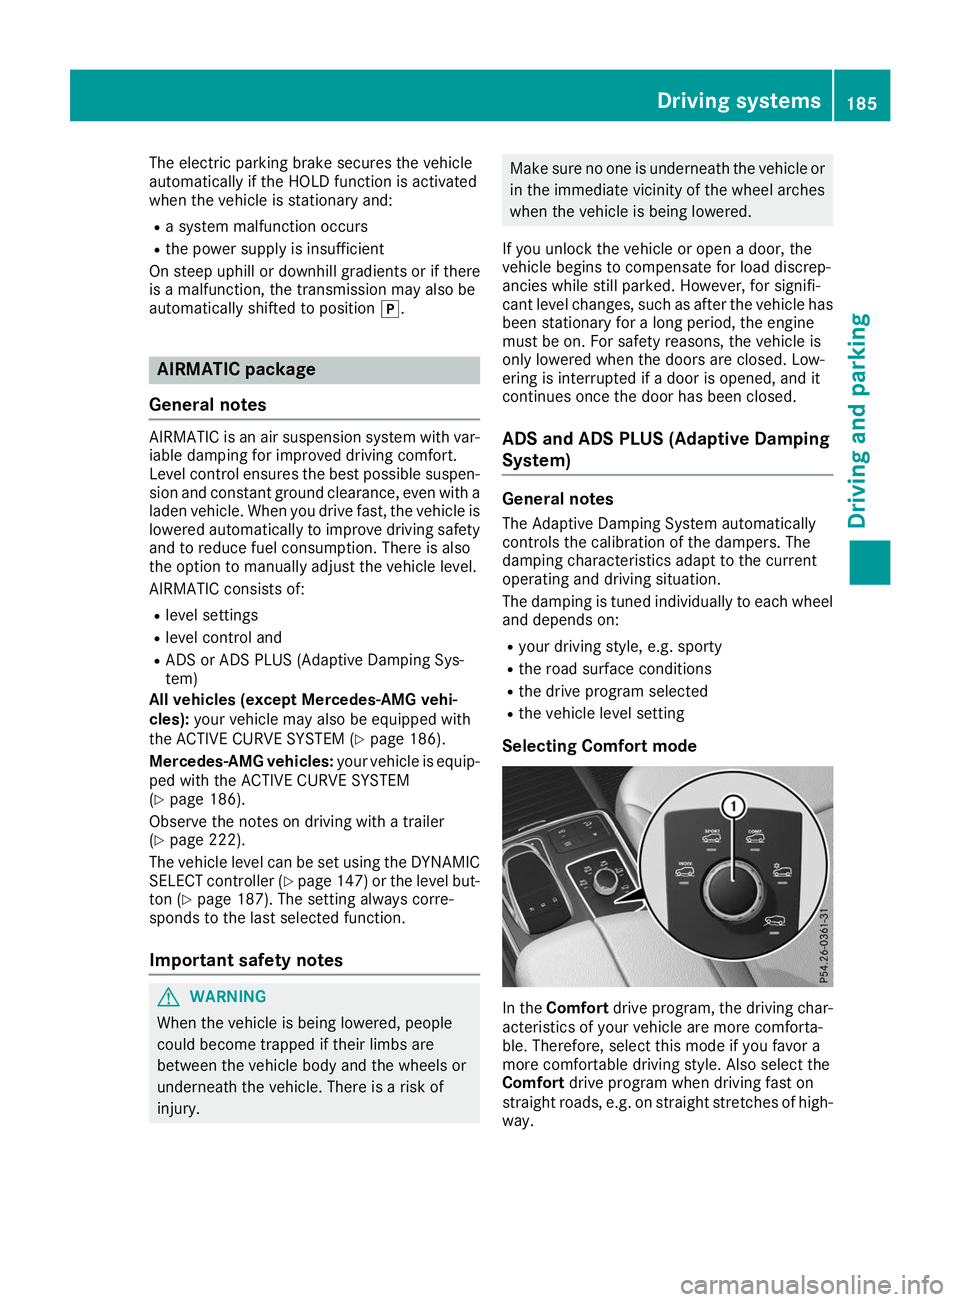
Selecting Comfort mode In the
Comfort drive program, the driving char-
acteristics of your vehicle are more comforta-
ble. Therefore, select this mode if you favor a
more comfortable driving style. Also select the
Comfort drive program when driving fast on
straight roads, e.g. on straight stretches of high-
way. Driving systems
185Driving and parking Z
Page 189 of 398
Vehicle level
Important safety notes
G
WARNING
When the vehicle is being lowered, people
could become trapped if their limbs are
between the vehicle body and the wheels or
underneath the vehicle. There is a risk of
injury.
Make sure no one is underneath the vehicle or in the immediate vicinity of the wheel arches
when the vehicle is being lowered. G
WARNING
When you drive with the vehicle raised, the
driving characteristics could be impaired by
the vehicle's raised center of gravity. The vehi- cle could rollover more easily, for example on
a bend. There is a risk of an accident.
Always select as low a vehicle level as possi-
ble and adjust your driving style. G
WARNING
When you drive with the chassis lowered or
raised, the vehicle's braking and driving char-
acteristics can be significantly impaired. You
could also exceed the permissible vehicle
height if the chassis is raised. There is a risk of an accident.
Adjust the vehicle level before pulling away. G
WARNING
Due to the high center of gravity, the vehicle
may start to skid and roll over in the event of
an abrupt steering maneuver and/or when
the vehicle's speed is not adapted to the road conditions. There is a risk of an accident.
Always adapt your speed and driving style to
the vehicle's driving characteristics and to the prevailing road and weather conditions.
! When driving on extremely rough terrain,
select a high vehicle level in good time. Make
sure there is always sufficient ground clear-
ance. You will otherwise damage the vehicle.
R Utility vehicles have a significantly higher roll-
over rate than other types of vehicles. Failure to operate this vehicle safely may
result in an accident, rollover of the vehicle,
and severe or fatal injury.
R In a rollover crash, an unbelted person is sig-
nificantly more likely to die than a person
wearing a seat belt.
You and all vehicle occupants should always
wear your seat belts.
General notes
Only select raised level if this is appropriate for
the road conditions. Otherwise, fuel consump-
tion may increase and handling may be affected.
Make changes to the vehicle level while the
vehicle is in motion. This enables the vehicle to adjust to the new level as quickly as possible.
The vehicle level may change visibly if you park
the vehicle and the outside temperature
changes. If the temperature drops, the vehicle
level is lower; with an increase in temperature,
the vehicle level rises.
If you unlock the vehicle or open a door, the
vehicle begins to compensate for load discrep-
ancies while still parked. However, for signifi-
cant level changes, such as after the vehicle has
been stationary for a long period, the engine
must be on. For safety reasons, the vehicle is
only lowered when the doors are closed. Low-
ering is interrupted if a door is opened, and it
continues once the door has been closed.
Vehicles with no trailer coupled: below a
speed of 37 mph (60 km/h) you can choose
between the normal and raised vehicle level.
Select the normal vehicle level for normal road
surfaces and the raised vehicle level for driving
with snow chains or on particularly poor road
surfaces. Your selection remains stored even if
you remove the SmartKey from the ignition lock.
If you try to select raised level at a speed above
37 mph (60 km/h), the Drive More Slowly
Drive More Slowly
message appears in the multifunction display.
Vehicles with a trailer coupled: below a speed
of 19 mph (30 km/h), you can choose between
the normal and raised vehicle level. Driving systems
187Driving and parking Z
Page 226 of 398
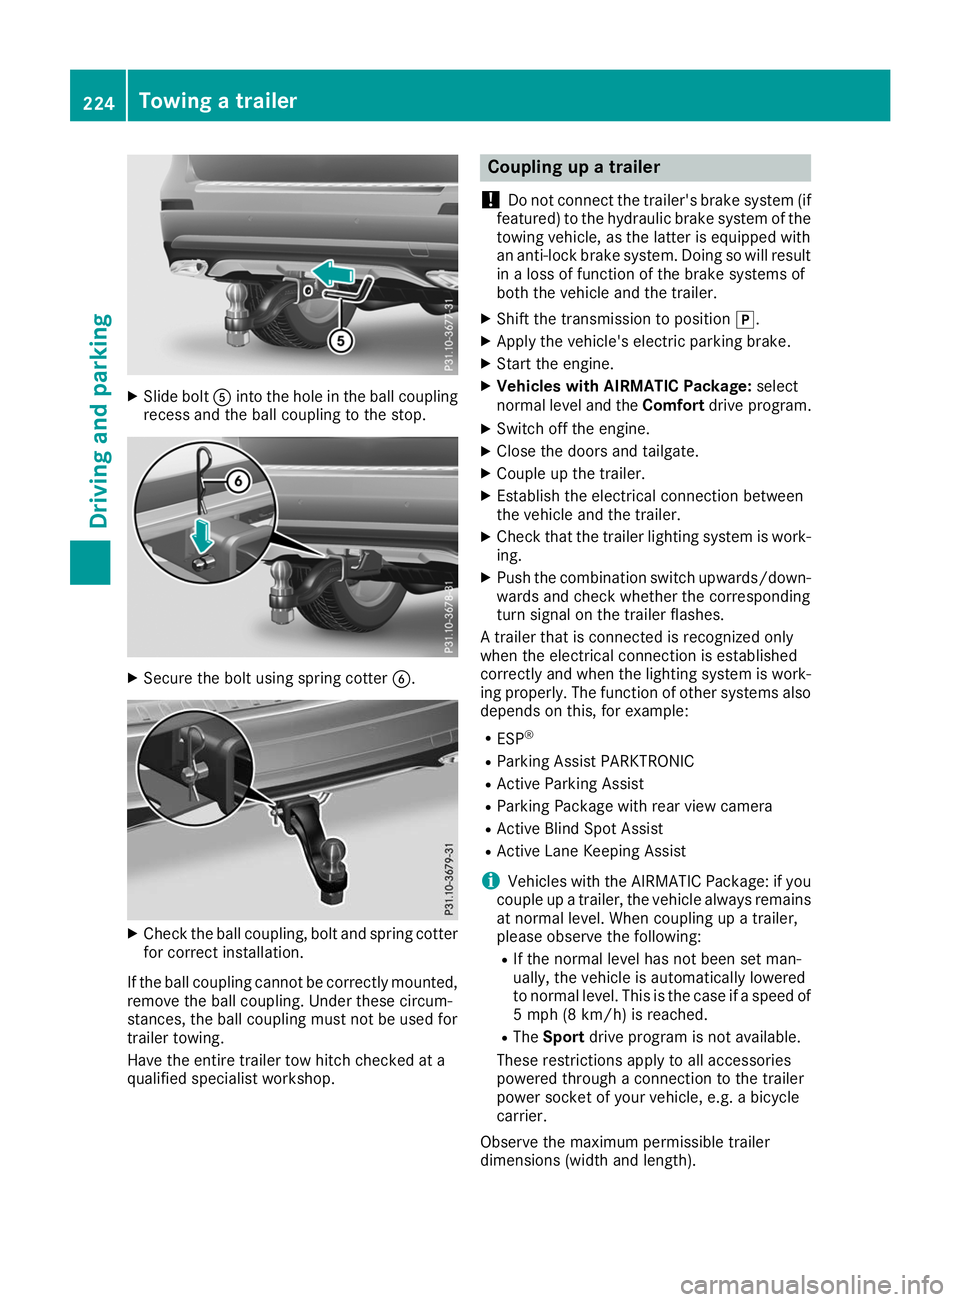
X
Slide bolt 0083into the hole in the ball coupling
recess and the ball coupling to the stop. X
Secure the bolt using spring cotter 0084.X
Check the ball coupling, bolt and spring cotter
for correct installation.
If the ball coupling cannot be correctly mounted,
remove the ball coupling. Under these circum-
stances, the ball coupling must not be used for
trailer towing.
Have the entire trailer tow hitch checked at a
qualified specialist workshop. Coupling up a trailer
! Do not connect the trailer's brake system (if
featured) to the hydraulic brake system of the towing vehicle, as the latter is equipped with
an anti-lock brake system. Doing so will result
in a loss of function of the brake systems of
both the vehicle and the trailer.
X Shift the transmission to position 005D.
X Apply the vehicle's electric parking brake.
X Start the engine.
X Vehicles with AIRMATIC Package: select
normal level and the Comfortdrive program.
X Switch off the engine.
X Close the doors and tailgate.
X Couple up the trailer.
X Establish the electrical connection between
the vehicle and the trailer.
X Check that the trailer lighting system is work-
ing.
X Push the combination switch upwards/down-
wards and check whether the corresponding
turn signal on the trailer flashes.
A trailer that is connected is recognized only
when the electrical connection is established
correctly and when the lighting system is work-
ing properly. The function of other systems also depends on this, for example:
R ESP ®
R Parking Assist PARKTRONIC
R Active Parking Assist
R Parking Package with rear view camera
R Active Blind Spot Assist
R Active Lane Keeping Assist
i Vehicles with the AIRMATIC Package: if you
couple up a trailer, the vehicle always remains
at normal level. When coupling up a trailer,
please observe the following:
R If the normal level has not been set man-
ually, the vehicle is automatically lowered
to normal level. This is the case if a speed of
5 mph (8 km/h) is reached.
R The Sport drive program is not available.
These restrictions apply to all accessories
powered through a connection to the trailer
power socket of your vehicle, e.g. a bicycle
carrier.
Observe the maximum permissible trailer
dimensions (width and length). 224
Towing a trailerDriving and parking
Page 243 of 398
R
Highway mode
R Active light function
R Cornering light function
R Extended range fog lamps
R Off-road lights
Further information on the Intelligent Light Sys-
tem (Y page 117).
Vehicle submenu Activating/deactivating the automatic
door locking mechanism
If you activate the Automatic AutomaticDoor
Door Lock
Lockfunc-
tion, the vehicle is centrally locked above a
speed of approximately 9 mph (15 km/h).
X Press the 0059or0065 button on the steering
wheel to select the Sett.
Sett. menu.
X Press the 0064or0063 button to select the
Vehicle
Vehicle submenu.
X Press 0076to confirm.
X Press the 0064or0063 button to select the
Automatic Door Lock Automatic Door Lock function.
When the Automatic Door Lock
Automatic Door Lock function is
activated, the vehicle doors are displayed in
orange in the multifunction display.
X Press the 0076button to save the setting.
For further information on the automatic locking
feature, see (Y page 84).
Activating/deactivating the acoustic
locking verification signal If you switch on the Acoustic
Acoustic Lock Lockfunction, an
acoustic signal sounds when you lock the vehi-
cle.
X Press the 0059or0065 button on the steering
wheel to select the Settings
Settings menu.
X Press the 0064or0063 button to select the
Vehicle
Vehicle submenu.
X Press 0076to confirm.
X Press the 0064or0063 button to select the
Acoustic Lock
Acoustic Lock function.
If the Acoustic Lock
Acoustic Lock function is activated,
the 0037 symbol in the multifunction display
lights up orange.
X Press the 0076button to save the setting. Convenience submenu Activating/deactivating the EASY-
ENTRY/EXIT feature
G
WARNING
When the EASY-ENTRY/EXIT feature adjusts
the steering wheel, you and other vehicle
occupants – particularly children – could
become trapped. There is a risk of injury.
While the EASY-ENTRY/EXIT feature is mak-
ing adjustments, make sure that no one has
any body parts in the sweep of the steering
wheel.
If somebody becomes trapped:
R press one of the memory function position
buttons, or
R move the switch for steering wheel adjust-
ment in the opposite direction to that in
which the steering wheel is moving.
The adjustment process is stopped.
X Press the 0059or0065 button on the steering
wheel to select the Sett. Sett.menu.
X Press the 0064or0063 button to select the
Convenience
Convenience submenu.
X Press 0076to confirm.
X Using 0064or0063, select the Easy
EasyEntry/
Entry/
Exit
Exit function.
If the Easy
Easy Entry/Exit
Entry/Exit function is activated,
the vehicle steering wheel is displayed in
orange in the multifunction display.
X Press the 0076button to save the setting.
Further information on the EASY-ENTRY/EXIT
feature (Y page 109).
Switching the seat belt adjustment on/off X Press the 0059or0065 button on the steering
wheel to select the Settings
Settings menu.
X Press the 0064or0063 button to select the
Convenience Convenience submenu.
X Press 0076to confirm.
X Press the 0064or0063 button to select the
Belt Adjustment
Belt Adjustment function.
If the Belt
Belt Adjustment
Adjustment function is activated,
the vehicle seat belt is shown in orange in the multifunction display.
X Press the 0076button to save the setting. Menus and submenus
241On-board computer and displays Z