Page 82 of 697
If
th eve hicle is not opened within appr oximately
40 seconds af ter unlocking, it loc ksagain. Anti-
th eft pr otection is primed again.
Do not keep theke yto ge ther with electronic
devices or me tal objects. This can af fect the
ke y's functionalit y.
Do not keep theke y in thete mp erature-contro l‐
led cup holder. Otherwise, theke y will not be
re liably de tected.
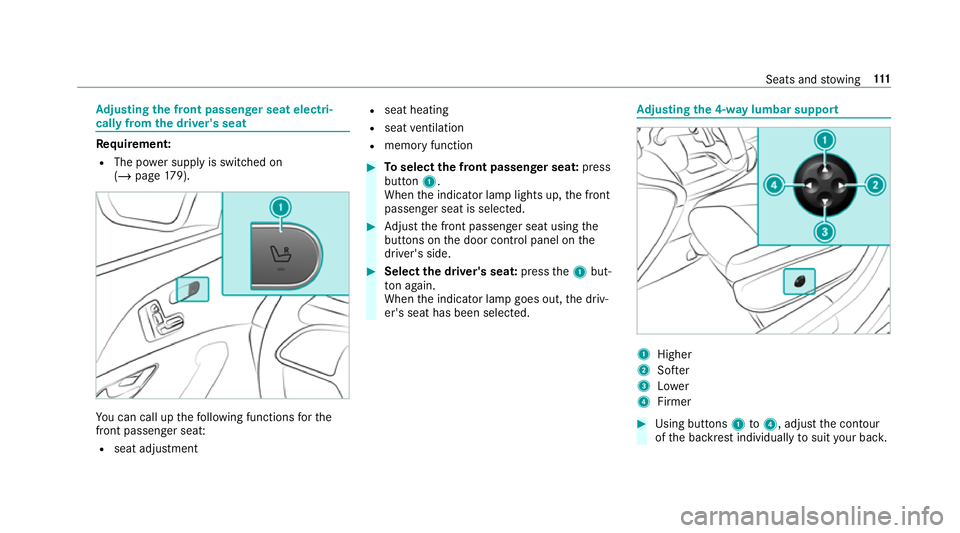
% If battery check lamp 2does not light up
af te r pressing theÜ orß button, the
battery is dischar ged.
Re placing theke y bat tery ( / page 80). Ac
tivating/deactivating the acoustic lo cking
ve rification signal Multimedia sy
stem:
4 © 5
Settings 5
Vehicle #
Activate or deacti vate Acoustic lock .
% Please no
te:
The selected setting forth e acoustic locking
ve rification signal must comply wi th there le‐ va
nt national road and traf fic re gulations. In
some countri es, including German y,using
th e acoustic locking verification signal is for‐
bidden bytraf fic la ws(in accordance with
§16 Para. 1 and §30 Para. 1 of the German
national road traf fic re gulations). The driver
of theve hicle must comply with these regu‐
lations. In countri es wherethe use of this
function is forbidden, this function is not
activated in theve hicle and must not be acti‐
va ted. Changing
the unlocking settings Po
ssible unlocking functions of theke y:
R cent ral unlocking
R unlocking the driver's door and fuel filler flap #
Toswitch between settings: pressthe
Ü andß buttons simultaneously for
appr oximately six seconds until the battery
ch eck lamp flashes twice. Options if
the unlocking function forth e driver's
door and fuel filler flap has been selec ted:
R pressing theÜ button a second time cen‐
trally unloc kstheve hicle
R Vehicles with KEYLESS-GO: ifyo uto uch
th e inner sur face of the door handle on the
driver's door, only the driver's door and fuel
fi ller flap are unlo cked. Deactivating
theke y functions If
yo u do not use theve hicle or a keyfo r an
ex tended pe riod of time, you can reduce the
energy consum ption of there spective key.Todo
so, deactivate theke y functions. #
Todeactivate: presstheß button on the
ke y twice in quick succession.
The battery check lamp of theke yflashes
twice brief lyand lights up once. #
Toactivate: press any button on thekey.
% When theve hicle is star ted with theke y in
th estow age compartment of the cent recon‐
sole, theke y functions are automatical ly
activated (/ page182). Opening and
closing79
Page 114 of 697
Ad
justing the front passen ger seat electri‐
cally from the driver's seat Re
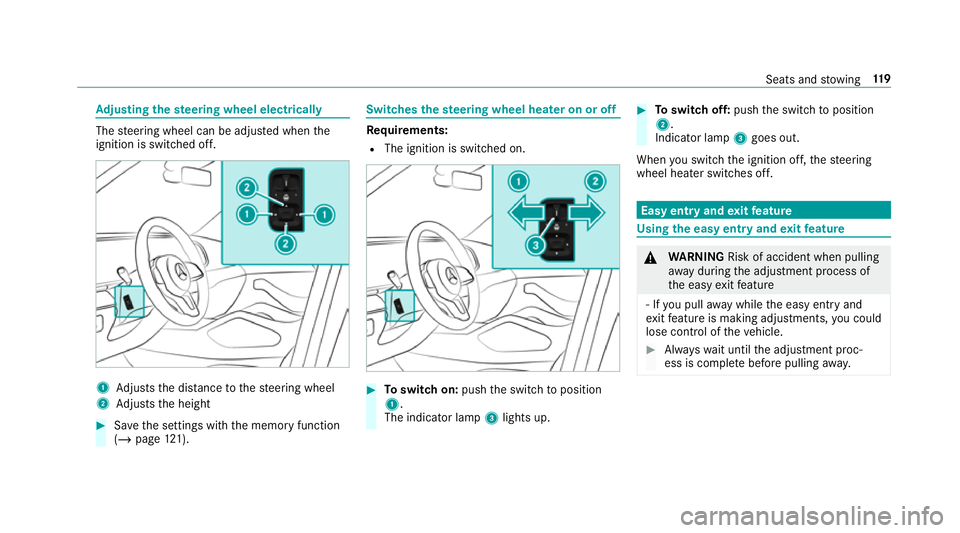
quirement:
R The po wer supp lyis switched on
(/ page 179). Yo
u can call up thefo llowing functions forthe
front passenger sea t:
R seat adjustment R
seat heating
R seat ventilation
R memory function #
Toselect the front passenger seat: press
button 1.
When the indicator lamp lights up, the front
passenger seat is selected. #
Adjust the front passenger seat using the
buttons on the door control panel on the
driver's side. #
Select the driver's seat: pressthe1 but‐
to n again.
When the indicator lamp goes out, the driv‐
er's seat has been selected. Ad
justing the 4-w aylumbar support 1
Higher
2 Softer
3 Lower
4 Firmer #
Using buttons 1to4 , adjust the conto ur
of the backrest individually tosuit your bac k. Seats and
stowing 111
Page 122 of 697
Ad
justing the steering wheel electrically The
steering wheel can be adjus ted when the
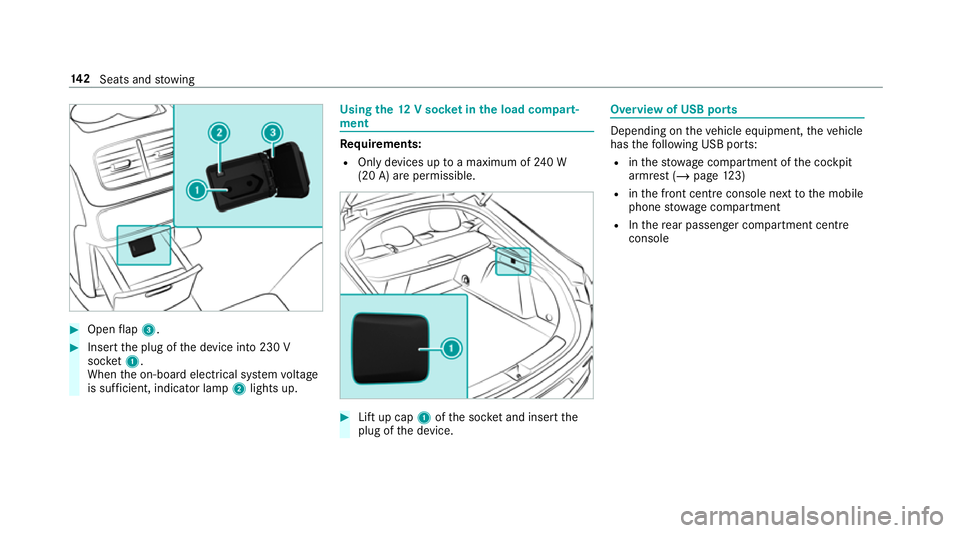
ignition is switched off. 1
Adjusts the dis tance tothesteering wheel
2 Adjusts the height #
Save the settings with the memory function
(/ page 121). Switches
thest eering wheel heater on or off Re
quirements:
R The ignition is switched on. #
Toswitch on: pushthe switch toposition
1.
The indicator lamp 3lights up. #
Toswitch off: pushthe switch toposition
2.
Indicator lamp 3goes out.
When you swit ch the ignition off, thesteering
wheel heater switches off. Easy entry and
exitfeature Using
the easy entry and exitfeature &
WARNING Risk of accident when pulling
aw ay during the adjustment process of
th e easy exitfeature
‑ If you pull away while the easy entry and
ex itfeature is making adjustments, you could
lose cont rol of theve hicle. #
Alw ayswa it until the adjustment proc‐
ess is comple tebefore pulling away. Seats and
stowing 11 9
Page 142 of 697
Switching
the cooling or heating function for
th etemp erature-cont rolled cup holder on or
off &
WARNING Risk of inju ryby touching the
heating elements
The cup holder's heating elements may be
ve ry hot.
Yo u can burn yourself on them. #
Do not touch the cup holder's hot heat‐
ing elements. #
Ensure that no children can access the
cup holder's hot heating elements. #
Never lea vechildren unat tended in the
ve hicle. *
NO
TEDama getoobjects in thete mp era‐
ture-contro lled cupholder If
yo u place objects into thete mp erature-
controlled cup holder, they may become
dama ged. #
Do not place objects into thete mp era‐
ture-contro lled cup holder. 1
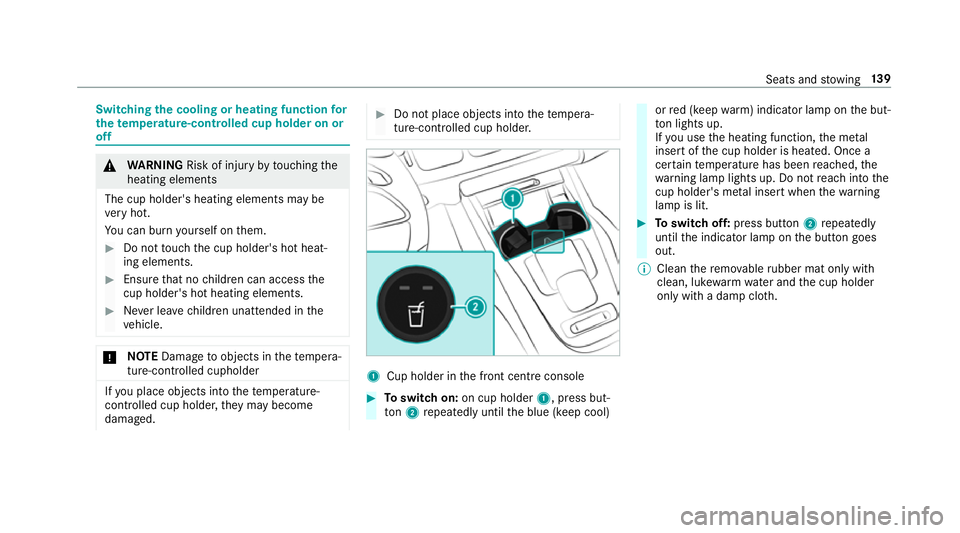
Cup holder in the front cent reconsole #
Toswitch on: on cup holder 1, press but‐
to n2 repeatedly until the blue (keep cool) or
red (keep warm) indicator lamp on the but‐
to n lights up.
If yo u use the heating function, the me tal
inse rtof the cup holder is heated. Once a
cer tain temp erature has been reached, the
wa rning lamp lights up. Do not reach into the
cup holder's me tal inse rtwhen thewa rning
lamp is lit. #
Toswitch off: press button 2repeatedly
until the indicator lamp on the button goes
out.
% Clean there mo vable rubber mat only with
clean, luk ewarmwate r and the cup holder
only with a damp clo th. Seats and
stowing 13 9
Page 145 of 697
#
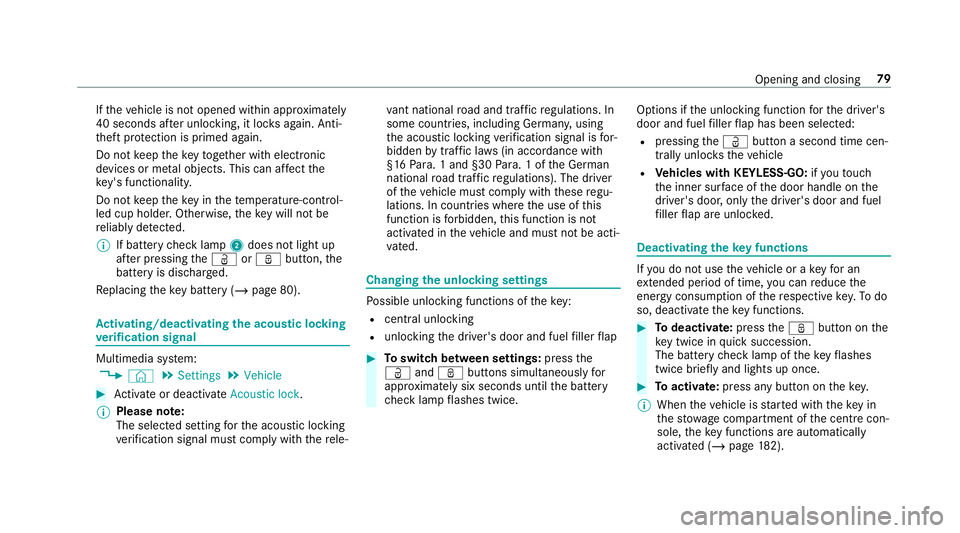
Open flap 3. #
Insert the plug of the device into 230 V
soc ket1.
When the on-board electrical sy stem voltage
is suf ficient, indicator la mp2lights up. Using
the12 V so cket inthe load compa rt‐
ment Re
quirements:
R Only devices up toa maximum of 240 W
(20 A) are permissible. #
Lift up cap 1ofthe soc ket and insert the
plug of the device. Overview of USB ports
Depending on
theve hicle equipment, theve hicle
has thefo llowing USB ports:
R inthestow age compartment of the cockpit
armrest (/ page123)
R inthe front cent reconsole next tothe mobile
phone stowage compartment
R Inthere ar passenger compartment centre
console 14 2
Seats and stowing
Page 149 of 697
Exterior lighting
Note
s on adjusting the lights when driving
abroad Ve
hicles with static LED headlamps: It is not
necessa ryto change the headlamps. The legal
re qu irements are also met in countries in which
traf fic drives on theot her side of thero ad.
Ve hicles with Intelligent Light Sy stem: The
headlamps are automatically adjus ted when the
ve hicle enters countries in which traf fic drives
on theot her side of thero ad. If necessar y,the
headlamp s can also be switched over manually
(/ page 154).
In thefo llowing cases, check the setting of the
headlamp s andchange it manually if necessary:
R Ifth eDipped-beam setting (left/right-side
traffic) Manual adjustment only display mes‐
sage is displa yed.
R Ifth eCheck dipped-beam setting (left/right-
side traffic) display message is displa yed.
Once the headlamps ha vebeen adjus ted:
R Oncoming tra ffic will not be dazzled R
The edge of thero ad will not be illuminated
as far or as high
R The "mo torw ay mode" and "enhanced fog
light" functions will not be available Information about lighting sy
stems and your
re sponsibility The
various lighting sy stems of theve hicle are
only aids. The driver of theve hicle is responsible
fo r cor rect vehicle illumination in accordance
with the pr evailing light and visibility conditions,
legal requ irements and traf fic situation. Light switch
Ope
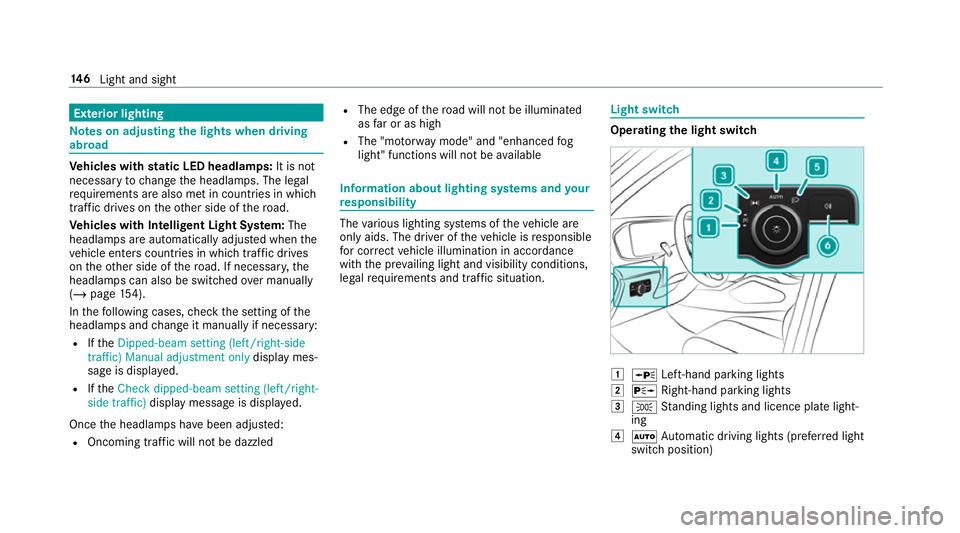
rating the light switch 1
W Left-hand pa rking lights
2 X Right-hand parking lights
3 T Standing lights and licence plate light‐
ing
4 Ã Automatic driving lights (prefer red light
switch position) 14 6
Light and sight
Page 150 of 697
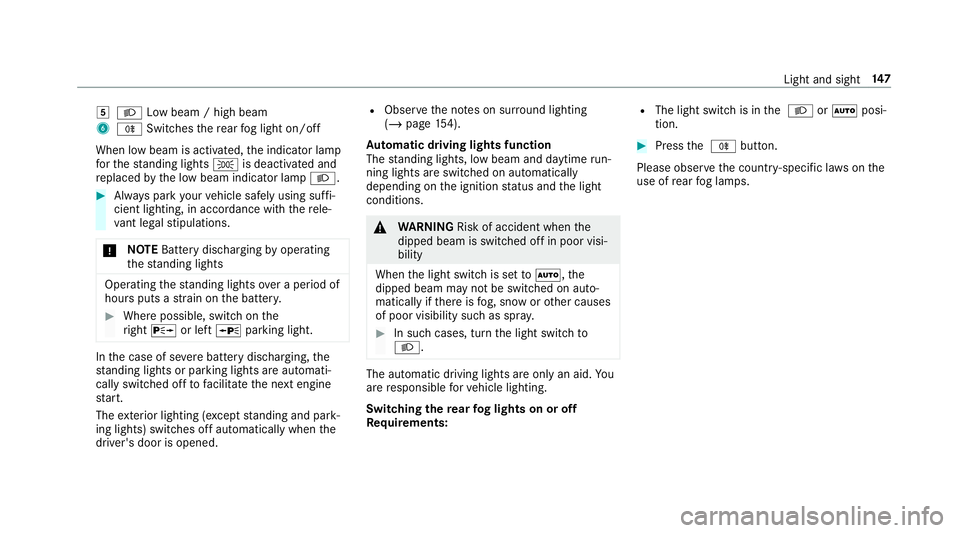
5
L Low beam / high beam
6 R Switches there ar fog light on/off
When low beam is activated, the indicator lamp
fo rth est anding lights Tis deactivated and
re placed bythe low beam indicator lamp L.#
Alw ays park your vehicle safely using suf fi‐
cient lighting, in acco rdance with there le‐
va nt le galst ipulations.
* NO
TEBattery discharging byoperating
th est anding lights Operating
thest anding lights over a period of
hours puts a stra in on the batter y. #
Where possible, switch on the
ri ght X or left Wparking light. In
the case of se vere battery discharging, the
st anding lights or parking lights are automati‐
cally swit ched off tofacilitate the next engine
st art.
The exterior lighting (e xcept standing and park‐
ing lights) swit ches off automatically when the
driver's door is opened. R
Obser vethe no tes on sur round lighting
(/ page 154).
Au tomatic driving lights function
The standing lights, low beam and daytime run‐
ning lights are switched on au tomatically
depending on the ignition status and the light
conditions. &
WARNING Risk of accident when the
dipped beam is switched off in poor visi‐
bility
When the light switch is set toà ,the
dipped beam may not be switched on auto‐
matically if there is fog, snow or other causes
of poor visibility such as spr ay. #
In such cases, turn the light switch to
L . The automatic driving lights are only an aid.
Yo u
are responsible forve hicle lighting.
Switching there ar fog lights on or off
Re quirements: R
The light switch is in the L orà posi‐
tion. #
Press the R button.
Please obser vethe count ry-specific la wsonthe
use of rear fog lamps. Light and sight
147
Page 151 of 697
Operating
the combination switch for the
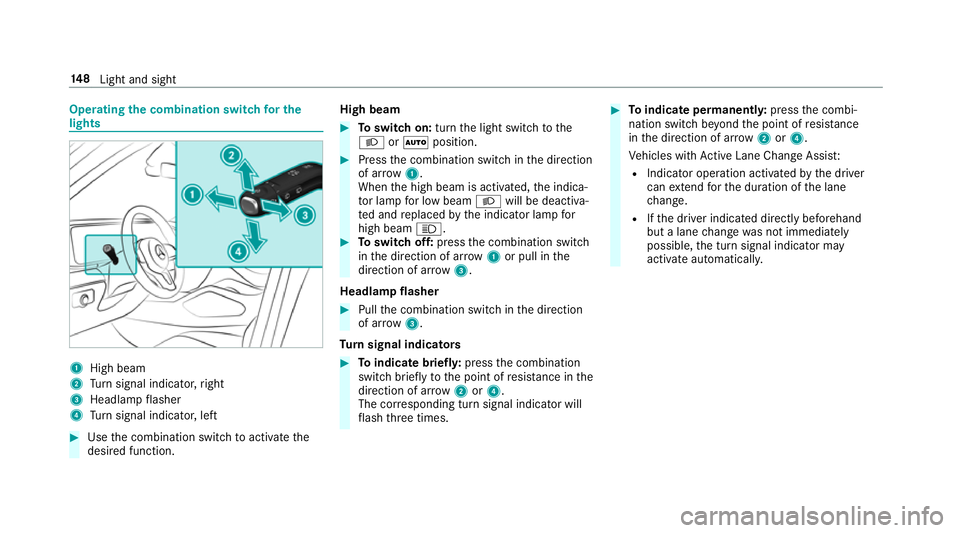
lights 1
High beam
2 Turn signal indicator, right
3 Headlamp flasher
4 Turn signal indicator, left #
Use the combination switch toactivate the
desired function. High beam #
Toswitch on: turnthe light switch tothe
L orà position. #
Press the combination switch in the direction
of ar row1.
When the high beam is activated, the indica‐
to r lamp for low beam Lwill be deactiva‐
te d and replaced bythe indicator lamp for
high beam K. #
Toswitch off: pressthe combination switch
in the direction of ar row1or pull in the
direction of ar row3.
Headlamp flasher #
Pull the combination switch in the direction
of ar row3.
Tu rn signal indicators #
Toindicate briefl y:press the combination
switch briefly tothe point of resis tance in the
direction of ar row2or4.
The cor responding turn signal indicator will
fl ash thre e times. #
Toindicate permanentl y:press the combi‐
nation switch be yond the point of resis tance
in the direction of ar row2or4.
Ve hicles with Active Lane Change Assi st:
R Indicator operation activated bythe driver
can extend forth e duration of the lane
ch ange.
R Ifth e driver indicated directly beforehand
but a lane change was not immediately
possible, the turn signal indicator may
activate automaticall y.14 8
Light and sight