2019 MERCEDES-BENZ GLB SUV lock
[x] Cancel search: lockPage 432 of 689
#
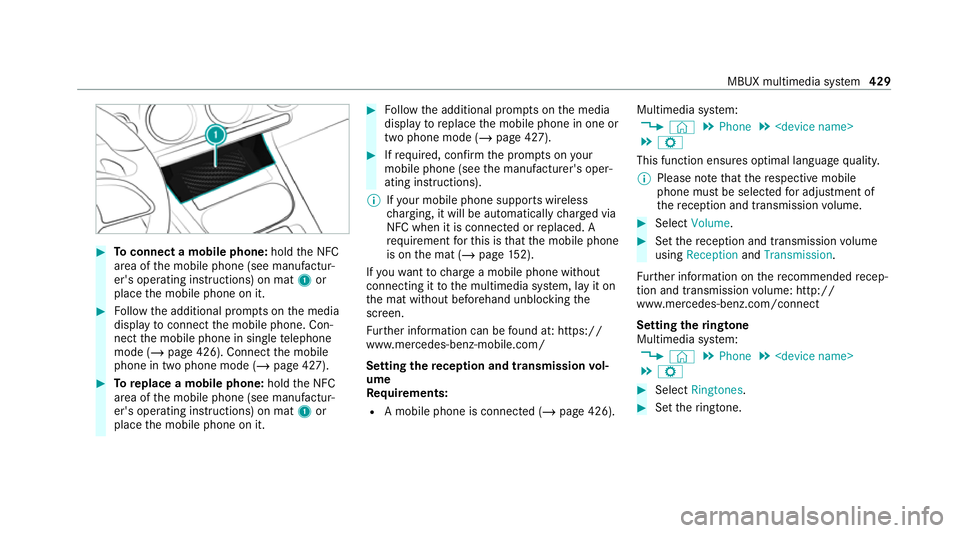
Toconnect a mobile phone: holdthe NFC
area of the mobile phone (see manufactur‐
er's operating instructions) on mat 1or
place the mobile phone on it. #
Follow the additional prom pts on the media
display toconnect the mobile phone. Con‐
nect the mobile phone in single telephone
mode (/ page 426). Connect the mobile
phone in two phone mode (/ page 427).#
Toreplace a mobile phone: holdthe NFC
area of the mobile phone (see manufactur‐
er's operating instructions) on mat 1or
place the mobile phone on it. #
Follow the additional prom pts on the media
display toreplace the mobile phone in one or
two phone mode (/ page 427). #
Ifre qu ired, con firm the prom pts on your
mobile phone (see the manufacturer's oper‐
ating instructions).
% Ifyo ur mobile phone suppo rts wireless
ch arging, it will be automatically charge d via
NFC when it is connec ted or replaced. A
re qu irement forth is is that the mobile phone
is on the mat (/ page152).
If yo uwa nttocharge a mobile phone without
connecting it tothe multimedia sy stem, lay it on
th e mat without beforehand unblocking the
screen.
Fu rther information can be found at: https://
www.mercedes-benz-mobile.com/
Setting there ception and transmission vol‐
ume
Requ irements:
R A mobile phone is connec ted (/ page 426). Multimedia sy
stem:
4 © 5
Phone 5
5 Z
This function ensures optimal language qualit y.
% Please no tethat there spective mobile
phone must be selected for adju stment of
th ere ception and transmission volume. #
Select Volume. #
Set there ception and transmission volume
using Reception andTransmission.
Fu rther information on there commended recep‐
tion and transmission volume: http://
www.me rcedes-benz.com/connect
Setting theringtone
Multimedia sy stem:
4 © 5
Phone 5
5 Z #
Select Ringtones. #
Set theringtone. MBUX multimedia sy
stem 429
Page 468 of 689
Calling up
thewe b br owser settings
Multimedia sy stem:
4 © 5
Mercedes me & Apps
5 z Browser 5
Z 5
Browser settings
The following functions are available:
R Block popups
R Enable Javascript
R Enable cookies #
Toswitch a function on: activatethe dis‐
play button. #
Toswitch a function off: deactivatethe dis‐
play button.
Deleting Internet his tory
Multimedia sy stem:
4 © 5
Mercedes me & Apps
5 z Browser 5
Z
5 Delete browser data
The following options are available:
R All
R Cache
R Cookies R
History
R Entered URLs
R Form data #
Select an option. #
Select Yes.
Managing bookmar ks
Multimedia sy stem:
4 © 5
Mercedes me & Apps
5 z Browser #
Select ?.
Selecting a bookmark #
Select an entry.
Creating a bookmark #
Select Add current site to bookmarks .
The bookmark is created.
Editing a bookmark #
Select rafte r a bookmar k. #
Select Edit. #
Enter the name. #
Select a.
Deleting a bookmark #
Select rafte r a bookmar k. #
Select Delete. #
Select Yes.
Closing the br owser
Multimedia sy stem:
4 © 5
Mercedes me & Apps
5 z Browser #
Select ©. Tu
neIn radio Calling up
TuneIn radio
Re quirements:
R A Mercedes me account is available.
R The vehicle is connected with the Mercedes
me account.
R The TuneIn radio service is activated in the
Mercedes me por tal.
R The data volume is available. MBUX multimedia sy
stem 465
Page 489 of 689
#
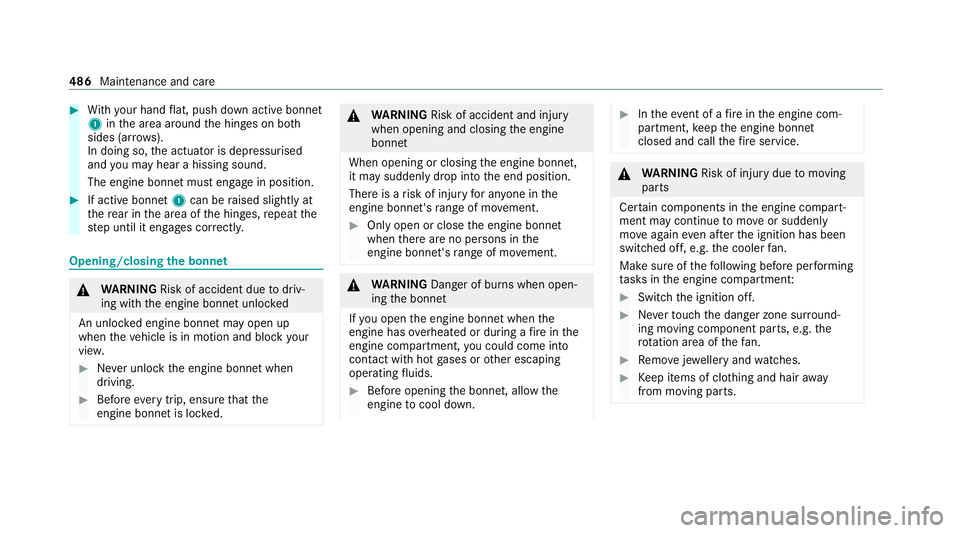
With your hand flat, push down active bonnet
1 inthe area around the hinges on bo th
sides (ar rows).
In doing so, the actuator is depressurised
and you may hear a hissing sound.
The engine bonnet must en gage in position. #
If active bonn et1 can be raised slight lyat
th ere ar in the area of the hinges, repeat the
st ep until it engages cor rectl y. Opening/closing
the bonnet &
WARNING Risk of accident due todriv‐
ing with the engine bonn etunlo cked
An unloc ked engine bonn etmay open up
when theve hicle is in motion and block your
vie w. #
Never unlock the engine bonn etwhen
driving. #
Before every trip, ensure that the
engine bonn etis loc ked. &
WARNING Risk of accident and inju ry
when opening and closing the engine
bonn et
When opening or closing the engine bonn et,
it may suddenly drop into the end position.
There is a risk of injury for an yone in the
engine bonn et's range of mo vement. #
Only open or close the engine bonn et
when there are no persons in the
engine bonn et's range of mo vement. &
WARNING Danger of bu rns when open‐
ing the bonn et
If yo u open the engine bonn etwhen the
engine has overheated or during a fire inthe
engine compartment, you could come into
contact with hot gases or other escaping
operating fluids. #
Before opening the bonn et, allow the
engine tocool down. #
Intheeve nt of a fire inthe engine com‐
partment, keep the engine bonn et
closed and call thefire service. &
WARNING Risk of inju rydue tomoving
parts
Cer tain components in the engine compart‐
ment may continue tomo veor suddenly
mo veagain even af terth e ignition has been
switched off, e.g. the cooler fan.
Ma kesure of thefo llowing before per form ing
ta sks in the engine compartmen t: #
Switch the ignition off. #
Neverto uch the danger zone sur round‐
ing moving co mponent parts, e.g. the
ro tation area of thefa n. #
Remo vejewe llery and watches. #
Keep items of clo thing and hair away
from moving parts. 486
Maintenance and care
Page 492 of 689
To
pping up engine oil &
WARNING Risk of bu rns from hot com‐
ponent parts in the engine compartment
Cer tain components in the engine compart‐
ment can be very hot, e.g. the engine, the
ra diator and parts of theex haust sy stem. #
Allow the engine tocool down and only
to uch co mponent parts described in
th efo llowing. &
WARNING Risk offire and injury from
engine oil
If engine oil comes into con tact wi thhot
component parts in the engine compart‐
ment, it may ignite. #
Make sure that no engine oil is spilled
next tothefiller opening. #
Allow the engine tocool off and thor‐
oughly clean the engine oil from compo‐
nent parts before starting theve hicle. *
NO
TEEngine dama gecaused byan
incor rect oil filter, incor rect oil or addi‐
tives #
Do not use engine oils or oil filters
which do not cor respond tothe specifi‐
cations explicitly prescribed forthe
service inter vals. #
Do not alter the engine oil or oil filter in
order toachie velonger change inter vals
th an presc ribed. #
Do not use additives. #
Follow the instructions in the service
inter val display rega rding the oil
ch ange. *
NO
TEDama gecaused bytopping up too
much engine oil To
o much engine oil can damage the engine
or the catalytic con verter. #
Have excess engine oil remo ved at a
qu alified specialist workshop. #
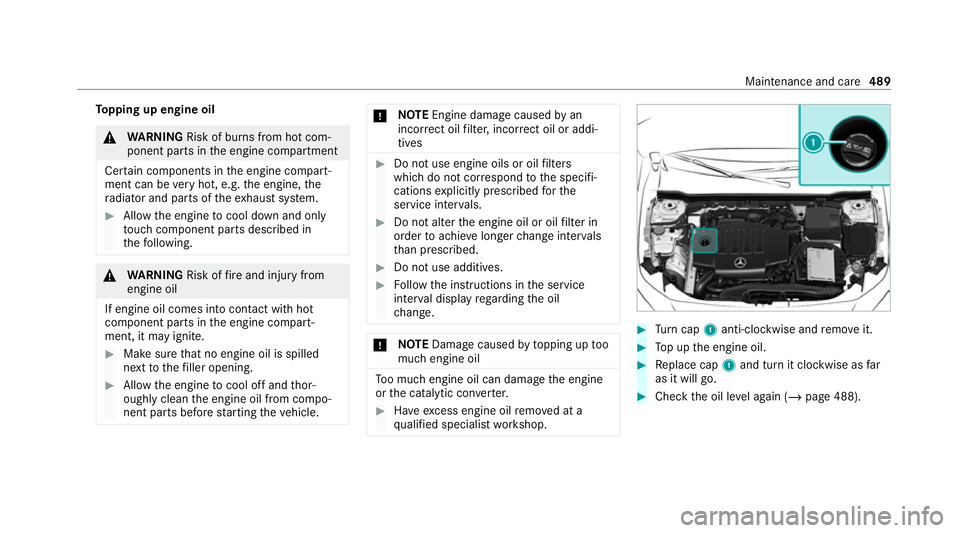
Turn cap 1anti-clockwise and remo veit. #
Top up the engine oil. #
Replace cap 1and turn it clockwise as far
as it will go. #
Check the oil le vel again (/ page 488). Maintenance and care
489
Page 493 of 689
Checking
the coolant le vel &
WARNING Risk of bu rns from hot com‐
ponent parts in the engine compartment
Cer tain components in the engine compart‐
ment can be very hot, e.g. the engine, the
ra diator and parts of theex haust sy stem. #
Allow the engine tocool down and only
to uch co mponent parts described in
th efo llowing. &
WARNING Risk of scalding from hot
coolant
The engine cooling sy stem is pressurised,
particularly when the engine is warm. If you
open the cap, you could be scalded byhot
coolant spr aying out. #
Let the engine cool down before open‐
ing the cap. #
When opening the cap, wear pr otective
gl ove s and saf etygl asses. #
Open the cap slowly torelease pres‐
sure. #
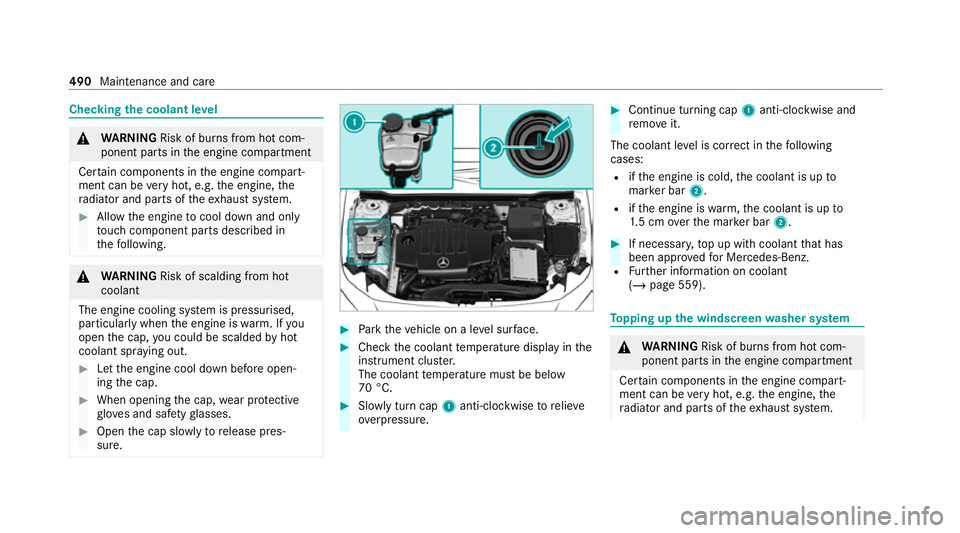
Park theve hicle on a le vel sur face. #
Check the coolant temp erature display in the
instrument clus ter.
The coolant temp erature must be below
70 °C. #
Slowly turn cap 1anti-clockwise torelie ve
ov erpressure. #
Continue turning cap 1anti-clockwise and
re mo veit.
The coolant le vel is cor rect in thefo llowing
cases:
R ifth e engine is cold, the coolant is up to
mar ker bar 2.
R ifth e engine is warm,th e coolant is up to
1. 5 cm overth e mar ker bar 2. #
If necessar y,top up with coolant that has
been appr ovedfo r Mercedes-Benz.
R Further information on coolant
(/ page 559). To
pping up the windsc reen washer sy stem &
WARNING Risk of bu rns from hot com‐
ponent parts in the engine compartment
Cer tain components in the engine compart‐
ment can be very hot, e.g. the engine, the
ra diator and parts of theex haust sy stem. 490
Maintenance and care
Page 505 of 689
#
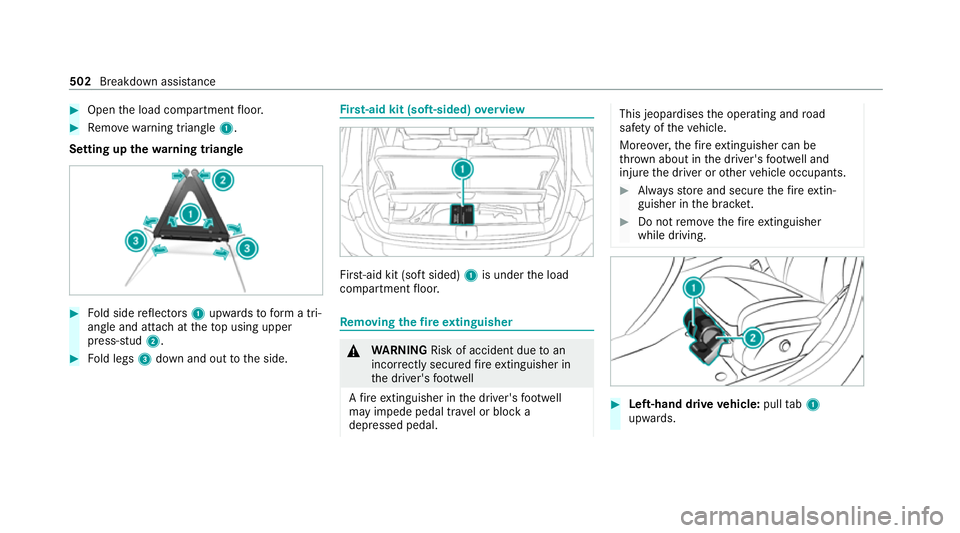
Open the load compartment floor. #
Remo ve wa rning triangle 1.
Setting up thewa rning triangle #
Fold side reflectors 1upwards toform a tri‐
angle and attach at theto p using upper
press-stud 2. #
Fold legs 3down and out tothe side. Fi
rs t-aid kit (soft-sided) overview Fir
st-aid kit (so ftsided) 1is under the load
compartment floor. Re
moving the fire extinguisher &
WARNING Risk of accident due toan
incor rectly secu redfire extinguisher in
th e driver's foot we ll
A fire extinguisher in the driver's foot we ll
may impede pedal tra vel or block a
depressed pedal. This jeopardises
the operating and road
saf ety of theve hicle.
Moreo ver,th efire extinguisher can be
th ro wn about in the driver's foot we ll and
injure the driver or other vehicle occupants. #
Alw aysst ore and secure thefire extin‐
guisher in the brac ket. #
Do not remo vethefire extinguisher
while driving. #
Left-hand drive vehicle: pulltab1
upwards. 502
Breakdown assis tance
Page 510 of 689
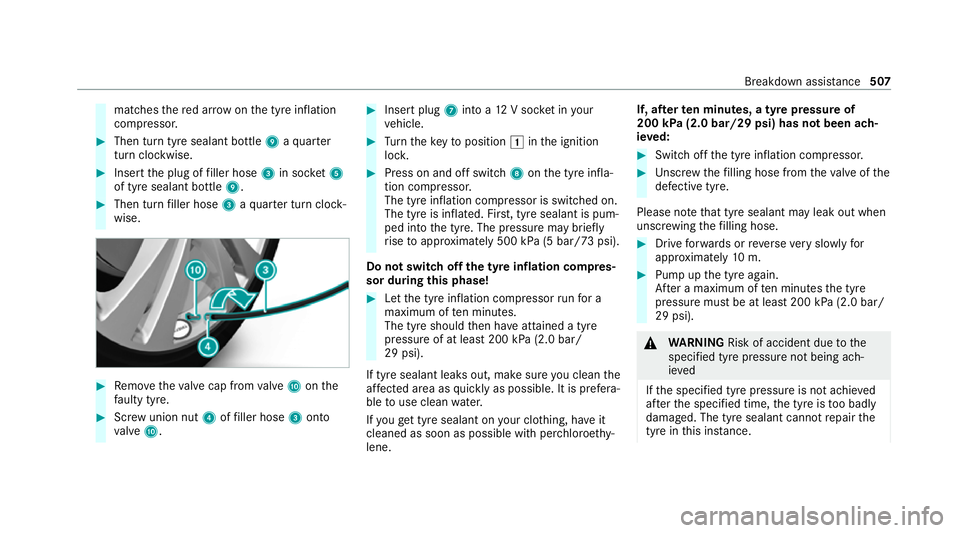
matches
there d ar row on the tyre inflation
compressor. #
Then turn tyre sealant bottle 9aqu arter
turn clo ckwise. #
Insert the plug of filler hose 3in soc ket5
of tyre sealant bottle 9.#
Then turn filler hose 3aqu arter turn clock‐
wise. #
Remo vetheva lve cap from valve A onthe
fa ulty tyre. #
Screw union nut 4offiller hose 3onto
va lve A. #
Insert plug 7into a 12V soc ket in your
ve hicle. #
Turn theke yto position 1inthe ignition
loc k. #
Press on and off switch 8onthe tyre infla‐
tion compressor.
The tyre inflation compressor is switched on.
The tyre is inflated. Fir st, tyre sealant is pum‐
ped into the tyre. The pressure may brief ly
ri se toappr oximately 500 kPa (5 bar/73 psi).
Do not switch off the ty reinflation compres‐
sor during this phase! #
Let the tyre inflation compressor runfo r a
maximum of ten minu tes.
The tyre should then ha veattained a tyre
pressure of at least 200 kPa (2.0 bar/
29 psi).
If tyre sealant leaks out, make sure you clean the
af fected area as quickly as possible. It is prefera‐
ble touse clean water.
If yo uge t tyre sealant on your clo thing, ha veit
cleaned as soon as possible with per chloroe thy‐
lene. If, af
terte n minutes, a tyre pressure of
200 kPa (2.0 bar/29 psi) has not been ach‐
ie ve d: #
Switch off the tyre inflation compressor. #
Unscr ew thefilling hose from theva lve of the
defective tyre.
Please no tethat tyre sealant may leak out when
unscr ewing thefilling hose. #
Drive forw ards or reve rseve ry slowly for
appr oximately 10m. #
Pump up the tyre again.
Af ter a maximum of ten minu testh e tyre
pressure must be at least 200 kPa (2.0 bar/
29 psi). &
WARNING Risk of accident due tothe
specified tyre pressure not being ach‐
ie ved
If th e specified tyre pressure is not achie ved
af te rth e specified time, the tyre is too badly
damaged. The tyre sealant cannot repair the
tyre in this ins tance. Breakdown assi
stance 507
Page 512 of 689
&
WARNING Risk of accident due tothe
specified tyre pressure not being ach‐
ie ved
If th e specified tyre pressure is not achie ved
af te r a brief drive, the tyre is too badly dam‐
aged. The tyre sealant cannot repair the tyre
in this ins tance.
Dama ged tyres and a tyre pressure that is
to o low can significantly impair braking and
handling characteristics. #
Do not drive on. #
Consult a qualified specialist workshop. Countries
that ha veMercedes-Benz
Service24h: you will find a sticke r with thete le‐
phone number, e.g. on the B‑pillar on the driver's
side. #
Cor rect the tyre pressure if it is still at least
13 0 kPa (1.3 bar/19 psi). See the tyre pres‐
sure table on the fuel filler flap forva lues. #
Toincrease the ty repressure: switch on
th e tyre inflation compressor. #
Toreduce the tyre pressure: remo vethe
tyre sealant bottle from the tyre inflation
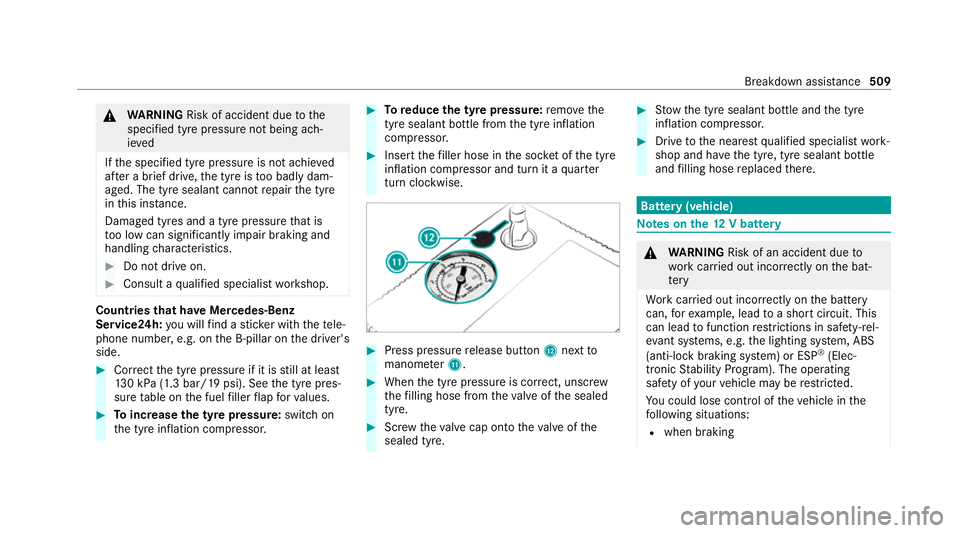
compressor. #
Insert thefiller hose in the soc ket of the tyre
inflation compressor and turn it a quarter
turn clo ckwise. #
Press pressure release button Cnext to
manome terB. #
When the tyre pressure is cor rect, unscr ew
th efilling hose from theva lve of the sealed
tyre. #
Screw theva lve cap onto theva lve of the
sealed tyre. #
Stow th e tyre sealant bottle and the tyre
inflation compressor. #
Drive tothe nearest qualified specialist work‐
shop and ha vethe tyre, tyre sealant bottle
and filling hose replaced there. Batte
ry(vehicle) Note
s onthe12 V battery &
WARNING Risk of an accident due to
wo rkcar ried out incor rectly on the bat‐
te ry
Wo rkcar ried out incor rectly on the battery
can, forex ample, lead toa short circuit. This
can lead tofunction restrictions in saf ety-re l‐
eva nt sy stems, e.g. the lighting sy stem, ABS
(anti-lock braking sy stem) or ESP ®
(Elec‐
tronic Stability Prog ram). The operating
saf ety of your vehicle may be restricted.
Yo u could lose cont rol of theve hicle in the
fo llowing situations:
R when braking Breakdown assis
tance 509